For reprinting, please indicate the source: Xia Xuan_xiaxuan
1. Introduction to Kotlin
I haven't blogged for a long time. A few days ago, Google introduced a new language, Kotlin. In short, Kotlin is a JVM-based programming language, which is growing into an inheritor of the Java language used in Android development. Java is one of the most widely used programming languages in the world, when other programming languages are more easily developed.
Relevant Web Sites
2. Execute Settings - > plugins - > Browse Repositories to search for "Kotlin" 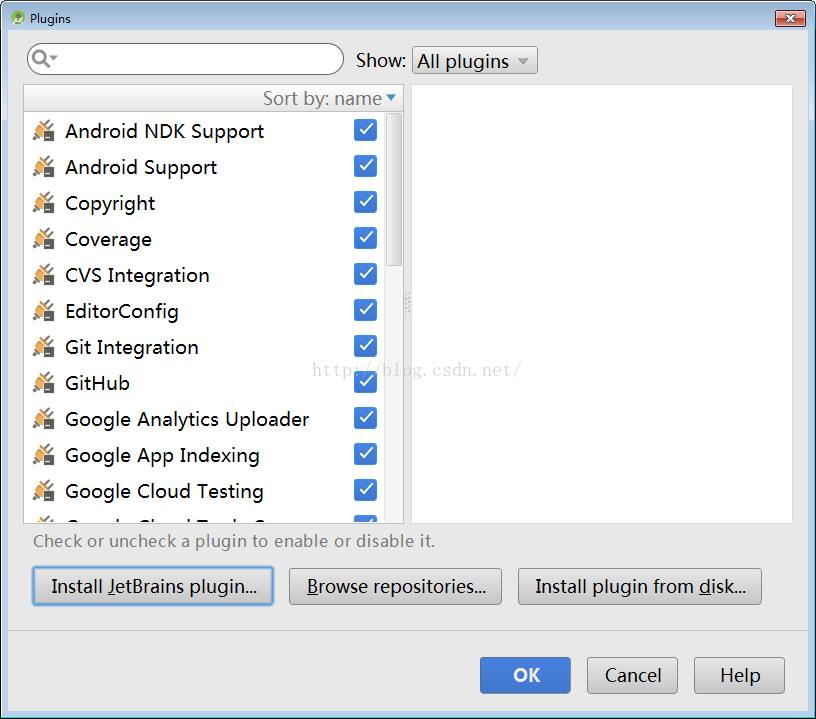
Click "Install JetBrains plugin" 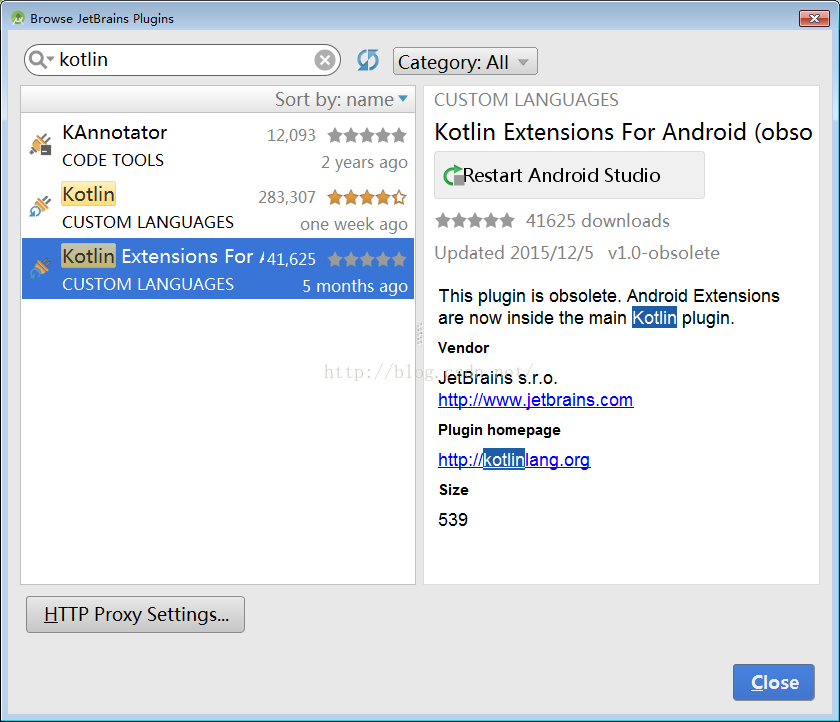
2.1. Actually, the way to create a new kotlin is the same as the way to create an Activity before, but the choice here is: 
2.2 When we first create a Kotlin class, a Configure Kotlin pop-up window pops up: 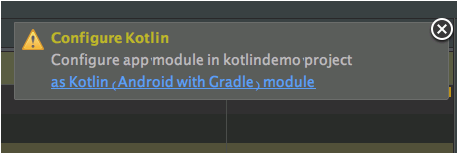
2.3 Click as Kotlin module and click ok. 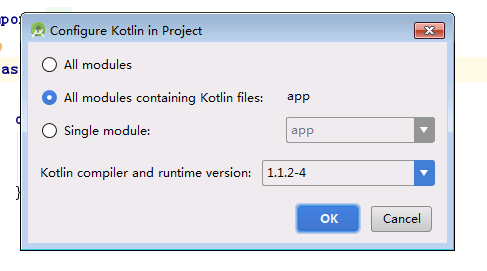
2.4 Next, let's look at the configuration in the following build.gradle for the project:
buildscript {
    ext.kotlin_version = '1.1.2-4'
    repositories {
        jcenter()
    }
    dependencies {
        classpath 'com.android.tools.build:gradle:2.3.1'
        classpath "org.jetbrains.kotlin:kotlin-gradle-plugin:$kotlin_version"
    }
}
2.5 and in module build.gradle:
apply plugin: 'com.android.application'
apply plugin: 'kotlin-android'
apply plugin: 'kotlin-android-extensions'
apply plugin: 'com.android.application'
android {
compileSdkVersion 25
buildToolsVersion "25.0.3"
defaultConfig {
applicationId "yizong.mores.com.day03"
minSdkVersion 15
targetSdkVersion 25
versionCode 1
versionName "1.0"
testInstrumentationRunner "android.support.test.runner.AndroidJUnitRunner"
}
buildTypes {
release {
minifyEnabled false
proguardFiles getDefaultProguardFile('proguard-android.txt'), 'proguard-rules.pro'
}
}
}
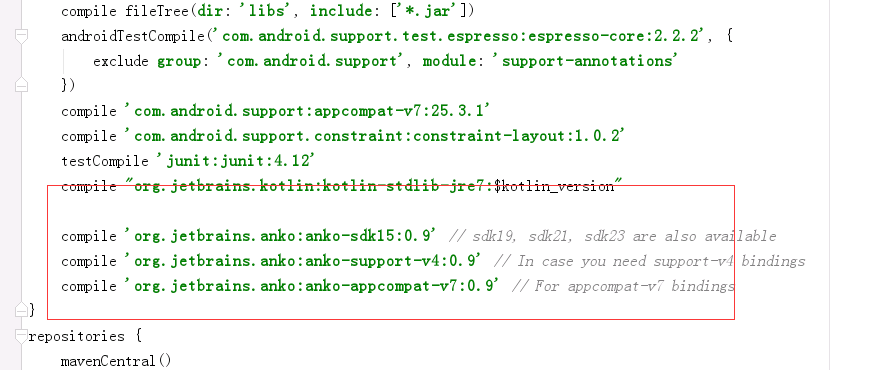
dependencies {
compile fileTree(dir: 'libs', include: ['*.jar'])
androidTestCompile('com.android.support.test.espresso:espresso-core:2.2.2', {
exclude group: 'com.android.support', module: 'support-annotations'
})
compile 'com.android.support:appcompat-v7:25.3.1'
compile 'com.android.support.constraint:constraint-layout:1.0.2'
testCompile 'junit:junit:4.12'
compile "org.jetbrains.kotlin:kotlin-stdlib-jre7:$kotlin_version"
compile 'org.jetbrains.anko:anko-sdk15:0.9' // sdk19, sdk21, sdk23 are also available
compile 'org.jetbrains.anko:anko-support-v4:0.9' // In case you need support-v4 bindings
compile 'org.jetbrains.anko:anko-appcompat-v7:0.9' // For appcompat-v7 bindings
}
repositories {
mavenCentral()
}Here are some points to be noted: 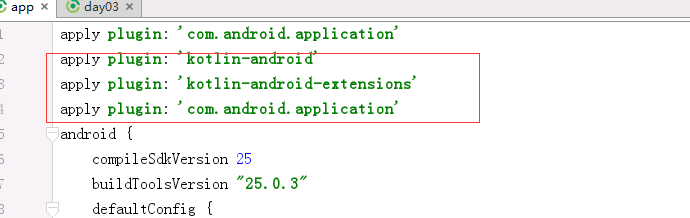
3.0 Now let's look at what kotlin says:
Then you can use the variable tv directly, which is very convenient, and you don't need to use findViewById to find every control again (the xml layout is the same as before).
The following is the complete code:
import android.content.Intent
import android.support.v7.app.AppCompatActivity
import android.os.Bundle
import kotlinx.android.synthetic.main.activity_main.*
import kotlinx.android.synthetic.main.activity_main2.*


class Main2Activity : AppCompatActivity() {

    override fun onCreate(savedInstanceState: Bundle?) {
        super.onCreate(savedInstanceState)
        setContentView(R.layout.activity_main2)
        tv.text = "nihao"
        tv.textSize = 16f
        btn.textSize=16f
       //Here's the Button Click Event: btn.setOnClickListener({startActivity(Intent(Main2Activity@ this, MainActivity::class.java)) })
    }
}
Looking at the xml layout is also very simple: 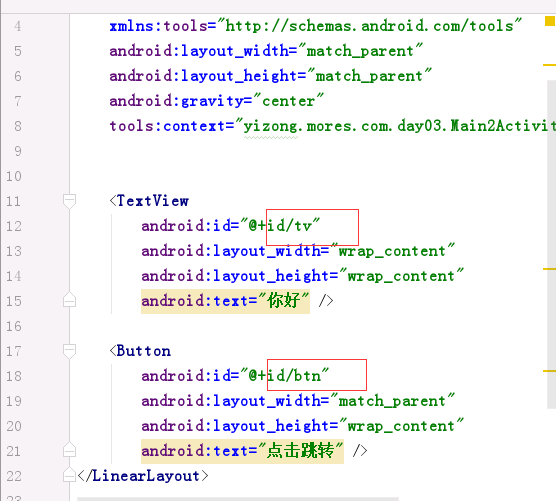
3.1 Let's look at another jump class:
import android.support.v7.app.AppCompatActivity
import android.os.Bundle
import kotlinx.android.synthetic.main.activity_main.*
import org.jetbrains.anko.custom.async
import org.jetbrains.anko.onClick
import org.jetbrains.anko.toast
import org.jetbrains.anko.uiThread
import java.net.URL

class MainActivity : AppCompatActivity() {

    override fun onCreate(savedInstanceState: Bundle?) {
        super.onCreate(savedInstanceState)
        setContentView(R.layout.activity_main)
        tvmess.text="Network Request"
        tvmess.textSize=18f
        tvmess.onClick {
            toast("Good bullish toast")
            async() {
        val result=URL("https://www.baidu.com/").readText()
                uiThread {
                    //Write updates to the main thread directly here
                    tvmess.text=result
                }
            }
        }
    }
}
The final operation is shown as follows: 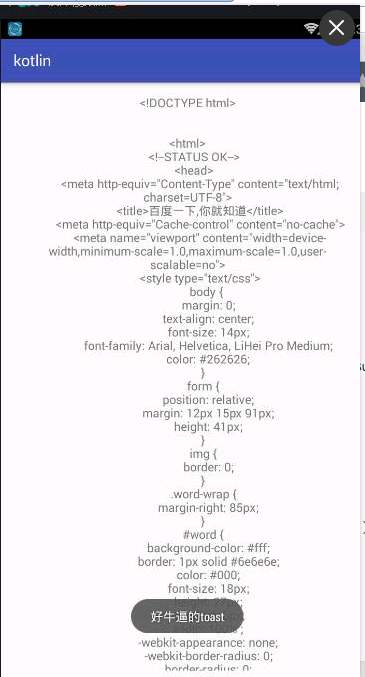
Summary:
Another useful operation about Kotlin in Android Studio is to convert Java source code into Kotlin code:
Execute code -> Convert Java File to Kotlin File
Due to space constraints, Kotlin has many other features (class extensions, function usage, DSL, etc.) which are not introduced. Please look forward to sharing later.