Travis CI is a newly emerging open source continuous integration construction project. More and more large companies are using Travis CI. Github builds more than 4000 per day. Why don't we try?
Preface
Our usual release process is roughly as follows: 
Travis CI can be simplified as follows: 
Imagine a scenario where an internal version is about to be released. After merging the code, you start packing it with IDE and then publishing it to fir. It will take an estimated 10 minutes for the whole process to complete, and the computer will not be able to do anything else. () b. With Travis CI, you just need to submit code, create tag, and submit tag. You can also add a few notification mailboxes (such as test manager, product manager, project manager) to Travis CI, and you can ignore everything and do your own thing with ease.
Here's how to use Travis CI
1. Configure Travis CI project
Preferred entry Travis CI official website You will see the following Icon  After logging in with the github account, choose which project to build automatically using Travis CI and turn on the switch.
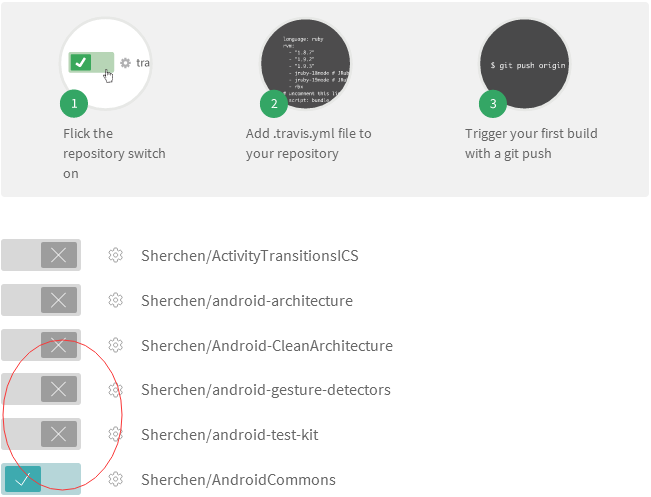
2. Install ruby and Travis Ci
Because Travis CI was developed using ruby, you need to install it first. ruby After installation, use the command
E:\code\Transitions-Everywhere>ruby -v
ruby 2.3.3p222 (2016-11-21 revision 56859) [i386-mingw32]
Install Travis CI
gem install travis -v 1.8.0 --no-rdoc --no-riView the Travis CI version
E:\code\Transitions-Everywhere>travis -v
1.8.2
3. Project Start Travis CI
In the first step, we have opened some projects in Travis CI, selected one of them git checkout to the local computer, and switched to the root directory of the project, first create an empty ". travis.yml file", and then use the command travis setup releases.
E:\code\LikeWechatPhotoViewer>travis setup releases
Username: sherchen
Password for sherchen: ***************
File to Upload:
Deploy only from Sherchen/LikeWechatPhotoViewer? |yes|
Encrypt API key? |yes|
After executing the above command, ". travis.yml" file has a few more things.
deploy:
  provider: releases
  api_key:
    secure: aIdot0oreg3u92HOW5QXpmBq2EjPOTDS5t3DnbMu9wBsQiMdvtaKtJkmJ4lPvB1hE2kPPeJFFCvqr1Gj/chpTocXIIPurHjSrO7Heez16aJDd86oFK1ySBCFLgwy6XVuM7VlTTWzfg4Eo2NnMvRI/W/b4SkyCEZgubsNPd8H0EJ6+epGlV3riEvG3JrHVxGo+FDZhW6mzLKdLha0vMn73JdfXMkQoioTsObdI/mck+SbqtOieuSwfwY5IIJefDAE1BgAEZbfqogKyNZ95okY8iPGkXfuFYBk8QDKBRo/VXOIlMrMgSKwR7/060fMmVEkDO6al7AN33CIeBUSPO0mznB+z5TMyDJVfvhEcKpltIC5vnn9X3G6rjN3sjY7w5KeMUpeIgUigGzTaCjhUFi00ZulWtu4mWPbNzG5O4uGFZBGApK9+vIO4DKHxROVxzP+drxZLMksLRGGsEOtcWCWnD7X93ZMwzOgWr7w5LP/QZeQhGLxupkZNMq4PTg/mYKOop/9fvIXkCQkp/nRZaUXNg5LPFlpBUHlB1rF6W+vrW1juCI9z+23R09mPKJ0zEba9VWPZvv4NDkwj4y4mh6zylQYjYJLiJ78nGA/BGbqKlQN7J/Epdci7PKcyXo2BOxxTPIoJYH+JZ4vqm91pUj2Mc6X5o7su+9avqmCJZr5RiA=
  file: ''
  on:
    repo: Sherchen/LikeWechatPhotoViewer
This is automatically configured by travis to submit releases to github later.
After that, you need to understand the scripting language of travis. 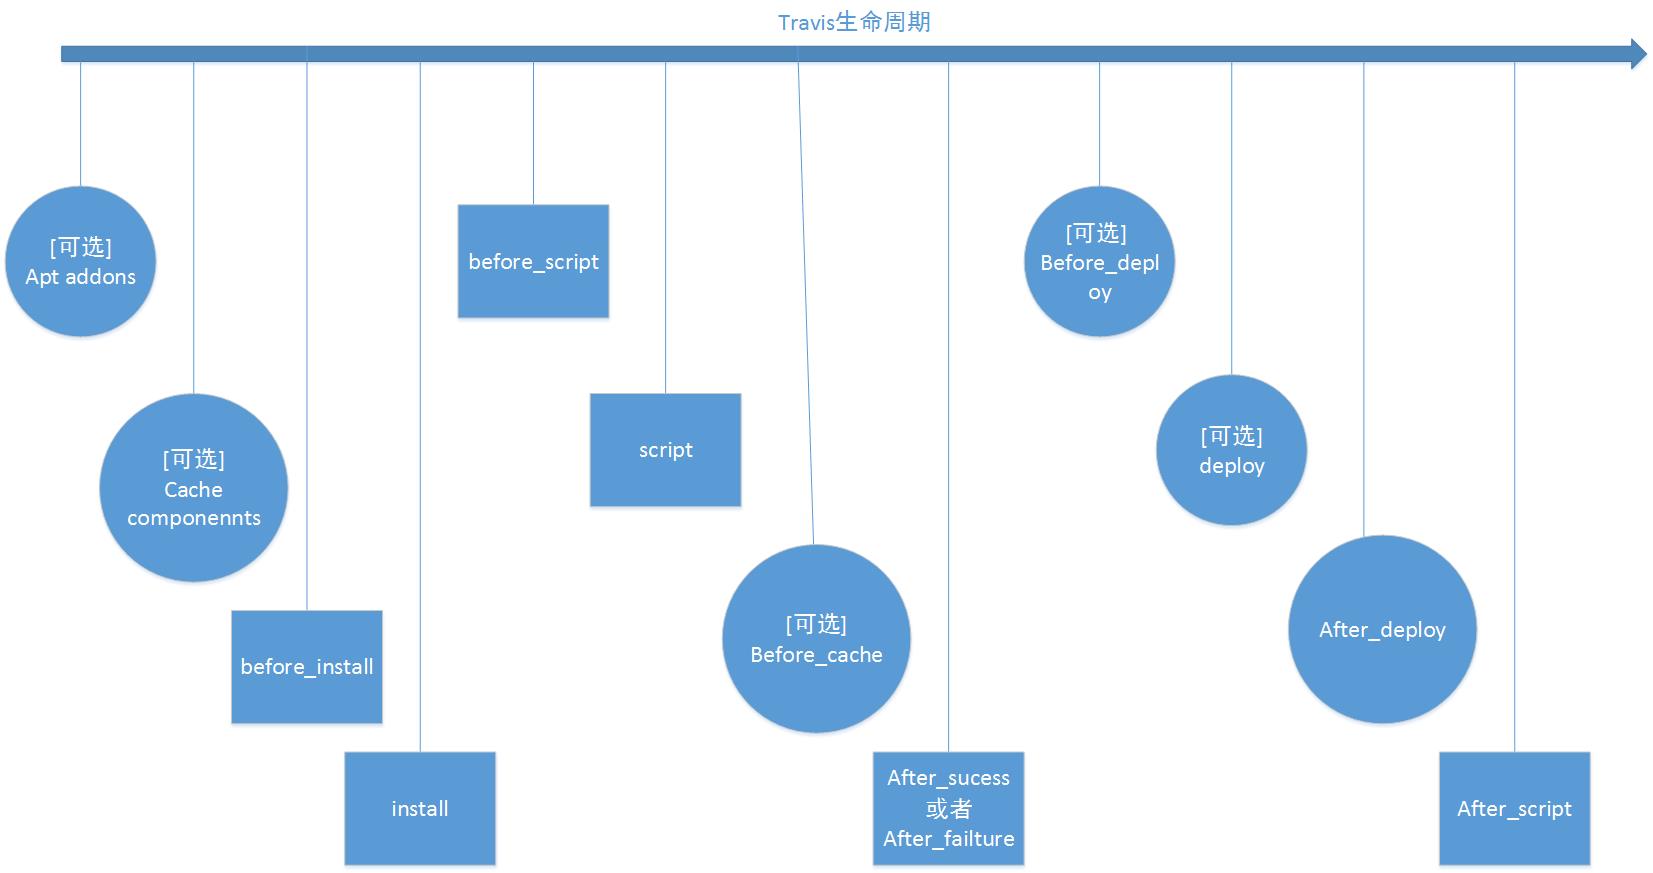
Above is the life cycle of the travis auto-build I painted, in which
- Optionally, if we add it to. travis.yml, it will execute and ignore it without a builder.
- Without an optional flag, it means that you can customize it. Without customization, the builder will use the default.
More details are available travis document Understanding.
4. Attention
4.1 Can configure environment variables for builders
Go back to travis website For example, I choose one of the projects. 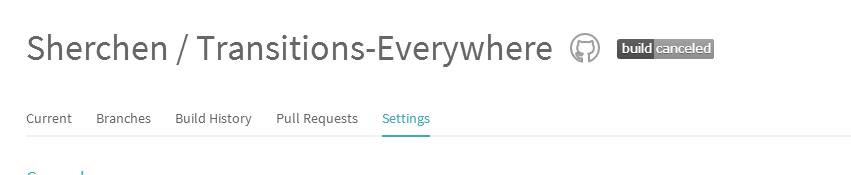
Find the environment variables I configure 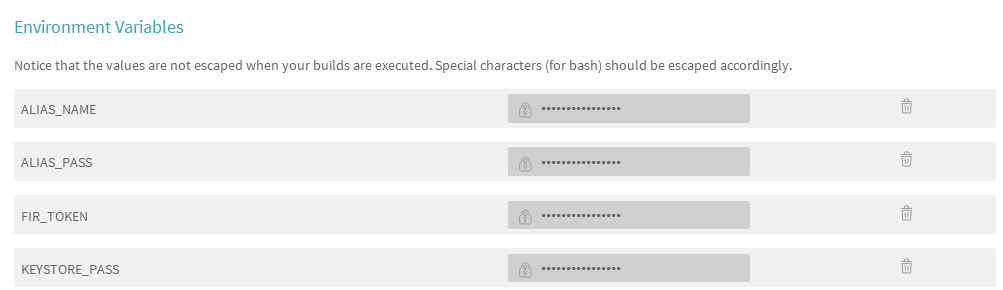
These environmental variables can be used in two places
- Used in the gradle file, through System.getenv()
signingConfigs {
        releaseConfig {
            storeFile file("../sherchen20170602.keystore")
            storePassword project.hasProperty("KEYSTORE_PASS") ? KEYSTORE_PASS : System.getenv("KEYSTORE_PASS")
            keyAlias project.hasProperty("ALIAS_NAME") ? ALIAS_NAME : System.getenv("ALIAS_NAME")
            keyPassword project.hasProperty("ALIAS_PASS") ? ALIAS_PASS : System.getenv("ALIAS_PASS")
        }
}- In the. travis.yml file, get it through $for example
fir publish sample/build/outputs/apk/sample-release.apk -T $FIR_TOKEN -c "`git cat-file tag $TRAVIS_TAG`"4.2 Encrypt keystore files
Encrypt with the following commands
travis encrypt-file xx.keystore --addAfter the command is executed, there will be some prompt information. Just follow its prompt.
NOTE: Linux, Mac only, Windows not supported
4.3 Use lint Check
Sometimes it's easy for us to. travis.yml, which causes the builder to fail. To avoid wasting time, we can use it lint Check.
5. Automatically publish to fir.im
Need to be added as follows
before_install:
- gem install fir-cli
after_deploy:
- fir p app/build/outputs/apk/app-release.apk -T $FIR_TOKEN -c "`git cat-file tag $TRAVIS_TAG`"
FIR_TOKEN is fir's apiToken,copy to travis Environmentally variable
But installing fir-cli requires more than ruby 2.0, so add the following
- rvm install 2.1.5 //Install ruby 2.1.56. Submit code and release version
6.1 Submit Code
As usual
git add .
git commit -m "Notes"
git push origin
I'm posting a log here.
The command "./gradlew :sample:assembleRelease" exited with 0.
Skipping a deployment with the releases provider because this is not a tagged commit
The above meaning is: without tag code submission, it will not go deploy, so after_deploy will not go, so it will not be published to fir.
6.2 Release
We need a tag commit
dave@Dave-PC MINGW64 /e/code/Transitions-Everywhere (master)
$ git tag -a v1.0.5 -m "1.test tag 2.New Node 3.test AccessToken 4.Remove redundant-"

dave@Dave-PC MINGW64 /e/code/Transitions-Everywhere (master)
$ git push origin --tags
Counting objects: 1, done.
Writing objects: 100% (1/1), 222 bytes | 0 bytes/s, done.
Total 1 (delta 0), reused 0 (delta 0)
To https://github.com/Sherchen/Transitions-Everywhere.git
 * [new tag]         v1.0.5 -> v1.0.5
See if it's released to fir. 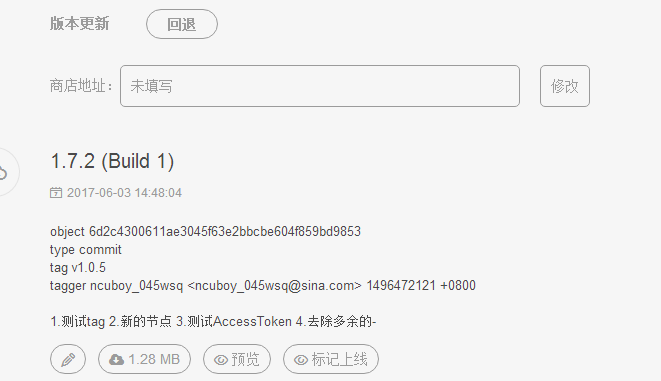
Great! The release was successful! C
Interested students, can see how I write, code address:
Transitions-Everywhere
In order to facilitate the analysis of the problem, I uploaded the successful implementation log, address:
log.txt