v-model (data binding)
v-model is commonly used for bi-directional binding of form data, which is essentially a grammatical sugar. It has two main applications:
- Application in text box, multi-line text, drop-down box of input, radio button and check box
Drop-down box:<div id="app"> <input v-model="test"> <!-- <input :value="test" @input="test= $event.target.value"> --> <!--Grammatical sugar--> <p>{{ test}}</p> </div> <script> new Vue({ el: '#app', data: { test: 'Welcome to Chivalrous Island' } }); </script>
Radio button:<div id="app"> <select v-model="selected"> <option value="Design">Phtotshop</option> <option value="programming">programming</option> <option value="Illustration">Illustration</option> </select> <span>Selected: {{ selected }}</span> </div> <script> new Vue({ el: '#app', data: { selected: '' } }); </script>
Check box:<div id="app"> <input type="radio" id="man" value="male" v-model="picked"> <label for="man">male</label> <br> <input type="radio" id="woman" value="female" v-model="picked"> <label for="woman">female</label> <br> <input type="radio" id="other" value="Other" v-model="picked"> <label for="other">Other</label> <br> <span>Picked: {{ picked }}</span> </div> <script> new Vue({ el: '#app', data: { picked: '' } }) </script><div id="app"> <input type="checkbox" id="one" value="Course one e" v-model.lazy="checkedNames"> <label for="one">Option 1</label> <input type="checkbox" id="two" value="Course two" v-model.lazy="checkedNames"> <label for="two">Option two</label> <input type="checkbox" id="three" value="Course three" v-model.lazy="checkedNames"> <label for="three">Option three</label> <br> <span>Checked names: {{ checkedNames }}</span> </div> <script> new Vue({ el: '#app', data: { checkedNames: [] } }) </script> - It can also be used with modifiers such as. lazy,. trim,. number
.lazy
number, which automatically converts user input values to numerical types<input v-model.lazy="test" >
trim, automatically filters the first and last blank characters entered by the user<input v-model.number="test" type="number"><input v-model.trim="test" >
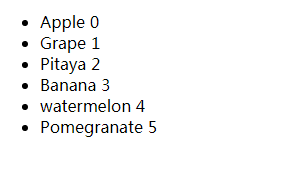
v-for (cycle)
Format: v-for= "field name in(of) array or json"
    <div id="main">
        <p>{{ message }}</p>
        <ul>
          <li v-for="(item,index) in fruit">{{ item }} {{ index }}</li>
        </ul>
    </div>
    <script>
        new Vue({
          el: '#main',
          data: {
            message: 'Welcome XKD!',
            fruit: [
              'Apple',
              'Grape',
              'Pitaya',
              'Banana',
              'watermelon',
              'Pomegranate'
            ]
          }
        })
    </script>
v-show and v-if (display and hide), v-else-if, v-else
v-show judges whether to load and display by value.
v-if judges whether to load or not by value.
v-else-if, which acts as "else-if block" of v-if, can be used continuously.
v-else, which means "else block" of v-if, must be used together, otherwise invalid will not be recognized.
The difference between v-show and v-if is that:
- When the v-if control element is hidden, it will delete the dom node, but v-show will not. v-if can also be used with v-else-if and v-else, which must be combined with v-if and can not be used alone.
- Generally speaking, v-if has higher switching overhead, while v-show has higher initial rendering overhead. If you need to switch very frequently, it's better to use v-show; if the runtime conditions are unlikely to change, it's better to use v-if.
v-show:
    <div v-show="isShow">I just use it to control. display Attribute value</div>

    <script>
    	var vm = new Vue({
    		el: "#main",
    		data: {
    			isShow: true
    		}
    	});
    </script>
v-if:
    <div id="main">
    	<div v-if="isShow">Display or hide</div>
    </div>
    <script>
    	var vm = new Vue({
    		el: "#main",
    		data: {
    			isShow: fasle
    		}
    	});
    </script>
v-else-if:
    <div v-if="type === 'A'">Programmer</div>
    <div v-else-if="type === 'B'">Designer</div>
    <div v-else-if="type === 'C'">Operator</div>
    <div v-else>Internet worker</div>

    <script>
    	var vm = new Vue({
    		el: "#main",
    		data: {
    			type: 'A'
    		}
    	});
    </script>
v-else:
    <div v-if="isTrue">Chivalry Island</div>
    <div v-else>Or Chivalrous Island</div>

    <script>
    	var vm = new Vue({
            el: '#main',
            data: {
                isTrue: true
            }
    	})
    </script>
v-bind (dynamic binding)
Update and modify the data of the page in time.
- v-bind:id is abbreviated as:id
- v-bind:disabled abbreviated as: disabled
- v-bind:href is abbreviated as: href
- v-on:click abbreviated as @ Click
v-on (binding event)
After an instruction binding event, the corresponding event is monitored.
v-on:click:
    <div id="main">
        <h3>Clicked {{count}} second</h3>
        <button @click="count++">Click Me!</button>
    </div>
    <script>
        var vm = new Vue({
          el: '#main',
          data: {
            count: 0
          }
        });
    </script>
v-on:keyup: Display the value first, then the pop-up layer
    <div id="main">
    	<input v-on:keyup.13="keyup" type="text">
    </div>
    <script>
        var vm = new Vue({
          el: '#main',
          data: {
          },
          methods: {
            // enterClick: function () {
            //   console.log("enterClick");
            // }
            keyup(e) {
              alert(JSON.stringify(e));
            }
          }
    	});
    </script>
v-on:keydown: Enter the pop-up layer in the box, and then display the input value.
    <div id="main">
    	<input v-on:keydown="keydown">
    </div>
    <script>
        var vm = new Vue({
          el: '#main',
          data: {
          },
          methods: {
            keydown(e) {
              alert(JSON.stringify(e));
            }
          }
    	});
    </script>
v-text and v-html (parsed text)
v-text:
    <span v-text="dangerHTML"></span>

    dangerHTML: '<span onclick="alert(123)">123</span>'
Whatever it is, it's all parsed into text, and the HTML tags inside are all escaped:

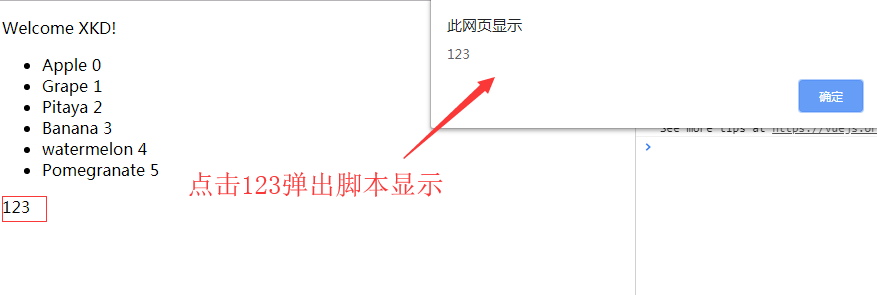
v-html:
    <span v-html="dangerHTML"></span>

    dangerHTML: '<span onclick="alert(123)">123</span>'
v-bind:class
- Object: {red: ifAbled Red}

- Trinomial operator: if Abled red? "red": "blue"
- Array: [{red:'ifAbled Red'}, {blue:'ifAbled Blue'}]
v-once
Render only once, no more.
<p v-once>{{ message }}</p>
v-cloak
V-cloak is usually used with [v-cloak] {display: none;} css.
<p v-cloak>{{ message }}</p>
Here's a flickering screenshot code. When we add a setTimeout delay to the following red code block and execute it, we will find that there is nothing on the page and there will be a time lag. So we provide a v-cloak method to solve this problem.

v-pre
In-situ output of elements within the label.