Introduction of Saltstack Function Module
1. Introduction to salt-ssh
Sal-ssh can run independently without minion, and use sshpass to interact with passwords, but it works in serial mode, resulting in a significant performance degradation.
2. Introduction to salt-syndic
Syndic is actually a proxy, separating master from minion. Syndic must run on master and connect to another topmaster. The status of Topmaster's download needs to be transmitted to the lower master through syndic, and the data from minion to master is also transferred from syndic to topmaster. Topmaster does not know how many minions there are. The directories of file_roots and pillar_roots of syndic and topmaster should be consistent, otherwise errors will occur.
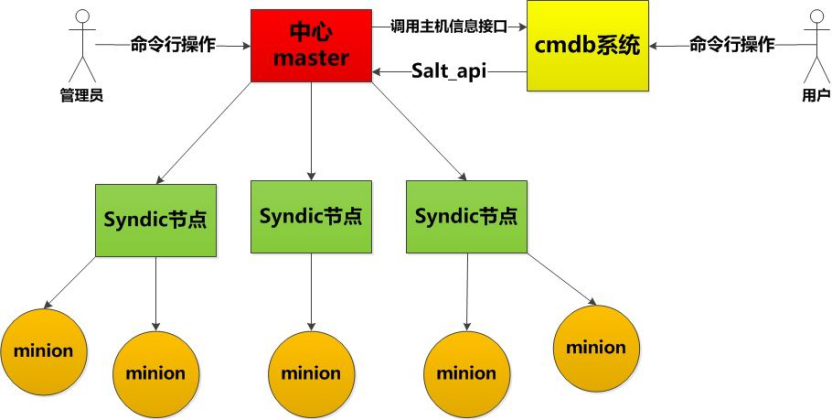
3. Introduction to salt-api
SaltStack officially provides a salt-api project in REST API format, which will make Salt's integration with third-party systems particularly easy.
Officially provided three api modules: rest_cherrypy, rest_tornado, rest_wsgi
II. Deployment of salt-syndic
Experimental preparation:
server1-master(172.25.5.1)-salt-master,salt-syndic
server2 and server3 - minion (172.25.5.2 and 172.25.5.3) - salt-minion
server4-topmaster(172.25.5.4)-salt-master
Installation software
#Serr1
yum install -y salt-syndic
#Serr4
yum install -y salt-master
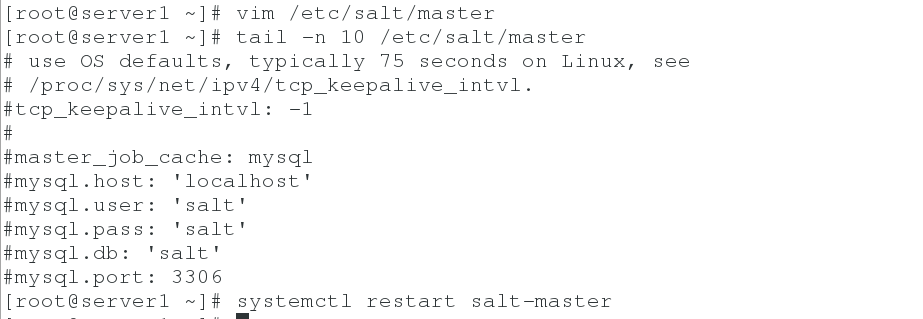
1. Note the parameters of mysql in the configuration file / etc/salt/master
vim /etc/salt/master
#master_job_cache: mysql
#mysql.host: 'localhost'
#mysql.user: 'salt'
#mysql.pass: 'salt'
#mysql.db: 'salt'
#mysql.port: 3306
systemctl restart salt-master
2. Setting up ip of managed master in server 4
vim /etc/salt/master
systemctl restart salt-master
netstat -antlp


3. Write topmaster ip in server 1 configuration file
vim /etc/salt/master
syndic_master: 172.25.5.4
systemctl restart salt-master
systemctl start salt-syndic


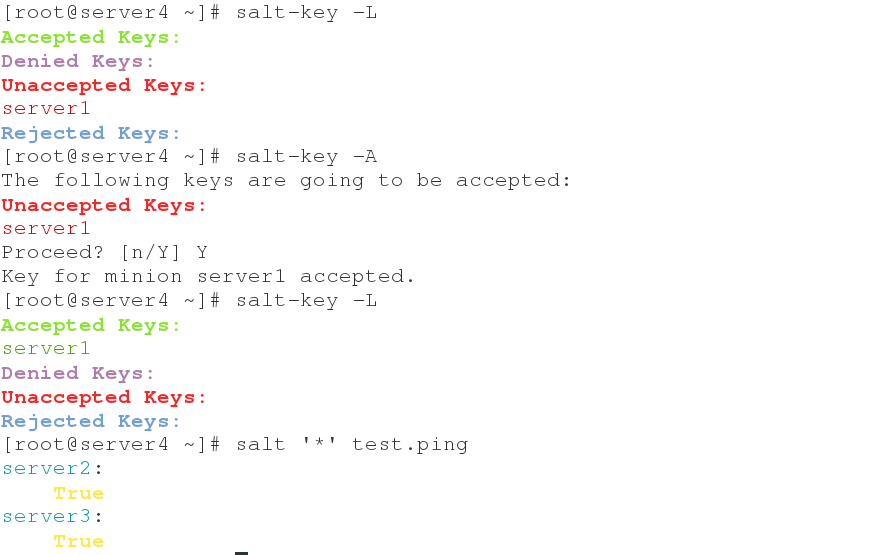
4. Testing in server 4
server2 and server3 are minion-side managed by server1, while server4 (topmaster) manages master, which can also be pushed indirectly by item minion-side.
salt-key -L
salt-key -A    #Add key
salt '*' test.ping
III. Deployment of salt-ssh
1. Close server 2 (minion) using the [system CTL stop salt-minion] command
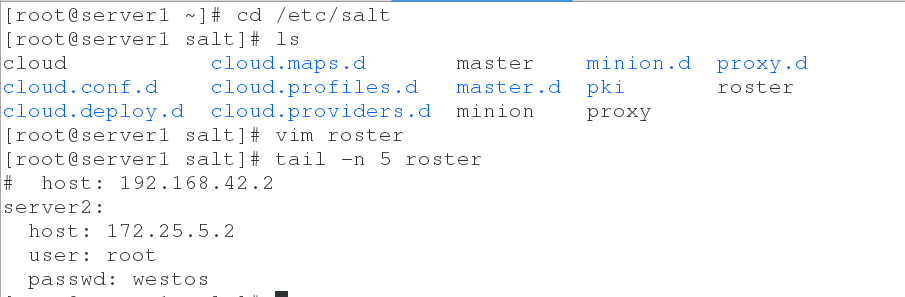
2. Setting up salt-ssh roster file in server 1
yum install -y salt-ssh
cd /etc/salt
vim roster
server2:
  host: 172.25.5.2
  user: root
  passwd: westos
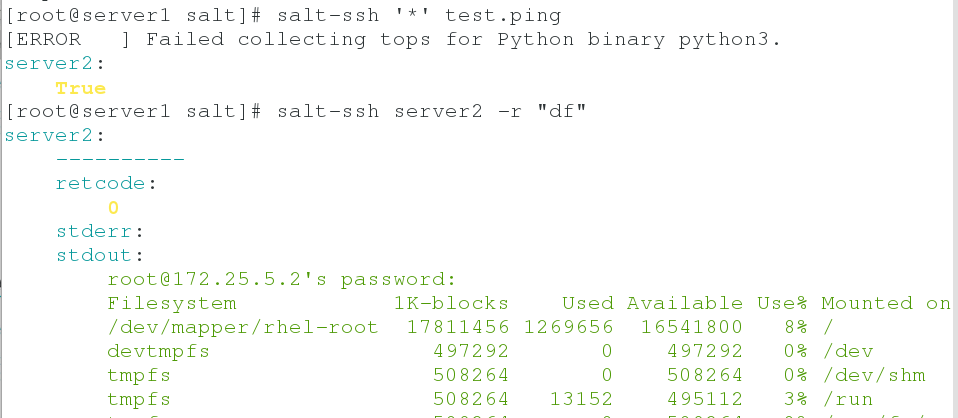
3. Test connection
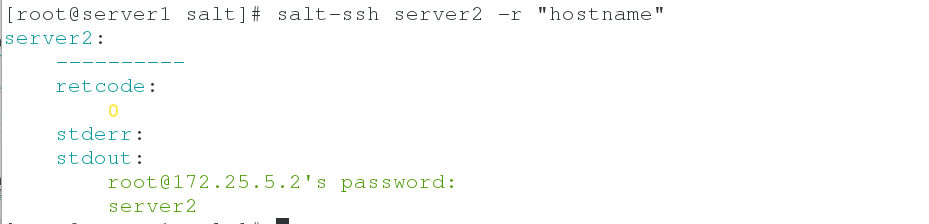
salt-ssh '*' test.ping
salt-ssh server2 -r "df"    #View mount information
salt-ssh server2 -r "hostname"    #View Host Name

4. salt-api invocation
Open the previously closed server 2 (minion) end [system CTL start salt-minion]
1. Install salt-api software
yum isntall -y salt-api
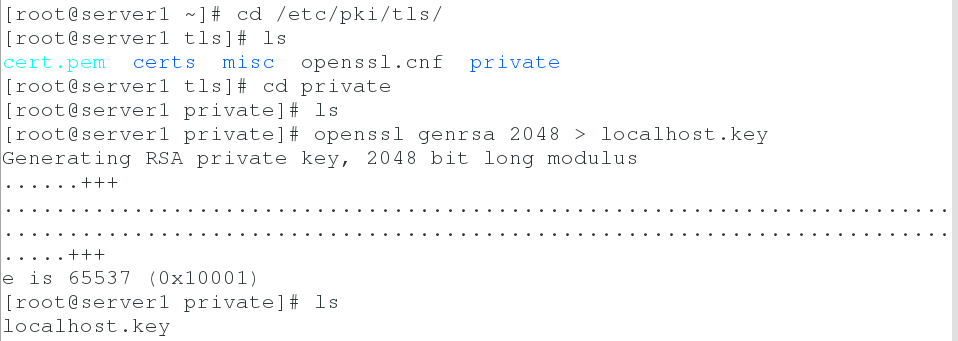
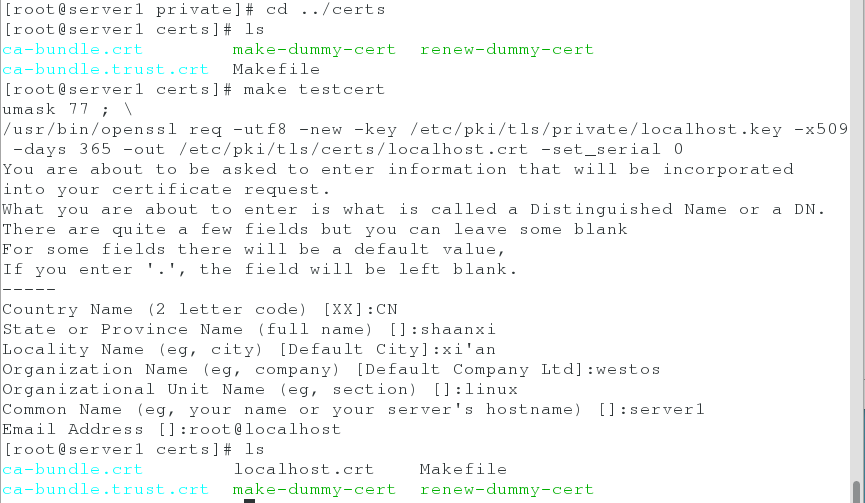
2. Create public and private keys
cd /etc/pki/tls/
cd private
openssl genrsa 2048 > localhost.key
cd ../certs
make testcert
3. Write api files and open ports
cd /etc/salt/master.d/
vim api.conf
rest_cherrypy:
  port: 8000
  ssl_crt: /etc/pki/tls/certs/localhost.crt
  ssl_key: /etc/pki/tls/private/localhost.key

4. Authenticate and authorize users to create users
cd master.d
external_auth:
  pam:
    saltapi:
      - .*
      - '@wheel'
      - '@runner'
      - '@jobs'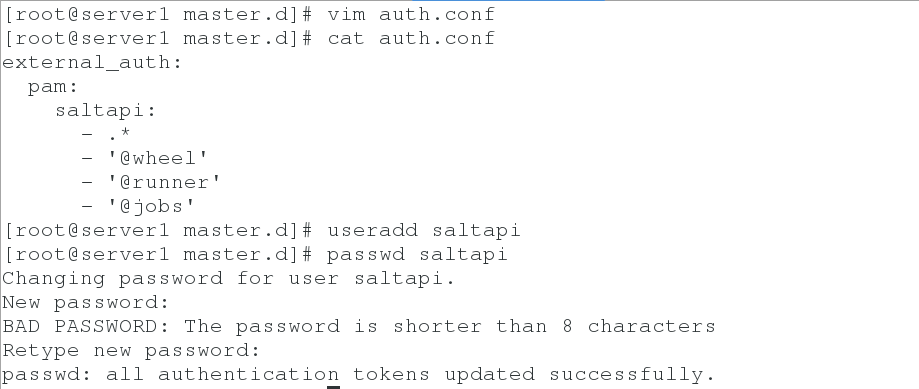
5. Restart master and api
systemctl restart salt-master
systemctl start salt-api
netstat -antlp | grep 8000

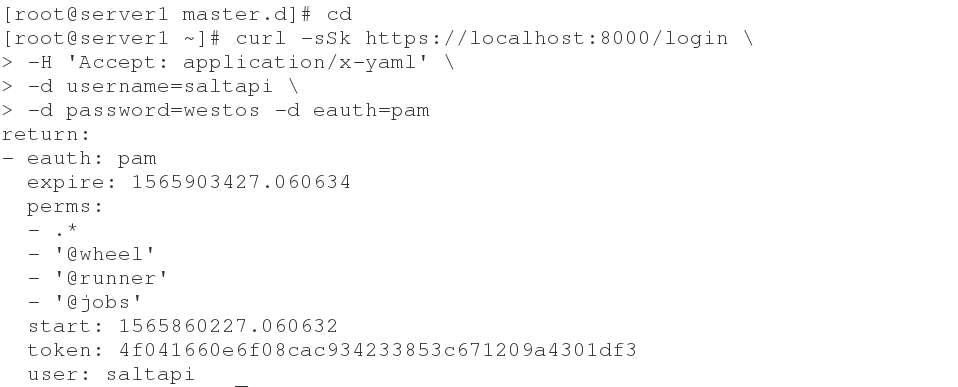
6. The user logs in and gets token
curl -sSk https://localhost:8000/login \
 -H 'Accept: application/x-yaml' \
 -d username=saltapi \
 -d password=westos -d eauth=pam
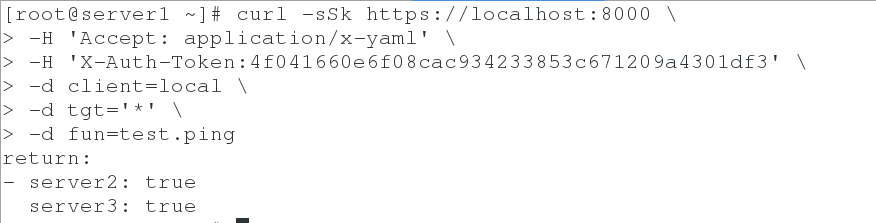
7. Test whether you can use api to control server2 and server3
curl -sSk https://localhost:8000 \
 -H 'Accept: application/x-yaml' \
 -H 'X-Auth-Token:4f041660e6f08cac934233853c671209a4301df3' \
 -d client=local \
 -d tgt='*' \
 -d fun=test.ping
8. py files are used for push
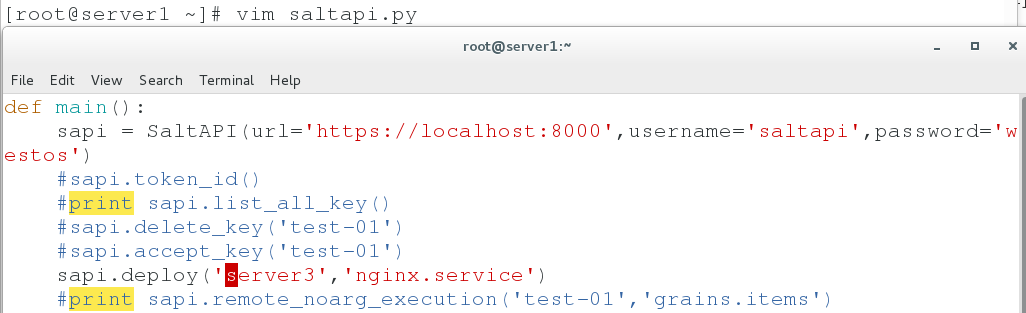
vim saltapi.py
def main():
    sapi = SaltAPI(url='https://localhost:8000',username='saltapi',password='westos')
    print sapi.list_all_key()
    sapi.deploy('server3','nginx.service')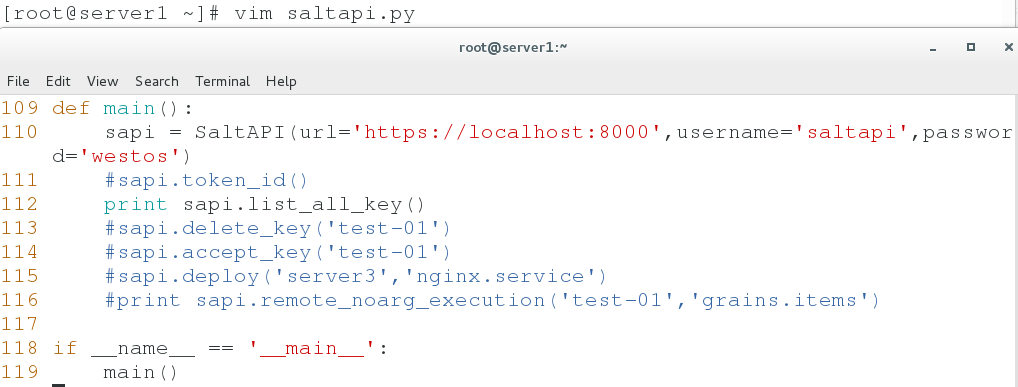

Push to server 3
Use the [python saltapi.py] command to push to server 3. After the push, we can see that the nginx service has been started in server 3.

