This article mainly refers to documents in Google VR. If you can read and understand English development documents fluently, you can go to Official website Check it out by yourself.
1. Introducing VR View
VR view allows you to embed 360 degree VR media into websites on desktop and mobile, and native apps on Android and iOS. This technology is designed to enable developers of traditional apps to enhance the apps with immersive content.
The VR view allows you to embed 360-degree VR media into desktop and mobile websites, as well as native applications on Android and iOS. This technology aims to enable developers of traditional applications to enhance applications through immersive content.
VR view supports mono and stereo 360 images and videos. Images and video need to be stored in the equirectangular-panoramic (equirect-pano) format, which is a common format supported by many capture solutions.
VR view supports mono and stereo images and videos. Images and videos need to be stored in equi rect - pano format, which is a common format supported by many capture solutions.
Image specification
- VR view images can be saved as PNG, JPEG or GIF. Google recommends using JPEG to improve compression.
- For maximum compatibility and performance, the image size should be a multiple of 2 (for example, 2048 or 4096).
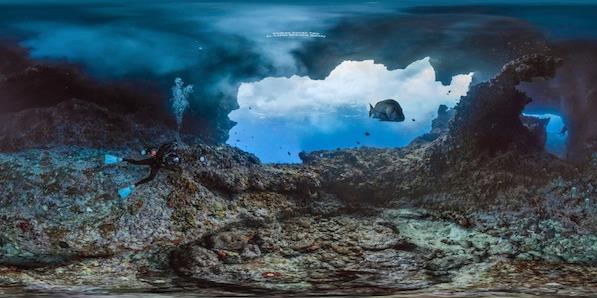
- A single image should have a aspect ratio of 2:1 (e.g. 4096 x 2048).
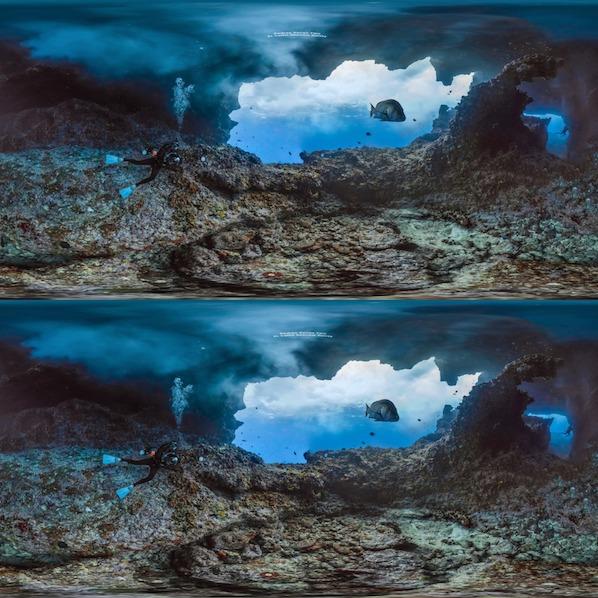
- Stereo images should have a aspect ratio of 1:1 (e.g. 4096 x 4096).
| Mono single image | Stereo stereo image |
|---|---|
 vr-1.jpg
|
 vr-2.jpg
|
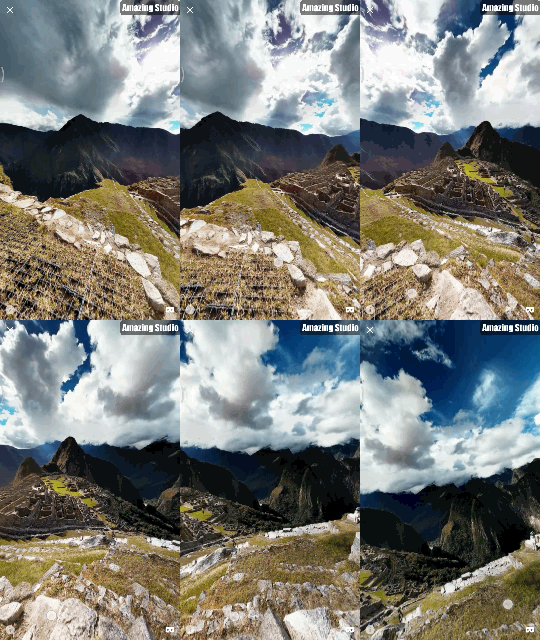
Let's see the effect first:

2. Embedding panoramic images using VrPanoramaView
1.build.gradle
Add panowidget library to build.gradle under app
    dependencies {
        compile 'com.google.vr:sdk-panowidget:1.10.0'
    }
2.AndroiManifest.xml
Add filtering classifications to the intent-filter node of Citiivity using VrPanoramaView:
com.google.intent.category.CARDBOARD: Cardboard-compatible cartons
<activity android:name=".VrPanoramaActivity"  >
        <intent-filter>
            <category android:name="com.google.intent.category.CARDBOARD" />
        </intent-filter>
    </activity>
3. Layout file
Just add a control to the layout
 <com.google.vr.sdk.widgets.pano.VrPanoramaView
      android:id="@+id/pano_view"
      android:layout_margin="5dip"
      android:layout_width="match_parent"
      android:scrollbars="@null"
      android:layout_height="250dip" />
4. Loading panorama
A. Initialization control
VrPanoramaView vrPanView = (VrPanoramaView) findViewById(R.id.vr_pan_view);
B. Read pictures
In advance, we put a selected panorama in the assets directory, aa.jpg, and turn the picture into a bitmap.
/**Get the image in assets and turn it into a stream**/
InputStream open = null;
try {
    open = getAssets().open("aa.jpg");
} catch (IOException e) {
    e.printStackTrace();
}
Bitmap bitmap = BitmapFactory.decodeStream(open);
C. Setting up VrPanoramaView.Options
/**VrPanoramaView.Options Set **/
VrPanoramaView.Options options = new VrPanoramaView.Options();
options.inputType = VrPanoramaView.Options.TYPE_MONO;
There are two types of VrPanoramaView.Options:
TYPE_MONO 360 Degree Single Graph (2:1 aspect ratio)
The image is expected to cover 360 degrees along its horizontal axis, while the vertical range is calculated based on the aspect ratio of the image. For example, if an image of 1000 x 250 pixels is given, the panorama will cover 360 x 90 degrees and a vertical range of - 45 to + 45 degrees.Stereogram of TYPE_STEREO_OVER_UNDER (1:1 aspect ratio)
It consists of two projected panoramas of equal size. The top image is displayed to the left eye and the bottom image to the right eye. The image will cover 360 degrees along the horizontal axis, while the vertical range is calculated according to the aspect ratio of the image. For example, if given in a 1000x500 pixel image (i.e., 1000x250 pixels per eye), the panorama will cover 360x90 degrees and a vertical range of - 45 to + 45 degrees.
D. Loading panorama
vrPanView.loadImageFromBitmap(bitmap, options);
E. Setting Upload Listener for VrPanorama EventListener
/**Setting Upload Picture Monitor**/
vrPanView.setEventListener(new VrPanoramaEventListener() {
    /**
    * Display mode change callback
    * 1.default
    * 2.Full screen mode
    * 3.VR Viewing mode, i.e. horizontal screen split mode
    */
    @Override
    public void onDisplayModeChanged(int newDisplayMode) {
        super.onDisplayModeChanged(newDisplayMode);
        Log.d(TAG, "onDisplayModeChanged()->newDisplayMode=" + newDisplayMode);
    }

    /**
    * Loading VR Picture Failure Callback
    */
    @Override
    public void onLoadError(String errorMessage) {
        super.onLoadError(errorMessage);
        Log.d(TAG, "onLoadError()->errorMessage=" + errorMessage);
    }

    /**
    * Loading VR Picture Successfully Callback
    */
    @Override
    public void onLoadSuccess() {
        super.onLoadSuccess();
        Log.d(TAG, "onLoadSuccess->Picture Loading Successfully");
    }

    /**
    * Click VR Picture Callback
    */
    @Override
    public void onClick() {
        super.onClick();
        Log.d(TAG, "onClick()");
    }
});
F. Processing in onPause, onResume and onDestroy
@Override
protected void onPause() {
    super.onPause();
    vrPanView.pauseRendering();//Pause 3D rendering and tracking
}

@Override
protected void onResume() {
    super.onResume();
    vrPanView.resumeRendering();//Restoring 3D Rendering and Tracking
}

@Override
protected void onDestroy() {
    vrPanView.shutdown();//Turn off the rendering and release the associated memory
    super.onDestroy();
}
G. Some other methods
// Whether to hide the button in the lower left corner
vrPanView.setInfoButtonEnabled(boolean enabled);
// Whether to Hide Full Screen Buttons
vrPanView.setFullscreenButtonEnabled(boolean enabled);
Not finished, if you encounter a new continue to add
Finally, complete code is attached:
Author: shijiacheng
Links to this article: http://shijiacheng.studio/2017/06/30/first-RecyclerView/
Copyright Statement: All articles in this blog are original articles except special statements. Please respect the results of labor, reprint and indicate the source!
Reprinted please note: from http://shijiacheng.studio