1. Preface
Paging is a common feature in the development of a Web site, especially when a certain amount of data is displayed on the page, which can cause pages to be too long and affect the user experience. In addition, slow loading may occur.Therefore, paging is necessary.
There are two common implementations of paging: foreground paging and background paging.Foreground paging is a query that retrieves all data in memory and retrieves data from corresponding intervals when needed, but only for small amounts of data.Background paging means that only the data in the corresponding interval is retrieved and returned when querying, and then queried and retrieved again when paging. This method can reduce transmission pressure and improve performance.Today this blog is about how Flask's extension library flask-pagination and paging plug-in layPage are used to paging in Flask.
2. Preparations
1.Flask environment configuration
First you need a Python environment, then you need to install several third-party libraries:
- flask
- pymysql
- flask-pagination
- SQLAlchemy
Use the following commands to install:
pip install flask
pip install pymysql
pip install flask-pagination
pip install SQLAlchemy
2.layui download installation
The layui is a classic modular front-end UI framework at: https://www.layui.com/ Or you can tap directly Here Download.
La layui is a front-end UI framework written with its own module specifications, following the native HTML/CSS/JS writing and organization, with very low threshold and ready to use.Its exterior is minimalist, yet it is full of interior. It is lightweight and has plenty of components. Every detail from core code to API has been carefully crafted, which makes it ideal for the rapid development of interface.

3. Data preparation
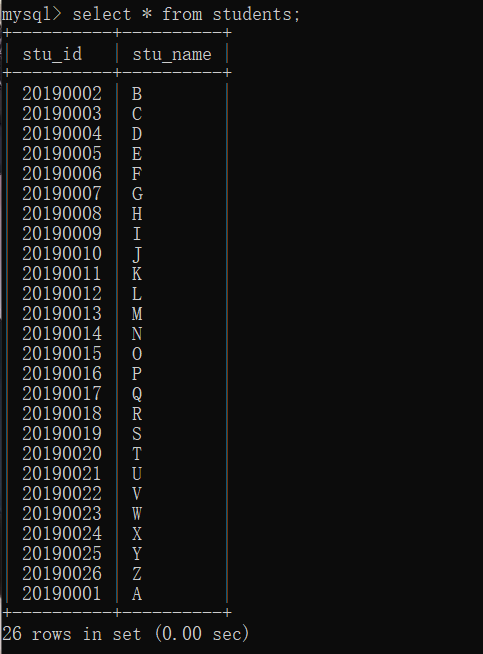
The database used this time is MySQL and a table, students, has only two fields: stu_id and stu_name. The data in the table is as follows:
3. Using flask-pagination
To use flask-pagination for paging, you need to export a class Pagination from it:
from flask_paginate import Pagination
Following is the paging code:
 1 @app.route('/index')
 2 def index(limit=10):
 3     sess = DBSession()
 4     data = sess.query(t_students).all()
 5     page = int(request.args.get("page", 1))
 6     start = (page - 1) * limit
 7     end = page * limit if len(data) > page * limit else len(data)
 8     paginate = Pagination(page=page, total=len(data))
 9     ret = sess.query(t_students).slice(start, end)
10     return render_template("index.html", data=ret, paginate=paginate)
Where limit denotes the number of bars displayed per page, page denotes the number of pages, start and end denote the data intervals displayed on that page, and then instantiate the Pagination class.Here I only pass in two parameters: page and total (total represents the total number of bars of data), in addition to these two parameters, you can also pass in other parameters, such as:
- bs_version: Supported BootStrap version, default 2;
- css_framework: The CSS framework used, defaulting to BootStrap;
- url_coding: The URL encoding format, which defaults to UTF-8.
In the code, I used render_template to render the page and return the data, following is the core code in the front end:
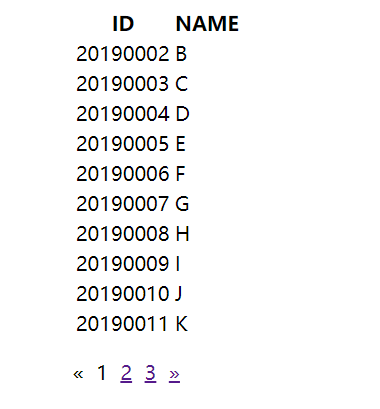
 1 <table>
 2 <thead>
 3     <tr>
 4         <th>ID</th>
 5         <th>NAME</th>
 6     </tr>
 7     </thead>
 8     <tbody>
 9     {% for i in data %}
10         <tr>
11             <td>{{ i.stu_id }}</td>
12             <td>{{ i.stu_name }}</td>
13         </tr>
14     {% endfor %}
15     </tbody>
16 </table>
17 {{ paginate.links }}
The results are as follows:
4. Use layPage
You can see that paging with flask-pagination is easier, but for better results, you can use some front-end frameworks, such as layPage, the paging plug-in in layui.LayerPage is dedicated to providing the ultimate paging logic, either as an asynchronous or as a refreshing page break, which can be Here View the document.
First you need to import layui.js and layui.css:
<script src="../static/layui.js"></script>
<link rel="stylesheet" href="../static/css/layui.css">
Layerpage is very simple to use, pointing to a container for storing paging, and rendering paging can be done by getting some initial values from the server side.For example:
 1 <div>
 2     <table>
 3         <thead>
 4         <tr>
 5             <th></th>
 6             <th>ID</th>
 7             <th>NAME</th>
 8         </tr>
 9         </thead>
10         <tbody id="demoBody"></tbody>
11     </table>
12     <div id="demo"></div>
13 </div>
demo is used for paging and demoBody is used for displaying data content.However, to achieve paging, you also need to use laypage.render() to render.In laypage.render(), there are some core parameters:
- elem: Points to a container where pages are stored, which can be an ID, DOM object;
- count: Total amount of data, usually available on the server side;
- limit: 10 bars per page by default;
- prev: Customize the content of the previous page to support incoming plain text and HTML;
- Next: Customize the content of the next page to support incoming plain text and HTML;
- Theme: Custom theme that supports incoming color values or any common character.
The layPage is used here to display the paging content, while the specific data content needs to be loaded using JS with the following code:
 1 <script>
 2     $(function () {
 3         initPage();
 4     });
 5
 6     function initPage(pageConf) {
 7         if (!pageConf) {
 8             pageConf = {};
 9             pageConf.pageSize = 10;
10             pageConf.currentPage = 1;
11         }
12         $.post("http://127.0.0.1:5000/get_data", pageConf, function (data) {
13             layui.use(['laypage', 'layer'], function () {
14                 var page = layui.laypage;
15                 page.render({
16                     elem: 'demo',
17                     count: data.count,
18                     curr: pageConf.currentPage,
19                     limit: pageConf.pageSize,
20                     first: "home page",
21                     last: "End Page",
22                     layout: ['count', 'prev', 'page', 'next', 'limit', 'skip'],
23                     jump: function (obj, first) {
24                         if (!first) {
25                             pageConf.currentPage = obj.curr;
26                             pageConf.pageSize = obj.limit;
27                             initPage(pageConf);
28                         }
29                     }
30                 });
31                 fillTable(data["data"], (pageConf.currentPage - 1) * pageConf.pageSize); //Page Fill
32             })
33         });
34     }
35
36     //Filling in tabular data
37     function fillTable(data, num) {
38         $("#demoBody").html('');
39         $.each(data, function (index, obj) {
40             // id Many times it is not continuous, so if you want to show a more continuous number of records, you can dynamically calculate the record number based on the current page and the number of bars per page
41             index = index + num + 1;
42             var info = '';
43             info += '<tr>';
44             info += '<td>' + index + '</td>';
45             info += '<td>' + obj.id + '</td>';
46             info += '<td>' + obj.name + '</td>';
47             info += '</tr>';
48             $("#demoBody").append(info);
49         });
50     }
51 </script>
The front-end code is complete and requires an interface to provide data, which can be implemented by defining a route using Flask, for example:
 1 @app.route('/get_data', methods=['POST'])
 2 def get_data():
 3     sess = DBSession()
 4     data = sess.query(t_students).all()
 5     limit = int(request.form.get("pageSize"))
 6     page = int(request.form.get("currentPage"))
 7     start = (page - 1) * limit
 8     end = page * limit if len(data) > page * limit else len(data)
 9     ret = [{"id": data[i].stu_id, "name": data[i].stu_name} for i in range(start, end)]
10     return {"data": ret, "count": len(data)}
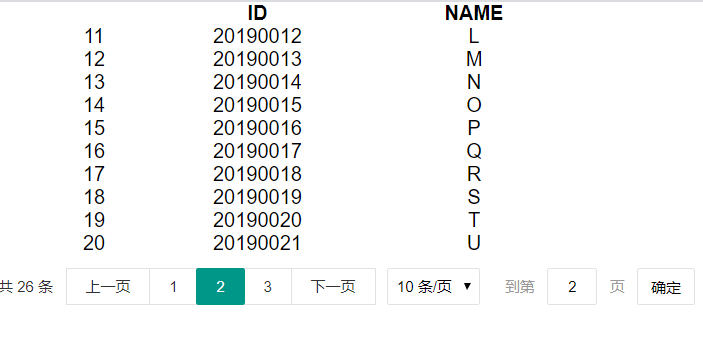
The front end uses POST requests, transfers data including the current number of pages and the number of display bars per page, and then uses request.form.get() in Flask to get the data, gets the number of pages and bars, and fetches the data in the corresponding interval. The result is a JSON format data, where data represents the data and count represents the total number of data bars.
The results are as follows:
Complete code uploaded to GitHub!