brief introduction
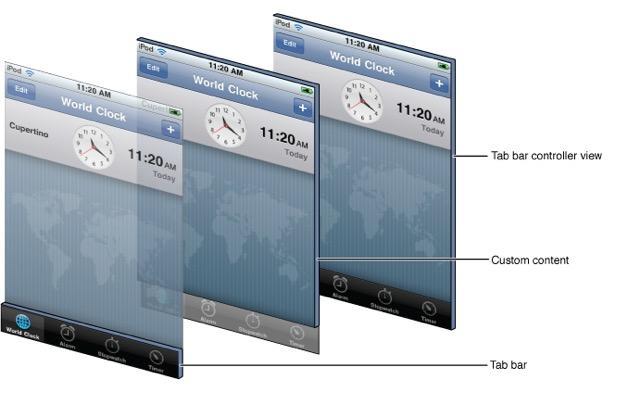
UITabBarController - tab controllers, like navigation controllers, are also widely used in various ios applications. As the name implies, the tab controller displays a series of "pick-up cards" at the bottom of the screen, which are represented as icons and text, and the user touches them to switch between different scenes. Similar to UINavigation Controller, UITabBarController can also be used to control multiple page navigation. Users can move between multiple view controllers and customize the tab bar at the bottom of the screen.
With the tab bar at the bottom of the screen, UITabBarController does not need to push and push views in a stack manner like UINavigation Controller. Instead, it builds a series of controllers (these controllers can be UIViewController, UINavigation Controller, UITableViewController, etc.) and adds them to the tab bar. Make each tab correspond to a controller. Each scenario presents a function of the application or provides a unique way to view the application. UITabBarController is a commonly used viewController in iOS, such as the alarm clock program of the system, and QQ is also used in UITabBarController. UITabBarController is usually used as the rootViewController for the entire program and cannot be added to other container viewController.
Like navigation controllers, tab controllers handle everything for us. When users touch buttons, they switch between scenes. We don't need to process tab bar events programmatically, nor do we need to switch between view controllers manually.
Usage steps of UITabBarController
- Initialize UITabBarController Controller
- Set the UIwindow rootViewController for this UITabBarController
- Add sub-controllers to UITabBarController
Sample code
#import "AppDelegate.h"


@interface AppDelegate ()

@end

@implementation AppDelegate


- (BOOL)application:(UIApplication *)application didFinishLaunchingWithOptions:(NSDictionary *)launchOptions {


    // create a window
    self.window = [[UIWindow alloc]init];
    self.window.frame = [UIScreen mainScreen].bounds;


    // Setting the Following Controller of the Window
    UITabBarController * tabbarVC = [[UITabBarController alloc]init];

    // Adding sub-controllers
    UIViewController * VC01 = [[UIViewController alloc]init];
    // Setting titles
    VC01.tabBarItem.title = @"Essence";
    // Setting default images
    VC01.tabBarItem.image = [UIImage imageNamed:@"tabBar_essence_icon"];
    // Set the selected picture
    VC01.tabBarItem.selectedImage = [UIImage imageNamed:@"tabBar_essence_click_icon"];
    VC01.view.backgroundColor = [UIColor yellowColor];
    [tabbarVC addChildViewController:VC01];

    UIViewController * VC02 = [[UIViewController alloc]init];
    VC02.tabBarItem.title = @"New posts";
    VC02.tabBarItem.image = [UIImage imageNamed:@"tabBar_new_icon"];
    VC02.tabBarItem.selectedImage = [UIImage imageNamed:@"tabBar_new_click_icon"];
    VC02.view.backgroundColor = [UIColor redColor];
    [tabbarVC addChildViewController:VC02];

    UIViewController * VC03 = [[UIViewController alloc]init];
    VC03.tabBarItem.title = @"follow";
    VC03.tabBarItem.image = [UIImage imageNamed:@"tabBar_friendTrends_icon"];
    VC03.tabBarItem.selectedImage = [UIImage imageNamed:@"tabBar_friendTrends_click_icon"];

    VC03.view.backgroundColor = [UIColor blueColor];
    [tabbarVC addChildViewController:VC03];

    UIViewController * VC04 = [[UIViewController alloc]init];
    VC04.tabBarItem.title = @"I";
    VC04.tabBarItem.image = [UIImage imageNamed:@"tabBar_me_icon"];
    VC04.tabBarItem.selectedImage = [UIImage imageNamed:@"tabBar_me_click_icon"];

    VC04.view.backgroundColor = [UIColor greenColor];
    [tabbarVC addChildViewController:VC04];


    self.window.rootViewController = tabbarVC;

    // Display window
    [self.window makeKeyAndVisible];

    return YES;
}
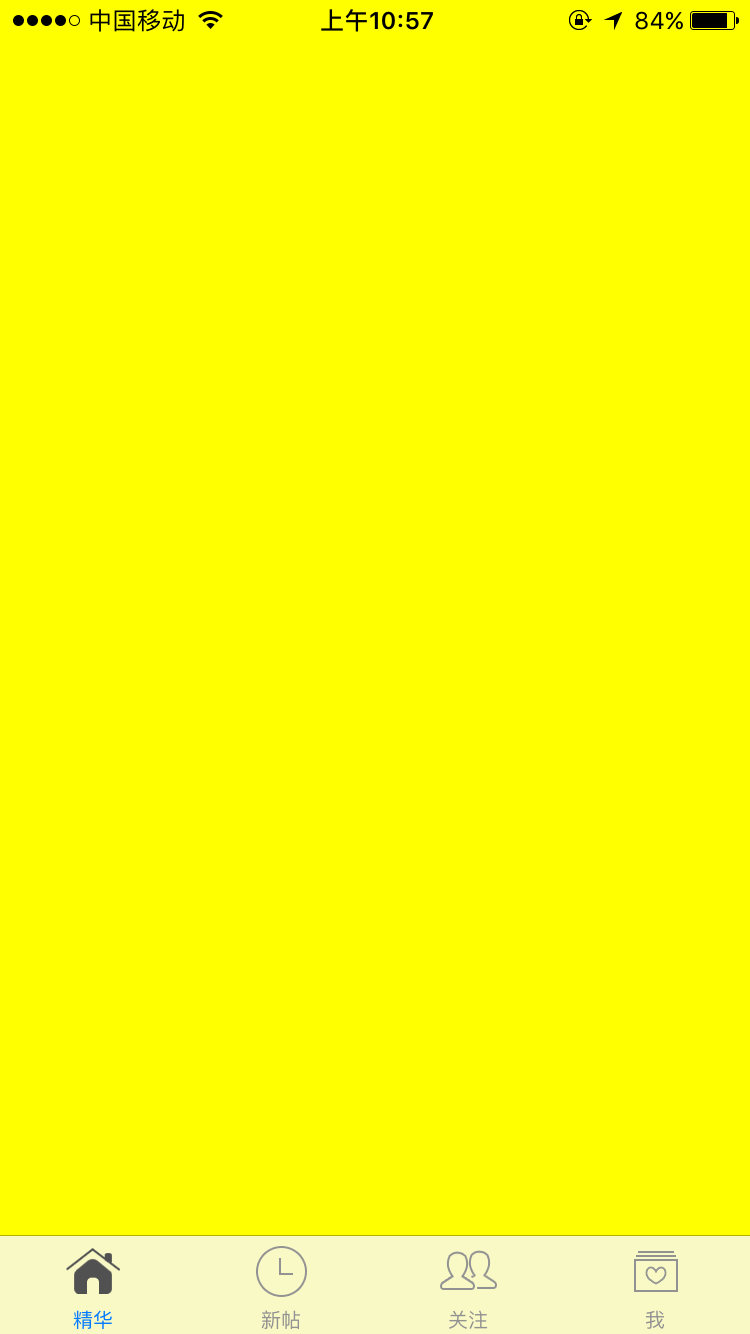
But there are many shortcomings in setting up appdelegate in this way:
- The bottom tabbarite is the default blue
- Code to add subcontrollers is exposed
Implementing UITabBarController in a Customized Way
Steps:
- Create a new subclass inherited from UITabBarController
- Set this subclass to the root controller
- The method of adding subcontrollers in this subclass
But in this case, because of the default blue rendering system, the selected icon selectedImage is not the original image, which can be solved in the following two ways:
-
Method 1: Set the rendering mode of the selected picture
// Adding sub-controllers UIViewController * VC01 = [[UIViewController alloc]init]; // Setting titles VC01.tabBarItem.title = @"Essence"; // Setting default images VC01.tabBarItem.image = [UIImage imageNamed:@"tabBar_essence_icon"]; UIImage * image = [UIImage imageNamed:@"tabBar_essence_click_icon"]; // Set up Rendering Mode - Keep Primitive Rendering image = [image imageWithRenderingMode:UIImageRenderingModeAlwaysOriginal]; // Set the selected picture VC01.tabBarItem.selectedImage =image; VC01.view.backgroundColor = [UIColor yellowColor]; [self addChildViewController:VC01] - Method 2: Set directly in the properties of the image folder - set render as to original image

Because the text is the default blue as the image, so we also need to set it up to achieve the desired effect.
Solution 1: Set TitleTextAttributes property (but this method is cumbersome and requires a lot of code to be written every time you set it up)
- setTitleTextAttributes are set up through dictionaries, so start with a dictionary.
    // Adding sub-controllers
    UIViewController * VC01 = [[UIViewController alloc]init];
    // Setting titles
    VC01.tabBarItem.title = @"Essence";
    // Setting default images
    VC01.tabBarItem.image = [UIImage imageNamed:@"tabBar_essence_icon"];
    //Set the selected picture
    VC01.tabBarItem.selectedImage = [UIImage imageNamed:@"tabBar_essence_click_icon"];

    // Setting Text Properties
    NSMutableDictionary * attrs = [NSMutableDictionary dictionary];
    attrs[NSFontAttributeName] = [UIFont systemFontOfSize:12.0];
    // Setting the prospect of text
    attrs[NSForegroundColorAttributeName] = [UIColor darkGrayColor];

    [VC01.tabBarItem setTitleTextAttributes:attrs forState:UIControlStateNormal];

    VC01.view.backgroundColor = [UIColor yellowColor];
    [self addChildViewController:VC01];
Appearance
- Because the code of text attributes is a lot of annoyance every time they are set up, it needs to be simplified.
- When the UI_APPERANCE macro is behind the method method method, it can be set at once through the appearance object.
- (void)setTitleTextAttributes:(nullable NSDictionary<NSString *,id> *)attributes forState:(UIControlState)state NS_AVAILABLE_IOS(5_0) UI_APPEARANCE_SELECTOR;
- Steps:
- Apprance to get that item
- Setting up this item,
- After that, all item s will be this property.
- (void)viewDidLoad {
    [super viewDidLoad];

    // Setting the text attributes of UITabbarItem uniformly through appearance s
    NSMutableDictionary * attrs = [NSMutableDictionary dictionary];
    attrs[NSFontAttributeName] = [UIFont systemFontOfSize:12.0];  // Set text size
    attrs[NSForegroundColorAttributeName] = [UIColor grayColor];  // Setting the prospect of text

    NSMutableDictionary * selectedAttrs = [NSMutableDictionary dictionary];
    selectedAttrs[NSFontAttributeName] = attrs[NSFontAttributeName];
    selectedAttrs[NSForegroundColorAttributeName] = [UIColor darkGrayColor];

    UITabBarItem * item = [UITabBarItem appearance];  // Setting appearance
    [item setTitleTextAttributes:attrs forState:UIControlStateNormal];
    [item setTitleTextAttributes:selectedAttrs forState:UIControlStateSelected];


    // Adding sub-controllers
    UIViewController * VC01 = [[UIViewController alloc]init];
    // Setting titles
    VC01.tabBarItem.title = @"Essence";
    // Setting default images
    VC01.tabBarItem.image = [UIImage imageNamed:@"tabBar_essence_icon"];
    //Set the selected picture
    VC01.tabBarItem.selectedImage = [UIImage imageNamed:@"tabBar_essence_click_icon"];


    [VC01.tabBarItem setTitleTextAttributes:attrs forState:UIControlStateNormal];

    VC01.view.backgroundColor = [UIColor yellowColor];
    [self addChildViewController:VC01];

    UIViewController * VC02 = [[UIViewController alloc]init];
    VC02.tabBarItem.title = @"New posts";
    VC02.tabBarItem.image = [UIImage imageNamed:@"tabBar_new_icon"];
    VC02.tabBarItem.selectedImage = [UIImage imageNamed:@"tabBar_new_click_icon"];
    VC02.view.backgroundColor = [UIColor redColor];
    [self addChildViewController:VC02];

    UIViewController * VC03 = [[UIViewController alloc]init];
    VC03.tabBarItem.title = @"follow";
    VC03.tabBarItem.image = [UIImage imageNamed:@"tabBar_friendTrends_icon"];
    VC03.tabBarItem.selectedImage = [UIImage imageNamed:@"tabBar_friendTrends_click_icon"];
    VC03.view.backgroundColor = [UIColor blueColor];
    [self addChildViewController:VC03];

    UIViewController * VC04 = [[UIViewController alloc]init];
    VC04.tabBarItem.title = @"I";
    VC04.tabBarItem.image = [UIImage imageNamed:@"tabBar_me_icon"];
    VC04.tabBarItem.selectedImage = [UIImage imageNamed:@"tabBar_me_click_icon"];
    VC04.view.backgroundColor = [UIColor greenColor];
    [self addChildViewController:VC04];
}
Encapsulation-Encapsulation Method for Adding Custom Subcontrollers
- Because the code of the custom sub-controller is very similar, it can be extracted.
- (void)viewDidLoad {
    [super viewDidLoad];

    // Setting the text attributes of UITabbarItem uniformly through appearance s
    NSMutableDictionary * attrs = [NSMutableDictionary dictionary];
    attrs[NSFontAttributeName] = [UIFont systemFontOfSize:12.0];  // Set text size
    attrs[NSForegroundColorAttributeName] = [UIColor grayColor];  // Setting the prospect of text

    NSMutableDictionary * selectedAttrs = [NSMutableDictionary dictionary];
    selectedAttrs[NSFontAttributeName] = attrs[NSFontAttributeName];
    selectedAttrs[NSForegroundColorAttributeName] = [UIColor darkGrayColor];

    UITabBarItem * item = [UITabBarItem appearance];  // Setting appearance
    [item setTitleTextAttributes:attrs forState:UIControlStateNormal];
    [item setTitleTextAttributes:selectedAttrs forState:UIControlStateSelected];


    // Adding sub-controllers
    [self setupChildVC:@"Essence" andImage:@"tabBar_essence_icon" andSelectImage:@"tabBar_essence_click_icon"];
    [self setupChildVC:@"New posts" andImage:@"tabBar_new_icon" andSelectImage:@"tabBar_new_click_icon"];
    [self setupChildVC:@"follow" andImage:@"tabBar_friendTrends_icon" andSelectImage:@"tabBar_friendTrends_click_icon"];
    [self setupChildVC:@"I" andImage:@"tabBar_me_icon" andSelectImage:@"tabBar_me_click_icon"];
}

/**
 * Initialization sub-controller
 */
- (void)setupChildVC:(NSString * )title andImage:(NSString * )image andSelectImage:(NSString *)selectImage{
    UIViewController * VC = [[UIViewController alloc]init];
    VC.tabBarItem.title = title;
    VC.tabBarItem.image = [UIImage imageNamed:image];
    VC.tabBarItem.selectedImage = [UIImage imageNamed:selectImage];
    VC.view.backgroundColor = [UIColor greenColor];
    [self addChildViewController:VC];
}
Customize the bottom tabbar style

If you want to add a button to the tabbar (note that it's not item, the tabbar item is the format of the image above and the text below), this button is different from the item style, occupying the size of the text plus the image above and item. Since the items added to the tabbar are arranged in left-to-right order, if you add an item directly, you can't achieve the desired style (of course, if you add an item, just follow the previous method), which can be achieved by customizing the tabbar.

- Because tabbar is read-only, tabbar can only be replaced by KVC mode.
Steps:
- Create a new class inherited from UITabbar
- Implement initialization in this class
- Relayout in the layoutSubviews method
- Replace tabbar in Tabbar Controller
- Although we replaced the tabbar with a custom tabbar in Tabbar Controller, because the tabbar inherits from uitabbar, its original properties and content are still there.
#import "LMHTabbar.h"

@interface LMHTabbar()
/** Publish button */
@property (nonatomic, weak) UIButton * publishBtn;

@end

@implementation LMHTabbar

/**
 * Initialization
 */
- (instancetype)initWithFrame:(CGRect)frame{
    if (self = [super initWithFrame:frame]) {

        // Setting tabbar's child controls
        UIButton * publishBtn = [UIButton buttonWithType:UIButtonTypeCustom];
        [publishBtn setBackgroundImage:[UIImage imageNamed:@"tabBar_publish_icon"] forState:UIControlStateNormal];
        [publishBtn setBackgroundImage:[UIImage imageNamed:@"tabBar_publish_click_icon"] forState:UIControlStateHighlighted];
        [publishBtn sizeToFit];

        [self addSubview:publishBtn];
        self.publishBtn = publishBtn;
    }
    return self;
}

/**
 * Override Layout Subcontrols for Layout
 */
- (void)layoutSubviews{
    [super layoutSubviews];

    CGFloat width = self.frame.size.width;
    CGFloat height = self.frame.size.height;

    // Setting the frame of the Publish button
    self.publishBtn.center = CGPointMake(width  * 0.5, height * 0.5);


    // Set up frame s for other UITabBar s
    CGFloat buttonY = 0;
    CGFloat buttonW = width /5;
    CGFloat buttonH = height;
    NSInteger index = 0;
    for (UIView  * button in self.subviews) {

        // Judgment - only UITabBarButton's button is the layout (that is, the essence of tabbar, new posts, concerns, my four buttons), and the release button is not UITabBarButton, but no layout.
        // Since UITabBar is officially private to Apple, it cannot be set directly.
        if (![button isKindOfClass:NSClassFromString(@"UITabBarButton")])  continue;

        //  Calculate the x value of the button
        CGFloat buttonX = buttonW * ((index > 1) ? (index + 1): (index));
        button.frame = CGRectMake(buttonX, buttonY, buttonW, buttonH);

        // Index increase
        index ++;
    }


}
@end