Basic use, upload and download of private server
Why build a private server
The network speed is slow, it takes a long time to download jar packages, and the work efficiency is low
It is not conducive to the management and maintenance of public construction
The jar packages developed in the company can only be shared and managed by the company
What we have to do
This is to record the warehouse addresses of the official Releases and Snapshots. In the future, the jar s developed and packaged by ourselves will be uploaded to these two addresses and can also be downloaded by colleagues in other companies
Basic use of private server
1. The private server here is built with the free software provided by nexus company
The download address is: https://www.sonatype.com/nexus/repository-oss-download
If you try to build it yourself, it is recommended to choose the old version of 2.x, because it is smaller and simpler
jdk – version adopted by 1.8; windows services adopted
2. After downloading, run console-nexus.bat;
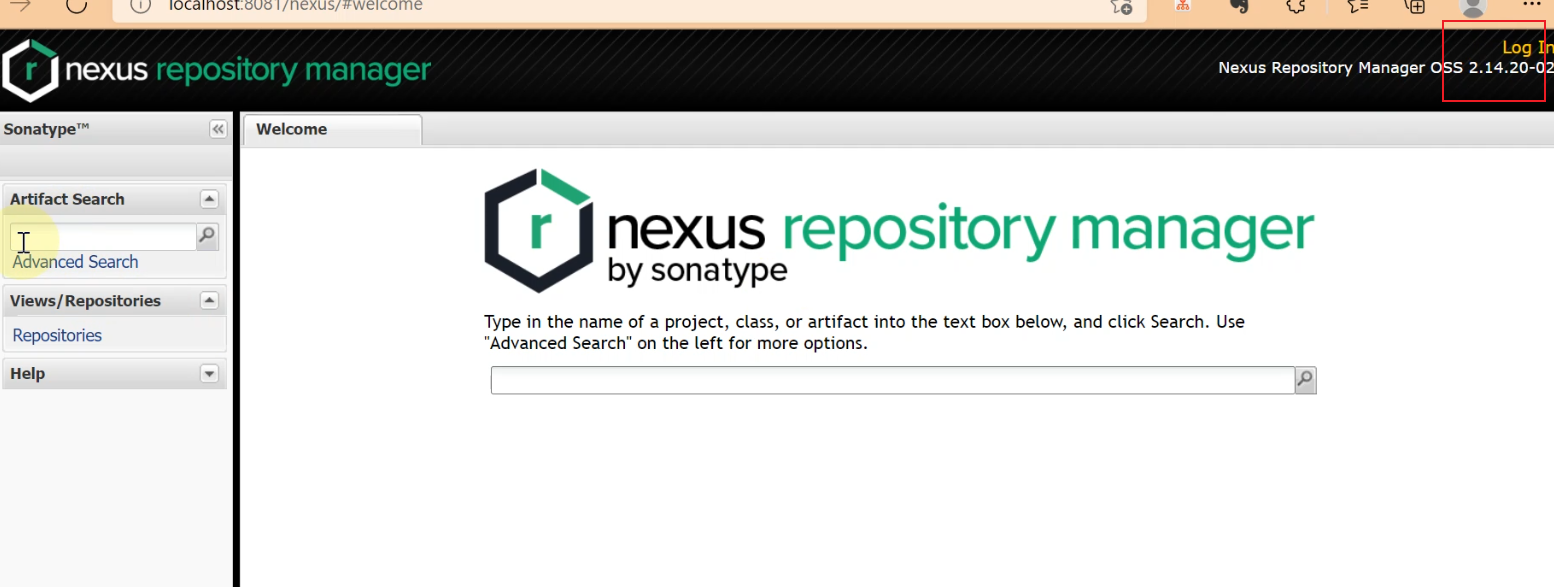
3. Open the browser http://localhost:8081/nexus

4. Click the Log In link in the upper right corner and enter the user name admin and password admin123
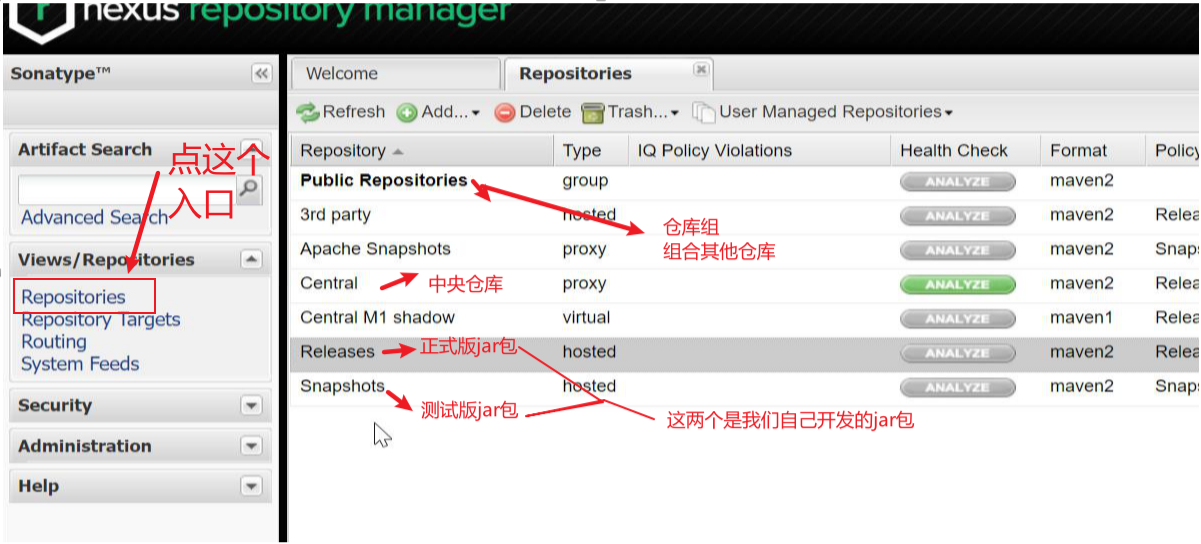
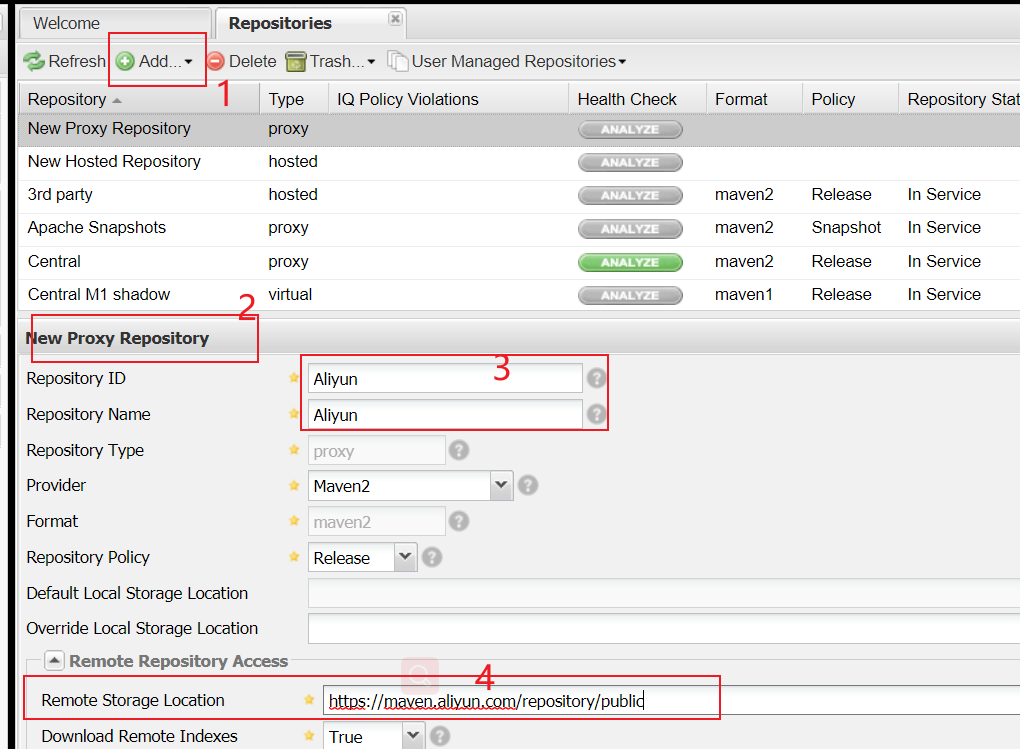
5. Add a new warehouse. Here you get an alicloud warehouse address on the official website. Change your name and add an address
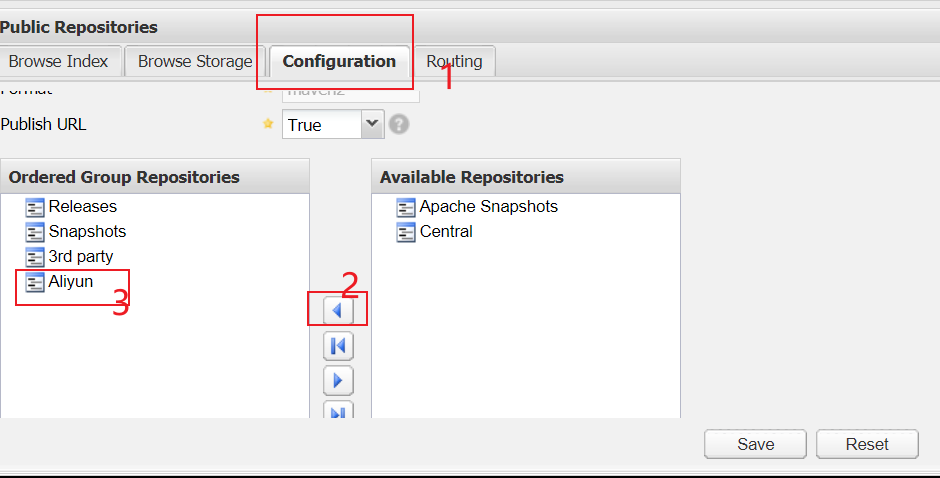
6. Then remove the central warehouse from the group warehouse, add the Alibaba cloud warehouse, and save it
Private server upload (generally speaking, password permission needs to be set for upload, not for download)
1. Configure upload address
<distributionManagement>
        <repository>
            <id>releases</id>
            <url>http://localhost:8081/nexus/content/repositories/releases/</url>
        </repository>
        <snapshotRepository>
            <id>snapshots</id>
            <url>http://localhost:8081/nexus/content/repositories/snapshots/</url>
        </snapshotRepository>
    </distributionManagement>
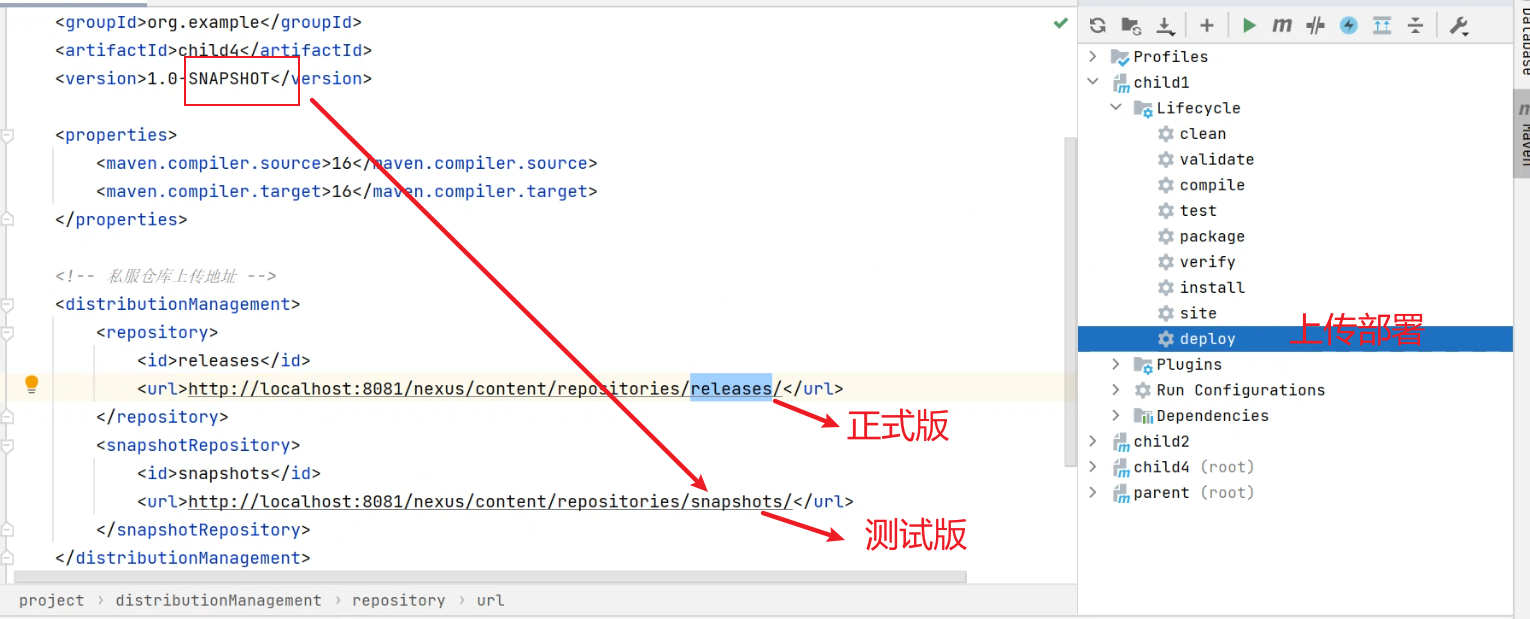
2. Configure authentication information in settings.xml in maven file conf
<?xml version="1.0" encoding="UTF-8"?>
<settings xmlns="http://maven.apache.org/SETTINGS/1.0.0"
          xmlns:xsi="http://www.w3.org/2001/XMLSchema-instance"
          xsi:schemaLocation="http://maven.apache.org/SETTINGS/1.0.0 http://maven.apache.org/xsd/settings-1.0.0.xsd">

  ...

  <servers>
    <server>
      <id>releases</id>
      <username>admin</username>
      <password>admin123</password>
    </server>
    <server>
      <id>snapshots</id>
      <username>admin</username>
      <password>admin123</password>
    </server>
  </servers>

  ...

</settings>
3. After configuration, you can upload the deployment by desdeploy. The following is the front and back figure of the upload
Before uploading

After uploading

Private server download
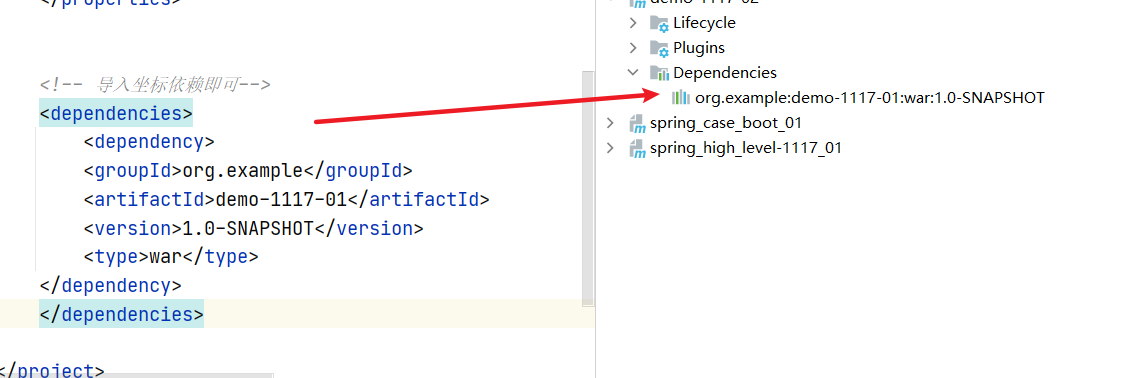
1. Import coordinate dependency
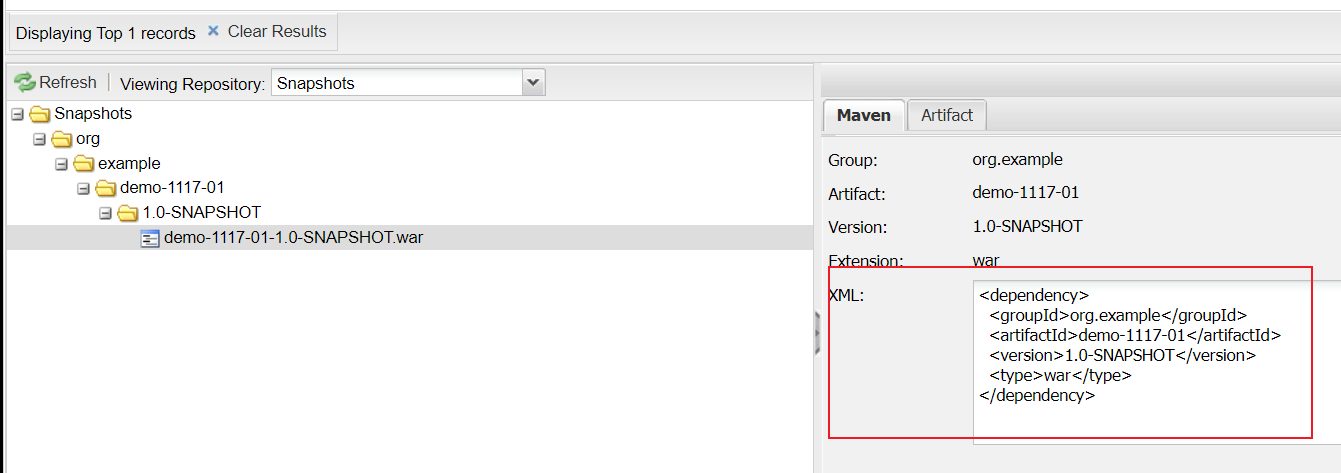
This is because my local warehouse has this address, so like the dependencies of other local warehouses, there is no need to import the address.
The priority of local warehouse is higher than that of private server
2. Generally speaking, there is no local warehouse. You need to go to the private server to download. You also need to configure the private server address. Then, the order of importing coordinates is from bottom to bottom, and the first one found is imported
<?xml version="1.0" encoding="UTF-8"?>
<project xmlns="http://maven.apache.org/POM/4.0.0"
         xmlns:xsi="http://www.w3.org/2001/XMLSchema-instance"
         xsi:schemaLocation="http://maven.apache.org/POM/4.0.0 http://maven.apache.org/xsd/maven-4.0.0.xsd">

	...

    <repositories>
        <!-- Other third party warehouses -->

		<!-- Address of the company's private server warehouse -->
        <repository>
            <id>releases</id>
            <url>http://localhost:8081/nexus/content/repositories/releases/</url>
        </repository>
        <repository>
            <id>snapshots</id>
            <url>http://localhost:8081/nexus/content/repositories/snapshots/</url>
        </repository>
    </repositories>

	...

</project>
http://localhost:8081/nexus/content/repositories/snapshots/
...