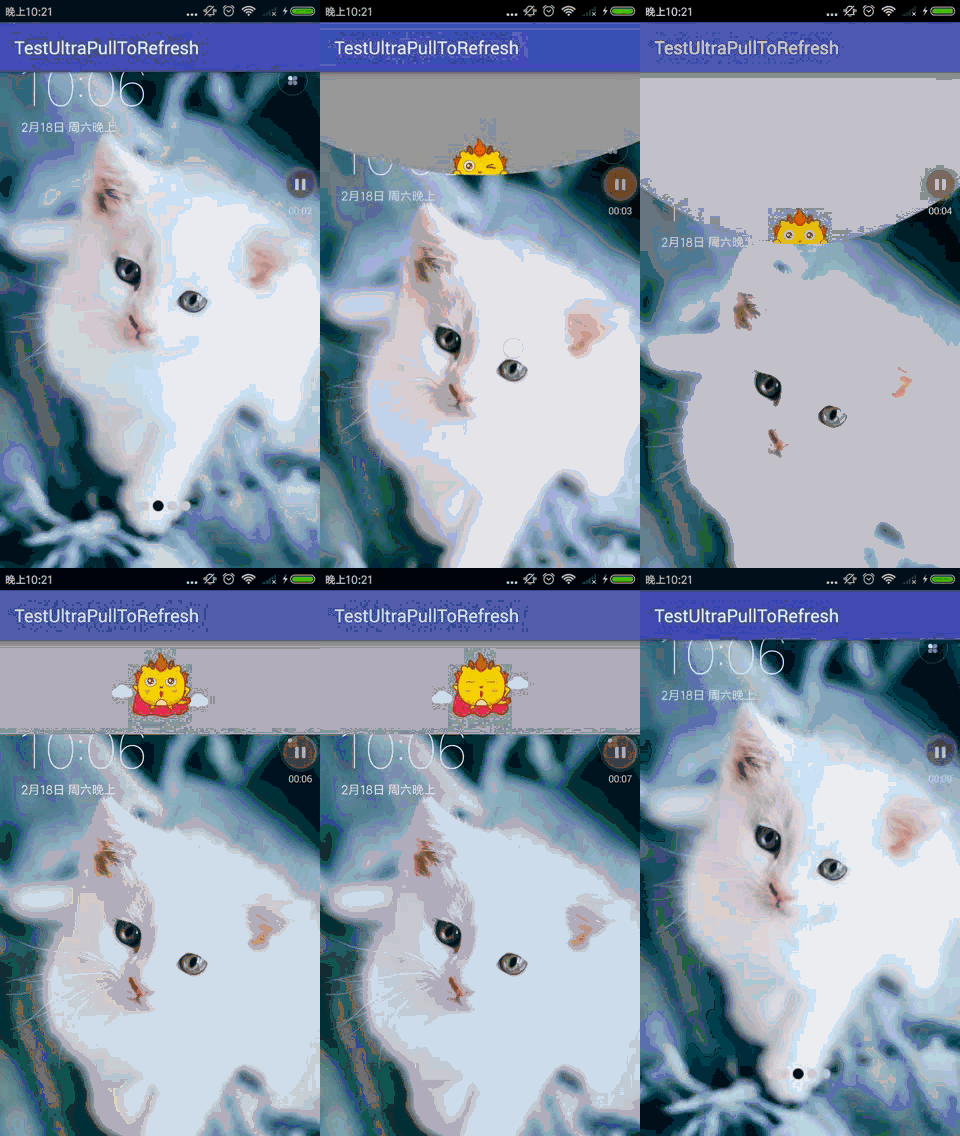
Ultra-Pull-To-Refresh has always been my favorite in drop-down refresh, where you customize a HeaderView style. It's slightly different from the normal style. Look at the effect first.

At first glance, it looks no different from the normal drop-down refresh style, but when you look carefully, you will find that the head is covered in the content (for simplicity, the whole layout here is a picture). The default layout style of PtrFrameLayout is to place the header above the content and display it gradually from top to bottom when it drops down. To achieve this effect of head covering on screen content, we need to think about something else.
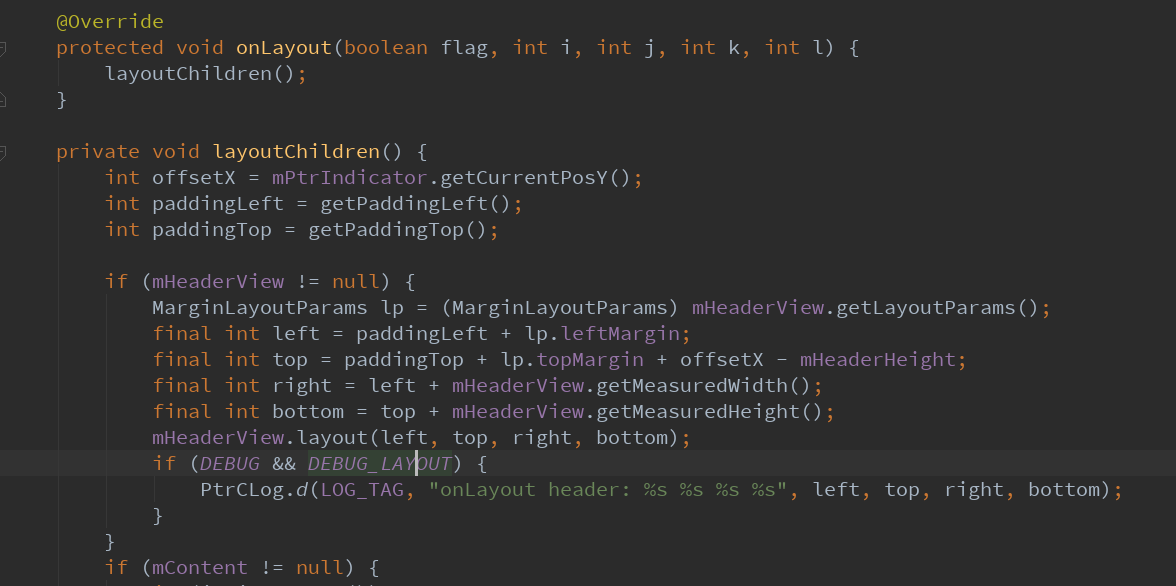
Solution 1: Modify the library file and place the display position of headerView above the content. Since PtrFrameLayout itself is a ViewGroup, modifying the onLayout code can implement this style.

However, considering a series of problems that Layout may cause to refresh the original function, think about giving up directly.
Solution 2: Without modifying the library file, the location of the HeaderView remains unchanged, but the content of the HeaderView is displayed on the content. In this way, the content display of HeaderView goes beyond its own boundaries. I heard that adding a magic code to the layout can be achieved, so I tried it myself, and it really can. So choose option 2 to continue to study.
<in.srain.cube.views.ptr.PtrFrameLayout xmlns:android="http://schemas.android.com/apk/res/android"
    android:id="@+id/ptr_layout_activity"
    android:layout_width="match_parent"
    android:layout_height="match_parent"
    android:clipChildren="false">
First of all, we can see several states in the whole pull-down refresh process by observing the process of pull-down refresh.
State 1: When the pull-down starts, the bottom shows an arc, and the yellow eyes of the little man are closed (left 1 picture). At this time, the height of the pull-down is not enough to trigger the refresh operation.
State 2: Pull down to the height that can trigger the refresh operation and open your eyes (left 2 pictures);
State 3: The action in the refresh process after loosening hands, which is displayed by the next five pictures by rotation.
Drop-down refresh distance and state judgment processing in onUIPositionChange callback method
@Override
    public void onUIPositionChange(PtrFrameLayout frame, boolean isUnderTouch, byte status, PtrIndicator ptrIndicator) {
        //Dropdown distance
        posY = ptrIndicator.getCurrentPosY();
        if (!isRefresh) {
            if (isComplete) {
                //The drop-down refresh operation has just been completed, and no reset events have been made. Use Picture 2. Keep the upper and lower margins, pull-down, push-up and bottom arcs are not displayed.
                drawable = ResourcesUtils.getDrawable(R.drawable.home_loading_1);
                flag = 4;
            } else {
                //Pull and play when not triggered drop-down refresh
                if (posY < turning) {
                    //Use Picture 1
                    drawable = ResourcesUtils.getDrawable(R.drawable.home_loading_0);
                    flag = 0;
                } else if (posY < measureHeight * RATIO_TO_REFRESH) {
                    //Use Picture 1
                    //Show the following arc
                    drawable = ResourcesUtils.getDrawable(R.drawable.home_loading_0);
                    flag = 1;
                } else {
                    //The drop-down distance has reached the position where the drop-down refresh can be triggered. Use Picture 2
                    drawable = ResourcesUtils.getDrawable(R.drawable.home_loading_1);
                    flag = 2;
                }
            }
        } else {
            //When the current pull-down refresh is in progress, you can manually slide the picture without changing it.
            flag = 3;
            if (!animation.isHasStart()) {
                startAnimation(animation);
                animation.setHasStart(true);
            }
        }
        invalidate();
}Drawable animationDrawable = ResourcesUtils.getDrawable(R.drawable.home_loading_2);
measureHeight = padding * 2 + animationDrawable.getIntrinsicHeight();1. Drawing arc stage, flag=1 and 2
switch (flag) {
            case 1:
            case 2:
                controlY = (int) ((posY - turning) * RATIO_TO_REFRESH) > dragDistance * 2
                        ? dragDistance * 2 + measureHeight : (int) ((posY - turning) * RATIO_TO_REFRESH)
                        + measureHeight;
                //Drop-down radian
                mPath.reset();
                mPath.moveTo(0, measureHeight);
                mPath.quadTo(getWidth() / 2, controlY, getWidth(), measureHeight);
                mPath.lineTo(getWidth(), 0);
                mPath.lineTo(0, 0);
                mPath.close();

                mDrawableRect.set((getWidth() - drawable.getIntrinsicWidth()) / 2,
                        getBsrPositionY(controlY) - drawable.getIntrinsicHeight() * 2 / 3,
                        (canvas.getWidth() + drawable.getIntrinsicWidth()) / 2,
                        getBsrPositionY(controlY) + drawable.getIntrinsicHeight() / 3);

                //Draw arc
                mPaint.setXfermode(null);
                canvas.drawPath(mPath, mPaint);
                canvas.save();
                canvas.clipPath(mPath);
                drawable.setBounds(mDrawableRect);
                drawable.draw(canvas);
                canvas.restore();
                break;
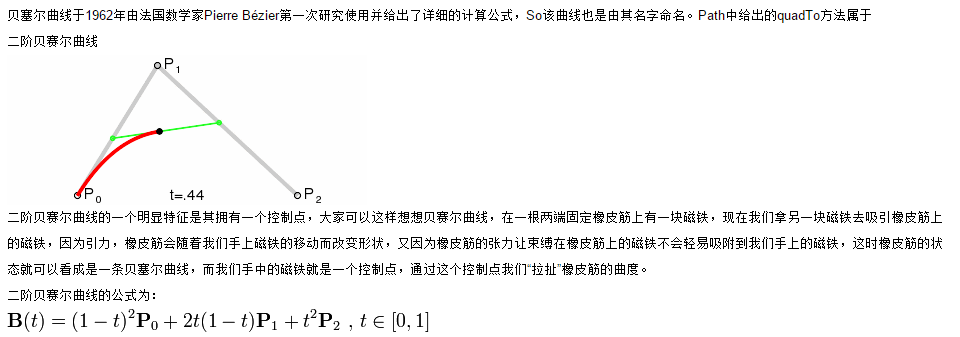
The control Y in the code is the Y coordinate of the control point P1, and the turning value indicates how far the drop-down distance starts to draw an arc (you can modify the value to see the effect). Here our control point X coordinate is in the center of the screen (t=0.5), and the X coordinates of P 0 and P2 are also determined. Only the highest point of the corresponding curve Y axis is required. Because the coordinates of P0 and P2Y axes are the same, they are measureHeight, so the left side of the highest point of the second-order curve here is simplified as
/**
     * Getting the Highest Point of Bessel Curve
     *
     * @param y y coordinates of intermediate control points
     * @return
     */
    private int getBsrPositionY(int y) {
        //Determined starting point and end point
        return measureHeight + (y - measureHeight) / 2;
}2. Start refreshing after letting go, flag = 3
Picture rotation, calculate the position and time interval of pictures, and switch pictures regularly
mDrawableRect.set((getWidth() - drawable.getIntrinsicWidth()) / 2,
                            padding,
                            (getWidth() + drawable.getIntrinsicWidth()) / 2,
                            padding + drawable.getIntrinsicHeight());
                    if (drawable != null) {
                        drawable.setBounds(mDrawableRect);
                        drawable.draw(canvas);
                    }
                    if (SystemClock.elapsedRealtime() - lastTime > DURATION) {
                        //Refresh the animation after the interval
                        changeDrawable();
                        lastTime = SystemClock.elapsedRealtime();
}class MyAnimation extends Animation {
boolean hasStart;
public boolean isHasStart() {
return hasStart;
}
public void setHasStart(boolean hasStart) {
this.hasStart = hasStart;
}
@Override
public void initialize(int width, int height, int parentWidth, int parentHeight) {
super.initialize(width, height, parentWidth, parentHeight);
setDuration(mDurationToClose);
//Retain the effect after setting the animation
setInterpolator(new AccelerateDecelerateInterpolator());
}
@Override
protected void applyTransformation(float interpolatedTime, Transformation t) {
super.applyTransformation(interpolatedTime, t);
//Gradual change (arc rebound animation), position change from control Y to 0
flag = 3;
proportion = interpolatedTime;
invalidate();
}
}case 3:
//While refreshing, execute the pop-up animation
if (proportion < 1.0f) {
mPath.reset();
mPath.moveTo(0, measureHeight);
mPath.quadTo(getWidth() / 2, (controlY - measureHeight) * (1 - proportion) + measureHeight, getWidth(), measureHeight);
mPath.lineTo(getWidth(), 0);
mPath.lineTo(0, 0);
mPath.close();
canvas.drawPath(mPath, mPaint);
mDrawableRect.set((getWidth() - drawable.getIntrinsicWidth()) / 2,
(int) ((getBsrPositionY((int) controlY) - drawable.getIntrinsicHeight() - padding) * (1 - proportion)) + padding,
(getWidth() + drawable.getIntrinsicWidth()) / 2,
(int) ((getBsrPositionY((int) controlY) - (padding + drawable.getIntrinsicHeight())) * (1 - proportion)) + (padding + drawable.getIntrinsicHeight()));
if (drawable != null) {
drawable.setBounds(mDrawableRect);
drawable.draw(canvas);
}
} else {3. Restore process after refresh
case 4:
                //When the refresh is completed, the image is changed to 1, which is smaller. Keep the picture in the middle, too.
                mDrawableRect.set((getWidth() - drawable.getIntrinsicWidth()) / 2,
                        (measureHeight - drawable.getIntrinsicHeight()) / 2,
                        (getWidth() + drawable.getIntrinsicWidth()) / 2,
                        (measureHeight + drawable.getIntrinsicHeight()) / 2);
                if (drawable != null) {
                    drawable.setBounds(mDrawableRect);
                    drawable.draw(canvas);
                }
break;case 0:
default:
//Picture location
mDrawableRect.set((getWidth() - drawable.getIntrinsicWidth()) / 2,
measureHeight - drawable.getIntrinsicHeight(),
(getWidth() + drawable.getIntrinsicWidth()) / 2,
measureHeight);
if (drawable != null) {
drawable.setBounds(mDrawableRect);
drawable.draw(canvas);
}
break;
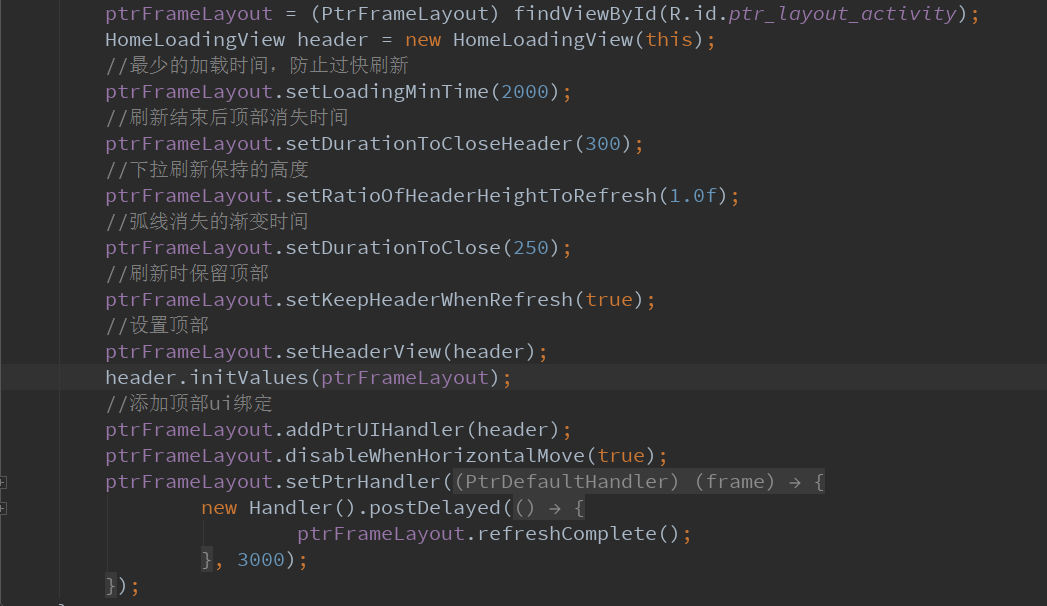
These configuration attributes can also be written in xml, and the custom of drop-down refresh is basically complete. But don't be happy too early. When drawing arcs, the closed area is filled with color. This filling color is paint's color. This color should be consistent with the layout color. Otherwise, try it for yourself. I don't set the background color for PtrFrameLayout here, but I use Theme to set the color of Windows Background. Specific code also has inside, do not continue to post, anyway, if not the same, you will appear to have bug s.