After last writing the basic part of iOS animation, in order to summarize the knowledge of the animation part more systematically and accurately, I spent a lot of time learning the knowledge of this direction. For developers, the animation implementation process is very interesting, and animation will make our APP become full of vitality. This article introduces the animation interfaces in UIKit framework. In most cases, these advanced interfaces can fully meet the needs of our animation implementation.
Next, we will explain some basic contents of animation in UIKit through basic animation and spring animation.
Basic animation
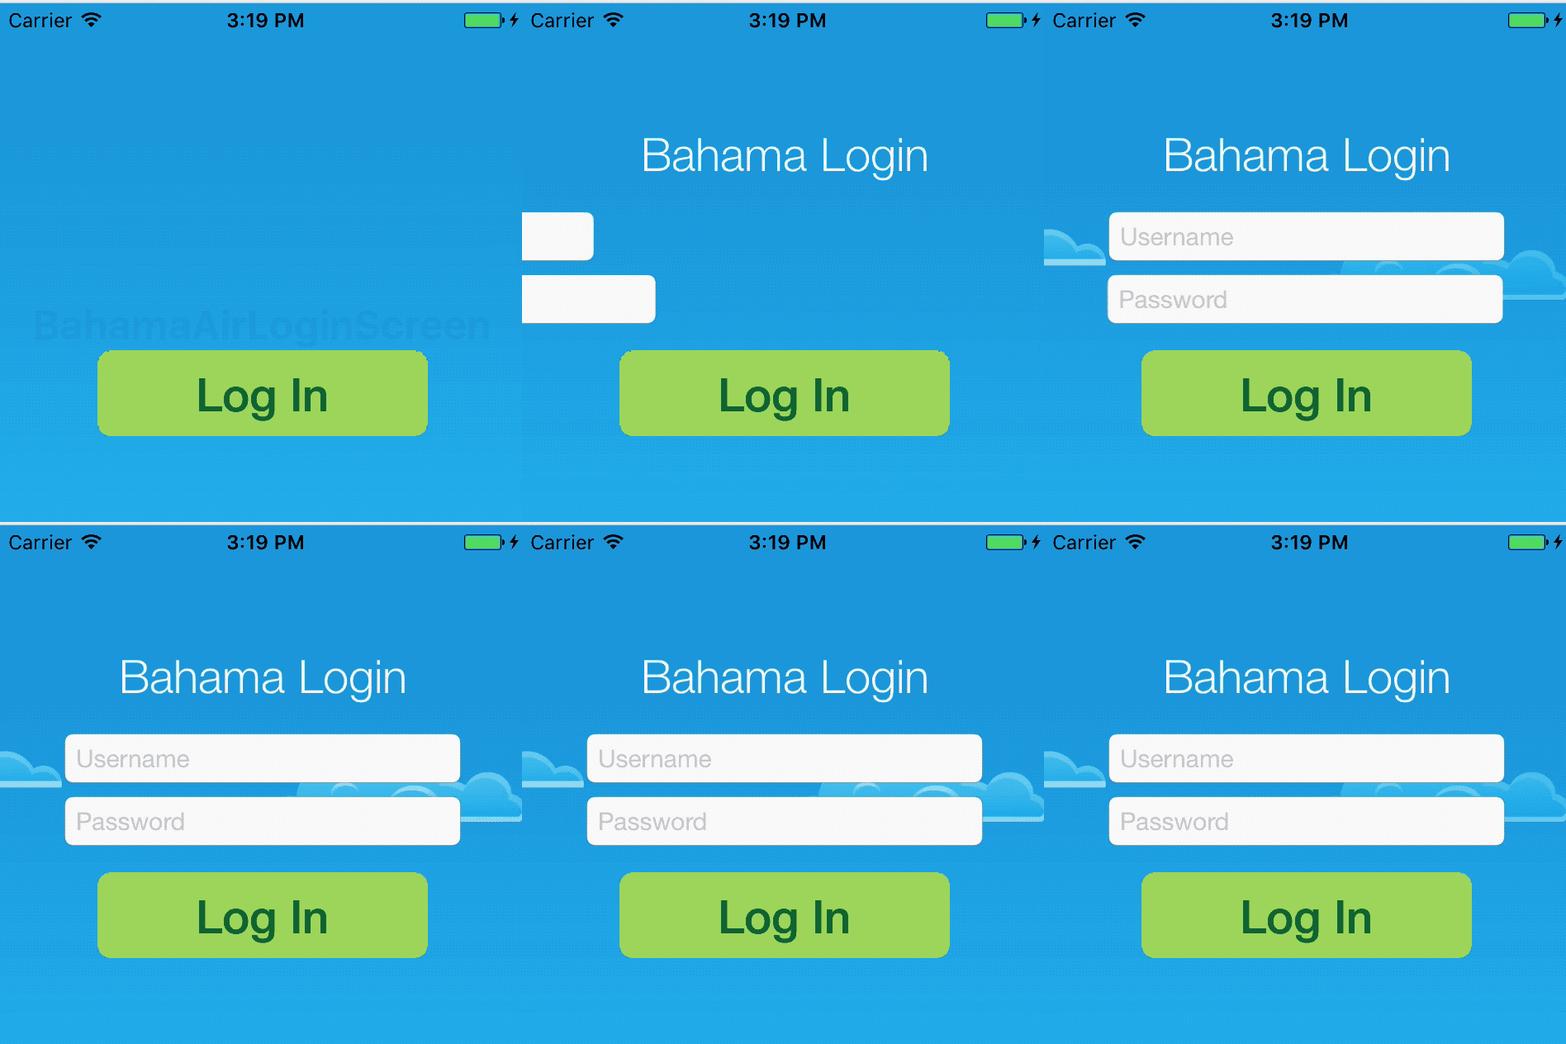
The basic animation effect in UIKit is shown in the following figure. Next, we analyze the implementation steps and details of the animation.

Animation is nothing more than the process of control state change, so the first thing to do is to set the initial state of the animation. The initial state is nothing more than setting the attributes of UIView objects, which can be roughly divided into position and size, background color, transparency, rotation angle. In the animation shown above, two UITextField s and one UILabel appear from left to right, while two UIImageView s appear from transparent to transparent, so we set the following code in viewWillAppear:
  override func viewWillAppear(_ animated: Bool) {
    super.viewWillAppear(animated)

    heading.center.x  -= view.bounds.width
    username.center.x -= view.bounds.width
    password.center.x -= view.bounds.width
    cloud1.alpha = 0
    cloud2.alpha = 0
}
Next is the animation process, that is, the timeline plus the final attribute value, which is implemented through the following advanced API interfaces:
animate(withDuration duration: TimeInterval, animations: @escaping () -> Void)
animate(withDuration duration: TimeInterval, animations: @escaping () -> Void, completion: ((Bool) -> Void)? = nil)
animate(withDuration duration: TimeInterval, delay: TimeInterval, options: UIViewAnimationOptions = [], animations: @escaping () -> Void, completion: ((Bool) -> Void)? = nil)
From top to bottom, functions are gradually enriched. The first function only completes the animation, the second function adds closure of finishing processing after the animation is completed, and the last function adds not only setting parameters of delayed start but also more animation effect. The parameters are explained as follows:
With Duration: Animation Length
delay: How long the animation delays the start
Options: options for over-animation
animations: Closure setting for animation final results
completion: closure at the end of animation
So the animation code of the above effect is as follows:
 override func viewDidAppear(_ animated: Bool) {
    super.viewDidAppear(animated)

    UIView.animate(withDuration: 0.5, animations: {
     self.heading.center.x += self.view.bounds.width
    })

    UIView.animate(withDuration: 0.5, delay: 0.3, options: [], animations: {
        self.username.center.x += self.view.bounds.width
    }, completion: nil)

    UIView.animate(withDuration: 0.5, delay: 0.4, options: [], animations: {
        self.password.center.x += self.view.bounds.width
    }, completion: nil)

    UIView.animate(withDuration: 0.2, delay: 0.5, options: [], animations: {
        self.cloud1.alpha = 1
    }, completion: nil)

    UIView.animate(withDuration: 0.2, delay: 0.6, options: [], animations: {
        self.cloud2.alpha = 1
    }, completion: nil)
}
You may notice that none of the options parameters in the code above set valid values. Here we introduce some common values of options parameters.
Repat: Represents a circular display of the animation.
autoreverse: This means that the animation goes backwards and needs to be used with repeat.
Curve EaseInOut: This means that the animation accelerates first, then uniformly, and finally slows down, the default effect of the animation.
Curve EaseIn: It means that animation is accelerating from slow to fast.
Curve EaseOut: It means that the animation slows down from fast to slow.
Curved Linear: Represents the uniform speed of the whole animation.
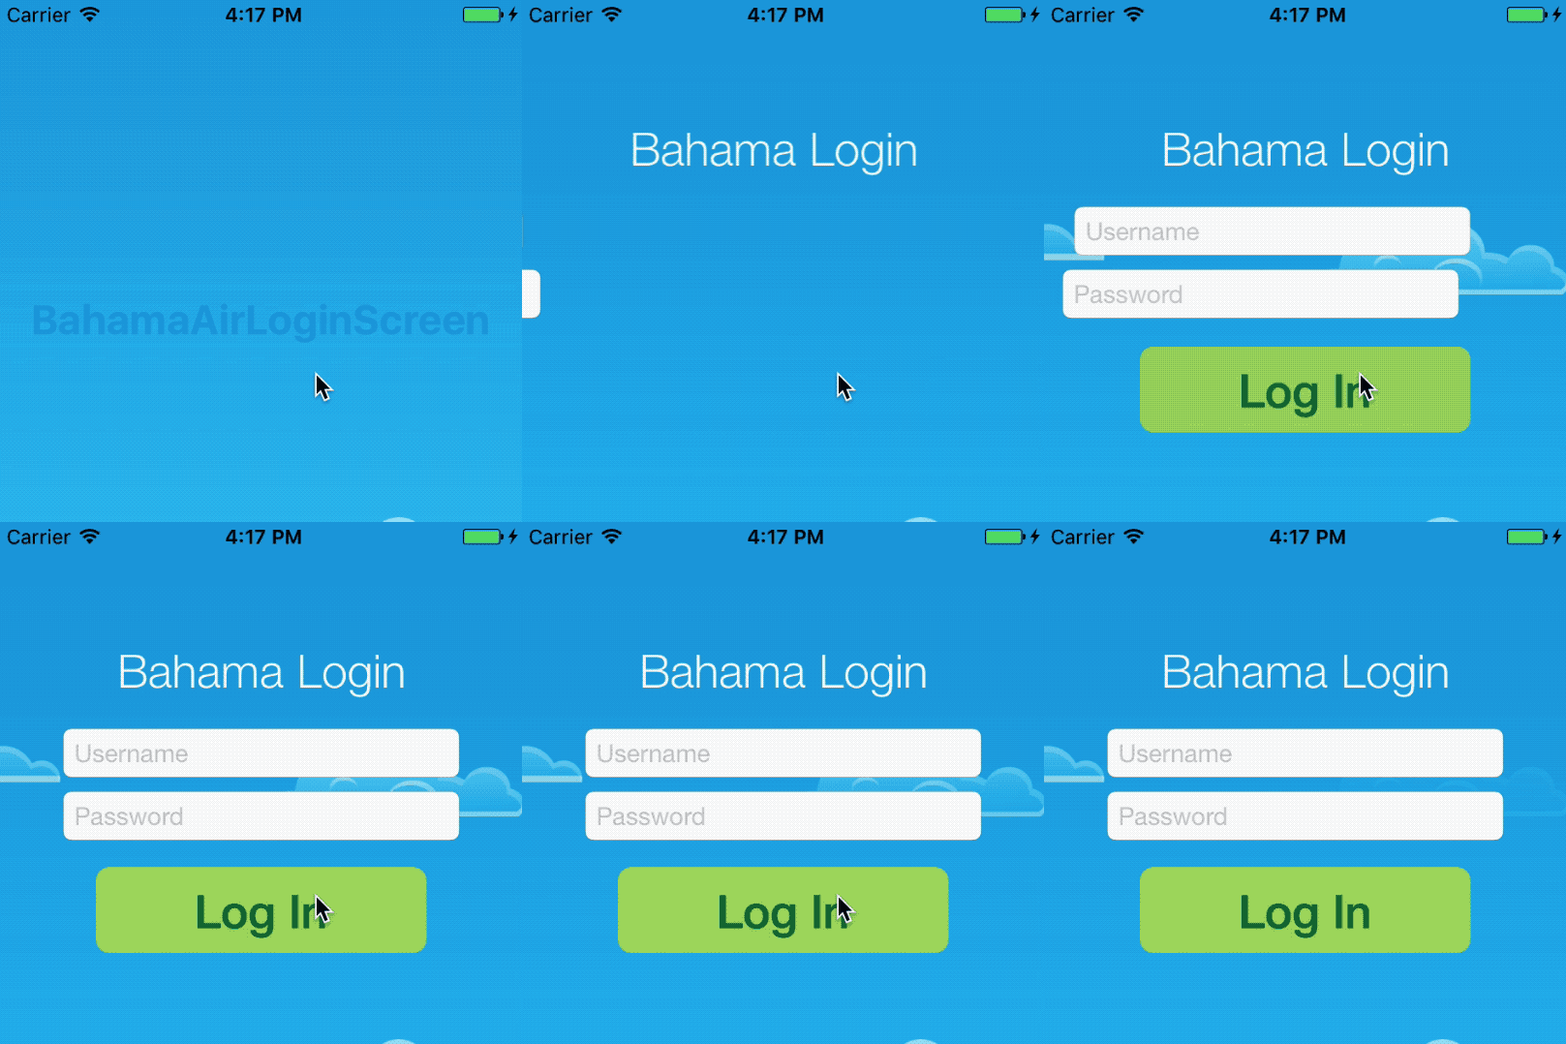
Now let's modify the code and see the effect:
override func viewDidAppear(_ animated: Bool) {
    super.viewDidAppear(animated)

    UIView.animate(withDuration: 0.5, animations: {
    self.heading.center.x += self.view.bounds.width
    })

    UIView.animate(withDuration: 0.5, delay: 0.3, options: [.curveEaseIn], animations: {
        self.username.center.x += self.view.bounds.width
    }, completion: nil)

    UIView.animate(withDuration: 0.5, delay: 0.4, options: [.curveEaseOut], animations: {
        self.password.center.x += self.view.bounds.width
    }, completion: nil)

    UIView.animate(withDuration: 0.2, delay: 0.5, options: [.curveEaseInOut], animations: {
        self.cloud1.alpha = 1
    }, completion: nil)

    UIView.animate(withDuration: 0.2, delay: 0.6, options: [.repeat,.autoreverse], animations: {
        self.cloud2.alpha = 1
    }, completion: nil)
}

Spring animation
Unlike the previous part of the basic animation in one direction, spring animation will appear in the animation process similar to the shock attenuation effect of the spring. This animation effect is widely used in iOS system because its effect is closer to the real world.
On the basis of the above, we realize spring animation for the login button. The steps are the same as above. First, set the state at the beginning of the animation, and add the following code:
override func viewWillAppear(_ animated: Bool) {
    ...

    loginButton.center.y += 30.0
    loginButton.alpha = 0.0
}
Then we call the animation interface to implement:
override func viewDidAppear(_ animated: Bool) {
    ...
    UIView.animate(withDuration: 0.5, delay: 0.5, usingSpringWithDamping: 0.5, initialSpringVelocity: 0.0, options: [], animations: {
        self.loginButton.center.y -= 30.0
        self.loginButton.alpha = 1.0
    }, completion: nil)

}
There are two main points in the above code:
Multiple attribute values can be modified during an animation
Spring animation is implemented through the function animate (with Duration: delay: using Spring WithDamping: initial Spring Velocity: opti ons: animations: completion:).
The functions used here are not much different from the previous basic animation functions, except for two more parameters:
Using Spring With Damping: The damping coefficient of animation ranges from 0.0 to 1.0. The smaller the value, the larger the vibration amplitude, you can also consider it as the spring stiffness.
Initial Spring Velocity: Initial speed of animation.
The results are as follows:

summary
Apart from the pitfalls in Xcode and the rush-taking Swift auto-completion, Apple has done a lot of work for developers. For example, the interface mentioned in the above animation content is enough for us to deal with simple animation interaction scenes. Of course, more complex animation content will be included in the next article.