In the last article, I introduced some basic animations in UIKit, which are enough to deal with ordinary animation interaction. But as developers, it is obviously not enough to grasp the basic usage. We need more powerful weapons to deal with complex scenarios in the future. Next, let's look at the advanced animations of UIView: Transitions, Keyframe Animations.
Transitions
In the previous article, we introduced the animation based on attribute modification, but what if you need to add and remove views? Of course you can use basic animation, but here's a new type of animation - Transitions. Unlike basic animation, which implements interpolation on the time line between the start and end states, Transitions presents the animation process in a more natural way.

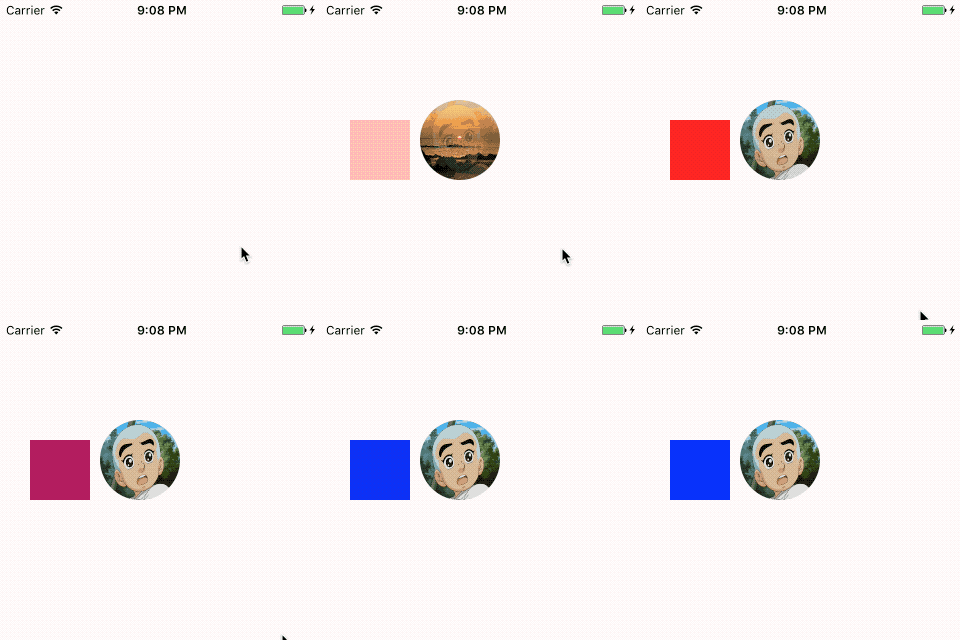
In the picture above, we flipped the head view, added the red view and replaced it with the blue view. The main code implementation is as follows:
// Head Reversal
UIView.transition(from: backView!, to: avatorView, duration: 1, options: [.transitionCrossDissolve], completion: nil)

// Add Red View
UIView.transition(with: animationContainserView!, duration: 1, options: [.transitionCrossDissolve], animations: {
    self.animationContainserView!.addSubview(redView)
}, completion: { finished in
    let blueView = UIView.init(frame: CGRect.init(x: 0, y: 0, width: 60, height: 60))
    blueView.backgroundColor = UIColor.blue

    // Replace Red View
    UIView.transition(from: redView, to: blueView, duration: 1, options: [.transitionCrossDissolve], completion: nil)

})
In the first function, we remove the backView from its parent view and add the avatorview. In the second function, we add the red view newView to the view represented by the parameter animation ContainserView. Among them, the transitional effect of animation is controlled by
The parameters in options can be combined with the options in previous basic animations.
Transition FlipFromLeft flips left to right on a vertical axis
Transition FlipFromRight flips right to left on a vertical axis
Transition FlipFromTop flips from top to bottom on a horizontal axis
Transition FlipFromBottom flips from bottom to top on a horizontal axis
Transition CurlUp right lower corner back flip effect
Transition CurlDown right lower corner forward turning effect
Transition CrossDissolve Cross-over Disappears
Keyframe
Most of the animations described above can be regarded as a single linear animation, but they are far from enough for complex animations such as taking off and landing of type aircraft. Actually, animation is the key frame combination of many pictures on time line. If some key frames can be extracted and combined, the flexibility will be greatly improved. Fortunately, Apple has already done everything for us. Let's look at the results first.

Here we mainly focus on the animation realization of the take-off and landing process of the aircraft, and other animations will be discussed later. The actual takeoff and landing process is much more complicated than the rendering, but here we simplify it. The take-off process is roughly as shown in the following figure: first fly flat, then adjust the angle, and then pull up quickly.

Knowing the key frames of the whole animation, we can implement the following code:
UIView.animateKeyframes(withDuration: 1.5, delay: 0.0, options: [], animations: {
    //add keyframes

    UIView.addKeyframe(withRelativeStartTime: 0.0, relativeDuration: 0.25, animations: {
        self.planeImage.center.x += 80.0
        self.planeImage.center.y -= 10.0
    })

    UIView.addKeyframe(withRelativeStartTime: 0.1, relativeDuration: 0.4) {
        self.planeImage.transform = CGAffineTransform(rotationAngle: CGFloat(-M_PI_4/2))
    }

    UIView.addKeyframe(withRelativeStartTime: 0.25, relativeDuration: 0.25) {
        self.planeImage.center.x += 100.0
        self.planeImage.center.y -= 50.0
        self.planeImage.alpha = 0.0
    }

    UIView.addKeyframe(withRelativeStartTime: 0.51, relativeDuration: 0.3) {
        self.planeImage.center = CGPoint(x: 0.0, y: originalCenter.y - 40)
        self.planeImage.transform = CGAffineTransform(rotationAngle: CGFloat(M_PI_4/2))

    }

    UIView.addKeyframe(withRelativeStartTime: 0.75, relativeDuration: 0.45) {
        self.planeImage.transform = CGAffineTransform.identity
        self.planeImage.alpha = 1.0
        self.planeImage.center = originalCenter
    }

}, completion: nil)
In the function animateKey frames, we add five key frames in turn: skiing, adjusting angle, fast pulling up, adjusting landing position and angle, landing. The animation design in each key frame is almost as simple as the basic animation. So as long as we can extract and combine the key frames of complex animation such as take-off and landing well, then everything is all right.
summary
Most of the animations in the UIKit framework are introduced in this article, and some new animation features will be added later. Next, the article will focus on Core Animations, which will explore more animation-related features on the basis of previous ones. Let's Go!