The purpose of this paper is to compile and install the famous C/C + + image processing open source software library OpenCV3.4.12 on Ubuntu 18.04 system, and practice using OpenCV to process pictures and videos.
1, Compile and install OpenCV
1. Compile and install source code
Now there are some posts about installing OpenCV on the Internet, most of which have some small errors. In the subsequent programming, there will be a variety of problems. The author here recommends an installation tutorial. At present, I have seen the most detailed one, and there are no errors in the follow-up.
2. Verify that the installation is successful
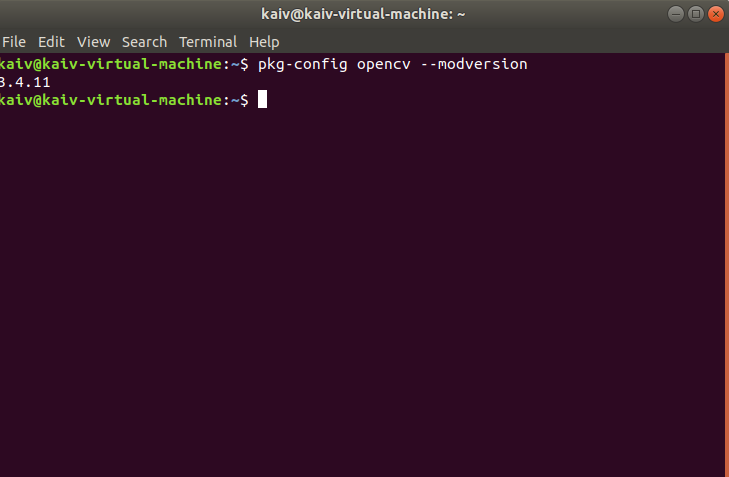
Use command
pkg-config opencv --modversion
Verify whether the installation is successful. If the installation is successful, the version number of OpenCV will be displayed.
2, Use OpenCV to process pictures
1. Preparation of procedures
- test1.cpp
#include<opencv2/highgui.hpp>
#include<opencv2/opencv.hpp>
using namespace cv;
using namespace std;

//Function: special effect processing and display of pictures
int main(int argc,char **argv)
{
        CvPoint center;
        double scale=-3;

        IplImage *image=cvLoadImage("dsm.jpg");//Note that this is the same as the picture name
        argc==2?cvLoadImage(argv[1]):0;

        cvShowImage("image",image);

        if(!image) return -1;
        center=cvPoint(image->width/2,image->height/2);
        for (int i = 0;i<image->height;i++)
                for (int j = 0;j<image->width;j++) {
                        double dx = (double)(j - center.x) / center.x;
                        double dy = (double)(i - center.y) / center.y;
                        double weight = exp((dx*dx + dy*dy)*scale);
                        uchar* ptr = &CV_IMAGE_ELEM(image, uchar, i, j * 3);
                        ptr[0] = cvRound(ptr[0] * weight);
                        ptr[1] = cvRound(ptr[1] * weight);
                        ptr[2] = cvRound(ptr[2] * weight);
                }
        Mat src;
        src=cvarrToMat(image);
        imwrite("test.png",src);
        imshow("test",src);

        cvWaitKey();
        return 0;
}
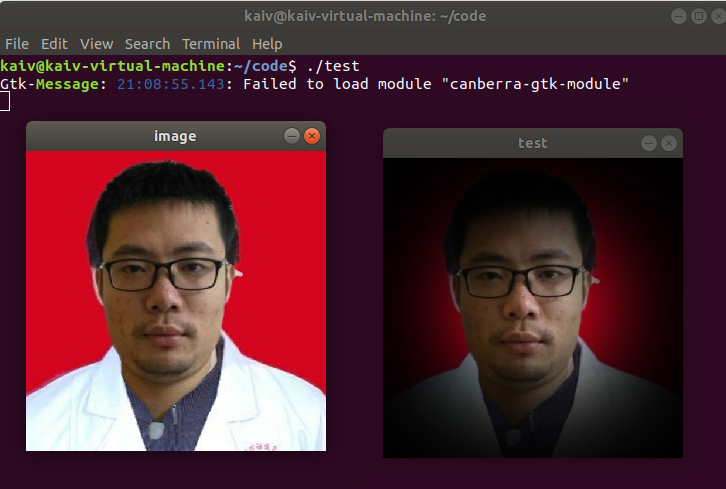
2. Compile and run the program
1. Compiler
By command
gcc test1.cpp -o test1 `pkg-config --cflags --libs opencv`
Will report an error!!
g++ test1.cpp -o test1 `pkg-config --cflags --libs opencv`
Reason: when compiling the program, first replace PKG config -- cflags -- LIBS opencv with the following path of OpenCV header file and library file, so as to obtain the path of OpenCV header file and linked lib library file. Then, the g + + compiler finds the required dependencies in the path of the opencv header file and library file, and compiles the program successfully.
2. Operation procedure
adopt
./test1
Run the program.
The operation results are as follows
3, Use OpenCV to process video
1. Code
video.cpp (use the computer camera to read and display video)
#include<opencv2/opencv.hpp>
using namespace cv;

int main()
{
        char key;
        VideoCapture capture(0);                //Read video from camera (camera)
//      Videocapture ("your name. mp4"); 	// Read the video from the local disk (to play the local video, you need to remove the comments and delete the previous statement)
        while(1)                                //Cycle through each frame to form a video
        {
                Mat frame;                      //Define the Mat variable to store each frame of image
                capture>>frame;                 //Read current frame
                imshow("Read video",frame);       //Displays the current frame
                waitKey(30);                  //delayed
        }
        return 0;
}
video_record.cpp (record video with computer camera)
#include<iostream>
#include<opencv2/opencv.hpp>
#include<opencv2/core/core.hpp>
#include<opencv2/highgui/highgui.hpp>
using namespace cv;
using namespace std;

int main()
{
        VideoCapture capture(0);        //Turn on the computer camera
        if (!capture.isOpened())
        {
                cout << "error" << endl;
                waitKey(0);
                return -1;
        }

        int w = static_cast<int>(capture.get(CV_CAP_PROP_FRAME_WIDTH)); //Obtain the resolution of capture
        int h = static_cast<int>(capture.get(CV_CAP_PROP_FRAME_HEIGHT));

        Size videoSize(w, h);
        VideoWriter writer("RecordVideo.avi", CV_FOURCC('M', 'J', 'P', 'G'), 25,videoSize);

        Mat frame;
        int key;                //Record keyboard keys
        char startOrStop = 1;   //0 starts recording video; 1 end recording video
        char flag = 0;          //Recording flag 0 - not recording; 1 - recording
        while (1)
        {
                capture >> frame;
                key = waitKey(100);
                if (key == 32)                  //Press space to start recording and pause recording
                {
                        startOrStop =1-startOrStop;
                        if (startOrStop == 0)   flag = 1;       //You can switch back and forth
                }
                if (key == 27)  break;                  //Press ESC to exit the whole program and save the video file to disk
                if (startOrStop == 0 && flag==1)
                {
                        writer << frame;
                        cout << "recording" << endl;
                }
                else if (startOrStop == 1 && flag==1)
                {
                        flag = 0;
                        cout << "pause recording" << endl;
                }
                imshow("picture", frame);
        }
        capture.release();
        writer.release();
        destroyAllWindows();
}
2. Operation procedure
1. Open local video with OpenCV
The author is shy, so I choose to play local videos. If you need to turn on the camera, you need to set it
The settings are as follows:
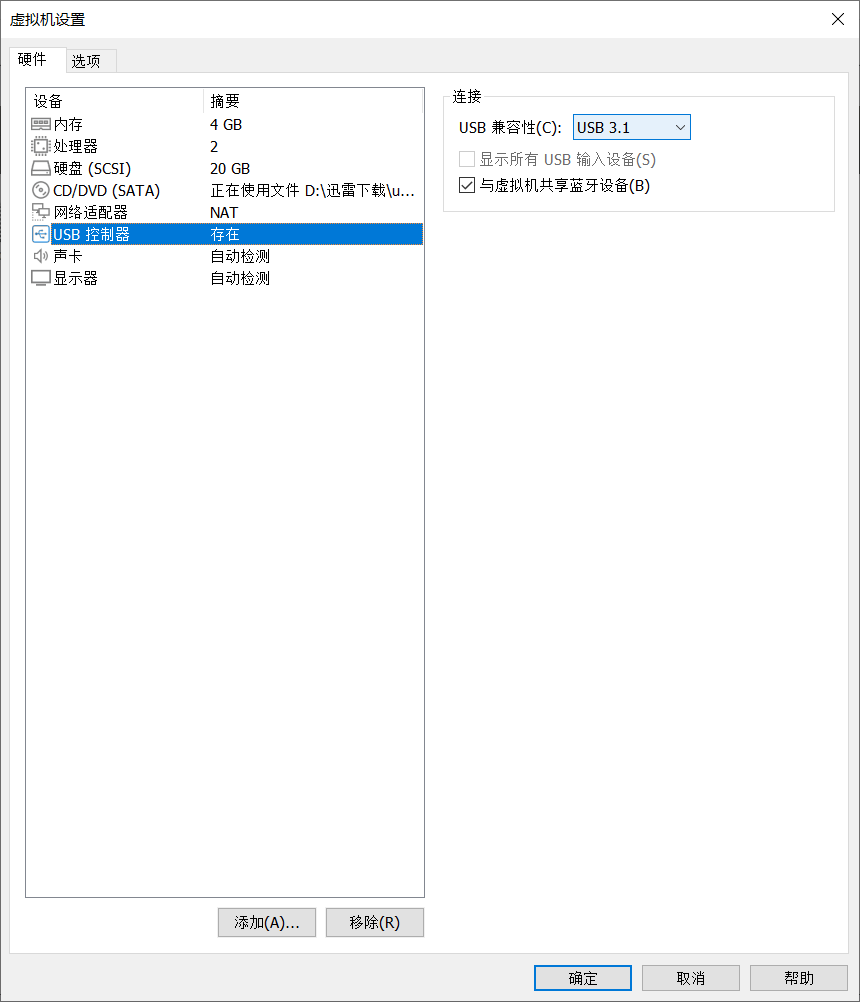
First, change the usb compatibility to 3.1 in the virtual machine settings
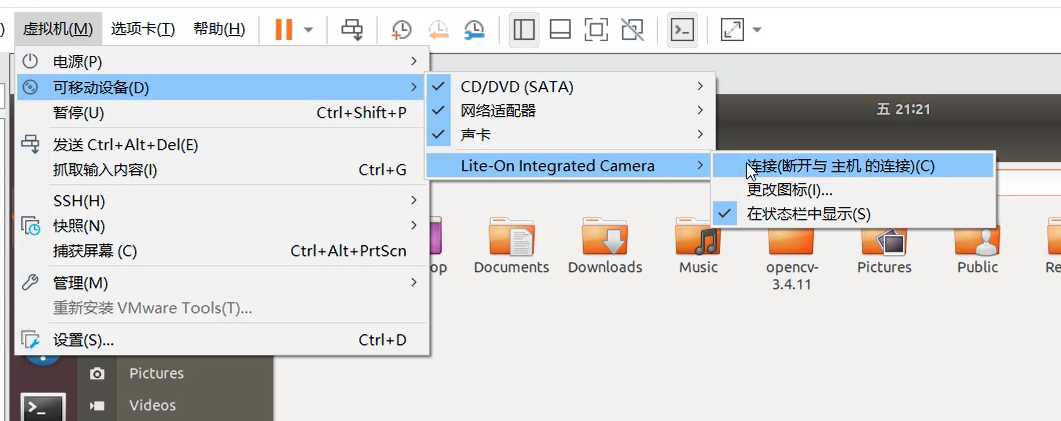
Then select removable device - xcamera - connection
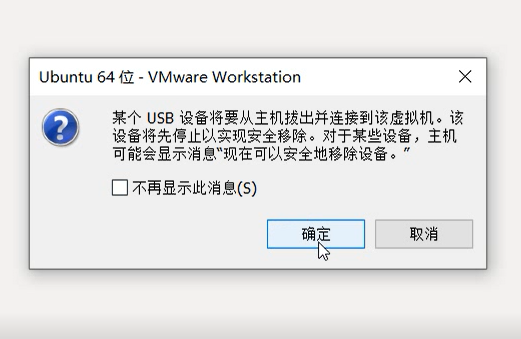
determine
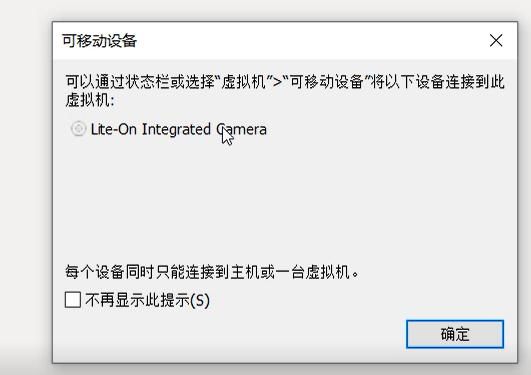
Each computer camera may have a different name

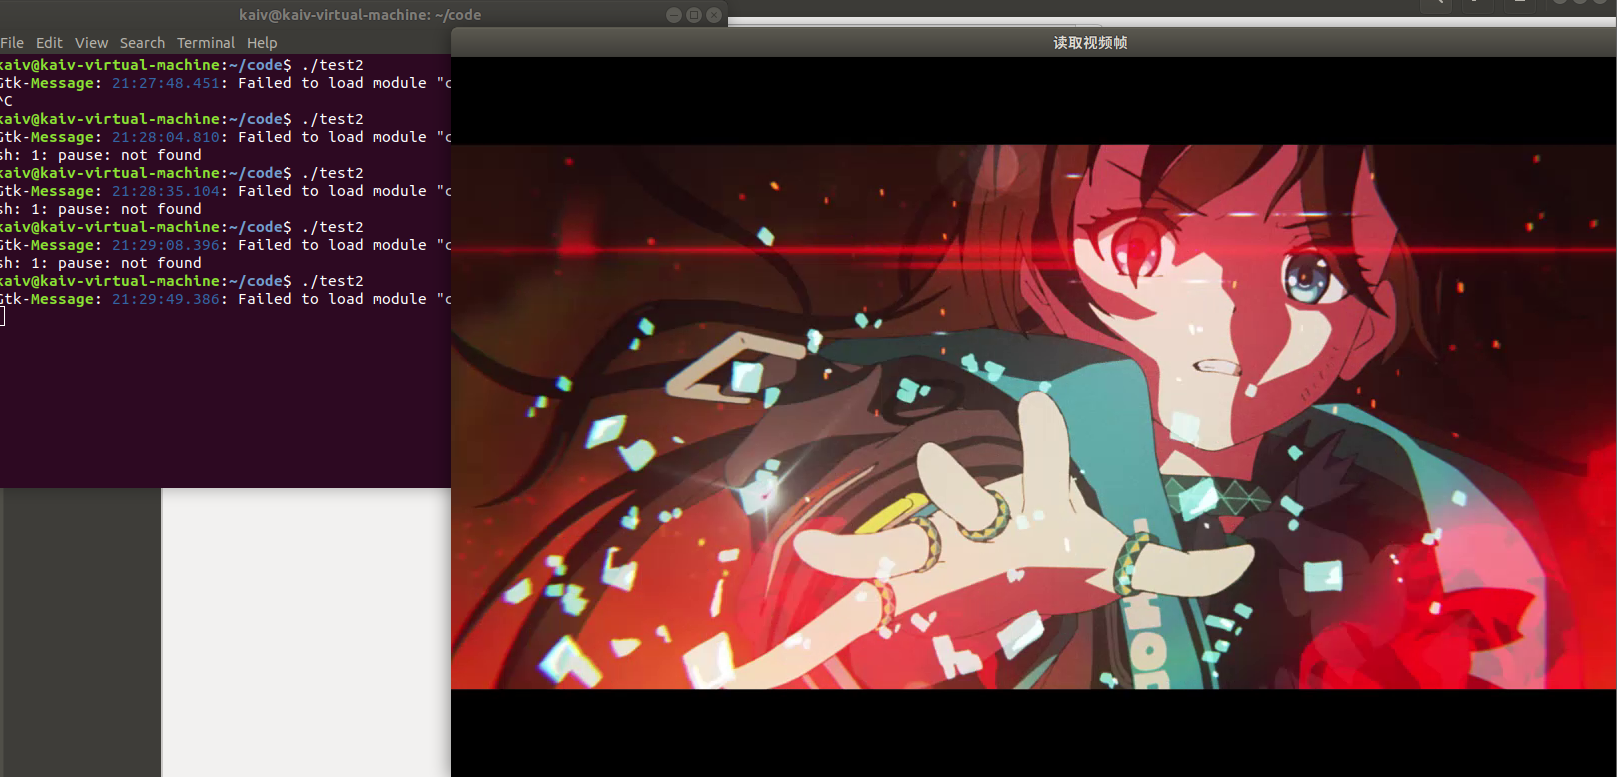
When the rightmost camera appears in the lower right corner, it succeeds
Next, play the video
code:
#include <opencv2/opencv.hpp>
using namespace cv;
int main()
{
        VideoCapture capture("01.mp4");
        while(1){
                Mat frame;//Define a Mat variable to store the image of each frame
                capture >> frame;//Read current frame
                if(frame.empty())//Play finished, exit
                        break;
                imshow("Read video frame",frame);//Displays the current frame
                waitKey(30);//Cover up 30ms
        }
        system("pause");
        return 0;
}
Compile the same as the picture opened above
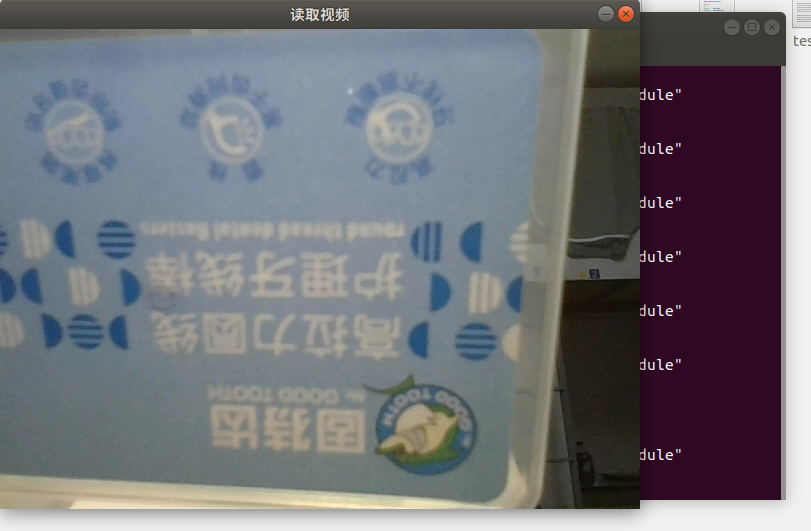
result:
2. Use OpenCV to open the camera for video recording
code:
#include<iostream>
#include<opencv2/opencv.hpp>
#include<opencv2/core/core.hpp>
#include<opencv2/highgui/highgui.hpp>
using namespace cv;
using namespace std;

int main()
{
        VideoCapture capture(0);        //Turn on the computer camera
        if (!capture.isOpened())
        {
                cout << "error" << endl;
                waitKey(0);
                return -1;
        }

        int w = static_cast<int>(capture.get(CV_CAP_PROP_FRAME_WIDTH)); //Obtain the resolution of capture
        int h = static_cast<int>(capture.get(CV_CAP_PROP_FRAME_HEIGHT));

        Size videoSize(w, h);
        VideoWriter writer("RecordVideo.avi", CV_FOURCC('M', 'J', 'P', 'G'), 25,videoSize);

        Mat frame;
        int key;                //Record keyboard keys
        char startOrStop = 1;   //0 starts recording video; 1 end recording video
        char flag = 0;          //Recording flag 0 - not recording; 1 - recording
        while (1)
        {
                capture >> frame;
                key = waitKey(100);
                if (key == 32)                  //Press space to start recording and pause recording
                {
                        startOrStop =1-startOrStop;
                        if (startOrStop == 0)   flag = 1;       //You can switch back and forth
                }
                if (key == 27)  break;                  //Press ESC to exit the whole program and save the video file to disk
                if (startOrStop == 0 && flag==1)
                {
                        writer << frame;
                        cout << "recording" << endl;
                }
                else if (startOrStop == 1 && flag==1)
                {
                        flag = 0;
                        cout << "pause recording" << endl;
                }
                imshow("picture", frame);
        }
        capture.release();
        writer.release();
        destroyAllWindows();
}
The compilation is the same as above
Finally, an avi file is generated
4, Experimental summary
By installing and compiling OpenCV3.4.12 on Ubuntu system and calling opencv interface functions for image and video processing, I have a deeper understanding of image programming using OpenCV. At the same time, I also experience the advantages of OpenCV open source library in image programming. In the process of compiling, installing and running the program, I also encountered many problems, but I finally solved the problems in my continuous access to materials and attempts in various ways. While solving these problems, I was also constantly improving my ability to solve problems.
 https://blog.csdn.net/qq_45237293/article/details/109391445?spm=1001.2014.3001.5501