Overview of this article
- The desktop computer is the HP dark spirit 3rd generation graphics card GTX1060 purchased in 2018. This paper records the process of installing Ubuntu 16.04.7 LTS and Nvidia driver on this machine;
- In addition, there are some summaries of pit avoidance. If you encounter similar problems, you can refer to them;
Pure Ubuntu system
- Install Ubuntu 16 lts desktop version first
- Installation of USB flash disk. This is an HP desktop computer. When the HP LOGO appears during startup, click F10 many times to enter bios, select USB flash disk startup in startup order, and then install Ubuntu system smoothly under the guidance of the page
Points needing attention
- Many installation documents on the Internet mention the need to turn off secure boot in BIOS settings. I didn't find this option here, so I skipped it and didn't do it. The installation can still succeed. Only the steps after installing the driver are essential and need to be performed according to the operations in this article;
Enable remote ssh
- Log in to the Ubuntu desktop, open the console, execute the following commands, and install the ssh service:
sudo apt-get install openssh-server
- Start ssh service
sudo service ssh start
- For the following operations, I connect to this Ubuntu 16 computer from another computer ssh remotely
Source change
- Backup:
sudo cp /etc/apt/sources.list /etc/apt/sources.list.bk
-Modify / etc/apt/sources.list to the following:
deb http://mirrors.aliyun.com/ubuntu/ xenial main restricted universe multiverse

deb http://mirrors.aliyun.com/ubuntu/ xenial-security main restricted universe multiverse

deb http://mirrors.aliyun.com/ubuntu/ xenial-updates main restricted universe multiverse

deb http://mirrors.aliyun.com/ubuntu/ xenial-proposed main restricted universe multiverse

deb http://mirrors.aliyun.com/ubuntu/ xenial-backports main restricted universe multiverse

deb-src http://mirrors.aliyun.com/ubuntu/ xenial main restricted universe multiverse

deb-src http://mirrors.aliyun.com/ubuntu/ xenial-security main restricted universe multiverse

deb-src http://mirrors.aliyun.com/ubuntu/ xenial-updates main restricted universe multiverse

deb-src http://mirrors.aliyun.com/ubuntu/ xenial-proposed main restricted universe multiverse

deb-src http://mirrors.aliyun.com/ubuntu/ xenial-backports main restricted universe multiverse
preparation
- Delete old drivers
sudo apt-get remove --purge nvidia*
- Mask the open source driver nouveau, and first create a new file:
sudo vi /etc/modprobe.d/blacklist-nouveau.conf
- Add the following:
blacklist nouveau
options nouveau modeset=0
- Update the above configuration:
sudo update-initramfs -u
- At this time, execute the command lsmod | grep nouveau. You can also see the following contents, which proves that the configuration just now has not taken effect:
will@ubuntu-hp:~$ lsmod | grep nouveau
nouveau              1712128  4
mxm_wmi                16384  1 nouveau
i2c_algo_bit           16384  1 nouveau
ttm                   106496  1 nouveau
drm_kms_helper        172032  1 nouveau
drm                   401408  7 drm_kms_helper,ttm,nouveau
wmi                    24576  4 hp_wmi,wmi_bmof,mxm_wmi,nouveau
video                  45056  1 nouveau
- In order to make the configuration take effect, please restart the computer sudo reboot immediately
- After restarting, log in again via ssh, and then execute the command lsmod | grep nouveau, which proves that the configuration has taken effect;
Install the drive
- Add official ppa source
sudo add-apt-repository ppa:graphics-drivers/ppa
- to update
sudo apt-get update
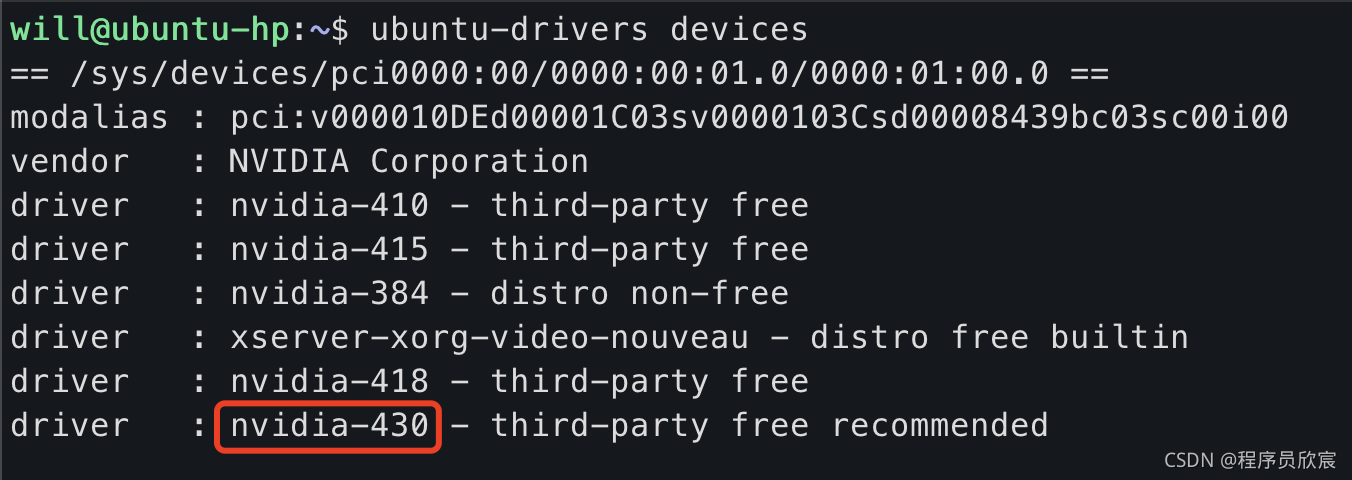
- View recommended drivers:
ubuntu-drivers devices
- Select the one with the word recommended behind the driver, as shown in the red box below. My side is nvidia-430:
- Start installing the driver, and pay attention to using the recommended driver you see:
sudo apt-get install nvidia-430 nvidia-settings nvidia-prime
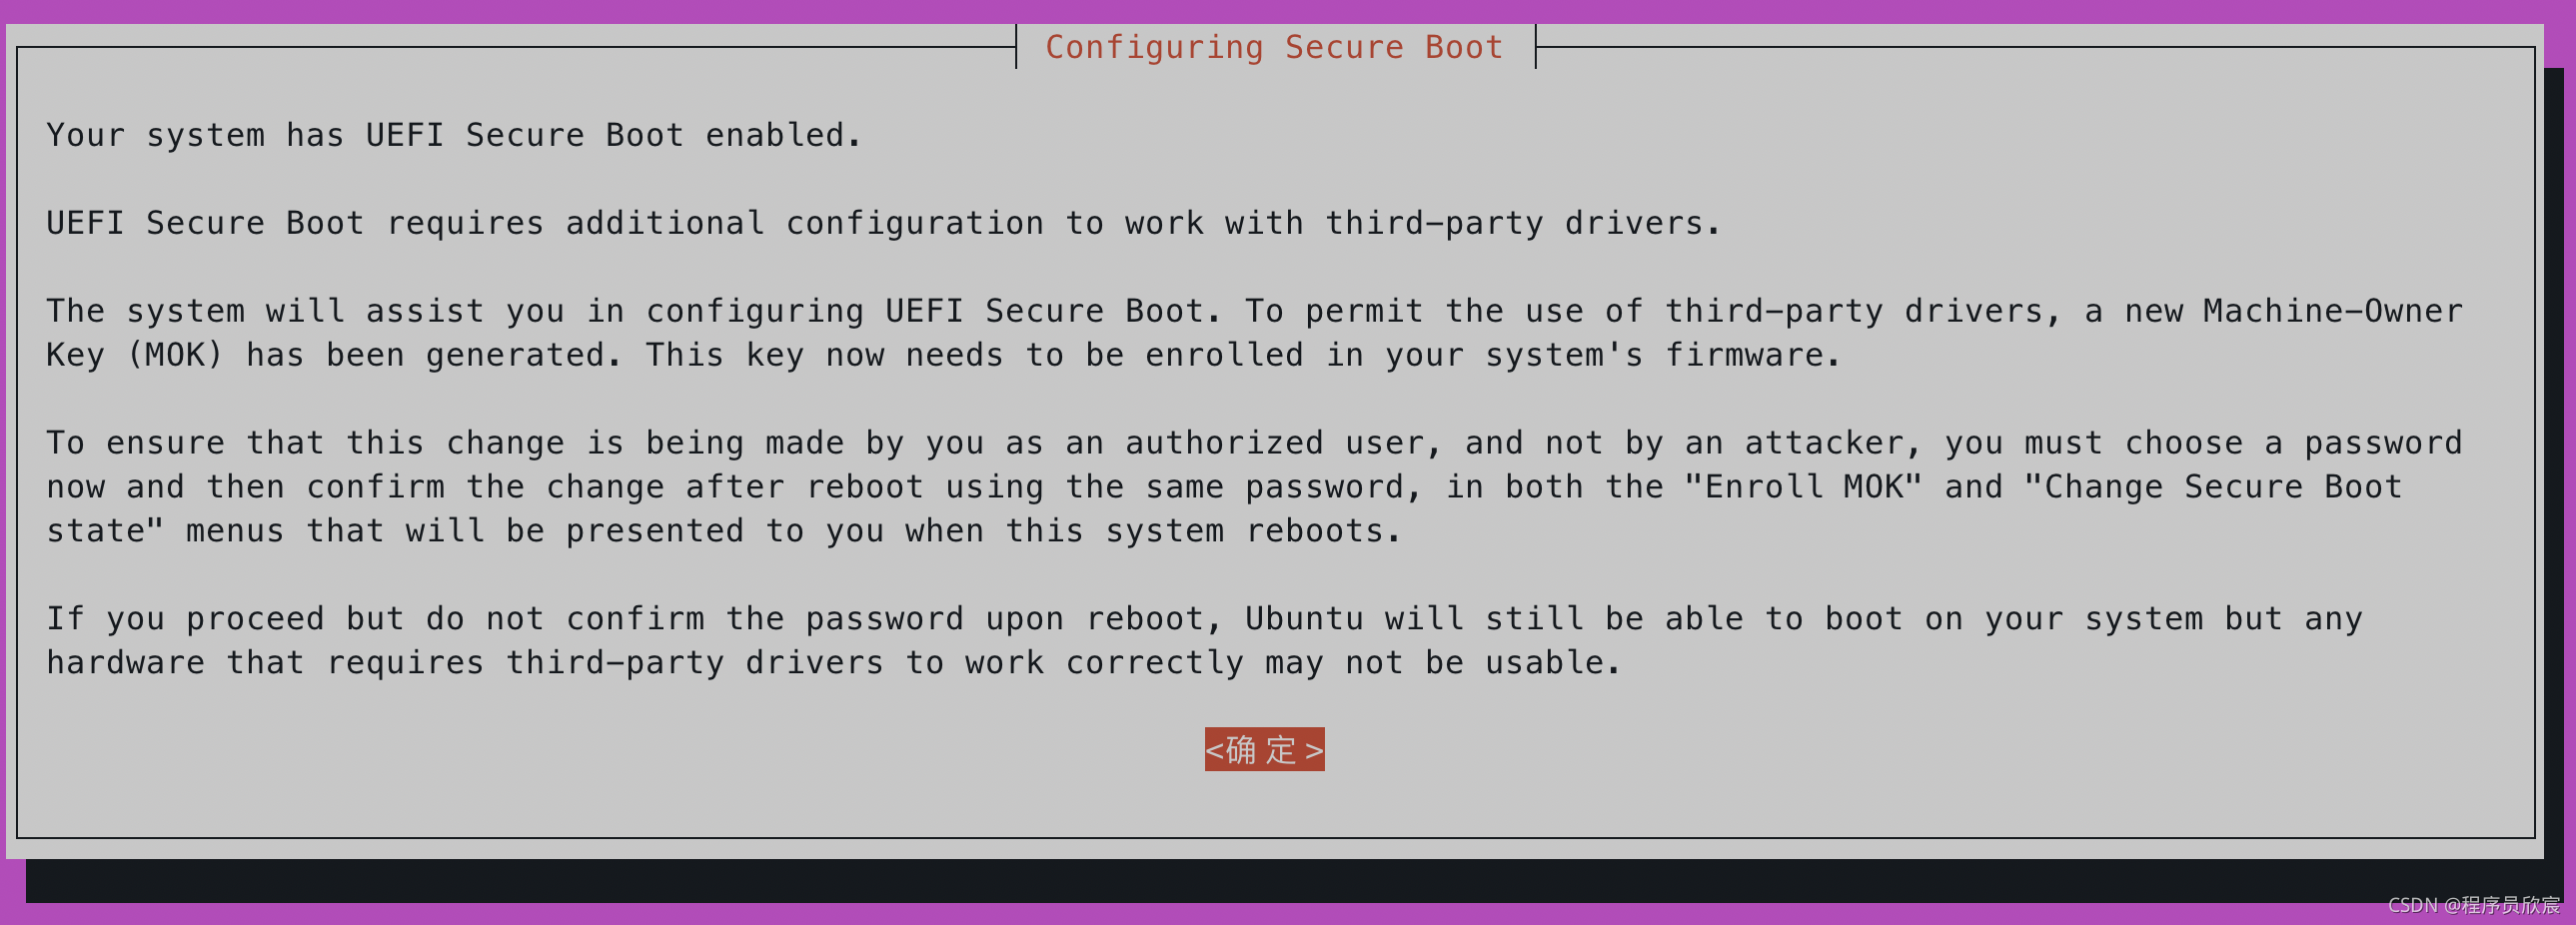
- If you encounter the following figure, enter enter:
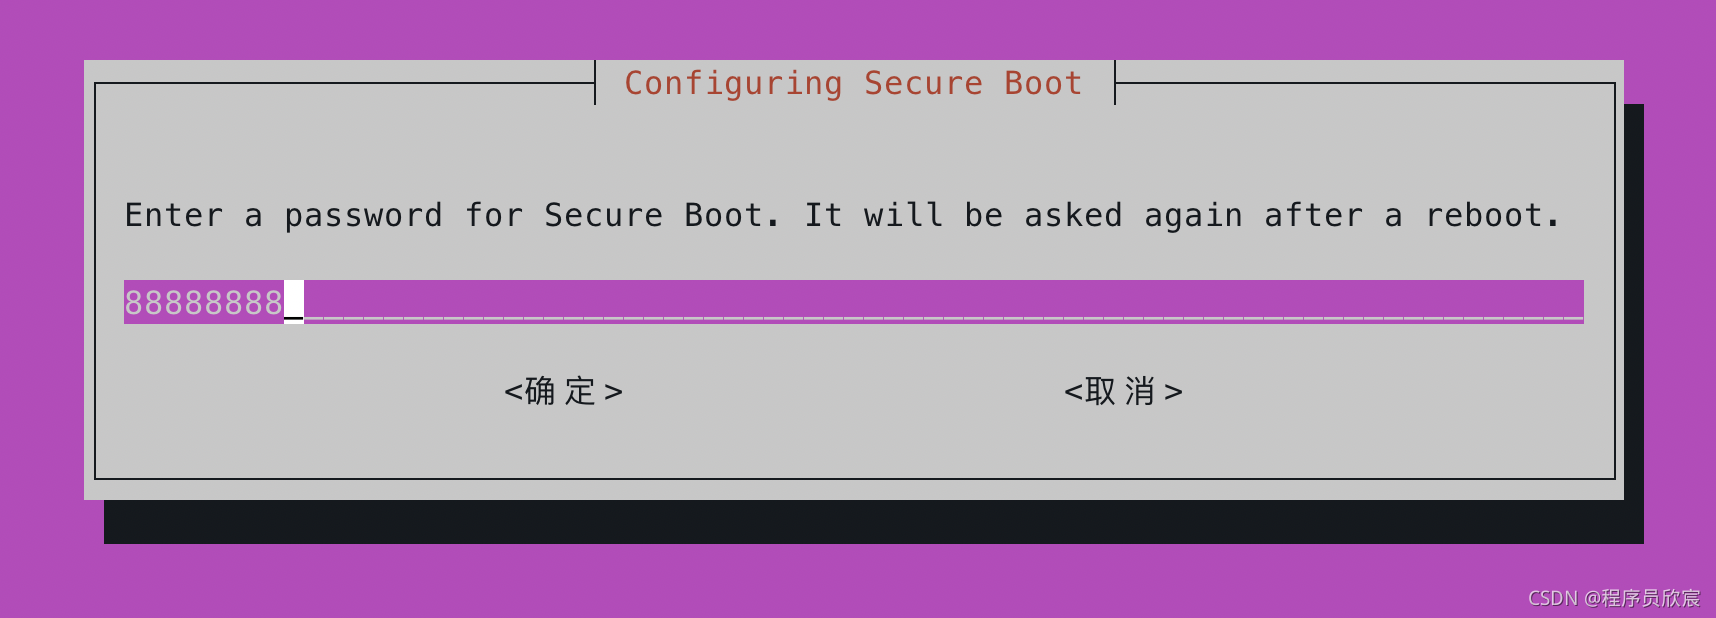
- In the following figure, enter the eight digit password, and then the confirmation page will pop up. Continue to enter the same password:
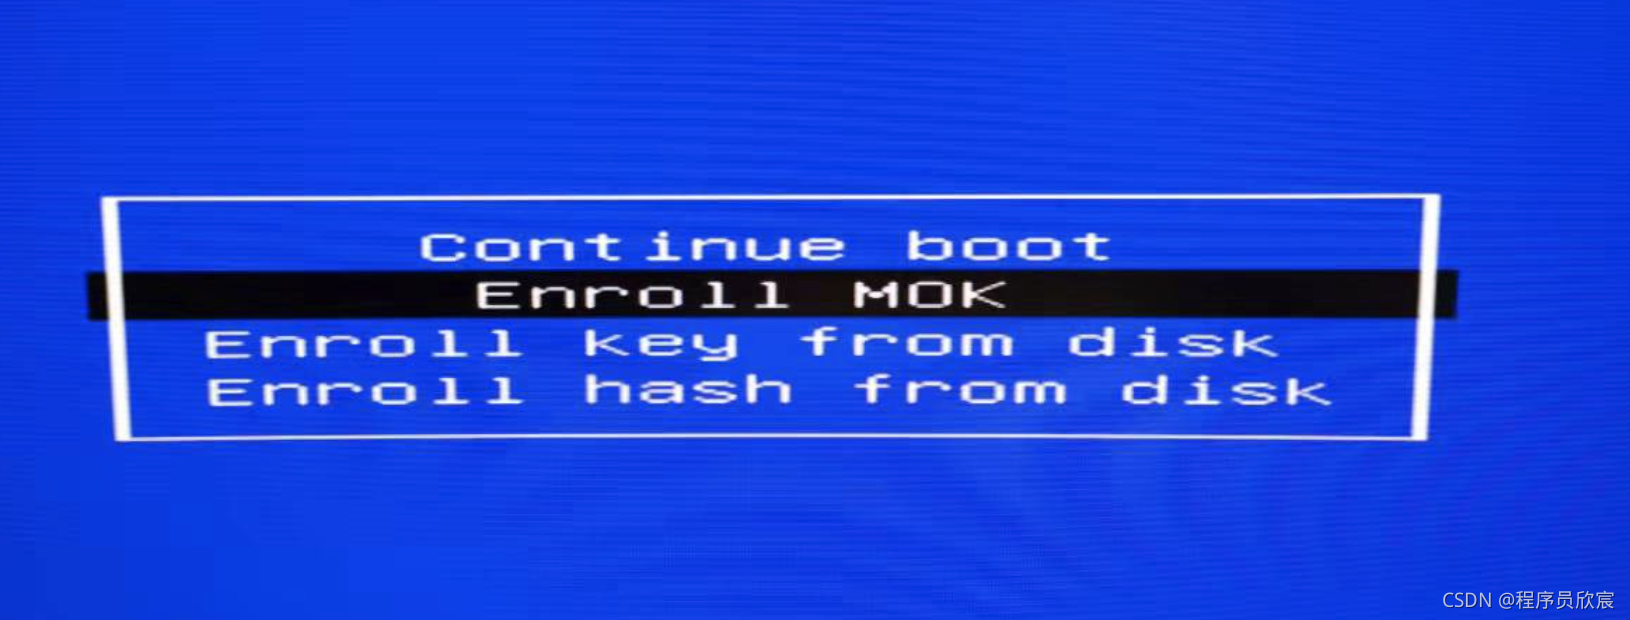
- After the installation is completed, restart the computer, and then there will be a crucial step. Please be sure to do it well
Settings at restart
- When prompted, select Enroll MOK:
- Select Continue:
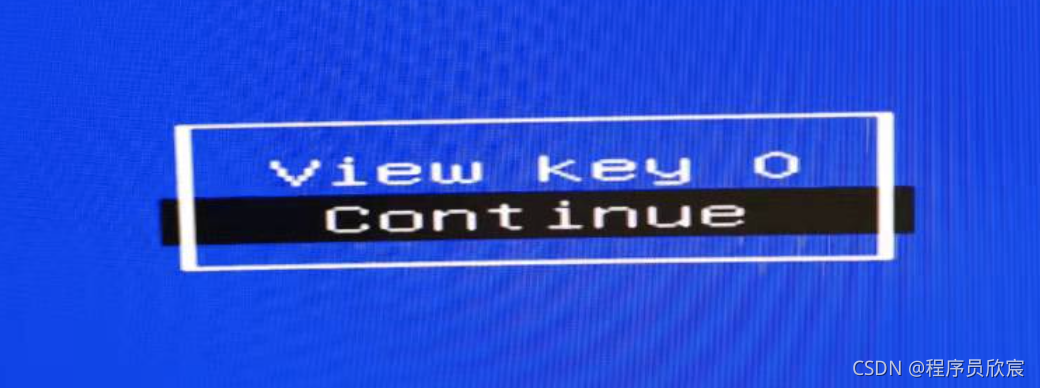
- Select Yes from the pop-up menu:
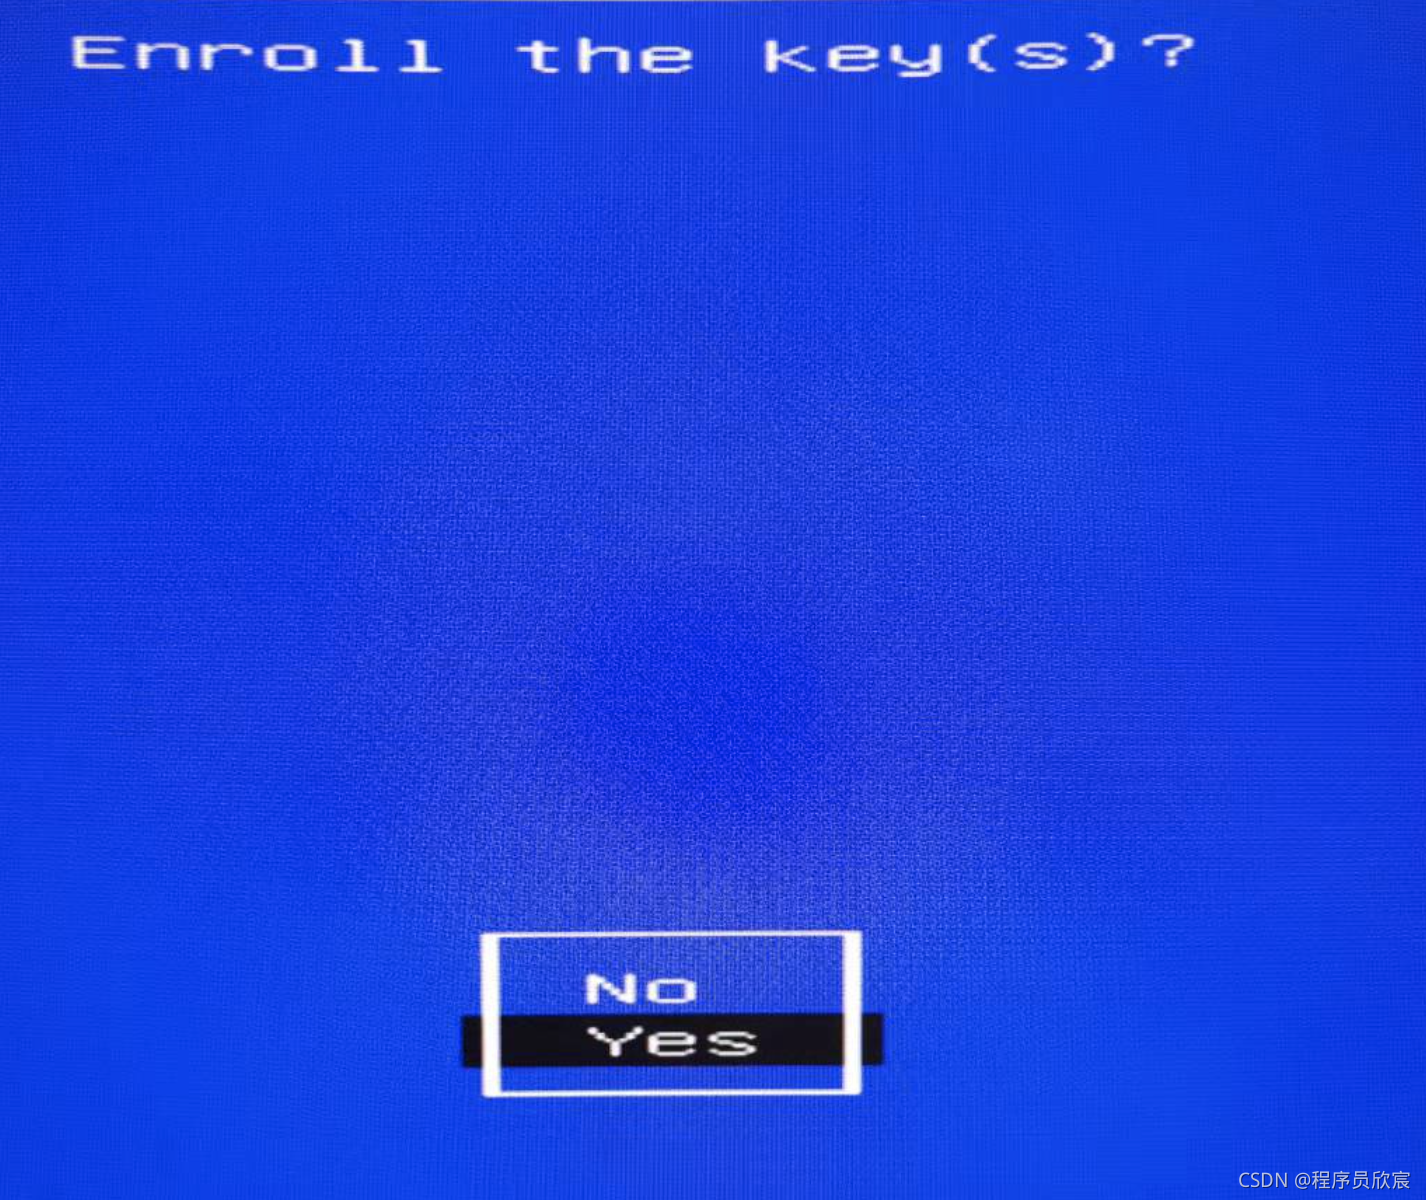
- Enter the password you just set:
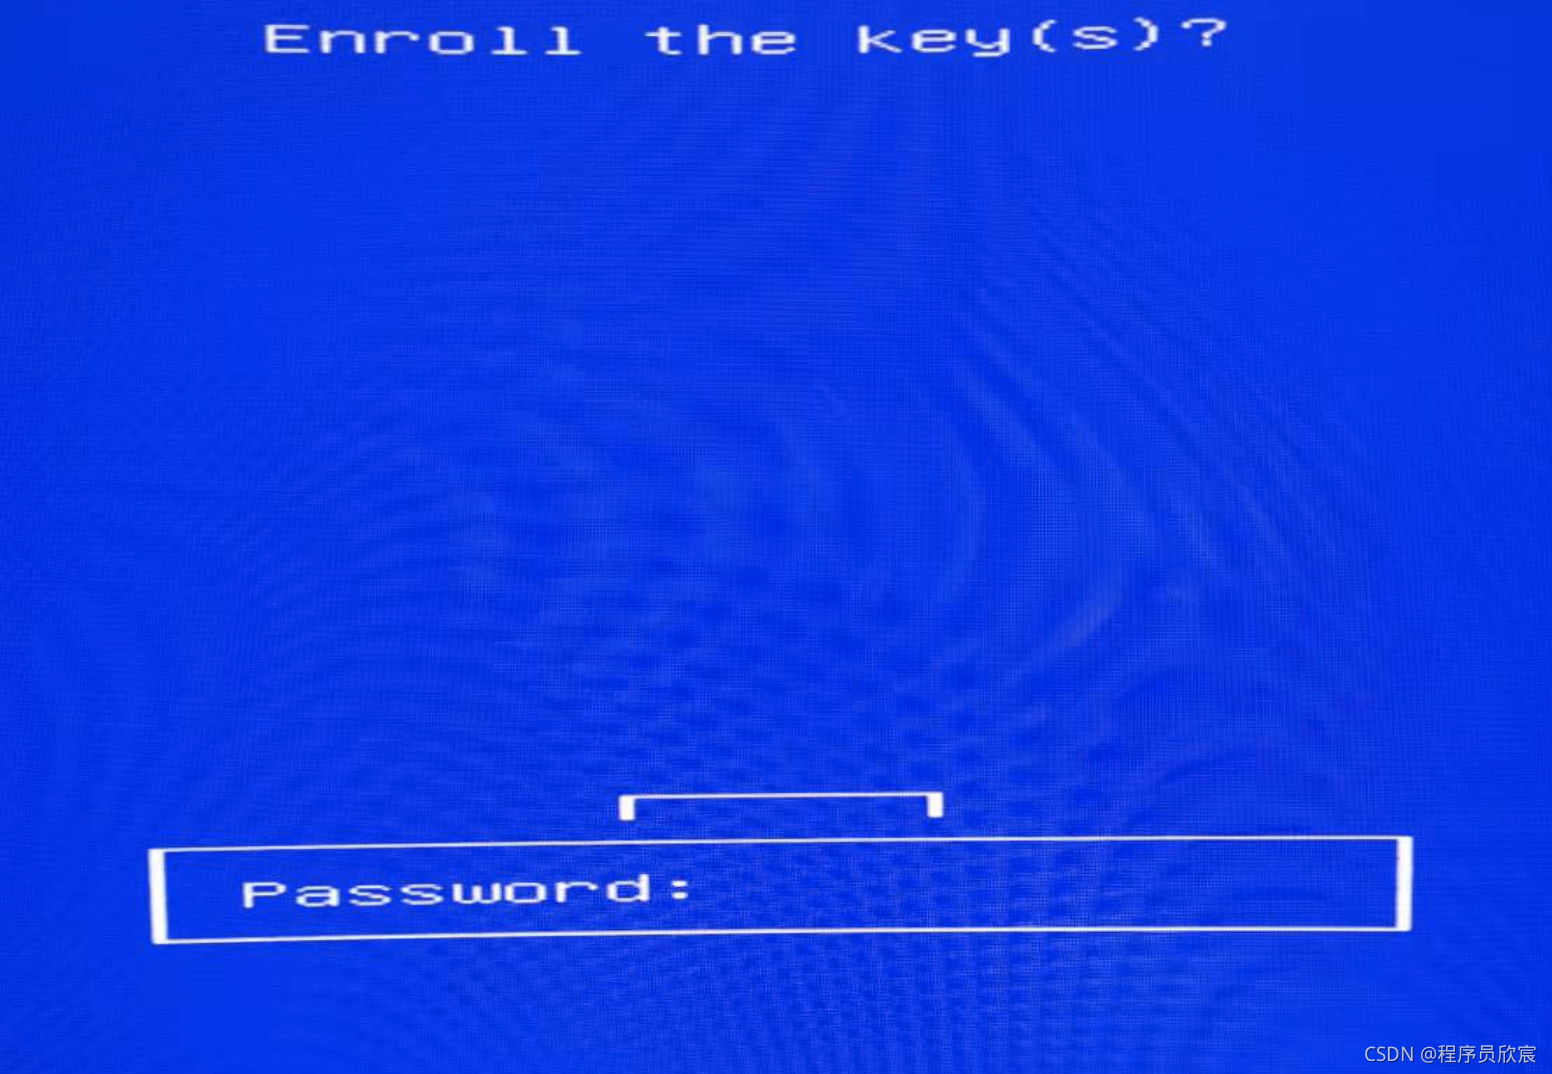
- Select reboot:

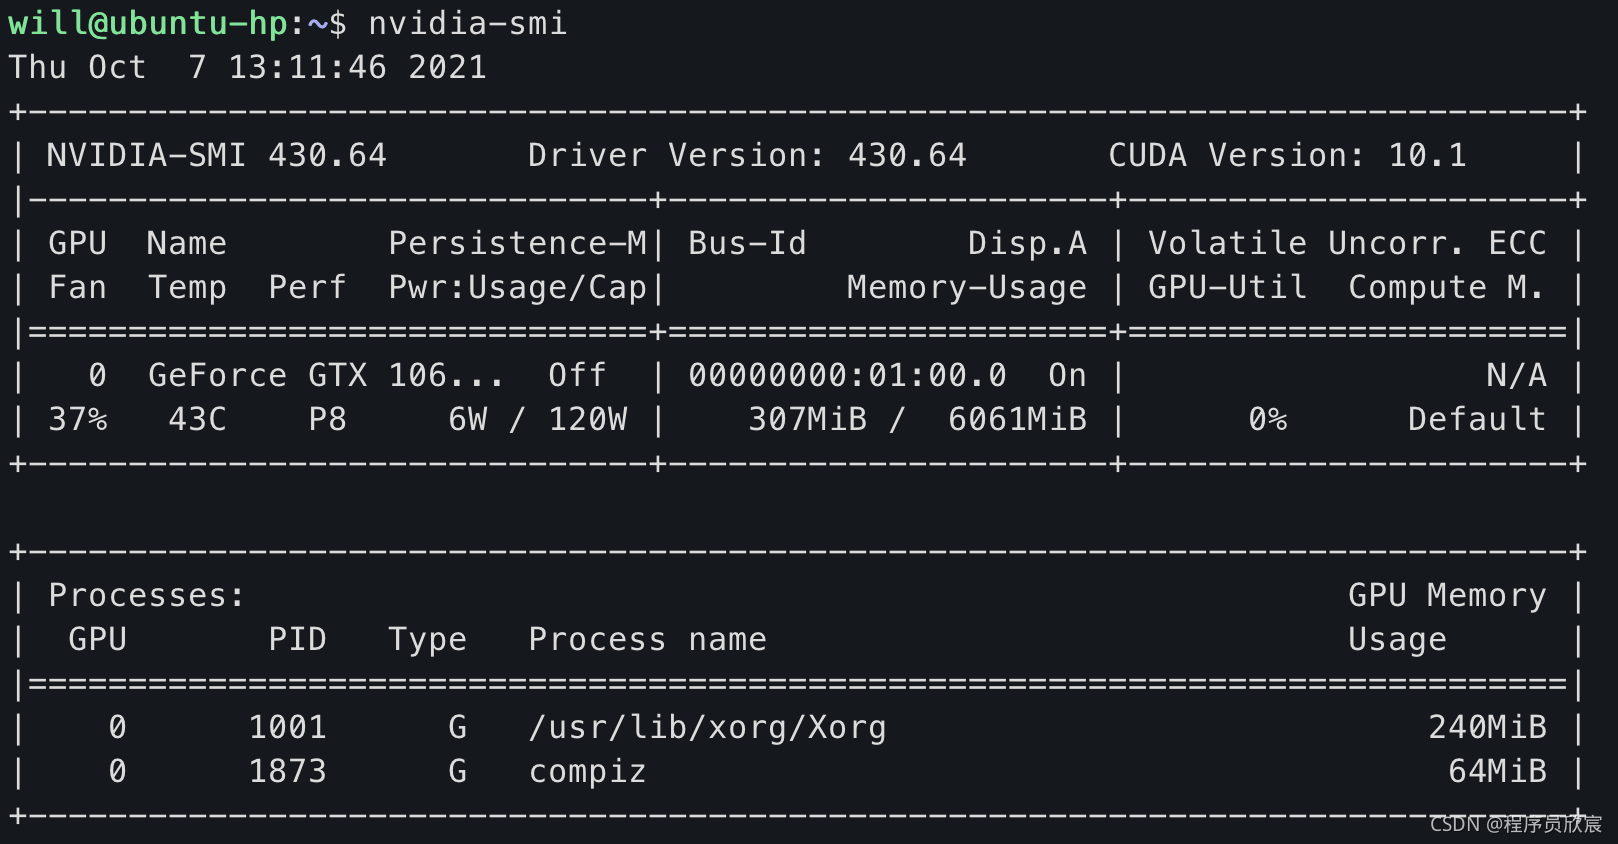
- After the restart, ssh logs in and executes the command NVIDIA SMI, as shown below. Finally, it is installed:
Install NCVV
- nvcc is the compiler of CUDA. The installation commands are as follows:
sudo apt install nvidia-cuda-toolkit
- verification:
will@ubuntu-hp:~$ nvcc -V
nvcc: NVIDIA (R) Cuda compiler driver
Copyright (c) 2005-2015 NVIDIA Corporation
Built on Tue_Aug_11_14:27:32_CDT_2015
Cuda compilation tools, release 7.5, V7.5.17
Appendix I: repeated restart
- At first, I used the double head hdmi cable to connect the graphics card and the display respectively. As a result, I would restart continuously. After switching to the double head DP cable, the problem would not reappear
Appendix II: NVIDIA SMI command failed
- Enter NVIDIA SMI to check the driver, but the following problems are encountered:
will@ubuntu-hp:~$ nvidia-smi NVIDIA-SMI has failed because it couldn't communicate with the NVIDIA driver. Make sure that the latest NVIDIA driver is installed and running. ```**Bold style** - implement<font color="blue">ls /usr/src/</font>,You'll see something called nvidia-xxx The folder is shown in the red box below. Here I am<font color="red">nvidia-430.64</font>:  - Execute command: ```shell sudo dkms install -m nvidia -v 430.64
Appendix III: repeated request for password
- At this time, after inputting the password on the Ubuntu computer, wait a few seconds and return to the page of inputting the password. You can't log in all the time
- This is because the setting in GRUP is to use the integrated graphics card. At this time, we have installed the Nvidia driver, so we can't log in with the integrated graphics card driver. We need to modify the setting
- At this time, ssh Remote connection is normal. Connect it first, open the file / etc/default/grub, and find grup_ CMDLINE_ LINUX_ In the line of default, change the value to the content of the red box in the figure below:

- Restart and log in smoothly
Appendix IV: obtaining Kernel source
- To install Linux source:
sudo apt-get install linux-source
- When executing the above command, pay attention to the contents in the following red box:
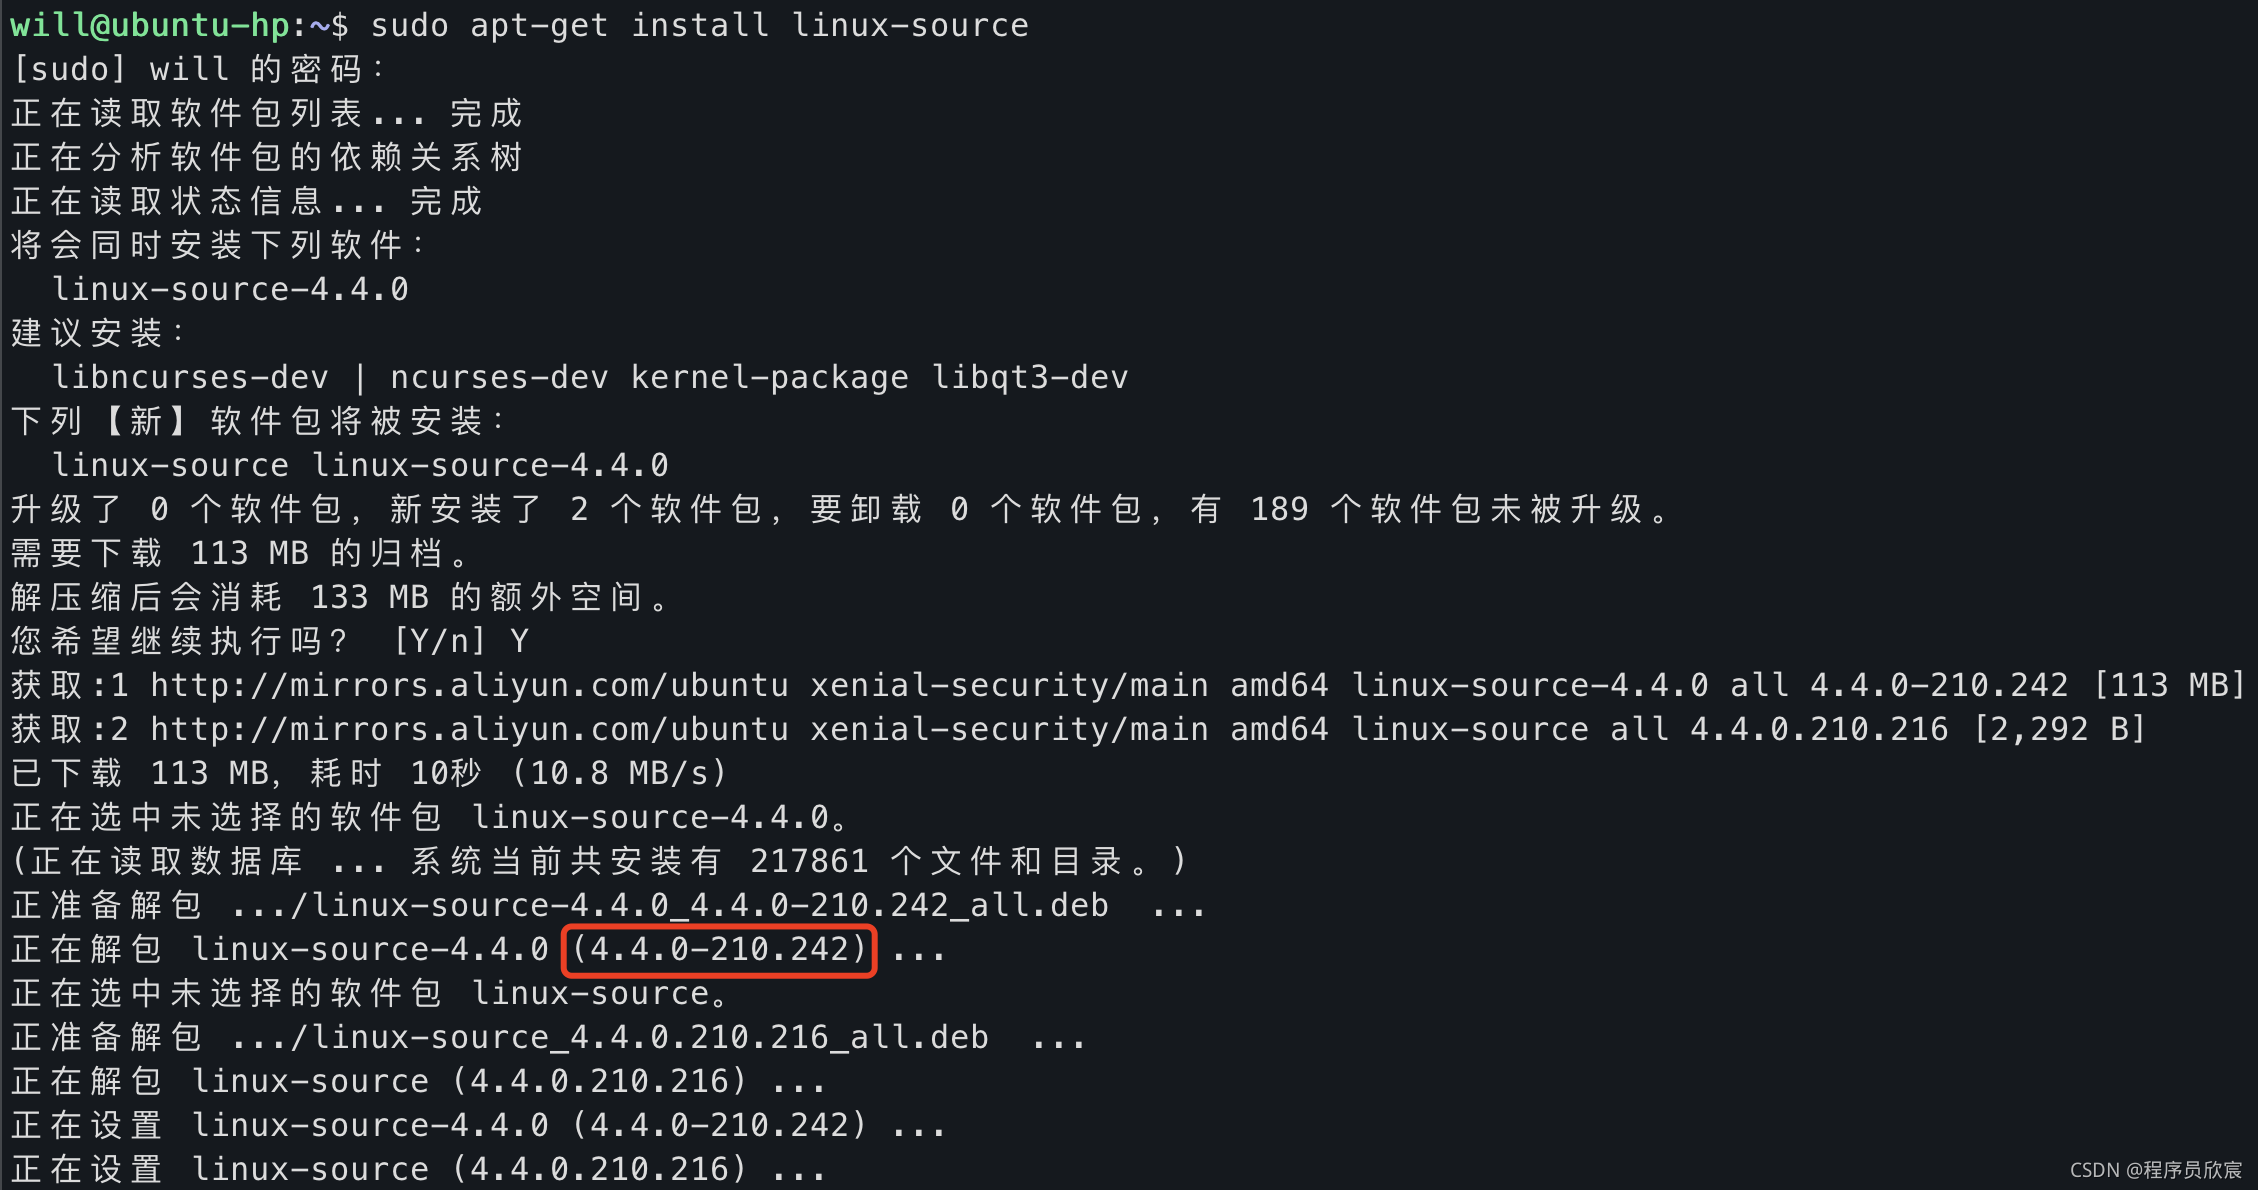
- In the above red box is 4.4.0-210.242, so the next command to be executed is (the content after the third decimal point is not concerned):
sudo apt-get install linux-headers-4.4.0-210-generic