install
Installation in cdn mode:
<script src="https://cdnjs.cloudflare.com/ajax/libs/pixi.js/4.2.2/pixi.min.js"></script>Features currently supported by engines
- WebGL Rendering Mode (Very Fast Rendering Mode)
- Canvas Rendering Mode (Old Fastest)
- Full scene
- Convenient API
- Supporting Texture Pictures
- Support sprite sheet
- Automatic Selection of Rendering Mode
- Complete interactive support
- text
- Picture text
- Multiline text
- render to texture
- Drawing element
- Mask
- Color filter
————————————————————- Official Introduction Documents————————————————————-
First, we need to create a renderer and stage.
<!DOCTYPE html>
<html>

<head>
    <meta charset="utf-8">
    <title>lala</title>
    <meta name="viewport" content="width=device-width,user-scalable=no,initial-scale=1, minimum-scale=1,maximum-scale=1,target-densitydpi=device-dpi">
    <meta name="apple-mobile-web-app-capable" content="yes">

</head>

<body>
    <script src="https://cdnjs.cloudflare.com/ajax/libs/pixi.js/4.2.2/pixi.min.js"></script>
    <script>
       //Create the renderer
        var renderer = PIXI.autoDetectRenderer(256, 256);

        //Add the canvas to the HTML document
        document.body.appendChild(renderer.view);

        //Create a container object called the `stage`
        var stage = new PIXI.Container();

        //Tell the `renderer` to `render` the `stage`
        renderer.render(stage);
    </script>
</body>

</html>
At this point, we have created a basic stage. You can add something to it.
Pixi sprite
The stage we just created is just a container, so that our object can have a parent-child relationship, form a tree structure, facilitate the management of synchronous object movement, deformation and so on.
renderer.render(stage);This code tells the renderer what to render.
So what do we need to put into the stage? One special object is sprite. Spritte is like a picture that can be manipulated by code. It can control its coordinates, rotation, size and so on. You can also touch or click on it.
Pixi has three ways to create them:
- Picture File Path (Picture Path is directly used to load, but webgl mode can not do so, you must first load, and then use texture to create sprite)
- Block map
- Picture texture
Loading images into the texture cache
Since WebGL mode is used for rendering, images need to be in a format that the GPU can handle. So before we use an image, we first load it and convert it into the texture format of WebGL. To make development more efficient, Pixi provides a texture cache object to store textures of all images and their corresponding names.
If you need to use a file, you can load it as follows:
var texture = PIXI.utils.TextureCache["images/anySpriteImage.png"];
var sprite = new PIXI.Sprite(texture); // Create a spritge object with the created texture
When we just talked about how to convert pictures into texture objects that webgl can recognize, how do we load these pictures in advance?
Pixi has a built-in loader object:
PIXI.loader
  .add("images/anyImage.png")
  .load(setup); // Load images/anyImage.png image and execute setup function after loading

function setup() {
  var sprite = new PIXI.Sprite(
    PIXI.loader.resources["images/anyImage.png"].texture
  ); // Create Sprite image objects based on texture objects
}
It can also be loaded continuously.
PIXI.loader
.add([
"images/imageOne.png",
"images/imageTwo.png",
"images/imageThree.png"
])
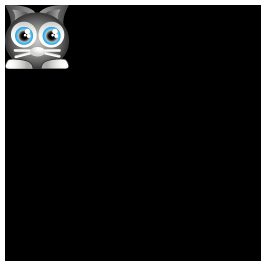
.load(setup);Here's a simple example to learn how to use the basic API:
var stage = new PIXI.Container(),
    renderer = PIXI.autoDetectRenderer(256, 256);
document.body.appendChild(renderer.view);

//Preload Pictures
PIXI.loader
  .add("images/cat.png")
  .load(setup);

// When the image is loaded, the setup function is executed
function setup() {

  // Create a sprite object based on the texture object
  var cat = new PIXI.Sprite(
    PIXI.loader.resources["images/cat.png"].texture
  );

  // Add cat to the stage
  stage.addChild(cat);

  // Show everything on the stage
  renderer.render(stage);
}
After coding, you can see that: