Reference the training tutorial of Mask-RCNN instance split model:
- Pyrtorch Official ask-RCNN Instance Split Model Training Tutorial: TORCHVISION OBJECT DETECTION FINETUNING TUTORIAL
- Chinese translation of the official Mask-RCNN training tutorial: Hand-on training for your Mask R-CNN image instance segmentation model (official PyTorch tutorial)
Faster-RCNN target detection model training can be achieved by slightly modifying the training of MSK-RCNN instance segmentation model.
Related pages:
- torchvision comes with image classification, semantic segmentation, target detection, instance segmentation, key point detection, video classification model: TORCHVISION.MODELS
- Tochvision Github project address: https://github.com/pytorch/vision
1. Preparations
In addition to installing pytorch and torchvision, you also need to install API pycotools for COCO
How to install pycocotools on a windows system: Install pycocotools under Windows
Import related packages and modules:
import torch
import os
import numpy as np
import cv2
import matplotlib.pyplot as plt
from torchvision import datasets, transforms
from PIL import Image
from xml.dom.minidom import parse
%matplotlib inline
2. Define datasets
I use a target detection dataset that I label using labelme and convert to voc format with two tags (mark_type_1 and mark_type_2), that is, num_classes=3
The directory structure of my voc dataset is as follows: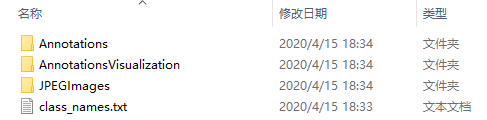
Examples of xml labels under the Annotations folder are:
<annotation>
  <folder/>
  <filename>172.26.80.5_01_20191128084208520_TIMING.jpg</filename>
  <database/>
  <annotation/>
  <image/>
  <size>
    <height>1536</height>
    <width>2048</width>
    <depth>3</depth>
  </size>
  <segmented/>
  <object>
    <name>mark_type_1</name>
    <pose/>
    <truncated/>
    <difficult/>
    <bndbox>
      <xmin>341.4634146341463</xmin>
      <ymin>868.2926829268292</ymin>
      <xmax>813.4146341463414</xmax>
      <ymax>986.5853658536585</ymax>
    </bndbox>
  </object>
  <object>
    <name>mark_type_1</name>
    <pose/>
    <truncated/>
    <difficult/>
    <bndbox>
      <xmin>1301.2195121951218</xmin>
      <ymin>815.8536585365853</ymin>
      <xmax>1769.512195121951</xmax>
      <ymax>936.5853658536585</ymax>
    </bndbox>
  </object>
</annotation>
The label contains a category (mark_type_1) Two bbox es
Define the dataset:
class MarkDataset(torch.utils.data.Dataset):
    def __init__(self, root, transforms=None):
        self.root = root
        self.transforms = transforms
        # load all image files, sorting them to ensure that they are aligned
        self.imgs = list(sorted(os.listdir(os.path.join(root, "JPEGImages"))))
        self.bbox_xml = list(sorted(os.listdir(os.path.join(root, "Annotations"))))

    def __getitem__(self, idx):
        # load images and bbox
        img_path = os.path.join(self.root, "JPEGImages", self.imgs[idx])
        bbox_xml_path = os.path.join(self.root, "Annotations", self.bbox_xml[idx])
        img = Image.open(img_path).convert("RGB")

        # Read file, VOC format dataset label is xml format file
        dom = parse(bbox_xml_path)
        # Get Document Element Object
        data = dom.documentElement
        # Get objects
        objects = data.getElementsByTagName('object')
        # get bounding box coordinates
        boxes = []
        labels = []
        for object_ in objects:
            # Get the contents of the label
            name = object_.getElementsByTagName('name')[0].childNodes[0].nodeValue  # Is label, mark_type_1 or mark_type_2
            labels.append(np.int(name[-1]))  # Background label is 0, mark_type_1 and mark_type_2 labels are 1 and 2, respectively

            bndbox = object_.getElementsByTagName('bndbox')[0]
            xmin = np.float(bndbox.getElementsByTagName('xmin')[0].childNodes[0].nodeValue)
            ymin = np.float(bndbox.getElementsByTagName('ymin')[0].childNodes[0].nodeValue)
            xmax = np.float(bndbox.getElementsByTagName('xmax')[0].childNodes[0].nodeValue)
            ymax = np.float(bndbox.getElementsByTagName('ymax')[0].childNodes[0].nodeValue)
            boxes.append([xmin, ymin, xmax, ymax])

        boxes = torch.as_tensor(boxes, dtype=torch.float32)
        # there is only one class
        labels = torch.as_tensor(labels, dtype=torch.int64)

        image_id = torch.tensor([idx])
        area = (boxes[:, 3] - boxes[:, 1]) * (boxes[:, 2] - boxes[:, 0])
        # suppose all instances are not crowd
        iscrowd = torch.zeros((len(objects),), dtype=torch.int64)

        target = {}
        target["boxes"] = boxes
        target["labels"] = labels
        # Since you are training a target detection network, there is no target [masks] = masks in the tutorial
        target["image_id"] = image_id
        target["area"] = area
        target["iscrowd"] = iscrowd

        if self.transforms is not None:
            # Note that target (including bbox) is also transformed\enhanced here, which is different from transforms from torchvision import
            # Https://github.com/pytorch/vision/tree/master/references/detectionOfTransforms.pyThere are examples of target transformations when RandomHorizontalFlip
            img, target = self.transforms(img, target)

        return img, target

    def __len__(self):
        return len(self.imgs)
3. Define the model
There are two ways to modify torchvision's default target detection model: the first is to use a pre-trained model and finetuning fine-tune after modifying the last layer of the network; the second is to replace the backbone network in the model as needed, such as replacing ResNet with MobileNet.
The specific use of these two methods can refer to the official tutorials at the beginning of the most article as well as the official tutorial translations, where I choose the first method.
Defining a model can be simple to use:
torchvision.models.detection.fasterrcnn_resnet50_fpn(pretrained=False, progress=True, num_classes=3, pretrained_backbone=True)
You can also refer to the tutorial:
import torchvision
from torchvision.models.detection.faster_rcnn import FastRCNNPredictor


def get_object_detection_model(num_classes):
    # load an object detection model pre-trained on COCO
    model = torchvision.models.detection.fasterrcnn_resnet50_fpn(pretrained=True)

    # replace the classifier with a new one, that has num_classes which is user-defined
    num_classes = 3  # 3 class (mark_type_1,mark_type_2) + background

    # get the number of input features for the classifier
    in_features = model.roi_heads.box_predictor.cls_score.in_features

    # replace the pre-trained head with a new one
    model.roi_heads.box_predictor = FastRCNNPredictor(in_features, num_classes)

    return model
4. Data Enhancement
The image needs to be enhanced before it can be input to the network.It is important to note that since the Faster R-CNN model itself can handle normalization (which is normalized by default using the mean and standard deviation of ImageNet) and scale changes, there is no need to do mean/std normalization or image scaling here.
Since transforms from torchvision import can only enhance pictures, but can not change label labels for pictures at the same time, we chose to use some of the encapsulated functions in the torchvision Github project for model training and testing: https://github.com/pytorch/vision/tree/master/references/detection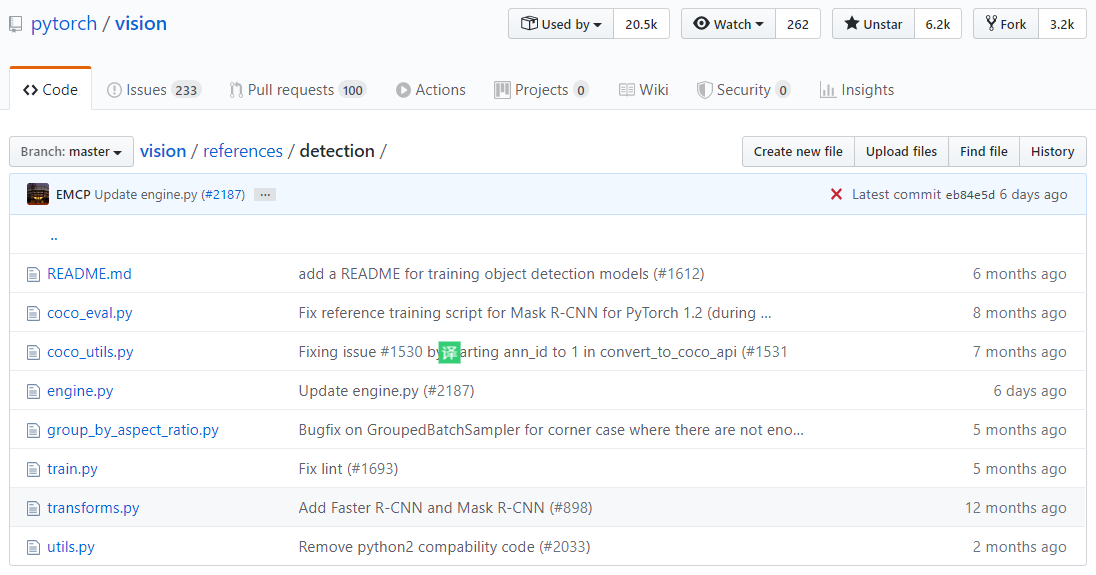
Among themEngine.py,utils.py,transforms.py, coco_utils.py, coco_Eval.pyWe'll use it to download these files.I placed these files next to the Faster-RCNN Target Detection Model Training.ipynb script I was writing
View downloadedTransforms.py, you can see that it contains an example of a target (bbox) transformation when the image is horizontally flipped (RandomHorizontalFlip):
class RandomHorizontalFlip(object):
    def __init__(self, prob):
        self.prob = prob

    def __call__(self, image, target):
        if random.random() < self.prob:
            height, width = image.shape[-2:]
            image = image.flip(-1)
            bbox = target["boxes"]
            bbox[:, [0, 2]] = width - bbox[:, [2, 0]]
            target["boxes"] = bbox
            if "masks" in target:
                target["masks"] = target["masks"].flip(-1)
            if "keypoints" in target:
                keypoints = target["keypoints"]
                keypoints = _flip_coco_person_keypoints(keypoints, width)
                target["keypoints"] = keypoints
        return image, target
Write the corresponding data enhancement functions:
import utils
import transforms as T
from engine import train_one_epoch, evaluate
# utils, transforms, engine were just downloadedUtils.py,transforms.py,engine.py

def get_transform(train):
    transforms = []
    # converts the image, a PIL image, into a PyTorch Tensor
    transforms.append(T.ToTensor())
    if train:
        # during training, randomly flip the training images
        # and ground-truth for data augmentation
        # 50% chance of flipping horizontally
        transforms.append(T.RandomHorizontalFlip(0.5))

    return T.Compose(transforms)
5. Training Model
So far, the datasets, models, and data enhancements have all been written.After model initialization, optimizer, and learning rate adjustment strategies are selected, training can begin.After each epoch training is completed, we also evaluate the performance of the model on the test set.
from engine import train_one_epoch, evaluate
import utils


root = r'Dataset Path'

# train on the GPU or on the CPU, if a GPU is not available
device = torch.device('cuda') if torch.cuda.is_available() else torch.device('cpu')

# 3 classes, mark_type_1,mark_type_2,background
num_classes = 3
# use our dataset and defined transformations
dataset = MarkDataset(root, get_transform(train=True))
dataset_test = MarkDataset(root, get_transform(train=False))

# split the dataset in train and test set
# My dataset has 492 diagrams, almost training validation 4:1
indices = torch.randperm(len(dataset)).tolist()
dataset = torch.utils.data.Subset(dataset, indices[:-100])
dataset_test = torch.utils.data.Subset(dataset_test, indices[-100:])

# define training and validation data loaders
# Num_when training models in jupyter notebook The workers parameter can only be 0, otherwise an error will occur, which is commented out here
data_loader = torch.utils.data.DataLoader(
    dataset, batch_size=2, shuffle=True, # num_workers=4,
    collate_fn=utils.collate_fn)

data_loader_test = torch.utils.data.DataLoader(
    dataset_test, batch_size=2, shuffle=False, # num_workers=4,
    collate_fn=utils.collate_fn)

# get the model using our helper function
model = torchvision.models.detection.fasterrcnn_resnet50_fpn(pretrained=False, progress=True, num_classes=num_classes, pretrained_backbone=True)  # Or get_object_detection_model(num_classes)

# move model to the right device
model.to(device)

# construct an optimizer
params = [p for p in model.parameters() if p.requires_grad]

# SGD
optimizer = torch.optim.SGD(params, lr=0.0003,
                            momentum=0.9, weight_decay=0.0005)

# and a learning rate scheduler
# cos learning rate
lr_scheduler = torch.optim.lr_scheduler.CosineAnnealingWarmRestarts(optimizer, T_0=1, T_mult=2)

# let's train it for   epochs
num_epochs = 31

for epoch in range(num_epochs):
    # train for one epoch, printing every 10 iterations
    # Engine.pyTrain_ofOne_The epoch function takes both images and targets. to(device)
    train_one_epoch(model, optimizer, data_loader, device, epoch, print_freq=50)

    # update the learning rate
    lr_scheduler.step()

    # evaluate on the test dataset
    evaluate(model, data_loader_test, device=device)

    print('')
    print('==================================================')
    print('')

print("That's it!")
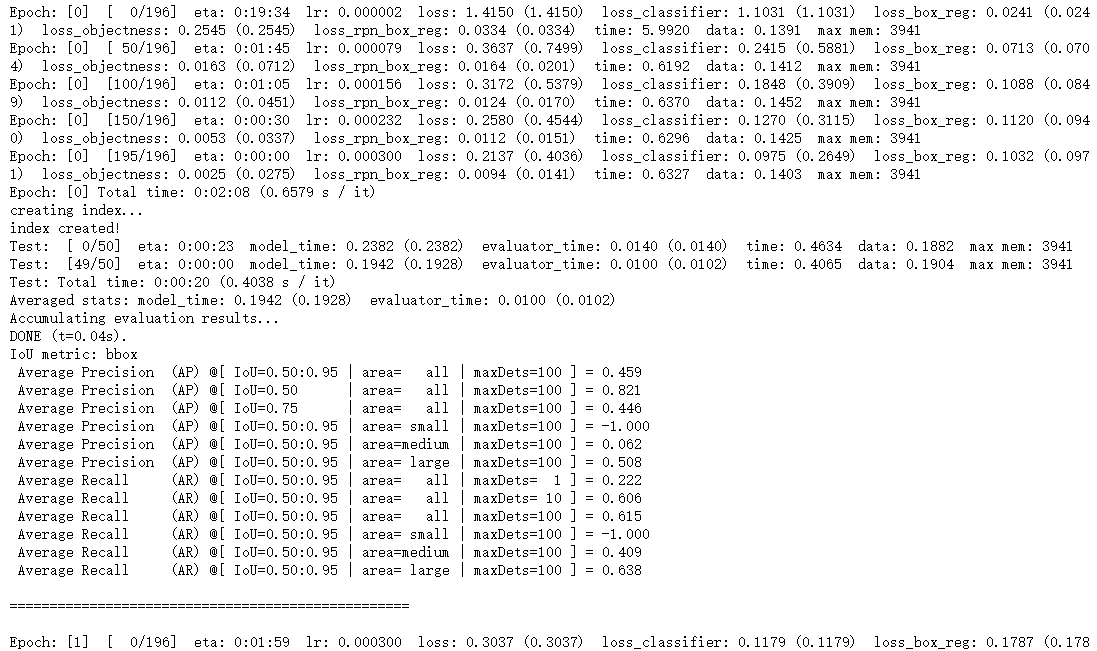
You can see that the learning rate of the first epoch is not set at 0.0003, but increases gradually from 0 because of the following reasons:Engine.pyTrain_ofOne_In the epoch function, the first epoch uses warmup's learning rate:
if epoch == 0:
        warmup_factor = 1. / 1000
        warmup_iters = min(1000, len(data_loader) - 1)

        lr_scheduler = utils.warmup_lr_scheduler(optimizer, warmup_iters, warmup_factor)
Additionally, since the bbox area in my dataset is large, both AP and AR are -1.000 when area= small
Finally, save the model:
torch.save(model, r'Save Path\modelname.pkl')
6. View the effect
Draw bbox with opencv:
def showbbox(model, img):
    # The img entered is a tensor in the 0-1 range
    model.eval()
    with torch.no_grad():
        '''
        prediction Like:
        [{'boxes': tensor([[1492.6672,  238.4670, 1765.5385,  315.0320],
        [ 887.1390,  256.8106, 1154.6687,  330.2953]], device='cuda:0'),
        'labels': tensor([1, 1], device='cuda:0'),
        'scores': tensor([1.0000, 1.0000], device='cuda:0')}]
        '''
        prediction = model([img.to(device)])

    print(prediction)

    img = img.permute(1,2,0)  # C,H,W_H,W,C, for drawing
    img = (img * 255).byte().data.cpu()  # * 255, float to 0-255
    img = np.array(img)  # tensor → ndarray

    for i in range(prediction[0]['boxes'].cpu().shape[0]):
        xmin = round(prediction[0]['boxes'][i][0].item())
        ymin = round(prediction[0]['boxes'][i][1].item())
        xmax = round(prediction[0]['boxes'][i][2].item())
        ymax = round(prediction[0]['boxes'][i][3].item())

        label = prediction[0]['labels'][i].item()

        if label == 1:
            cv2.rectangle(img, (xmin, ymin), (xmax, ymax), (255, 0, 0), thickness=2)
            cv2.putText(img, 'mark_type_1', (xmin, ymin), cv2.FONT_HERSHEY_SIMPLEX, 0.7, (255, 0, 0),
                               thickness=2)
        elif label == 2:
            cv2.rectangle(img, (xmin, ymin), (xmax, ymax), (0, 255, 0), thickness=2)
            cv2.putText(img, 'mark_type_2', (xmin, ymin), cv2.FONT_HERSHEY_SIMPLEX, 0.7, (0, 255, 0),
                               thickness=2)

    plt.figure(figsize=(20,15))
    plt.imshow(img)
View the effect:
model = torch.load(r'Save Path\modelname.pkl')
device = torch.device('cuda') if torch.cuda.is_available() else torch.device('cpu')
model.to(device)

img, _ = dataset_test[0]
showbbox(model, img)