Use yolov5 to train your own dataset (detailed process) and deploy yolov5 through flash
github project address
Use yolov5 to train your own data set (detailed process) and deploy it through flash
1. Prepare data set
PASCAL VOC
In this paper PASCAL VOC extraction code: 07wp
Take the dataset as an example. Put the dataset under the project dataset directory. The dataset structure is as follows:
---VOC2012
--------Annotations
---------------xml0
---------------xml1
--------JPEGImages
---------------img0
---------------img1
--------pascal_voc_classes.txt
Annotations are all xml files, JPEGImages are all image files, pascal_voc_classes.txt is a category file.
Get label file
The format of yolo tag file is as follows:
102 0.682813 0.415278 0.237500 0.502778
102 0.914844 0.396528 0.168750 0.451389

first place label,Is the category of objects in the picture
 The last four digits are the positions of the objects in the picture( xcenter, ycenter, h, w)That is, the relative coordinates and relative height and width of the central position of the target object
 There are two targets in the figure above
If you already have the above label file, you can skip to the next step.
If there is no label file above, it can be used labelimg extraction code dbi2
Label. Generate a label file in xml format and then convert it to a label file in yolo format. The use of labelimg is very simple and will not be repeated here.
The label file in xml format is converted to yolo format,
Run the get_train_val.py file under the project.
python xml_yolo.py
pascal_voc_classes.txt is the json file corresponding to your category. The following is the category format of VOC dataset.
["aeroplane","bicycle", "bird","boat","bottle","bus","car","cat","chair","cow","diningtable","dog","horse","motorbike","person","pottedplant","sheep","sofa","train", "tvmonitor"]
Path structure after running the above code
---VOC2012
--------Annotations
--------JPEGImages
--------pascal_voc_classes.json
---yolodata
--------images
--------labels
2. Divide training set and test set
The division of training set and test set is very simple. The original data is scrambled, and then divided into training set and test set according to 9:1.
Run the get_train_val.py file under the project.
python get_train_val.py
Running the above code will generate the following path structure
---VOC2012
--------Annotations
--------JPEGImages
--------pascal_voc_classes.json
---yolodata
--------images
--------labels
---traindata
--------images
----------------train
----------------val
--------labels
----------------train
----------------val
Traintata is the last training file needed
3. Training model
The training of yolov5 is very simple. The code has been simplified in this paper. The code structure is as follows:
dataset             # data set
------traindata     # Training data set
inference           # Input / output interface
------inputs        # input data
------outputs       # output data
config              # configuration file
------score.yaml    # Training profile
------yolov5l.yaml  # Model profile
models              # Model code
runs	            # log file
utils               # Code file
weights             # Model saving path, last.pt, best.pt
train.py            # Training code
detect.py           # Test code
score.yaml is explained as follows:
# train and val datasets (image directory)
train: ./datasets/traindata/images/train/
val: ./datasets/traindata/images/val/
# number of classes
nc: 2
# class names
names: ['Apple','Banana']
Train: refers to the train address of image data
val: the address of the image data
nc: number of categories
names: the name corresponding to the category
yolov5l.yaml is explained as follows:
nc: 2 # number of classes
depth_multiple: 1.0  # model depth multiple
width_multiple: 1.0  # layer channel multiple
anchors:
  - [10,13, 16,30, 33,23]  # P3/8
  - [30,61, 62,45, 59,119]  # P4/16
  - [116,90, 156,198, 373,326]  # P5/32
backbone:
  # [from, number, module, args]
  [[-1, 1, Focus, [64, 3]],  # 1-P1/2
   [-1, 1, Conv, [128, 3, 2]],  # 2-P2/4
   [-1, 3, Bottleneck, [128]],
   [-1, 1, Conv, [256, 3, 2]],  # 4-P3/8
   [-1, 9, BottleneckCSP, [256]],
   [-1, 1, Conv, [512, 3, 2]],  # 6-P4/16
   [-1, 9, BottleneckCSP, [512]],
   [-1, 1, Conv, [1024, 3, 2]], # 8-P5/32
   [-1, 1, SPP, [1024, [5, 9, 13]]],
   [-1, 6, BottleneckCSP, [1024]],  # 10
  ]
head:
  [[-1, 3, BottleneckCSP, [1024, False]],  # 11
   [-1, 1, nn.Conv2d, [na * (nc + 5), 1, 1, 0]],  # 12 (P5/32-large)
   [-2, 1, nn.Upsample, [None, 2, 'nearest']],
   [[-1, 6], 1, Concat, [1]],  # cat backbone P4
   [-1, 1, Conv, [512, 1, 1]],
   [-1, 3, BottleneckCSP, [512, False]],
   [-1, 1, nn.Conv2d, [na * (nc + 5), 1, 1, 0]],  # 17 (P4/16-medium)
   [-2, 1, nn.Upsample, [None, 2, 'nearest']],
   [[-1, 4], 1, Concat, [1]],  # cat backbone P3
   [-1, 1, Conv, [256, 1, 1]],
   [-1, 3, BottleneckCSP, [256, False]],
   [-1, 1, nn.Conv2d, [na * (nc + 5), 1, 1, 0]],  # 22 (P3/8-small)
   [[], 1, Detect, [nc, anchors]],  # Detect(P3, P4, P5)
  ]
nc: the number of target categories
depth_multiple and width_multiple: control the depth and width of the model. Different parameters correspond to: s, m, l, x model.
anchors: it is the basic box generated by k-means clustering for the input target box, which is used to predict the target box.
yolov5 will automatically generate anchors. yolov5 uses Euclidean distance for k-means clustering, and then uses genetic algorithm to do a series of mutation to get the final anchors. However, the effect of using Euclidean distance for k-means clustering is not as good as that of using 1 - iou for k-means clustering. If you want the source code of 1 - iou for k-means clustering, please talk to me in private. But the effect is the same A few.
backbone: the network structure of the image feature extraction part.
head: the network structure for the final prediction part
The train.py configuration is very simple:
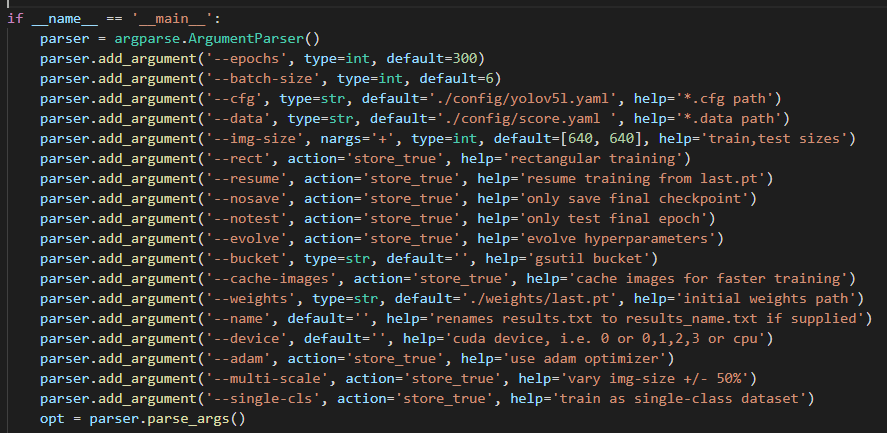
We only need to modify the following parameters
epoch:         Controls the number of training iterations
batch_size     Enter the number of pictures for the iteration
cfg:           Configure network model path
data:          Training profile path
weights:       Load the model and continue training
Terminal operation
python train.py
Start training.
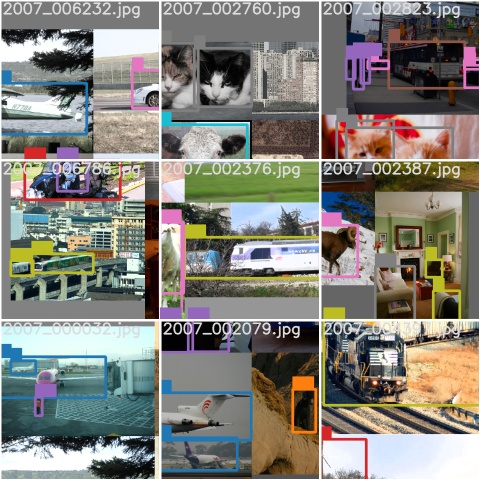
Training process
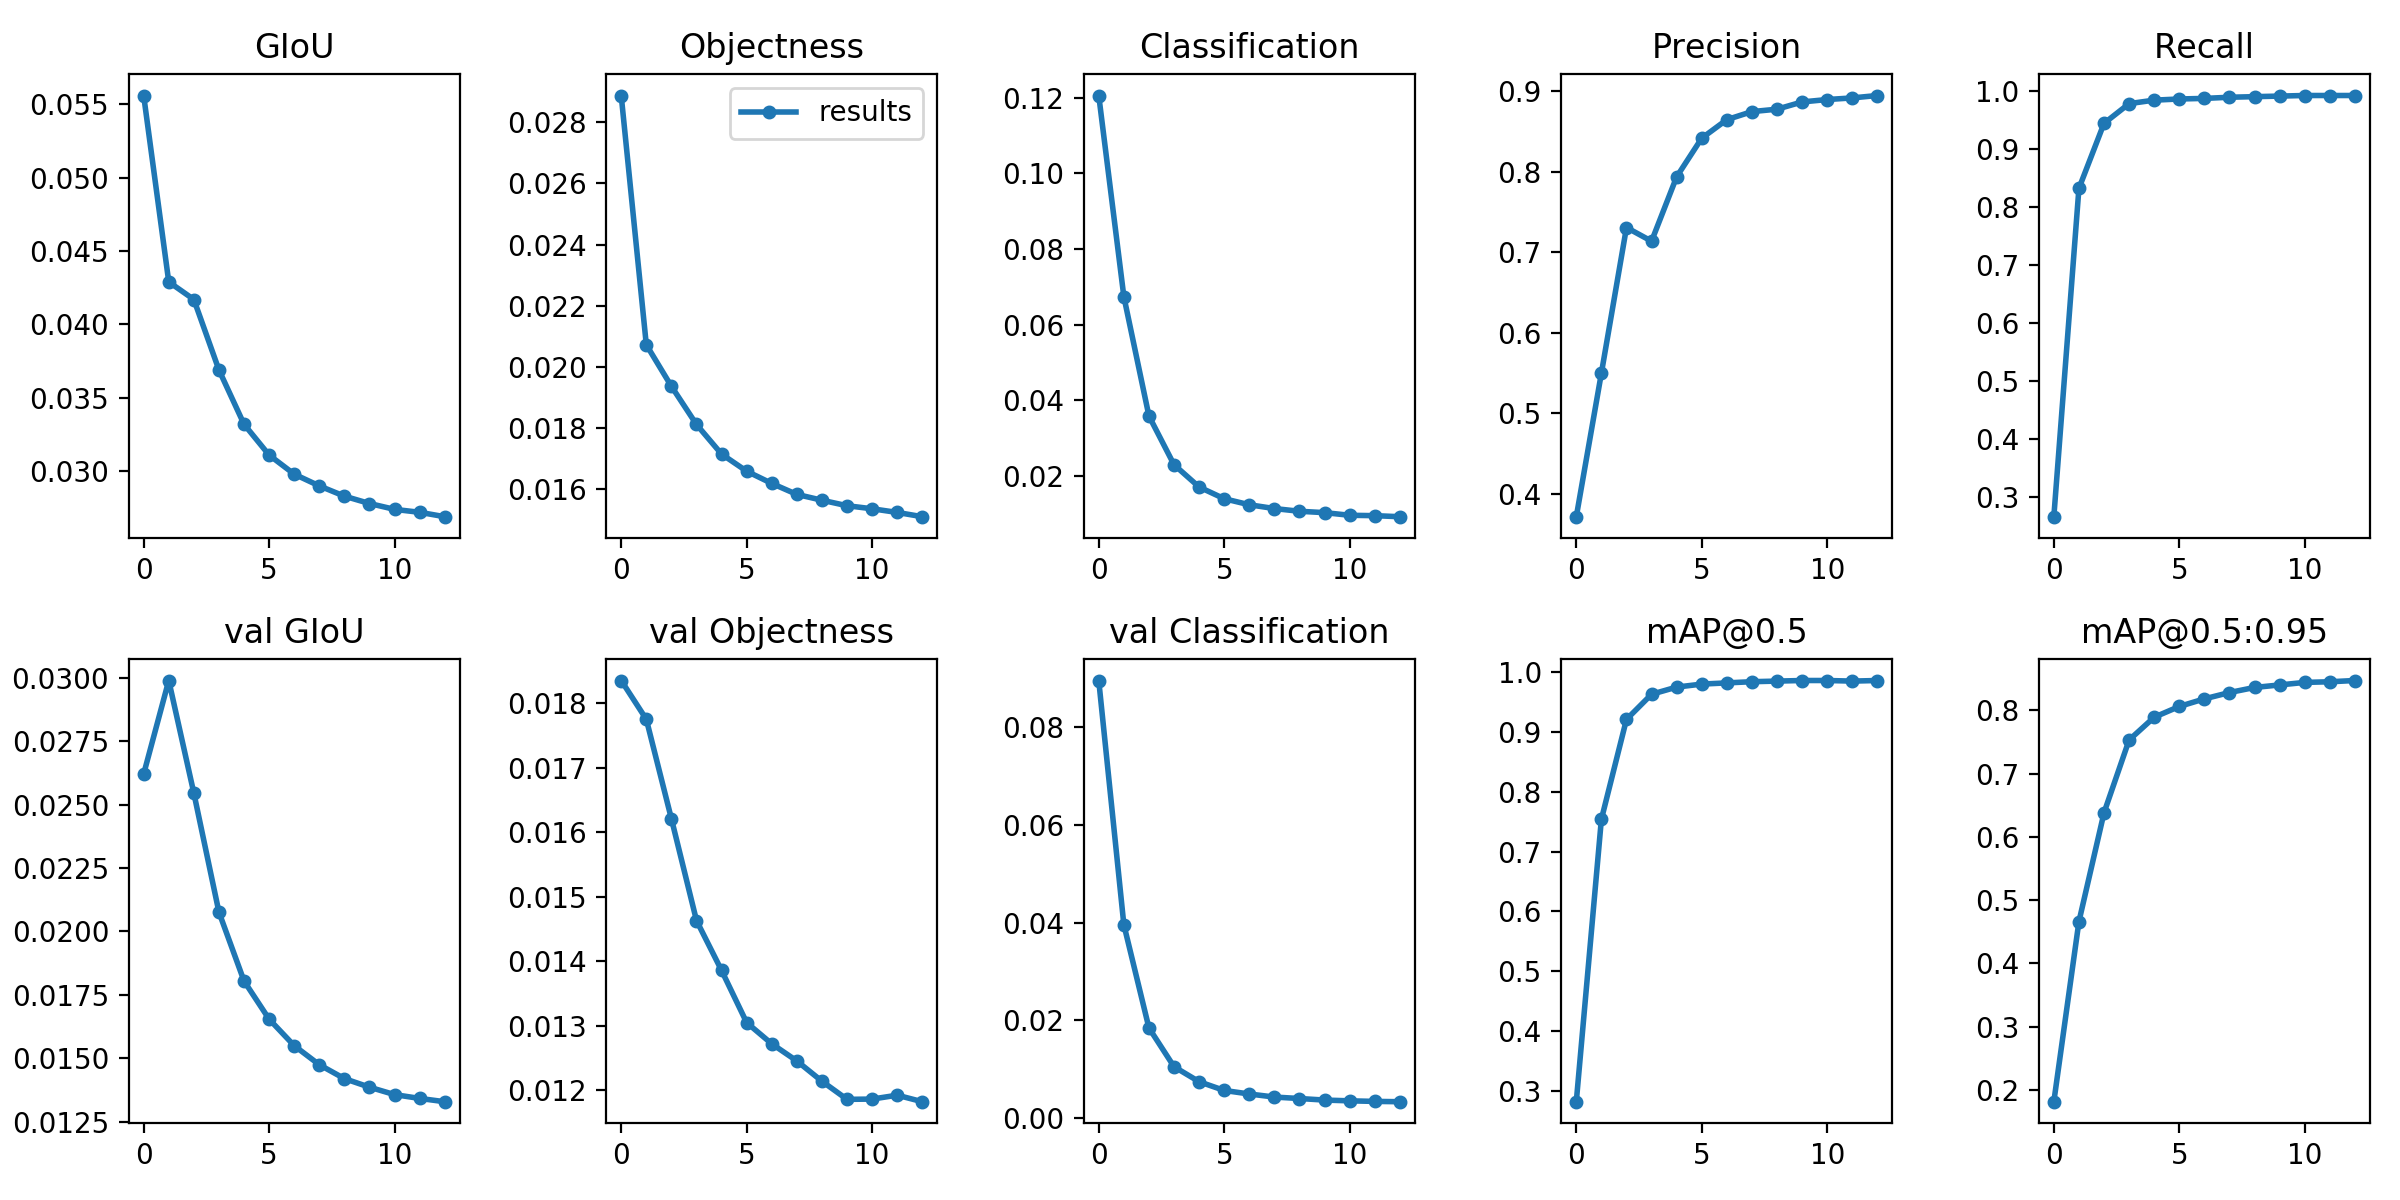
Training results
3. Test model
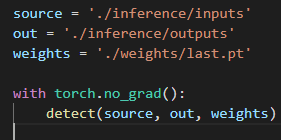
Three parameters need to be changed
source:     To be tested images/videos route
out: 		Path to save results
weights:    The path of the trained model weight file
Terminal operation
python detect.py
The test can be started.
You can also use the weight files on the coco dataset to test and put them in the weights folder
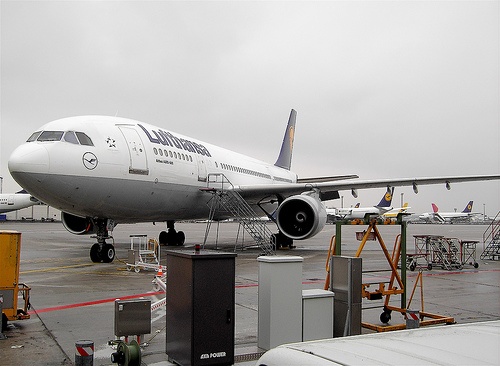
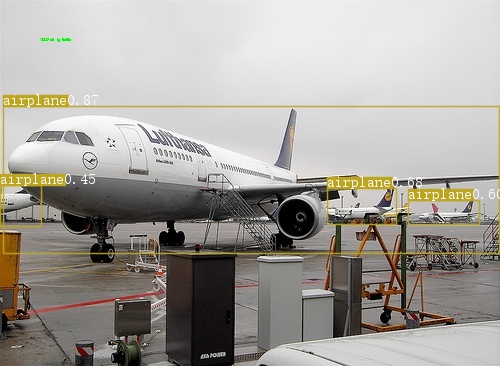
detection result
4. Deploy through flash
The deployment of flash is very simple. If you don't understand, please refer to my previous blog or the comments below.
Deploying Python and flash projects on alicloud ECS is easy to understand without nginx and uwsgi
web platform for target detection and multi-target tracking based on yolov3 deep sort flash
Terminal operation
python app.py
You can start to jump to the web page for image or video upload detection.