Recently, in the research of small programs, we used Jingdong React based small program development framework Taro. Compared with mpvue and uni app, Taro is more elegant and stable. Big factories are iterating, but it is different. In a word, there are fewer pits ~
Pre knowledge
Before reading this tutorial, you need to master the development process of DVA, react hooks, Redux and applet. I hope you know what it is and why. If you don't have any of the above points, I suggest you stop first, I'll give you the address below, learn by yourself first, and then come and see my article.
One of the Redux react global state management tools
dva - make your global state management easier
React - JavaScript library for building user interfaces
React Hooks - a more elegant way of writing react applications
Taro - React based applet framework
Official start
Installation of Taro scaffold
# Installing CLI using npm
$ npm install -g @tarojs/cli
# OR installing CLI using yarn
$ yarn global add @tarojs/cli
# OR with cnpm installed, use cnpm to install CLI
$ cnpm install -g @tarojs/cli
Because cnpm image source is installed on my computer, I will use cnpm below
After the scaffold is completed, use the scaffold to initialize a new project
Open CMD in the folder where you need to create the project
taro init test//The project we demonstrated is called test
Then follow the process. In order to reduce your learning cost, it is recommended not to select typescript, CSS less and the default template.
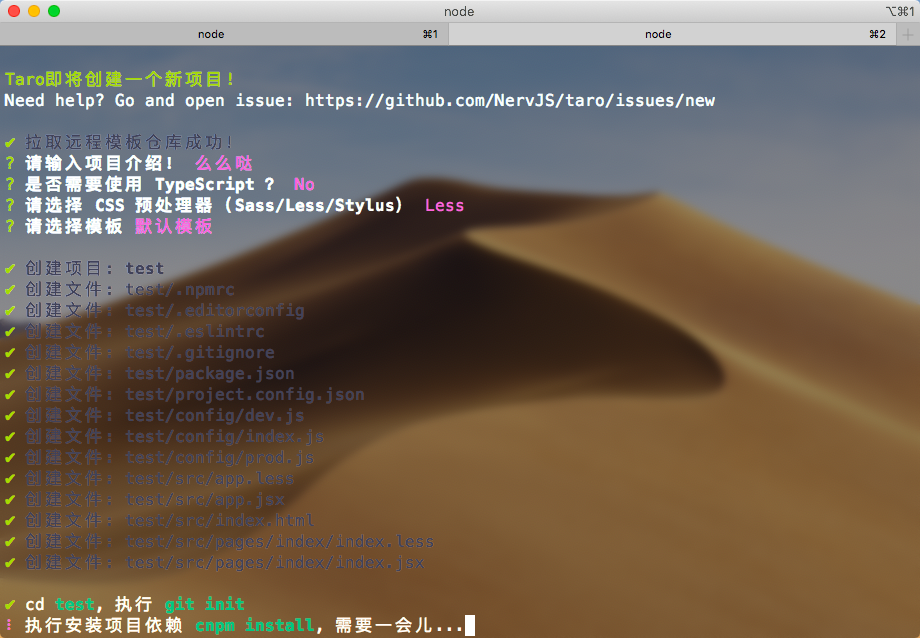
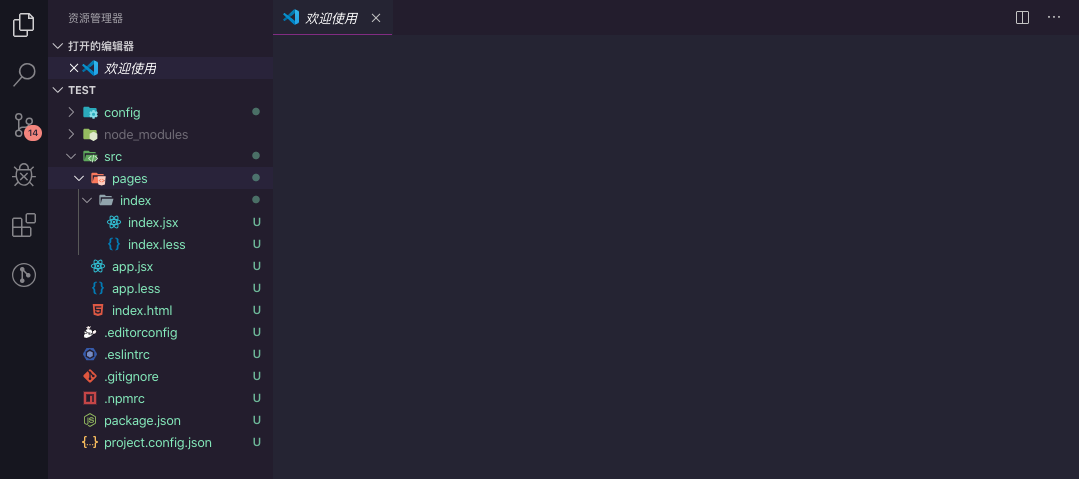
After the final success, open the test directory with your editor.
Your directory structure should be the same as mine
First delete the index folder under. / src/pages.
Then open the command line in the test directory and install the extensions we need
cnpm install --save @tarojs/async-await  //Unexpectedly, you need to install this extension to use async and await in Taro
cnpm install --save redux @tarojs/redux @tarojs/redux-h5 redux-thunk redux-logger //Redux family bucket
cnpm install --save dva-core dva-loading  //dva
cnpm install --save taro-axios //To use axios in Taro, you need to install it
After the four commands are installed, open the. / src directory and create two new folders, one called utils and the other called models. Note that these two folders should be at the same level as your pages folder.
Create a new file dva.js under the utils folder and write the following contents to register the DVA
import { create } from 'dva-core';
import { createLogger } from 'redux-logger';
import createLoading from 'dva-loading';
let app;
let store;
let dispatch;

function createApp(opt) {
  // redux log
  // opt.onAction = [createLogger()];
  app = create(opt);
  app.use(createLoading({}));

  if (!global.registered) opt.models.forEach(model => app.model(model));
  global.registered = true;
  app.start();

  store = app._store;
  app.getStore = () => store;

  dispatch = store.dispatch;

  app.dispatch = dispatch;
  return app;
}
export default {
  createApp,
  getDispatch() {
    return app.dispatch;
  }
}
Create a new file request.js under the utils folder and write the following content to encapsulate a simple axios. It may be different in your project
import axios from "taro-axios";
const baseURL = `https://blog.xiaohuwei.cn`
const service = axios.create({
    baseURL: baseURL,
    withCredentials: true,
    timeout: 300000
});
service.interceptors.response.use(
    response => {
        return response.data;
    },
    error => {
        return Promise.reject(error)
    })

export default service
Create a new file model.js under the model folder, write the following content, connect the warehouse of each page and register it to the global
import index from '../pages/index/model';

export default [index];
You will find that the index folder has been deleted just now. Write it like this first, and I'll explain it later.
The next step is to modify. / src/app.jsx to connect all our warehouses so that you can learn all the modified codes given below
import '@tarojs/async-await'
import Taro, { Component } from '@tarojs/taro'
import Index from './pages/index'
import dva from './utils/dva';
import models from './models/models';
import { Provider } from '@tarojs/redux';
import './app.less'
const dvaApp = dva.createApp({
  initialState: {},
  models: models,
});
const store = dvaApp.getStore();
class App extends Component {
  config = {
    pages: [
      'pages/index/index'
    ],
    window: {
      backgroundTextStyle: 'light',
      navigationBarBackgroundColor: '#fff',
      navigationBarTitleText: 'WeChat',
      navigationBarTextStyle: 'black'
    }
  }
  componentDidMount() { }
  componentDidShow() { }
  componentDidHide() { }
  componentDidCatchError() { }
  // The render() function in the App class has no practical effect
  // Do not modify this function
  render() {
    return (
      <Provider store={store}>
        <Index />
      </Provider>

    )
  }
}
Taro.render(<App />, document.getElementById('app'))
Last step
In the root directory of your project, in order to be consistent with me, I hope you can create a new file called page.js in the root directory. This file is used to automatically generate new pages, including ui layer, service layer and model layer of new pages, so as to facilitate rapid development. The contents are as follows
/**
 * pages The template quickly generates a script and executes the command npm run temp ` file name`
 */
const fs = require('fs');
const dirName = process.argv[2];
if (!dirName) {
  console.log('Folder name cannot be empty!');
  console.log('Example: npm run temp test');
  process.exit(0);
}
// Page template
const indexTep = `import Taro,{useEffect} from '@tarojs/taro';
import { View,Text } from '@tarojs/components';
import { connect } from '@tarojs/redux';
import './index.less';

const ${titleCase(dirName)} = props =>{
    const {${dirName},loading} = props;
      useEffect(() => {
        console.log(props)
      }, [])
    return (
           <View className="${dirName}-page">
             <Text>As you can see, this is yours ${dirName}page</Text>
           </View>
           )
}
${titleCase(dirName)}.config = {
  navigationBarTitleText: '${dirName}'
}
//Global style inheritance you can turn it off
${titleCase(dirName)}.options = {
  addGlobalClass: true
}
export default connect(
    ({
    ${dirName},
    loading
    })=>({
    ${dirName},
    loading
}))(${titleCase(dirName)})
`;
// less file template
const lessTep = `

.${dirName}-page {
}
`;

// model file template
const modelTep = `import * as ${dirName}Api from './service';

export default {
  namespace: '${dirName}',
  state: {
      keai:'Test data 666'
  },

  effects: {
    * effectsDemo(_, { call, put }) {
      const { status, data } = yield call(${dirName}Api.demo, {});
      if (status === 'ok') {
        yield put({ type: 'save',
          payload: {
            topData: data,
          } });
      }
    },
  },

  reducers: {
    save(state, { payload }) {
      return { ...state, ...payload };
    },
  },

};
`;


// service page template
const serviceTep = `import Request from '../../utils/request';

export const demo = (data) => {
  return Request({
    url: 'route',
    method: 'POST',
    data,
  });
};
`;
fs.mkdirSync(`./src/pages/${dirName}`); // mkdir $1
process.chdir(`./src/pages/${dirName}`); // cd $1

fs.writeFileSync('index.js', indexTep);
fs.writeFileSync('index.less', lessTep);
fs.writeFileSync('model.js', modelTep);
fs.writeFileSync('service.js', serviceTep);
console.log(`Template ${dirName}Created,Please manually add to./src/models`);
function titleCase(str) {
  const array = str.toLowerCase().split(' ');
  for (let i = 0; i < array.length; i++) {
    array[i] = array[i][0].toUpperCase() + array[i].substring(1, array[i].length);
  }
  const string = array.join(' ');
  return string;
}
process.exit(0);
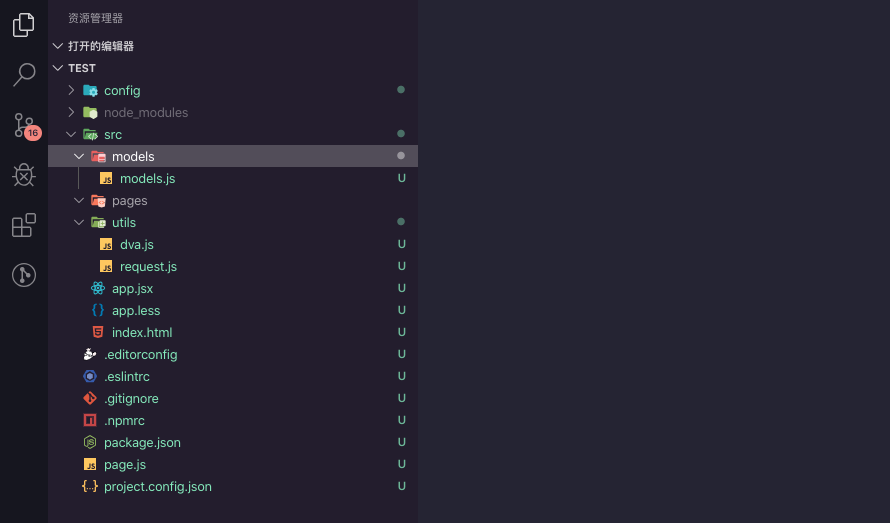
After completion, go to the scripts in package.json and add a command "temp": "node page.js"
If you can get to this step, you have succeeded. Compare it with my directory structure
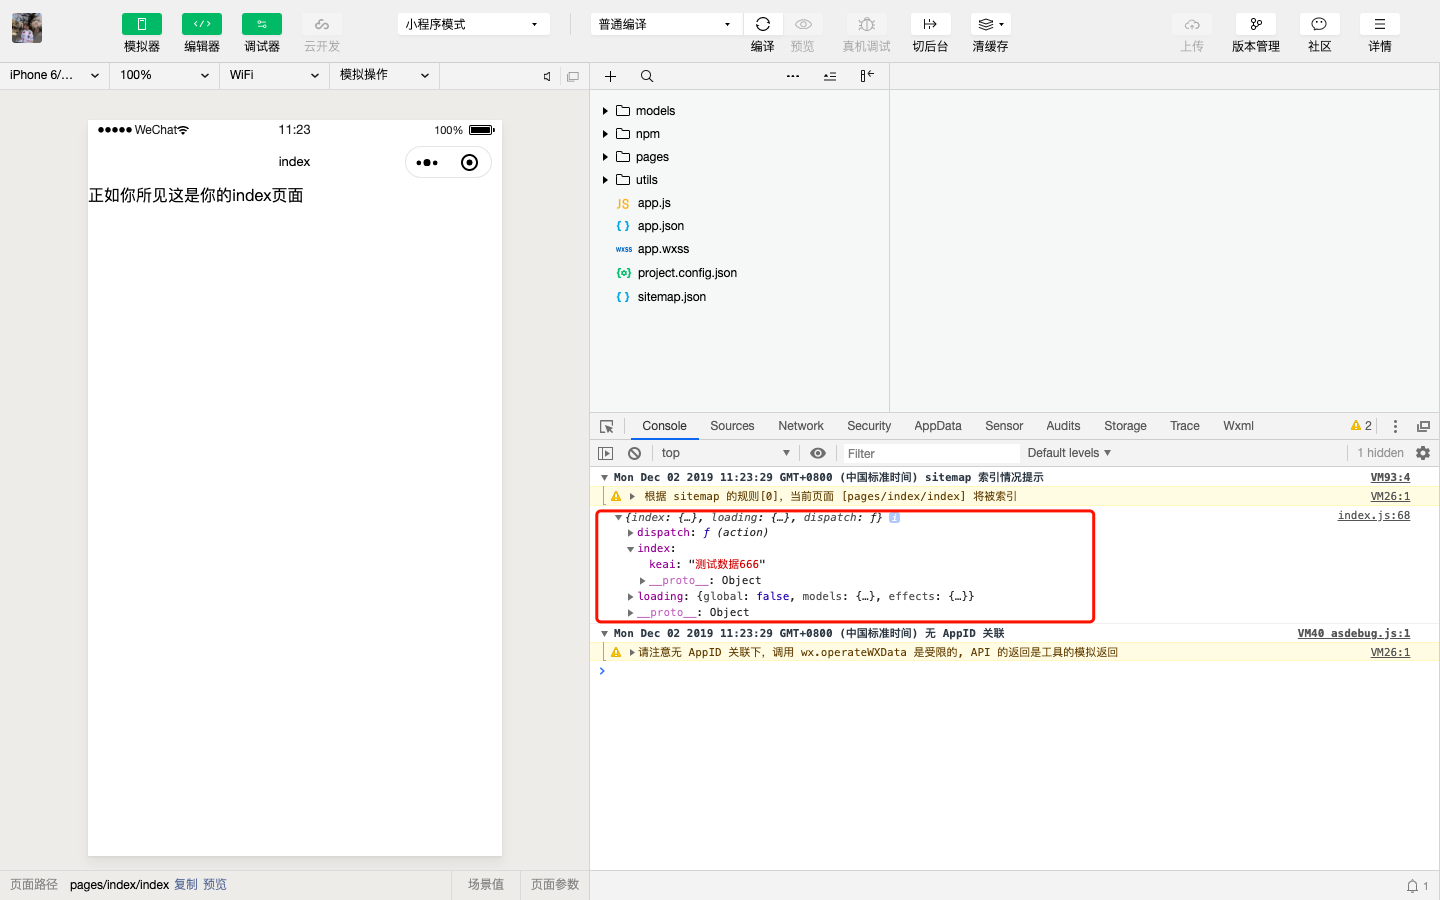
The command line opens in your project directory. Let's use the script to generate the first page index
npm run temp index
You will find that there is an index folder in your. / src/pages directory, and all the files you need have been initialized under the folder, but it is not over.
As mentioned above, every time you create a new page, you need to go to. / src/models/models.js and manually import it according to the format I gave you. Because my component is called index, the default I gave you is index, so I don't need to change it here. You need to add it manually when you do a project.
Try the effect!
npm run dev:weapp
Well, everything is finished. Start developing your small program! ~
Tell me about Taro's precautions
When you use static resources such as pictures, you need to use the syntax reference of import.