Tomcat Server
Overview
Introduction to Java
Java is a cross-platform, object-oriented programming language. Java technology has excellent versatility, efficiency, platform portability and security
system
- Java SE (Standard Edition)
- Java EE (Enterprise Edition)
Introduction to JDK
JDK(Java Development Kit) is Sun's software development kit for Java developers
JDK is the core of Java
- Includes the Java runtime environment
- Java tools (such as compile, troubleshoot, package, etc.)
- Java-based class libraries
JDK
JRE (Java Runtime Environment), JRE is a subset of JDK
JRE includes
- Java Virtual Machine (jvm)
- Java Core Class Library and Support Files
- Include no development tools (JDK) - compilers, debuggers, and other tools
Java Servlet
Servlet is a component specification for Java Extended Web Server functionality
Common Servlet Containers
- IBM websphere
- Oracle weblogic
- Apache tomcat
- RedHat jboss
Tomcat Installation
How Tomcat works
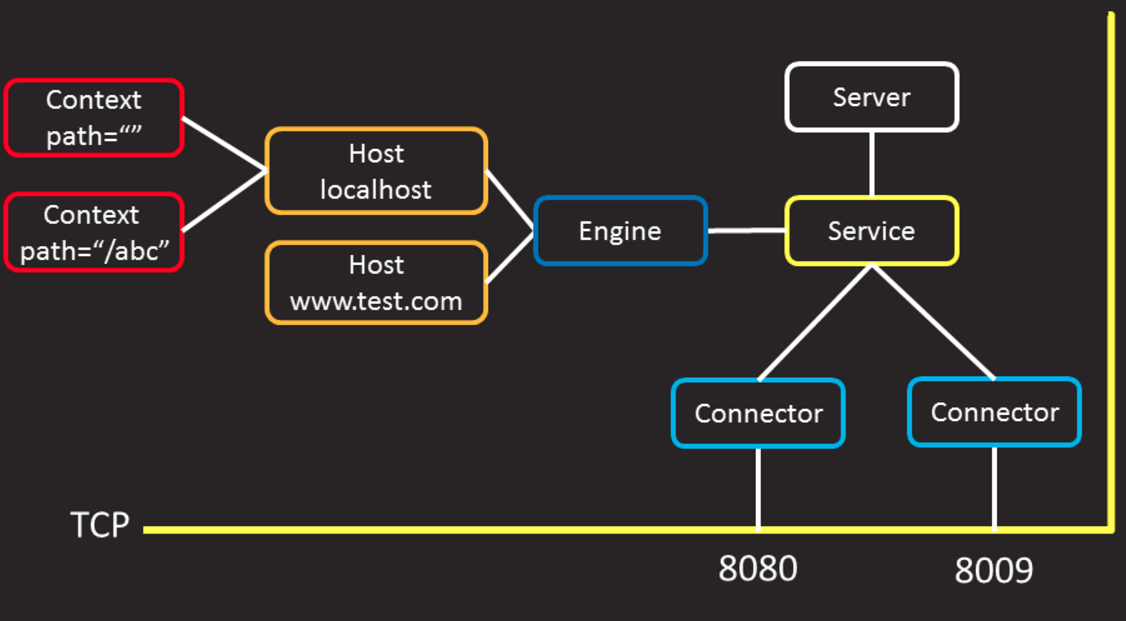
- Connector---->Represents Port
- Service------> Provide Services
- Server-------->server
- Host-----------> on behalf of virtual host
- When a client accesses a page from port 8080, he can access not only the Host above but also the Host below.
- Each virtual machine host for Apache and Nginx is port bound. Tomcat is not.
- For example, if Apache and Nginx configure a virtual host for an encrypted website, then that virtual host configured has encryption capabilities
- Tomcat only needs to configure encryption once and all websites can enjoy it. The following example shows
Install and deploy Tomcat server
problem
This case requires the Tomcat server to be deployed as follows:
- Install and deploy the JDK base environment
- Install and deploy Tomcat server
- Create a JSP test page, named test.jsp, that shows the current time of the server
Clients then access the Web server to verify the results:
- Use Firefox Browser to access port 8080 of Tomcat Server and browse the default home page
- Use Firefox Browser to access port 8080 of Tomcat Server and browse the default test page
Program
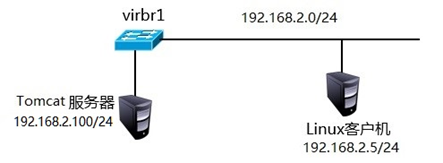
Use two RHEL7 virtual machines, one as a Tomcat server (192.168.2.100) and the other as a Linux client for testing (192.168.2.5), as shown in the diagram.Use RPM to install the JDK base environment and source installation to deploy Tomcat server
Step 1: Deploy Tomcat server software (192.168.2.100/24)
1. Install JDK environment using RPM
stay web1(192.168.2.100)Install on top
[root@web1 ~]# Yum-y install java-1.8.0-openjdk //install JDK (tab key can be used)
[root@web1 ~]# Java-version // View JAVA version
openjdk version "1.8.0_161"
OpenJDK Runtime Environment (build 1.8.0_161-b14)
OpenJDK 64-Bit Server VM (build 25.161-b14, mixed mode)
2. Install Tomcat (apache-tomcat-8.0.30.tar.gz package, available in lnmp_soft)
[root@web1 ~]# cd  lnmp_soft/
[root@web1 lnmp_soft]# ls apache-tomcat-8.0.30.tar.gz
apache-tomcat-8.0.30.tar.gz
[root@web1 ~]# tar -xf  apache-tomcat-8.0.30.tar.gz
[root@web1 ~]# mv apache-tomcat-8.0.30  /usr/local/tomcat
[root@web1 ~]# ls /usr/local/tomcat
bin/                                            //Main Program Directory
lib/                                            //Library File Directory
logs/                                           //Log Directory
temp/                                           //Temporary directory
work/                                           //Automatically compile directory jsp code conversion servlet
conf/                                           //Profile directory
webapps/                                        //page directory
3. Start the service
[root@web1 ~]# /usr/local/tomcat/bin/startup.sh
4. Server Verify Port Information
[root@web1 ~]# Ss-nutlp | grep java //View the port that java listens on
tcp        0      0 :::8080                   :::*                LISTEN      2778/java
tcp        0      0 :::8009                   :::*                LISTEN      2778/java
tcp        0      0 ::ffff:127.0.0.1:8005     :::*         LISTEN       2778/java
//Tip: If you check the port, port 8005 starts very slowly. The default tomcat startup requires a large amount of random data to be read from/dev/random. By default, the device generates random data very slowly. You can replace random with urandom using the following command.

[root@web1 tomcat]# strings  /dev/random
   #Tomcat reads random random data at startup. The more random data, the faster it starts
[root@web1 ~]# mv /dev/random  /dev/random.bak
[root@web1 ~]# ln -s /dev/urandom  /dev/random
//Alternatively, scheme two can be used to solve the problem:

[root@web1 ~]# yum install rng-tools
[root@web1 ~]# systemctl start rngd
[root@web1 ~]# systemctl enable rngd
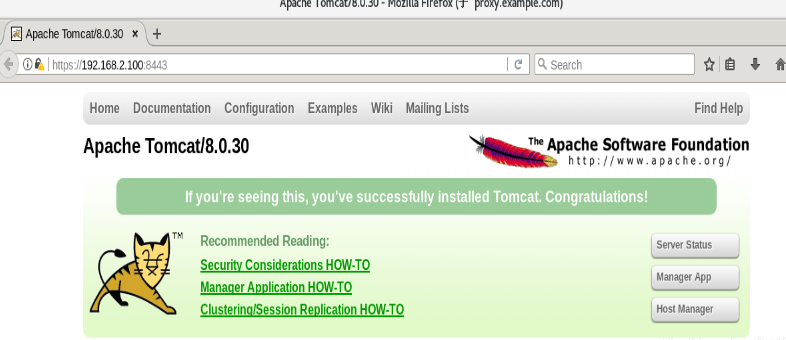
5. Client Browse Test Page (proxy as client)
[root@proxy~]# firefox 192.168.2.100:8080
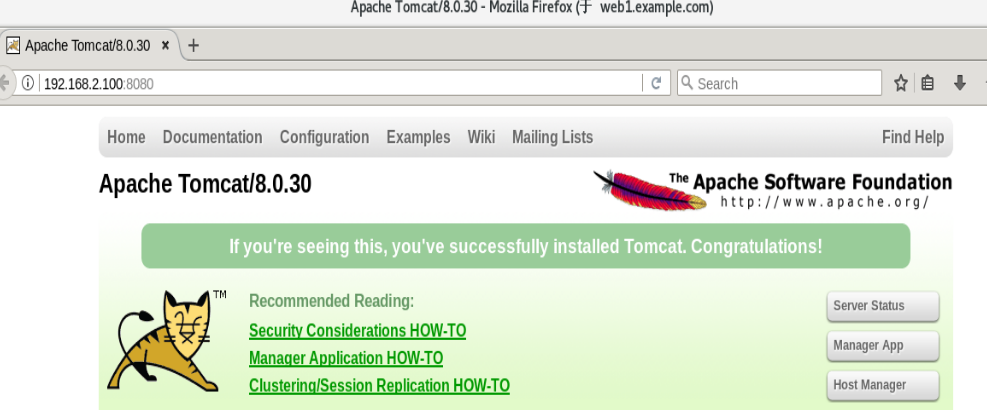
See if Tomcat's default page exists
[root@web1 tomcat]# cd  /usr/local/tomcat/webapps/ROOT/
[root@web1 ROOT]# ls
asf-logo.png       bg-middle.png    bg-upper.png  index.jsp          tomcat.gif        tomcat.svg
asf-logo-wide.gif  bg-nav-item.png  build.xml     RELEASE-NOTES.txt  tomcat.png        WEB-INF
bg-button.png      bg-nav.png       favicon.ico   tomcat.css         tomcat-power.gif
   #Be sure to end with.jsp
Step 2: Modify the Tomcat configuration file
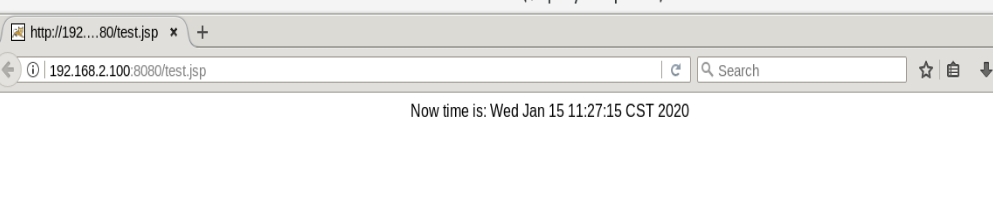
Create Test JSP Page
[root@web1 ~]# vim  /usr/local/tomcat/webapps/ROOT/test.jsp
<html>
<body>
<center>
Now time is: <%=new java.util.Date()%>            //Display the current time of the server
</center>
</body>
</html>
Step 3: Validation testing
Client Browse Test Page (proxy acts as client role)
[root@proxy ~]# firefox http://192.168.2.100:8080
[root@proxy ~]# firefox http://192.168.2.100:8080/test.jsp
Deploying virtual hosts using Tomcat
problem
Use Tomcat to deploy encrypted virtual hosts to achieve the following requirements:
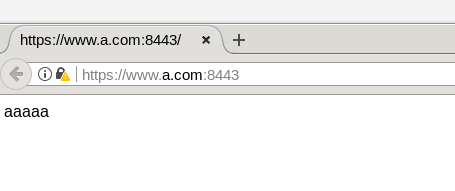
- Implement two domain-based virtual hosts: www.a.com and www.b.com
- Page root path accessed using www.a.com domain name is/usr/local/tomcat/a/ROOT
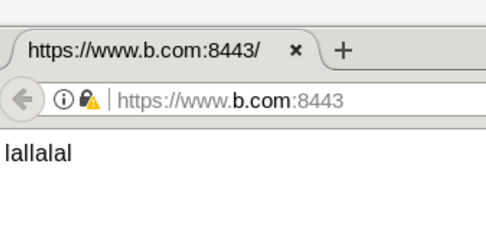
- The root path of the page accessed using the www.b.com domain name is/usr/local/tomcat/b/base
- When you visit www.a.com/test, the page automatically jumps to a page in the / var/www/html directory
- Support SSL encrypted communication when accessing pages
- Private key, certificate store path is/usr/local/tomcat/conf/cert
- Each virtual host has a separate access log file
- Configuring the tomcat cluster environment
programme
Modify the server.xml configuration file, create a virtual host with two domain names, and modify the following two parameter blocks:
# cat /usr/local/tomcat/conf/server.xml
<Server>
   <Service>
     <Connector port=8080 />
     <Connector port=8009 />
     <Engine name="Catalina" defaultHost="localhost">
<Host name="www.a.com" appBase="a" unpackWARS="true" autoDeploy="true">
</Host>
<Host name="www.b.com" appBase="b" unpackWARS="true" autoDeploy="true">
</Host>
... ...
Step 1: Configure the server virtual host
1. Modify the server.xml configuration file to create a virtual host
[root@web1 ~]# vim  /usr/local/tomcat/conf/server.xml
123       <Host name="www.a.com"  appBase="a"
124             unpackWARs="true" autoDeploy="true">
125 </Host>
126       <Host name="www.b.com"  appBase="b"
127             unpackWARs="true" autoDeploy="true">
128 </Host>
129       <Host name="localhost"  appBase="webapps"
130             unpackWARs="true" autoDeploy="true">
       #Copy the template on 123 lines and paste it on top of 123 lines to make two virtual hosts.
       appBase Indicates that subdirectories under this directory will be automatically deployed as applications
       unpackWARs Represents automatic decompression
       autoDeploy Represents an automatic deployment update
       #Strict case sensitivity!!!!!!!!!
2. Create the page root path for the virtual host
[root@web1 ~]# mkdir -p /usr/local/tomcat/{a,b}/ROOT
[root@web1 ~]# ls /usr/local/tomcat/a
[root@web1 ~]# ls /usr/local/tomcat/b
ROOT
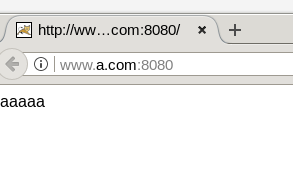
[root@web1 ~]# echo "aaaaa" > /usr/local/tomcat/a/ROOT/index.html
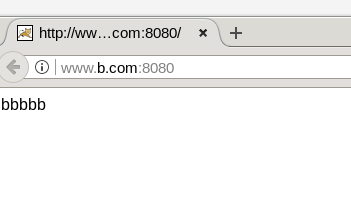
[root@web1 ~]# echo "bbbbb" > /usr/local/tomcat/b/ROOT/index.html3. Restart the Tomcat server
[root@web1 ~]# /usr/local/tomcat/bin/shutdown.sh
[root@web1 ~]# /usr/local/tomcat/bin/startup.sh
#Re-check port after restart to confirm successful restart
[root@web1 ~]# ss  -anutlp  |  grep  java
tcp    LISTEN     0      1      ::ffff:127.0.0.1:8005                 :::*                   users:(("java",pid=5404,fd=73))
tcp    LISTEN     0      100      :::8009                 :::*                   users:(("java",pid=5404,fd=51))
tcp    LISTEN     0      100      :::8080                 :::*                   users:(("java",pid=5404,fd=46))
4. The client sets the host file and browses the test page for testing (proxy acts as the client role)
Note: Use -X parameter for ssh Remote connection!!!
[root@proxy ~]# vim /etc/hosts
... ...
192.168.2.100      www.a.com  www.b.com
[root@proxy ~]# firefox http://www.a.com:8080///Note that the port accessed is 8080
[root@proxy ~]# firefox http://www.b.com:8080/
[root@proxy ~]# curl  www.a.com:8080
aaaaa
[root@proxy ~]# curl  www.b.com:8080
bbbbb
Step 2: Modify the home page directory of the www.b.com website to base
1. Use the docBase parameter to modify the default site home page path
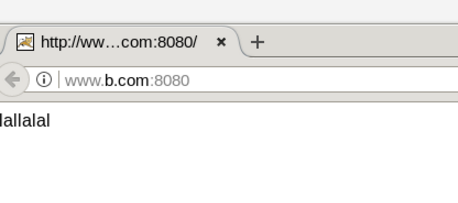
[root@web1 ~]# vim  /usr/local/tomcat/conf/server.xml
123       <Host name="www.a.com"  appBase="a"
124             unpackWARs="true" autoDeploy="true">
125 </Host>
126       <Host name="www.b.com"  appBase="b"
127             unpackWARs="true" autoDeploy="true">
128         <Context path="" docBase="base"/>
            #Writing more than one <Context path> is allowed in the same virtual host. Context path is equivalent to address jump. When accessing a path under Context path, the path under docBase is actually accessed
129 </Host>
130       <Host name="localhost"  appBase="webapps"
131             unpackWARs="true" autoDeploy="true">
[root@web1 ~]# mkdir  /usr/local/tomcat/b/base
[root@web1 ~]# echo  "lallalal"  >  /usr/local/tomcat/b/base/index.html
[root@web1 ~]# /usr/local/tomcat/bin/shutdown.sh
[root@web1 ~]# /usr/local/tomcat/bin/startup.sh
2. Test to see if the page is correct (proxy acts as client role)
[root@proxy ~]# firefox http://www.b.com:8080///Result is page content in base directory
[root@proxy ~]# curl http://www.b.com:8080/
lallalal
Step 3: Jump
1. When the user visits http://www.a.com/test, open a page in the/var/www/html directory
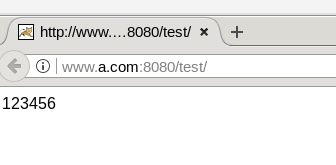
[root@web1 ~]# vim /usr/local/tomcat/conf/server.xml
... ...
123       <Host name="www.a.com"  appBase="a"
124             unpackWARs="true" autoDeploy="true">
125         <Context path="/test" docBase="/var/www/html"/>
126 </Host>
127       <Host name="www.b.com"  appBase="b"
128             unpackWARs="true" autoDeploy="true">
129         <Context path="" docBase="base"/>
130 </Host>
131       <Host name="localhost"  appBase="webapps"
132             unpackWARs="true" autoDeploy="true">
.. ..
[root@web1 ~]# echo "123456" >  /var/www/html/index.html
[root@web1 ~]# /usr/local/tomcat/bin/shutdown.sh
[root@web1 ~]# /usr/local/tomcat/bin/startup.sh
[root@web1 ~]# ss  -anutlp  |  grep java
2. Test to see if the page is correct (proxy acts as client role)
[root@proxy ~]# firefox http://www.a.com:8080/test
//Return the contents of /var/www/html/index.html
//Note that the port accessed is 8080
Step 4: Configure Tomcat to support an SSL-encrypted website
1. Create a private key and certificate file for encryption
[r
oot@web1 ~]# Keytool-genkeypair-alias tomcat-keyalg RSA-keystore/usr/local/tomcat/keystore*//Prompt for password: 123456
//-genkeypair
//-alias tomcat) key alias
//-keyalg RSA Defines the key algorithm as RSA algorithm
//-keystore) Definition key file stored in: /usr/local/tomcat/keystore
2. Modify the server.xml configuration file again to create a Connector that supports encrypted connections
[root@web1 ~]# vim /usr/local/tomcat/conf/server.xml
... ...
85  <Connector port="8443" protocol="org.apache.coyote.http11.Http11NioProtocol"
maxThreads="150" SSLEnabled="true" scheme="https" secure="true"
keystoreFile="/usr/local/tomcat/keystore" keystorePass="123456" clientAuth="false" sslProtocol="TLS" />
//Note, by default this Connector is commented out. Delete 84 and 88 lines of comment and add key information
3. Restart the Tomcat server
[root@web1 ~]# /usr/local/tomcat/bin/shutdown.sh
[root@web1 ~]# /usr/local/tomcat/bin/startup.sh
[root@web1 ~]# ss  -anutlp |  grep java
tcp    LISTEN     0      1      ::ffff:127.0.0.1:8005                 :::*                   users:(("java",pid=6115,fd=77))
tcp    LISTEN     0      100      :::8009                 :::*                   users:(("java",pid=6115,fd=52))
tcp    LISTEN     0      100      :::8080                 :::*                   users:(("java",pid=6115,fd=46))
tcp    LISTEN     0      100      :::8443                 :::*                   users:(("java",pid=6115,fd=51))
#The port becomes four default ports
4. The client sets the host file and browses the test page for testing (proxy acts as the client role)
[root@proxy ~]# vim /etc/hosts
... ...
192.168.2.100      www.a.com  www.b.com
[root@proxy ~]# firefox https://www.a.com:8443/
[root@proxy ~]# firefox https://www.b.com:8443/
[root@proxy ~]# firefox https://192.168.2.100:8443/
Step 5: Configure Tomcat logs
1. Set up different log files for each virtual host
[root@web1 ~]# vim /usr/local/tomcat/conf/server.xml .. .. <Host name="www.a.com" appBase="a" unpackWARS="true" autoDeploy="true"> <Context path="/test" docBase="/var/www/html/" /> #Copy this section of Valve from the default localhost virtual host and modify it appropriately <Valve className="org.apache.catalina.valves.AccessLogValve" directory="logs" prefix="a_access" suffix=".txt" pattern="%h %l %u %t "%r" %s %b" /> </Host> <Host name="www.b.com" appBase="b" unpackWARS="true" autoDeploy="true"> <Context path="" docBase="base" /> <Valve className="org.apache.catalina.valves.AccessLogValve" directory="logs" prefix="www_a_com" suffix=".log" pattern="%h %l %u %t "%r" %s %b" /> </Host> .. ..
2. Restart the Tomcat server
[root@web1 ~]# /usr/local/tomcat/bin/shutdown.sh
[root@web1 ~]# /usr/local/tomcat/bin/startup.sh
3. View server log files
[root@web1 ~]# cd  /usr/local/tomcat/logs

[root@web1 logs]# ls
catalina.2020-01-15.log  host-manager.2020-01-15.log  localhost_access_log.2020-01-15.txt  www_a_com.2020-01-15.log
catalina.out             localhost.2020-01-15.log     manager.2020-01-15.log

[root@web1 logs]# cat  www_a_com.2020-01-15.log      #First time view, no access record, access by client
[root@proxy ~]# firefox  http://www.a.com:8080 #Client Access

[root@web1 logs]# cat  www_a_com.2020-01-15.log
192.168.2.5 - - [15/Jan/2020:15:52:46 +0800] "GET / HTTP/1.1" 200 6
192.168.2.5 - - [15/Jan/2020:15:52:46 +0800] "GET /favicon.ico HTTP/1.1" 404 1016
- Step 6: Expand the experiment (configure the Tomcat cluster)
1.Configure the Nginx scheduler on the 192.168.4.5 host
[root@proxy ~]# vim  /usr/local/nginx/conf/nginx.conf
http{
    upstream toms {
        server 192.168.2.100:8080;
        server 192.168.2.200:8080;
    }
    server  {
        listen 80;
        server_name localhost;
        location / {
            proxy_pass  http://toms;
        }
    }
}
2. Configure the Tomcat scheduler on 192.168.2.100 and 192.168.2.200 hosts
Take Web1 as an example:
[root@web1 ~]# Yum-y install java-1.8.0-openjdk //install JDK
[root@web1 ~]# tar -xzf  apache-tomcat-8.0.30.tar.gz
[root@web1 ~]# mv apache-tomcat-8.0.30  /usr/local/tomcat
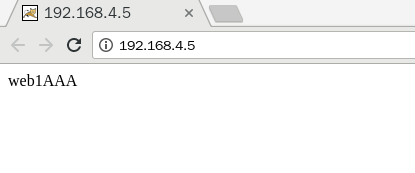
3. To better see the difference between the two web servers, modify the home page
[root@web1 ~]# vim /usr/local/tomcat/conf/server.xml
..  ..
     <Host name="localhost"  appBase="webapps"
            unpackWARs="true" autoDeploy="true">
        <Context path="" docBase="base"/>
..  ..
</Host>
[root@web1 ~]# mkdir /usr/local/tomcat/webapps/base
[root@web1 ~]# echo "web1AAA" > /usr/local/tomcat/webapps/base/index.html
4. Start the service
[root@web1 ~]# /usr/local/tomcat/bin/shutdown.sh
[root@web1 ~]# /usr/local/tomcat/bin/startup.sh
[root@web1 ~]# ss -ntulp | grep java
tcp    LISTEN     0      1      ::ffff:127.0.0.1:8005                 :::*                   users:(("java",pid=6852,fd=85))
tcp    LISTEN     0      100      :::8009                 :::*                   users:(("java",pid=6852,fd=55))
tcp    LISTEN     0      100      :::8080                 :::*                   users:(("java",pid=6852,fd=46))
tcp    LISTEN     0      100      :::8443                 :::*                   users:(("java",pid=6852,fd=51))
5. Client Validation
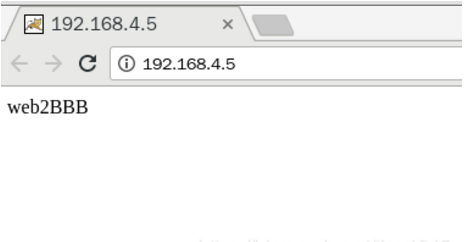
To prevent data caching, you can use the real host's google-chrome to access the proxy server and enter Ctrl+F5 to refresh the page.
[root@client ~]# curl  192.168.4.5
web2BBB                              #web2 Modified Default Page
[root@client ~]# curl  192.168.4.5
web1AAA                              #web1 Modified Default Page
[root@client ~]# curl  192.168.4.5
web2BBB
[root@client ~]# curl  192.168.4.5
web1AAA
Varnish Proxy Server
What is CDN
The cdn is fully known as the Content Delivery Network.The basic idea is to avoid as many bottlenecks and links as possible that may affect the speed and stability of data transmission on the Internet, so as to make content transmission faster and more stable.By placing node servers everywhere in the Internet to form a virtual network only layer on the basis of the existing Internet, the cdn system can redirect users'requests to the nearest service node based on the comprehensive information of network traffic and individual nodes' connection, load status, distance to users and response time.The purpose is to provide users with access to what they need, to solve the network congestion problem, and to improve the response speed of users.
Overview of Proxy Server
- proxy, agent, broker, intermediary
- Proxy User Handles Transactions
Provides resources that are normally inconvenient or inaccessible
- Application Scenarios
- web Access Acceleration (Forward/Reverse)
- IP disguise, "flip wall"
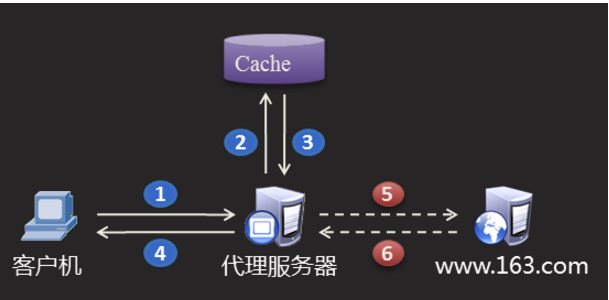
- Proxy Server Working Mechanism
- Reuse of Cache Pool
- Line transfer
Varnish Server
- Varnish is a high performance, open source reverse proxy server and a web cache proxy
- Varnish has many advantages, such as high performance, fast speed, convenient management and so on.
Configure Varnish Server
problem
By configuring the Varnish cache server, you achieve the following goals:
- Accelerate Backend Web Services with Varnish
- Proxy servers can cache remote Web server pages locally
- Remote Web servers are transparent to client users
- Improving the responsiveness of Web sites by using caching mechanisms
- Using the varnishadm command to manage cached pages
- View Varnish status using the varnishstat command
programme
Install Varnish Cache Server via Source Code Compilation
Compile and install Varnish software
Modify the configuration file to cache the proxy source Web server for Web acceleration
Use three RHEL7 virtual machines, one as a Web server (192.168.2.100), one as a Varnish proxy server (192.168.4.5, 192.168.2.5), and one as a Linux client for testing (192.168.4.10), as shown in the diagram.
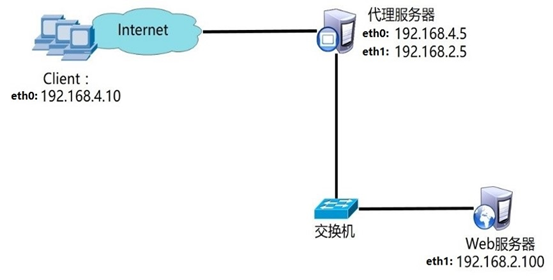
For Web server deployment, only nginx or httpd software is installed, service is started, and test home page file is generated. The default httpd site root path is / var/www/html, the first page document name is index.html, the default nginx site root path is / usr/local/nginx/html, and the default home page is index.html.The following experiment takes httpd as a Web server.
Step 1: Build a Web server
1. Use yum to install web packages
[root@web1 ~]# yum -y install httpd
2. Enable the httpd service (note that nginx needs to be turned off, otherwise port conflicts)
[root@web1 ~]# systemctl start httpd
httpd Services pass by default TCP 80 Port listens for client requests:

[root@web1 ~]# netstat  -anptu  |  grep httpd
tcp        0        0        :::80        :::*        LISTEN        2813/httpd
3. Create test files for Web access
Create a first page file named index.html under the root directory of the website/var/www/html:

[root@web1 ~]# cat /var/www/html/index.html
123456
4. Test whether the page is working (proxy server tests background web)
[root@proxy ~]# firefox http://192.168.2.100
Step 2: Deploy the Varnish cache server (192.168.4.5)
1. Compile installation software
[root@proxy ~]# Yum-y install GCC readline-devel //install software dependency packages
[root@proxy ~]# Yum-y install python-docutils //install software dependency packages
#If nginx is installed, the following do not need to be installed
[root@proxy ~]# Yum-y install pcre-devel //install software dependency packages
[root@proxy ~]# Yum-y install python-docutils //install software dependency packages


[root@proxy ~]# cd lnmp_soft/             #The source packages are all here in the practice environment
[root@proxy lnmp_soft]# ls
apache-tomcat-8.0.30.tar.gz             nginx-1.15.8.tar.gz                                      redis-3.0.6.tar.gz
apache-tomcat-9.0.6.tar.gz              nginx.conf.bak                                           tomcat_session
buffer.sh                               nginx.spec                                               varnish-5.2.1.tar.gz
[root@proxy ~]# Useradd-s/sbin/nologin varnish //Create Account
[root@proxy ~]# tar -xf varnish-5.2.1.tar.gz
[root@proxy ~]# cd varnish-5.2.1
[root@proxy varnish-5.2.1]# ./configure
[root@proxy varnish-5.2.1]# make && make install
2. Copy the configuration file (note relative and absolute paths)
[root@proxy varnish-5.2.1]# cp  etc/example.vcl   /usr/local/etc/default.vcl
    #The name after the copy starts at random
3. Modify the proxy profile
[root@proxy varnish-5.2.1]# vim  /usr/local/etc/default.vcl
 16 backend default {                          #Modify Background Original Site
 17     .host = "192.168.2.100";
 18     .port = "80";
 19 }
 .. ..
4. Start the service
[root@proxy varnish-5.2.1]# varnishd  -f  /usr/local/etc/default.vcl
Debug: Platform: Linux,3.10.0-862.el7.x86_64,x86_64,-junix,-smalloc,-smalloc,-hcritbit
Debug: Child (14530) Started

#Watch to see if the port is occupied!!!!!!!!!!!

//Other options for the varnishd command are described below:
//Varnishd-s malloc, 128M Defines that varnish uses memory as the cache with 128M of space
//Varnishd-s file, /var/lib/varnish_storage.bin, 1G defines varnish to use file as cache
Step 3: Client Test
Client opens browser access
[root@client ~]# curl  http://192.168.4.5
123456
Step 4: Other operations
1. View the varnish log
[root@proxy ~]# varnishlog //varnish log
[root@proxy ~]# varnishncsa //Access log
2. Update the cached data, after the background web server updates the page content, the user accesses the proxy server to see the same data as before, indicating that the data in the cache is out of date and needs to be updated (automatic updates by default, but not real-time updates)
[root@proxy ~]# varnishadm
varnish> ban req.url ~ .*
//Empty cache data, support regular expressions


//Example:
[root@web1 logs]# cd  /var/www/html          #Switch to Page Directory Root Path on web1 Server
[root@web1 html]# echo  cc  >  c.html        #Write Web Page Files for Testing
[root@client ~]# curl  http://192.168.4.5/c.html
cc                                            #Client access, cc at this time
[root@web1 html]# echo  11  >  c.html         #Make a change in the background at this time
[root@client ~]# curl  http://192.168.4.5/c.html
cc                                            #The client is still cc, indicating that what the client sees at this point is cached data, which is automatically updated in about a minute or two


//Manually clear the cache:
[root@web1 html]# echo  dd  >  d.html        #Write Web Page Files for Testing
[root@client ~]# curl  http://192.168.4.5/d.html
dd                                           #Access Page
[root@web1 html]# echo  44  >  d.html        #Make a change in the background
[root@client ~]# curl  http://192.168.4.5/d.html
dd                                           #This is still dd
[root@proxy varnish-5.2.1]# varnishadm       #Manual modification clears d.html cache
varnish> ban req.url ~ d.html
200
[root@client ~]# curl  http://192.168.4.5/d.html
44                                           #Client access changes directly to new data\

