I. Introduction:
ButterKnife is a relatively easy-to-understand open source framework for annotations.
1. Powerful View binding and Click event handling functions, simplify the code and improve development efficiency;
2. Handle the ViewHolder binding problem in Adapter conveniently;
3. The running time will not affect the efficiency of APP, and it is convenient to use and configure.
4. The code is clear and readable.
2. Use steps:
- Install the ButterKnife plug-in for reference: Android Studio installs the ButterKnife plug-in
-
Add:
dependencies { classpath 'com.android.tools.build:gradle:2.2.3' classpath 'com.neenbedankt.gradle.plugins:android-apt:1.8' //Additional // NOTE: Do not place your application dependencies here; they belong // in the individual module build.gradle files } -
Add in the build.gradle file of app
apply plugin: 'com.android.application'
apply plugin: 'com.neenbedankt.android-apt'  //Additional

......

dependencies {
    .........
    compile 'com.jakewharton:butterknife:8.1.0'    //Additional
    apt 'com.jakewharton:butterknife-compiler:8.1.0'   //Additional
}
3. Unlocking Skills:
-
Eliminate findViewById()
-
Use in Activity
-
Once we:
mTextView1 = (TextView) findViewById(R.id.tv_1);
-
Now we:
@BindView(R.id.butter_text_view_2)
TextView mTextView2;
- Note: View variables cannot be declared private ly or static ally and are called after the layout is set: ButterKnife.inject(this). Normally, it doesn't matter. We all do Generate auto-plug-in generation in the layout file location.
-
-
Use in Fragment
Also call ButterKnife.inject(this, view) after loading the layout, passing an additional parameter view. Add comments to the control. @ InjectView(R.id.fragment_text_view) can be used normally.View view = inflater.inflate(R.layout.fragment_simple, container, false); ButterKnife.inject(this, view); @BindView(R.id.fragment_text_view) TextView mTextView; mTextView.setText("TextView in Fragment are found!"); -
Use in Adapter ViewHolder
In Adapter, you can call ButterKnife.inject(this, view) within the constructor, as well as annotate above the control declaration.static class ViewHolder { @BindView(R.id.person_name) TextView name; public ViewHolder(View view) { ButterKnife.inject(this, view); } }
-
-
Omit setOnClickListener()
-
Once we:
bt.setOnClickListener(new View.OnClickListener() { @Override public void onClick(View v) { finish(); } }); -
Now we:
@OnClick(R.id.basic_finish_a_button) void finishA(View view) { finish(); } - Note: Note that the method here is still not private and static, and can have either a parameter View or not.
-
-
Special listenable methods for some controls
- ListView click on OnItemClick
- On Checked Changed of CheckBox
- EditText plus addTextChangedListener
See Demo for example.
-
Binding the same event handling method for multiple views with multiple IDS at the same time
The id of multiple view s should be wrapped in {}, "," separated.@OnClick({R.id.bt1, R.id.bt2, R.id.bt3, R.id.bt4}) void editViewsClicked() { Toast.makeText(this, "You click the Button!", Toast.LENGTH_SHORT).show(); }
Demo examples:
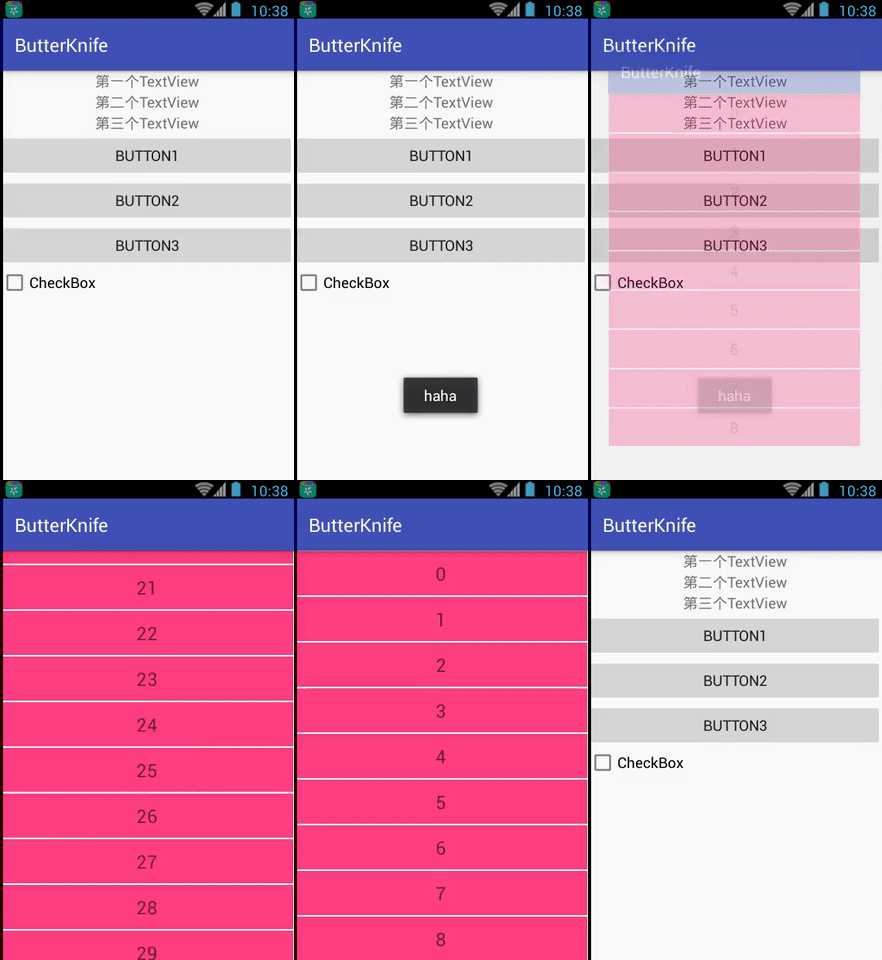
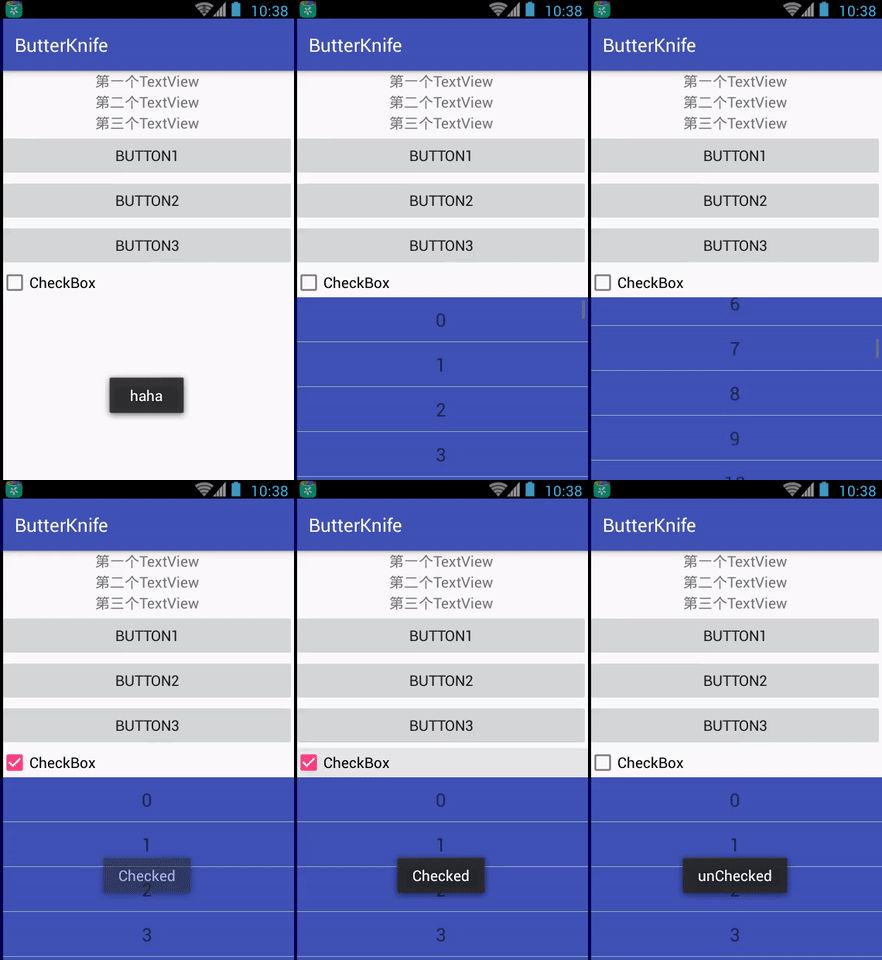
- Firstly, the effect map is shown.


-
Some of the uses in MainActivity are:
-
Binding View
@BindView(R.id.tv_1) TextView mTv1; @BindView(R.id.tv_2) TextView mTv2; @BindView(R.id.tv_3) TextView mTv3; @BindView(R.id.bt1) Button mBt1; @BindView(R.id.bt2) Button mBt2; @BindView(R.id.bt3) Button mBt3; @BindView(R.id.cb1) CheckBox mCb1; @BindView(R.id.activity_main) LinearLayout mActivityMain; @Override protected void onCreate(Bundle savedInstanceState) { super.onCreate(savedInstanceState); setContentView(R.layout.activity_main); ButterKnife.bind(this); } -
Setting Click Events
-
Single View Binding Event
@OnClick(R.id.bt2) void jumpToSecondActivity() { startActivity(new Intent(MainActivity.this, SecondActivity.class)); } @OnClick(R.id.bt3) void jumpToOneFragment() { FragmentManager fragmentManager = getSupportFragmentManager(); FragmentTransaction fragmentTransaction = fragmentManager.beginTransaction(); FirstFragment firstFragment = new FirstFragment(); fragmentTransaction.add(R.id.fl_container, firstFragment); fragmentTransaction.commit(); } -
Multiple View s Bind an Event Together
@OnClick({R.id.bt1, R.id.tv_1}) void click() { Toast.makeText(MainActivity.this, "haha", Toast.LENGTH_SHORT).show(); } -
OnCheckedChanged Method for Listening to checkBox
@OnCheckedChanged(R.id.cb1)
void checkBoxCheckedChanged(){
    if(mCb1.isChecked())
        Toast.makeText(MainActivity.this, "Checked", Toast.LENGTH_SHORT).show();
    else
        Toast.makeText(MainActivity.this, "unChecked", Toast.LENGTH_SHORT).show();
}
-
-
-
Some uses in Second Activity (Recycler View):
-
SecondActivity.java, mainly has a RecyclerView. RecyclerView does not support onItemClick, so Butterknife is gone.
public class SecondActivity extends AppCompatActivity { @BindView(R.id.recyclerView) RecyclerView mRecyclerView; private List<String> mList = new ArrayList<>(); @Override protected void onCreate(@Nullable Bundle savedInstanceState) { super.onCreate(savedInstanceState); setContentView(R.layout.activity_second); ButterKnife.bind(this); initData(); mRecyclerView.setAdapter(new RecyclerAdapter(mList, this)); mRecyclerView.setLayoutManager(new LinearLayoutManager(this)); } private void initData() { for (int i = 0; i < 30; i++) mList.add(i + ""); } } -
The binding in Recycler Adapter is very similar to the listview binding in the Fragment below.
public class RecyclerAdapter extends RecyclerView.Adapter<RecyclerAdapter.RecyclerViewHolder> {

    private List<String> data;
    private Context mContext;

    public RecyclerAdapter(List<String> data, Context context) {
        this.data = data;
        mContext = context;
    }

    @Override
    public RecyclerViewHolder onCreateViewHolder(ViewGroup parent, int viewType) {
        View view = LayoutInflater.from(mContext).inflate(R.layout.item_recycler, parent, false);
        RecyclerViewHolder holder = new RecyclerViewHolder(view);
        return holder;
    }

    @Override
    public void onBindViewHolder(RecyclerViewHolder holder, int position) {
        holder.mItemRecyclerTv.setText(data.get(position));
    }

    @Override
    public int getItemCount() {
        return data.size();
    }

    public class RecyclerViewHolder extends RecyclerView.ViewHolder {

        @BindView(R.id.item_recycler_tv)
        TextView mItemRecyclerTv;

        public RecyclerViewHolder(View itemView) {
            super(itemView);
            ButterKnife.bind(this, itemView);
        }
    }
}
-
-
Fragment uses:
-
The ListView control is bound in FirstFragment and the click event is monitored by @OnItemClick(R.id.listview), in which the position parameter can be passed.
public class FirstFragment extends Fragment { @BindView(R.id.listview) ListView mListview; Unbinder unbinder; private List<String> mList = new ArrayList<>(); @Nullable @Override public View onCreateView(LayoutInflater inflater, @Nullable ViewGroup container, @Nullable Bundle savedInstanceState) { View view = inflater.inflate(R.layout.fragment_first, container, false); unbinder = ButterKnife.bind(this, view); initData(); mListview.setAdapter(new ListAdapter(getActivity(), mList)); return view; } private void initData() { for (int i = 0; i < 30; i++) mList.add(i + ""); } @OnItemClick(R.id.listview) void onListItemClick(int pos){ Toast.makeText(getActivity(), mList.get(pos), Toast.LENGTH_SHORT).show(); } @Override public void onDestroyView() { super.onDestroyView(); unbinder.unbind(); } } -
The inflate layout in ListAdapter, butterknife can automatically generate ViewHolder for us, and the rest, as usual, copy the four methods of the Adapter.
public class ListAdapter extends BaseAdapter {

    private List<String> data;
    private Context mContext;

    public ListAdapter(Context context, List<String> data) {
        mContext = context;
        this.data = data;
    }

    @Override
    public int getCount() {
        return data.size();
    }

    @Override
    public Object getItem(int position) {
        return data.get(position);
    }

    @Override
    public long getItemId(int position) {
        return position;
    }

    @Override
    public View getView(int position, View convertView, ViewGroup parent) {
        ViewHolder holder = null;
        if(convertView == null){
            convertView = View.inflate(mContext, R.layout.item_list, null);
            holder = new ViewHolder(convertView);
            convertView.setTag(holder);
        }else {
            holder = (ViewHolder) convertView.getTag();
        }
        holder.mItemRecyclerTv.setText(data.get(position));
        return convertView;
    }

    static class ViewHolder {
        @BindView(R.id.item_recycler_tv)
        TextView mItemRecyclerTv;

        ViewHolder(View view) {
            ButterKnife.bind(this, view);
        }
    }
}
-