In many APP applications, you can see that the form of multicast is everywhere, taking up the least space, displaying more content and the user experience is quite good. Today, let's talk about how to use multicast in wechat applets.
Open our demonstration project, and open the wechat applet Developer Center document: Wechat Developer Center carousel component document
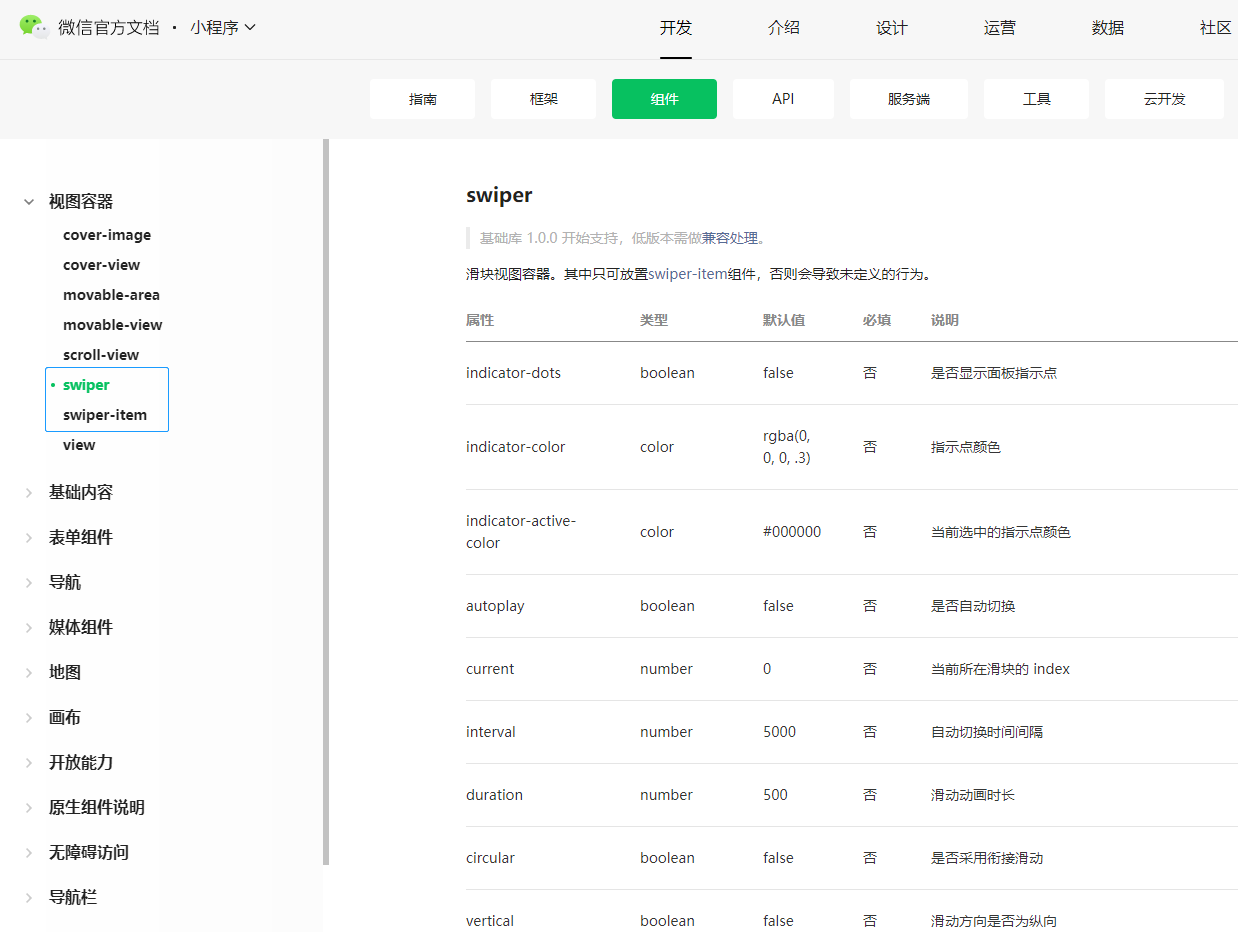
As you can see, wechat has implemented the corresponding components, we just need to learn how to use them.
Here's the point: unlike the native implementation of the carousel control, the carousel of wechat applet must be in the form of parent container and child project to form the effect of carousel. The native control basically adds child views to scrollView. In fact, strictly speaking, the implementation scheme is the same. The parent container supports the pipe view, the parent container realizes the sliding effect, and the child view displays the contents of the rotation.
Use in wechat applet swiper As the parent container, you have the right to interpret it as scrollView. use swiper-item To render everything as a child view.
Open the mainPage.wxml File:
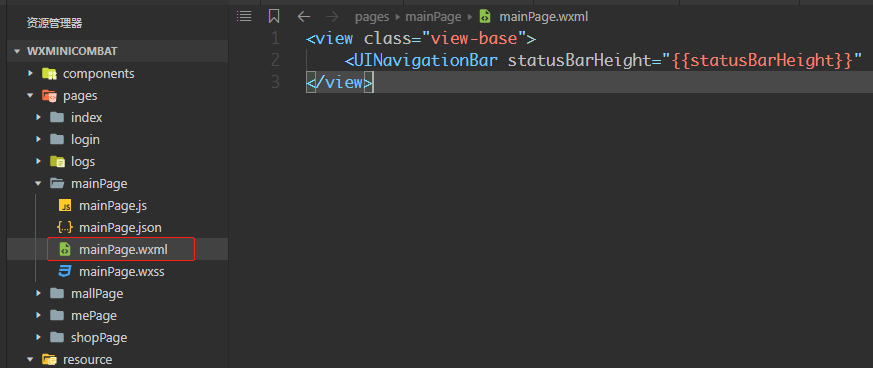
Copy and paste the following code below the navigation bar:
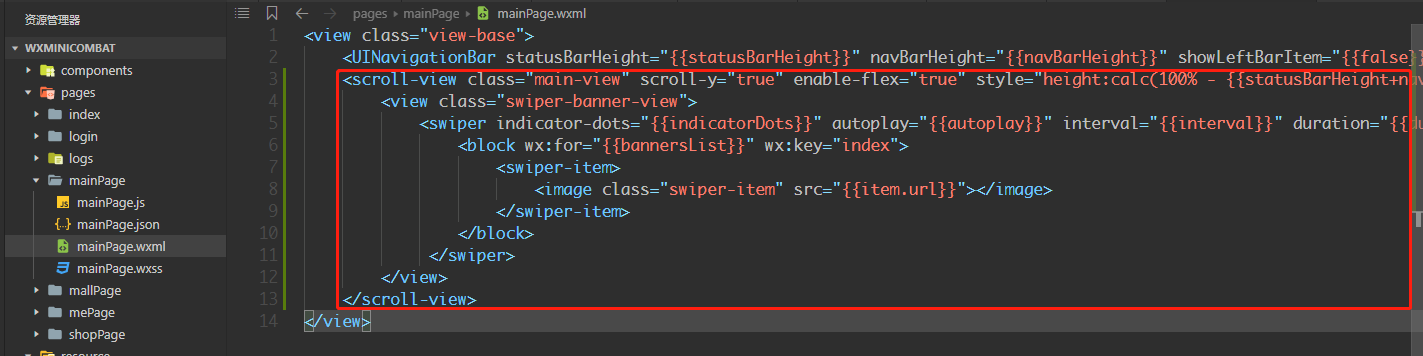
<scroll-view class="main-view" scroll-y="true" enable-flex="true" style="height:calc(100% - {{statusBarHeight+navBarHeight}}px);top:{{statusBarHeight+navBarHeight}}px">
<view class="swiper-banner-view">
<swiper indicator-dots="{{indicatorDots}}" autoplay="{{autoplay}}" interval="{{interval}}" duration="{{duration}}" indicator-color="darkgray" indicator-active-color="black" style="height:100%">
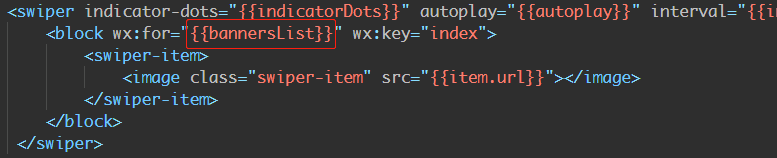
<block wx:for="{{bannersList}}" wx:key="index">
<swiper-item>
<image class="swiper-item" src="{{item.url}}"></image>
</swiper-item>
</block>
</swiper>
</view>
</scroll-view>
</view>Here we analyze the code of page layout:
1. The scroll view component adds the following inline style
style="height:calc(100% - {{statusBarHeight+navBarHeight+tailsHeight}}px);top:{{statusBarHeight+navBarHeight}}px"
The calc() function is used for dynamic calculation. It is generally used for percentage and numerical calculation. The format is Calc (percentage - xx unit). Note that spaces must appear on the left and right sides of the minus sign, otherwise it is invalid.

2. swiper , as stated in the official document, we have added several property configurations. Whether to display indicator dots, whether to automatically play autoplay, interval of rotation time, animation execution time duration, indicator color of indicator normal color, indicator active color
Interval refers to the interval between rounds, in ms. Animation execution time duration refers to the execution time of the current rotation view animation, in ms.
3. Data array of round robin, add subview content through for loop
4. Here, why do we add a scroll view? There is no other reason, just for better management of subviews, and for the subsequent addition of other content on this page for business logic layering. The structure is clear, which is very convenient for our later maintenance and modification.
open mainPage.wxss , add the following styles

Copy and paste the following.
.main-view {
    position: fixed;
    width: 100%;
    background-color: white;

    display: flex;
    flex-direction: column;
    justify-content: flex-start;
    align-items: center;
  }

.swiper-banner-view
{
    position: relative;
    width: 100%;
    height:50vmin;
}


.swiper-item
{
    position: relative;
    width: 100%;
    height: 100%;

    background-color: rgb(239, 240, 245);
}
open mainPage.js Add the following code: mainly related to page control and rotation data source array.
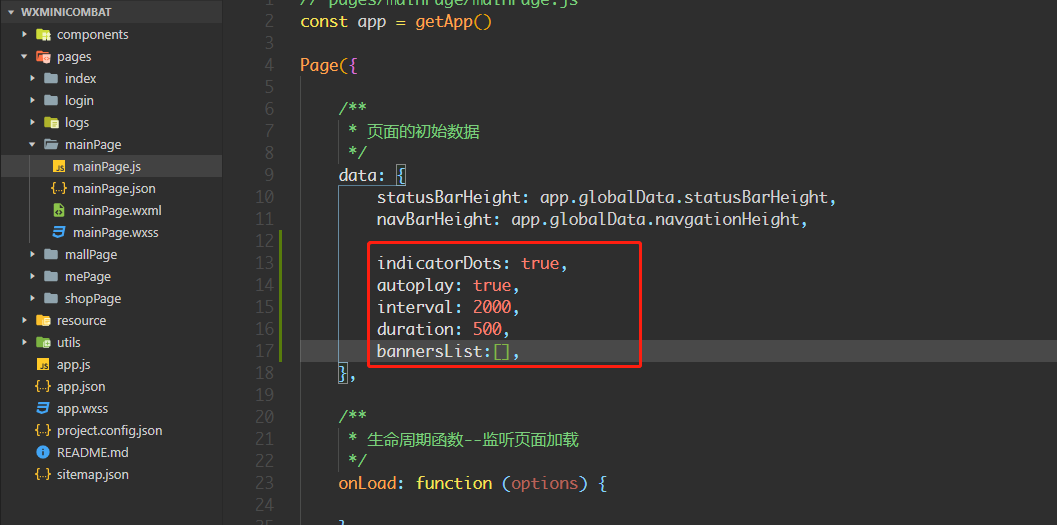
Usually, we call the back-end interface to return our broadcast pictures. For the convenience of simulation, I directly found some broadcast pictures on the Internet, and we can use them directly.
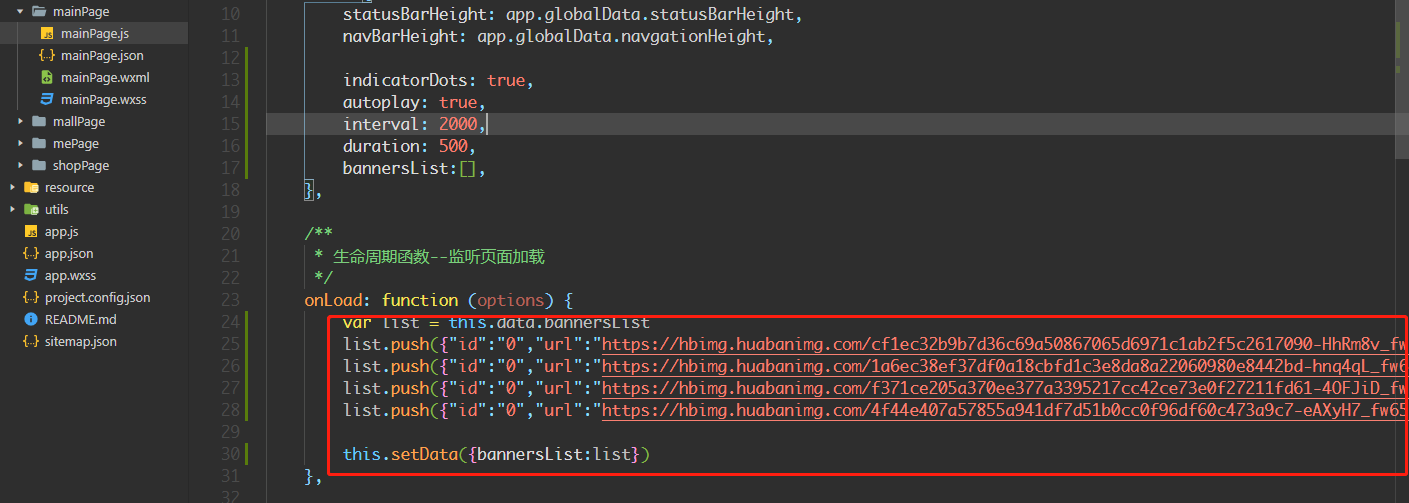
Copy and paste into the onload method. You can also replace the material by yourself. Note that the key value we bind in the page is url, and the data in the data source must also be url, otherwise the picture will not be displayed correctly.
var list = this.data.bannersList
        list.push({"id":"0","url":"https://hbimg.huabanimg.com/cf1ec32b9b7d36c69a50867065d6971c1ab2f5c2617090-HhRm8v_fw658"})
        list.push({"id":"0","url":"https://hbimg.huabanimg.com/1a6ec38ef37df0a18cbfd1c3e8da8a22060980e8442bd-hnq4qL_fw658"})
        list.push({"id":"0","url":"https://hbimg.huabanimg.com/f371ce205a370ee377a3395217cc42ce73e0f27211fd61-4OFJiD_fw658"})
        list.push({"id":"0","url":"https://hbimg.huabanimg.com/4f44e407a57855a941df7d51b0cc0f96df60c473a9c7-eAXyH7_fw658"})

        this.setData({bannersList:list})
Save the running project, we found that our data has been loaded correctly, and the page we expected is displayed correctly.

Students themselves must be more practical, write code by hand, so that learning is very fast.