This tutorial will install ros, px4 toolchain, and gazebo simulation environment in Ubuntu 18
Refer to this tutorial to install ros, px4 toolchain, and gazebo simulation environment in Ubuntu 16
First of all, let's take a look at the corresponding gazebo relationship of Ubuntu versions. Gazebo 9.0 has been installed in Ubuntu 18
The corresponding relationship of each version is as follows: Please note that Ubuntu 18 corresponds to melody and Ubuntu 16 corresponds to kinetic
Ubuntu 14.04 Trusty Tahr - ROS Indigo Igloo - Gazebo 2.X 2014-2019
Ubuntu 16.04 Xenial Xerus - ROS Kinetic Kame - Gazebo 7.X 2016-2021
Ubuntu 18.04 Bionic Beaver - ROS Melodic Morenia - Gazebo 9.X 2018-2023
**
1. Install Px4? Toolchain
First, let's take a look at the installation instructions given by the px4 official website px4 official website reference link
1. For the installation script provided by Px4, you can see that the melody version requires Ubuntu SIM common deps.sh + ROS / gazebo and mavros Considering that ros may have been installed, here we choose to use the Ubuntu ﹣ SIM ﹣ common ﹣ deps.sh script, which will not install gazebo, otherwise, it will overwrite the gazebo 9 installed in ros melody, which can also be used in ubuntu 16
step1:
Create a new script with an empty file Ubuntu SIM common deps.sh, which I write directly in vscode and save as a. Sh file, which can be copied and pasted directly, without any change, and only install the px4 tool chain. The code is as follows:
#!/bin/bash

## Bash script for setting up a PX4 development environment on Ubuntu LTS (16.04).
## It can be used for installing simulators (only) or for installing the preconditions for Snapdragon Flight or Raspberry Pi.
##
## Installs:
## - Common dependencies and tools for all targets (including: Ninja build system, Qt Creator, pyulog)
## - FastRTPS and FastCDR
## - jMAVSim simulator dependencies
## - PX4/Firmware source (to ~/src/Firmware/)

# Preventing sudo timeout https://serverfault.com/a/833888
trap "exit" INT TERM; trap "kill 0" EXIT; sudo -v || exit $?; sleep 1; while true; do sleep 60; sudo -nv; done 2>/dev/null &

# Ubuntu Config
echo "We must first remove modemmanager"
sudo apt-get remove modemmanager -y


# Common dependencies
echo "Installing common dependencies"
sudo apt-get update -y
sudo apt-get install git zip qtcreator cmake build-essential genromfs ninja-build exiftool astyle -y
# make sure xxd is installed, dedicated xxd package since Ubuntu 18.04 but was squashed into vim-common before
which xxd || sudo apt install xxd -y || sudo apt-get install vim-common --no-install-recommends -y
# Required python packages
sudo apt-get install python-argparse python-empy python-toml python-numpy python-dev python-pip -y
sudo -H pip install --upgrade pip
sudo -H pip install pandas jinja2 pyserial pyyaml
# optional python tools
sudo -H pip install pyulog

# Install FastRTPS 1.7.1 and FastCDR-1.0.8
fastrtps_dir=$HOME/eProsima_FastRTPS-1.7.1-Linux
echo "Installing FastRTPS to: $fastrtps_dir"
if [ -d "$fastrtps_dir" ]
then
    echo " FastRTPS already installed."
else
    pushd .
    cd ~
    wget https://www.eprosima.com/index.php/component/ars/repository/eprosima-fast-rtps/eprosima-fast-rtps-1-7-1/eprosima_fastrtps-1-7-1-linux-tar-gz -O eprosima_fastrtps-1-7-1-linux.tar.gz
    tar -xzf eprosima_fastrtps-1-7-1-linux.tar.gz eProsima_FastRTPS-1.7.1-Linux/
    tar -xzf eprosima_fastrtps-1-7-1-linux.tar.gz requiredcomponents
    tar -xzf requiredcomponents/eProsima_FastCDR-1.0.8-Linux.tar.gz
    cpucores=$(( $(lscpu | grep Core.*per.*socket | awk -F: '{print $2}') * $(lscpu | grep Socket\(s\) | awk -F: '{print $2}') ))
    (cd eProsima_FastCDR-1.0.8-Linux && ./configure --libdir=/usr/lib && make -j$cpucores && sudo make install)
    (cd eProsima_FastRTPS-1.7.1-Linux && ./configure --libdir=/usr/lib && make -j$cpucores && sudo make install)
    rm -rf requiredcomponents eprosima_fastrtps-1-7-1-linux.tar.gz
    popd
fi

# jMAVSim simulator dependencies
echo "Installing jMAVSim simulator dependencies"
sudo apt-get install ant openjdk-8-jdk openjdk-8-jre -y
To add permissions to a script:
sudo chmod +x ubuntu_sim_common_deps.sh
step2:
Open a new terminal and execute:
sudo usermod -a -G dialout $USER
After execution, restart it. Officially, Logout and login again make the operation effective
step3:
In the directory where Ubuntu SIM common deps.sh was just created, execute
source ubuntu_sim_common_deps.sh
Waiting to install
done in terminal
Indicates installation is complete
2. Compile Px4? Firmware
Because the speed of git clone is very slow, this step is the most frustrating one. The blogger tried to improve the speed of git on the Internet, including adding domain name, using code cloud, etc. domain name should be the most mainstream method, but the effect of the blogger after trying is not good, but still posted the method
Method 1. Add domain name mapping
nslookup github.global.ssl.fastly.net
nslookup github.com
 Different network, different domain name Adress, add by yourself
Execute again in the terminal
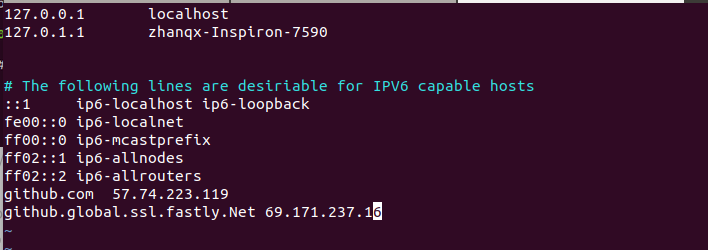
sudo vim /etc/hosts
Add the above domain name. The effect is as follows. You can add it according to your own domain name. After that, see the figure below
 This method may not be very effective. The blogger just pastes this method, another code cloud. Yes, you heard it correctly. That is, code cloud, not Ma Yun. It's similar to github, but only transfers the github to the domestic one. The download speed will be greatly improved. This method can improve the download speed, but it's still not suitable for firmware download. It includes branch jump
1. Compile px4 /Firmware
Choose a version to install. There is no big difference between the two versions
Install version 1.8.2 here
mkdir PX4
cd PX4
git clone  https://github.com/PX4/Firmware.git
cd Firmware

git checkout v1.8.2

git submodule update --init --recursive
Install version 1.9.2 here
mkdir PX4
cd PX4
git clone https://github.com/PX4/Firmware.git
cd Firmware

git checkout v1.9.2

git submodule update --init --recursive
At this time, please wait patiently. Normally, it takes 4 to 5 hours. The speed of git clone is about 10-30kib, and what you want to download is about 500M. So please be patient. It took the blogger three days to get it done. There's no way (you can only download with 4G hotspot at home, but it's easy to use)
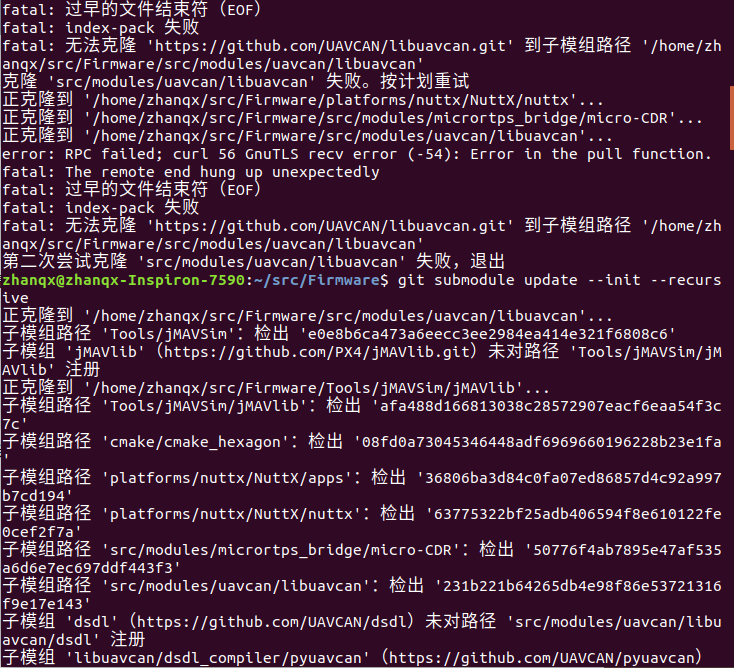
Here are the problems encountered by bloggers:
Firmware's warehouse has been downloaded, but the branch has not been downloaded well. When you open the path of the sub module, you can see that the folder is empty, and the premature end of file in the middle is caused by the low network speed, so you must try git sub module update -- init -- recursive several times, and he will fill in the missing sub module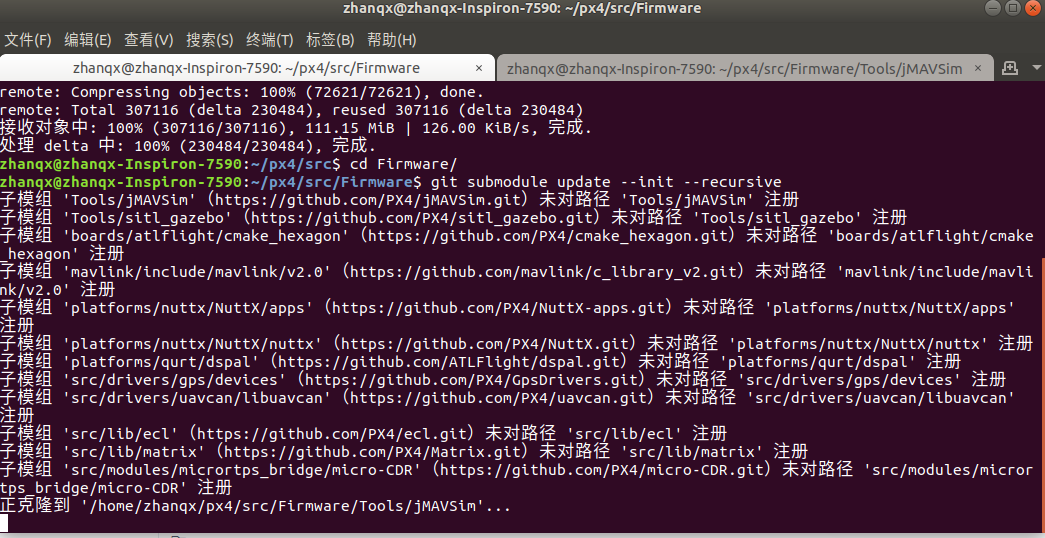
 When all submodules are installed, executing git submodule update --init --recursive will not respond
Re execution
make px4_sitl_default
3. Install ros (ignore if ros has been installed)
Please refer to: ROS installation tutorial
4. mavros and mavlink installation
Use binary installation here:
Execute in terminal
If it is Ubuntu 16, execute the following code:
sudo apt-get install ros-kinetic-mavros ros-kinetic-mavros-extras
If it is Ubuntu 18, execute the following code:
sudo apt-get install ros-melodic-mavros ros-melodic-mavros-extras
After the installation is completed, execute successively
wget https://raw.githubusercontent.com/mavlink/mavros/master/mavros/scripts/install_geographiclib_datasets.sh

chmod +x install_geographiclib_datasets.sh

./install_geographiclib_datasets.sh
After completion:
roslaunch mavros px4.launch fcu_url:="udp://:14540@127.0.0.1:14557"
If the following error occurs
[FATAL] [1455208235.573568497]: UAS: GeographicLib exception: File not readable /usr/share/GeographicLib/geoids/egm96-5.pgm | Run install_geographiclib_dataset.sh script in order to install Geoid Model dataset!
================================================================================REQUIRED process [mavros-2] has died!
process has died [pid 2396, exit code -6, cmd /home/ubuntu/catkin_ws_wyz/devel/lib/mavros/mavros_node __name:=mavros __log:=/home/ubuntu/.ros/log/c5fc1ef8-d0dc-11e5-89a3-00044b65bbf5/mavros-2.log].
log file: /home/ubuntu/.ros/log/c5fc1ef8-d0dc-11e5-89a3-00044b65bbf5/mavros-2*.log
Initiating shutdown!
================================================================================
[mavros-2] killing on exit
[rosout-1] killing on exit
[master] killing on exit
shutting down processing monitor...
... shutting down processing monitor complete
done
The solution is:
sudo /opt/ros/kinetic/lib/mavros/install_geographiclib_datasets.sh
At this time, you still need to wait patiently. It will take more than an hour to download
If appear
Gazebo [Err] [REST.cc:205] Error in REST request
implement
# Use the text editor to edit the following files
$ sudo gedit ~/.ignition/fuel/config.yaml
  # url:  https://api.ignitionfuel.org comment out this line
    url: https://api.ignitionrobotics.org ා add this line
If you don't make a mistake, it's ok
5. Launch gazebo with ros wrappers
If you want to modify the Gazebo simulation so that it can publish additional sensor information directly to the ROS topic, such as the Gazebo ROS laser sensor information, you must start Gazebo through the appropriate ROS wrapper
Configure environment variables
sudo vim ~/.bashrc
export FIRMWARE_DIR={path_to_Firmware} #Path to firmware is your firmware path, such as / home/zhanqx/PX4/Firmware
source $FIRMWARE_DIR/Tools/setup_gazebo.bash $FIRMWARE_DIR $FIRMWARE_DIR/build/posix_sitl_default
export ROS_PACKAGE_PATH=$ROS_PACKAGE_PATH:$FIRMWARE_DIR
export ROS_PACKAGE_PATH=$ROS_PACKAGE_PATH:$FIRMWARE_DIR/Tools/sitl_gazebo
Add the above code to the map. Path "to" firmware is your firmware path, such as / home/zhanqx/PX4/Firmware. Please refer to your own path to add
As shown in the figure below, it's mine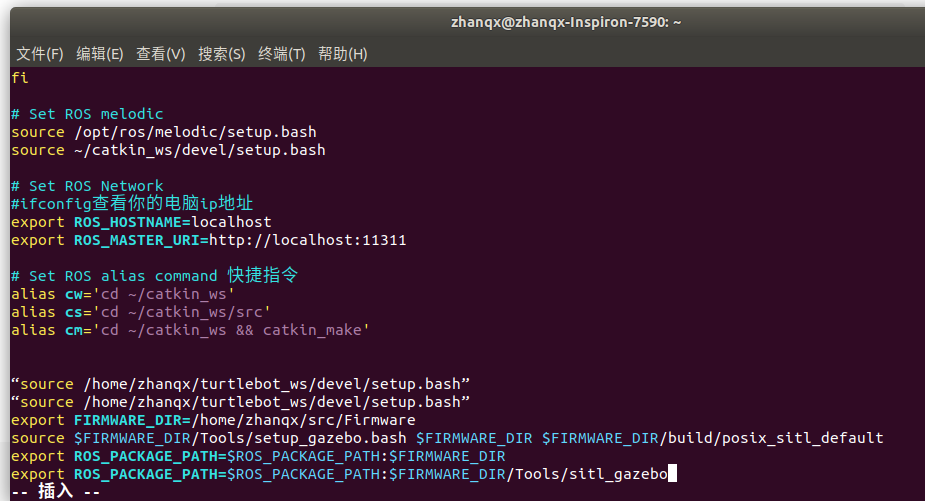
Open new terminal, execute
roslaunch px4 mavros_posix_sitl.launch
A uav will appear in the opened gazebo scene, and the result is complete.
As shown in the figure: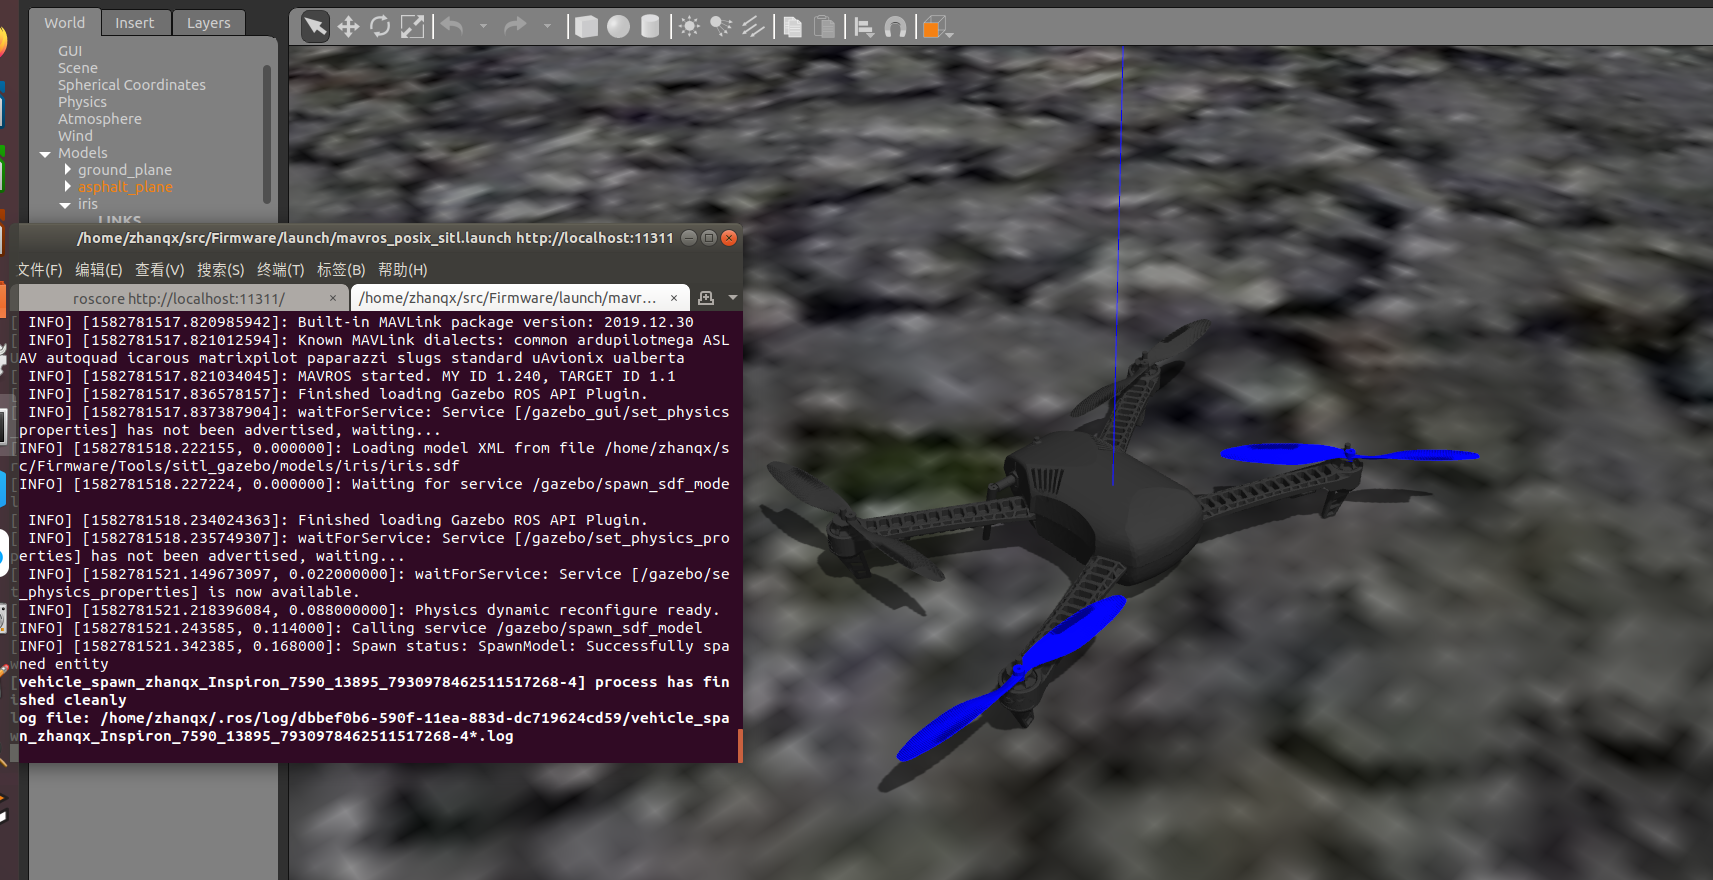
Reference link:
https://dev.px4.io/v1.9.0/en/setup/dev_env_linux_ubuntu.html
https://zhuanlan.zhihu.com/p/91420855
https://github.com/PX4/Firmware

