The original application ran with a single node, and the user always complained that the service response was very slow. In order to improve the user experience, we thought of trying to alleviate the multi-node load balancing
Because of the pressure of the server, we found the window version of nginx. According to the introduction of the parameters in the official documents, we set the corresponding parameters
. With a two node WEB application, this problem is finally solved. 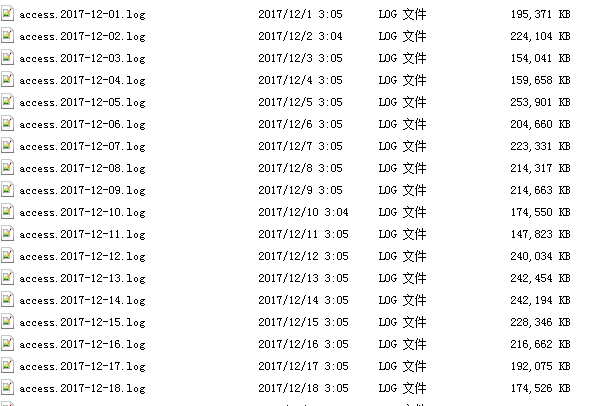
In the figure above is a partial access log screenshot of my screenshot. Basically, more than 150M to 200m access logs are generated every day. Because the user feedback is satisfied, the configuration file is posted for your reference.
Download the corresponding installation package from the nginx official website and extract it to the corresponding directory. I put the c disk and change the directory name to nginx. Double click nginx.exe in the directory. For configuration parameters, open nginx.conf under the conf directory to make changes (here is the core of the heart).
My test and debug files are listed as follows:
#user  nobody;
worker_processes  1;

#error_log  logs/error.log;
#error_log  logs/error.log  notice;
#error_log  logs/error.log  info;

#pid        logs/nginx.pid;


events {
    worker_connections  10240;
}
http {
    include       mime.types;
    default_type  application/octet-stream;
    log_format  main  '$remote_addr - $remote_user [$time_local] "$request" '
                      '$status $body_bytes_sent "$http_referer" '
                      '"$http_user_agent" "$http_x_forwarded_for"';

    access_log  logs/access.log  main;
    tcp_nopush on;                              #Send header files in one packet, not one after another.
    sendfile on;                                #Immediately read data from disk to OS cache.
    keepalive_timeout 1800;                     #nginx timeout
    #gzip on;
    OPEN_FILE_CACHE MAX=102400 INACTIVE=20S;    #When you open the cache, you specify the maximum number of caches, as well as the time of the cache.
    OPEN_FILE_CACHE_VALID 30S;                  #Specify the interval between the detection of correct information in open file cache.
    OPEN_FILE_CACHE_MIN_USES 2;                 #Minimum number of files during inactivity.
    OPEN_FILE_CACHE_ERRORS ON;                  #Determines whether to cache error messages when searching for a file

    proxy_temp_path C:\\nginx-1.12.0\\temp\\temp_path;  #When creating a cache, some temporary file locations may be generated
    proxy_cache_path C:\\nginx-1.12.0\\temp\\cache_temp levels=1:2 keys_zone=mycache:20m

max_size=2048m inactive=60m;            #Define cache storage directory, cache level, cache data source data space

    upstream bakend {
        ip_hash;
            server 192.168.3.114:8080;
        }

        server {
        listen       8081;
        server_name  192.168.3.6;

        #charset koi8-r;
        #access_log  logs/host.access.log  main;

        location / {
            #root   html;
            #index  index.html index.htm;
proxy_pass   http://bakend;                         #Proxy web server
proxy_cache mycache;                                #Memory cache source data space name corresponds to the previous settings
proxy_cache_valid 200 302 60m;                      #Cache with page return code 200 302 60 points
proxy_cache_valid 404 1m;                           #Page error response 404 cache time 1 point
proxy_redirect off;

proxy_set_header Host $host;                       #Add the primary domain name of the virtual Host when the request does not carry the "Host" request header
proxy_set_header X-Real-IP $remote_addr;           #Getting the real ip of users on the web server
proxy_set_header REMOTE-HOST $remote_addr;             #Get the host name on the web server side
proxy_set_header X-Forwarded-For $proxy_add_x_forwarded_for;

            client_max_body_size 16m;               #Upload large file limit 16M
            client_body_buffer_size 256k;           #Specifies the buffer size to use for connection requests.
            proxy_connect_timeout 75;               #Set the connection timeout with nginx, which cannot exceed 75 seconds.
            proxy_send_timeout 600;                 #Send timeout defaults to 600 seconds
            proxy_read_timeout 600;                 #Read timeout defaults to 600 seconds
            proxy_buffer_size 256k;                 #The corresponding header of the backend server will be put into the proxy buffer size
            proxy_buffers 4 256k;               #Proxy buffer to handle large pages.
            proxy_busy_buffers_size 256k;
            proxy_temp_file_write_size 256k;    #Is the size of temporary files that can be written in one access
            proxy_next_upstream off;            #Disable delivery of requests to the next server
            proxy_max_temp_file_size 128m;      #Size of temporary files written to the hard disk
        }


        #error_page  404              /404.html;

        # redirect server error pages to the static page /50x.html
        #
        #error_page   500 502 503 504  /50x.html;
        #location = /50x.html {
        #    root   html;
        #}

        # proxy the PHP scripts to Apache listening on 127.0.0.1:80
        #
        #location ~ \.php$ {
        #}

        # deny access to .htaccess files, if Apache's document root
        # concurs with nginx's one
        #
        #location ~ /\.ht {
        #    deny  all;
        #}
    }
}
Note: you should add and modify the parameters and parameter values of the response according to your own situation, and never use them directly, because the user experience obtained by adjusting the parameters of NGINX in different scenarios is very different.