Details of SSM development process
SSM execution flow chart: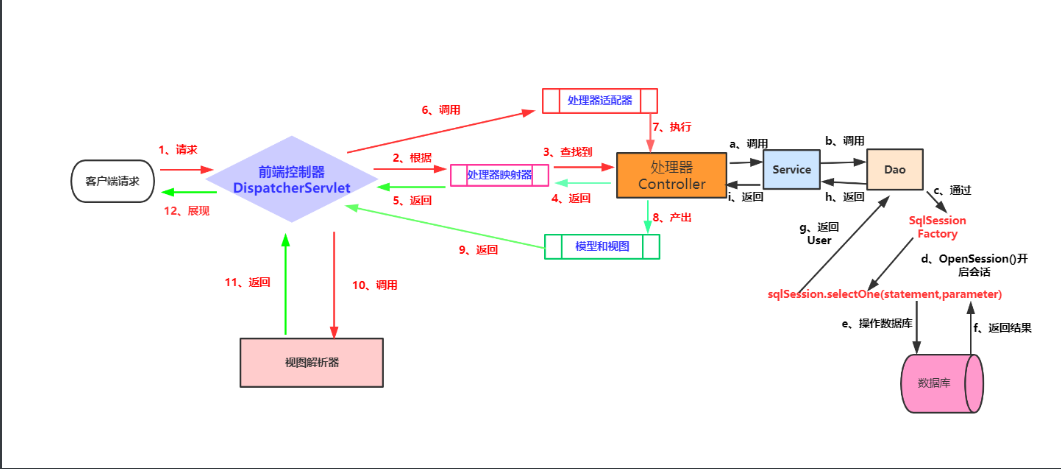
Step 1: create database, create table statement, use mysql database, Navicat for MySQL visual database management tool.
Step 2: create Maven web project structure and use IDEA development tools for development.
Step 3: create a project directory structure,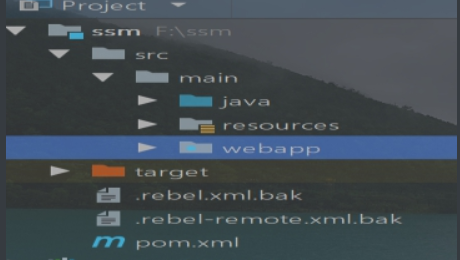
Step 4: create a hierarchy, that is, create a package structure,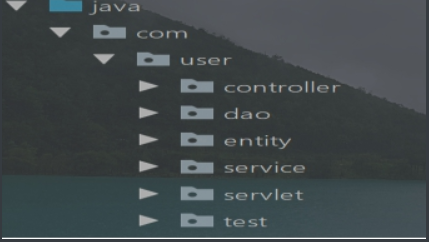
Step 5: write the contents of dao layer, entity layer and servlce layer,
Step 6: create the query statement to create the same directory structure under the resources directory as the project structure of the dao layer under the java directory, and create the xml file with the same initial and lowercase as the interface name in the dao layer, that is, here is the mybatis file, the content is as follows:

<?xml version="1.0" encoding="UTF-8"?>
<!DOCTYPE mapper PUBLIC "-//mybatis.org//DTD Mapper 3.0//EN"
        "http://mybatis.org/dtd/mybatis-3-mapper.dtd" >
<!--namespace  What is written is dao Interface fully qualified class name corresponding to layer-->
<mapper namespace="com.user.dao.UserDao">


</mapper>
Step 7: create the jdbc.properties configuration file, which is used to connect to mysql database. The connection information is as follows:
#Database driven
jdbc.driverClassName=com.mysql.jdbc.Driver
#url of the database
jdbc.url=jdbc:mysql://localhost:3306/test?useUnicode=true& useJDBCCompliantTimezoneShift=true&useLegacyDatetimeCode=false&serverTimezone=UTC
#Connected database user name
jdbc.username=root
#Connected database password
jdbc.password=123456
Step 8: write the mybatis-config.xml configuration file
<?xml version="1.0" encoding="UTF-8" ?>
<!DOCTYPE configuration
        PUBLIC "-//mybatis.org//DTD Config 3.0//EN"
        "http://mybatis.org/dtd/mybatis-3-config.dtd">
<configuration>
    <!--Configure global properties-->
    <settings>
        <!--Use jdbc Of getGeneratedKeys Get database auto increment primary key value-->
        <setting name="useGeneratedKeys" value="true"/>
        <!--Replace column default with column labeltrue-->
        <setting name="useColumnLabel" value="true"/>
        <!--Turn on hump naming conversion:Table{create_time}->Entity{createTime}-->
        <setting name="mapUnderscoreToCamelCase" value="true"/>
    </settings>
</configuration>
Step 9: write the configuration file spring-dao.xml(spring and database integration, operation database) integrated by spring and mybatis. The content of the configuration file is as follows:
<?xml version="1.0" encoding="UTF-8"?>
<beans xmlns="http://www.springframework.org/schema/beans"
       xmlns:xsi="http://www.w3.org/2001/XMLSchema-instance"
       xmlns:context="http://www.springframework.org/schema/context"
       xsi:schemaLocation="http://www.springframework.org/schema/beans http://www.springframework.org/schema/beans/spring-beans.xsd http://www.springframework.org/schema/context http://www.springframework.org/schema/context/spring-context.xsd">

    <!--First step:Load jdbc.properties Database connection information profile-->
    <context:property-placeholder location="classpath:jdbc.properties"/>
    <!--The second step:To configure dataSource,Connect to database-->
    <bean id="dataSource" class="com.alibaba.druid.pool.DruidDataSource">
        <property name="driverClassName" value="${jdbc.driverClassName}"/>
        <property name="url" value="${jdbc.url}"/>
        <property name="username" value="${jdbc.username}"/>
        <property name="password" value="${jdbc.password}"/>
    </bean>
    <!--The third step:To configure sqlSessionFactory object-->
    <bean id="sqlSessionFactory" class="org.mybatis.spring.SqlSessionFactoryBean">
        <!--3.1:Inject data source dataSource,Database connection pool-->
        <property name="dataSource" ref="dataSource"/>
        <!--3.2To configure mybatis Global profile-->
        <property name="configLocation" value="classpath:mybatis/mybatis-config.xml"/>
        <!--3.3Configure aliases,scanning entity All entity classes under the package-->
        <property name="typeAliasesPackage" value="com.user.entity"/>
        <!--3.4scanning sql configuration file-->
        <property name="mapperLocations" value="classpath:com/user/dao/*.xml"/>
    </bean>


    <!--The fourth step:Configuration scan Dao Interface package,Dynamic implementation Dao Interface, injecting into spring Container-->
    <bean class="org.mybatis.spring.mapper.MapperScannerConfigurer">
        <!--4.1:injection sqlSessionFactory object-->
        <property name="sqlSessionFactoryBeanName" value="sqlSessionFactory"/>
        <!--4.2:Give what needs to be scanned dao Interface package-->
        <property name="basePackage" value="com.user.dao"/>
    </bean>

</beans>
The spring-service.xml configuration file explains the writing and development steps in detail: there are three steps to complete the operation of the service layer:
<?xml version="1.0" encoding="UTF-8"?>
<beans xmlns="http://www.springframework.org/schema/beans"
       xmlns:xsi="http://www.w3.org/2001/XMLSchema-instance"
       xmlns:context="http://www.springframework.org/schema/context" xmlns:tx="http://www.alibaba.com/schema/stat"
       xsi:schemaLocation="http://www.springframework.org/schema/beans http://www.springframework.org/schema/beans/spring-beans.xsd http://www.springframework.org/schema/context http://www.springframework.org/schema/context/spring-context.xsd http://www.alibaba.com/schema/stat http://www.alibaba.com/schema/stat.xsd">

    <!--Step 1: turn on scanning,This annotation indicates support for annotation development,scanning service All content support notes under the package-->
    <context:component-scan base-package="com.user.service"/>
    <!--Step 2: configure the transaction manager-->
    <bean id="transactionManager" class="org.springframework.jdbc.datasource.DataSourceTransactionManager">
        <!--Inject database connection pool-->
        <property name="dataSource" ref="dataSource"/>
    </bean>
    <!--Step 3: configure annotation based transactions-->
    <tx:annotation-driven/>

</beans>
The configuration file of spring-mvc.xml explains the writing and development steps in detail: there are three steps to complete the operation of the service layer:
<?xml version="1.0" encoding="UTF-8"?>
<beans xmlns="http://www.springframework.org/schema/beans"
       xmlns:context="http://www.springframework.org/schema/context"
       xmlns:mvc="http://www.springframework.org/schema/mvc"
       xmlns:xsi="http://www.w3.org/2001/XMLSchema-instance"
       xsi:schemaLocation="http://www.springframework.org/schema/beans
       http://www.springframework.org/schema/beans/spring-beans.xsd
       http://www.springframework.org/schema/context
       http://www.springframework.org/schema/context/spring-context.xsd
       http://www.springframework.org/schema/mvc
       http://www.springframework.org/schema/mvc/spring-mvc.xsd">


    <!--First step:To configure springMvc-->
    <!--open springMvc Annotation mode-->
    <mvc:annotation-driven/>

    <!--The second step: scanning web Dependent bean,scanning controller Layer all classes,To configure Handler-->
    <context:component-scan base-package="com.user.controller"/>

    <!-- Step 3: define the view parser,ViewResolver-->
    <bean class="org.springframework.web.servlet.view.InternalResourceViewResolver">
        <property name="prefix" value="/"/>
        <property name="suffix" value=".jsp"/>
        <property name="viewClass" value="org.springframework.web.servlet.view.JstlView"/>
    </bean>
</beans>
The most important thing is to give the configuration files of spring-dao.xml, spring-service.xml and spring-mvc.xml to Tomcat container for management, and configure the front-end controller (dispatcher servlet) in the web.xml configuration file:
<servlet>
  <servlet-name>springMvc</servlet-name>
  <servlet-class>org.springframework.web.servlet.DispatcherServlet</servlet-class>
  <!--Specify profile path-->
  <init-param>
    <param-name>contextConfigLocation</param-name>
      <!--Load spring-dao.xml and spring-service.xml and spring-mvc.xml file-->
    <param-value>classpath:spring/spring*.xml</param-value>
  </init-param>
  <!--Indicates that the servlet-->
  <load-on-startup>1</load-on-startup>
</servlet>
<servlet-mapping>
  <servlet-name>springMvc</servlet-name>
  <url-pattern>/</url-pattern>
</servlet-mapping>

