
I. Brief Introduction
As shown in the following figure, according to the way the interface is written, it can be divided into traditional layout and new layout.
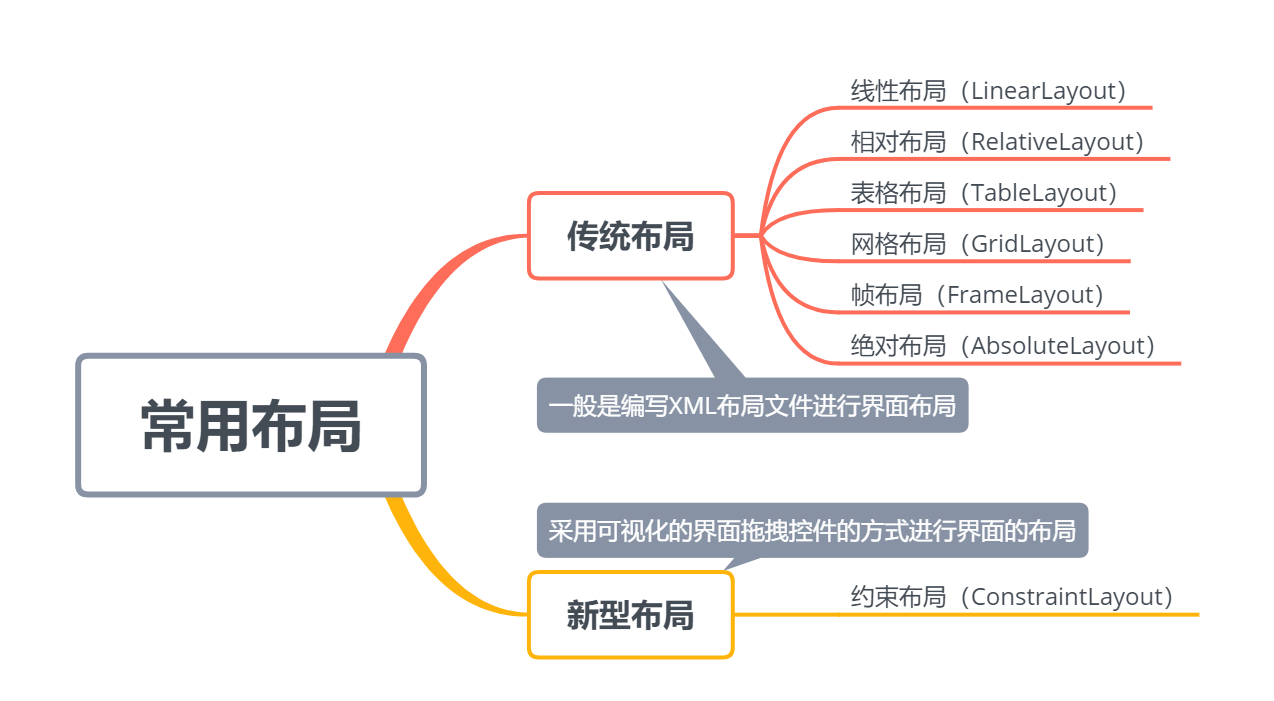
Linear layout: ** is the most commonly used layout in demo practice. It can be divided into two types: horizontal and vertical, that is, to set its attribute orientation: "vertical or horizontal". [Note: When the direction is not specified, the default is horizontal, i.e. horizontal direction]
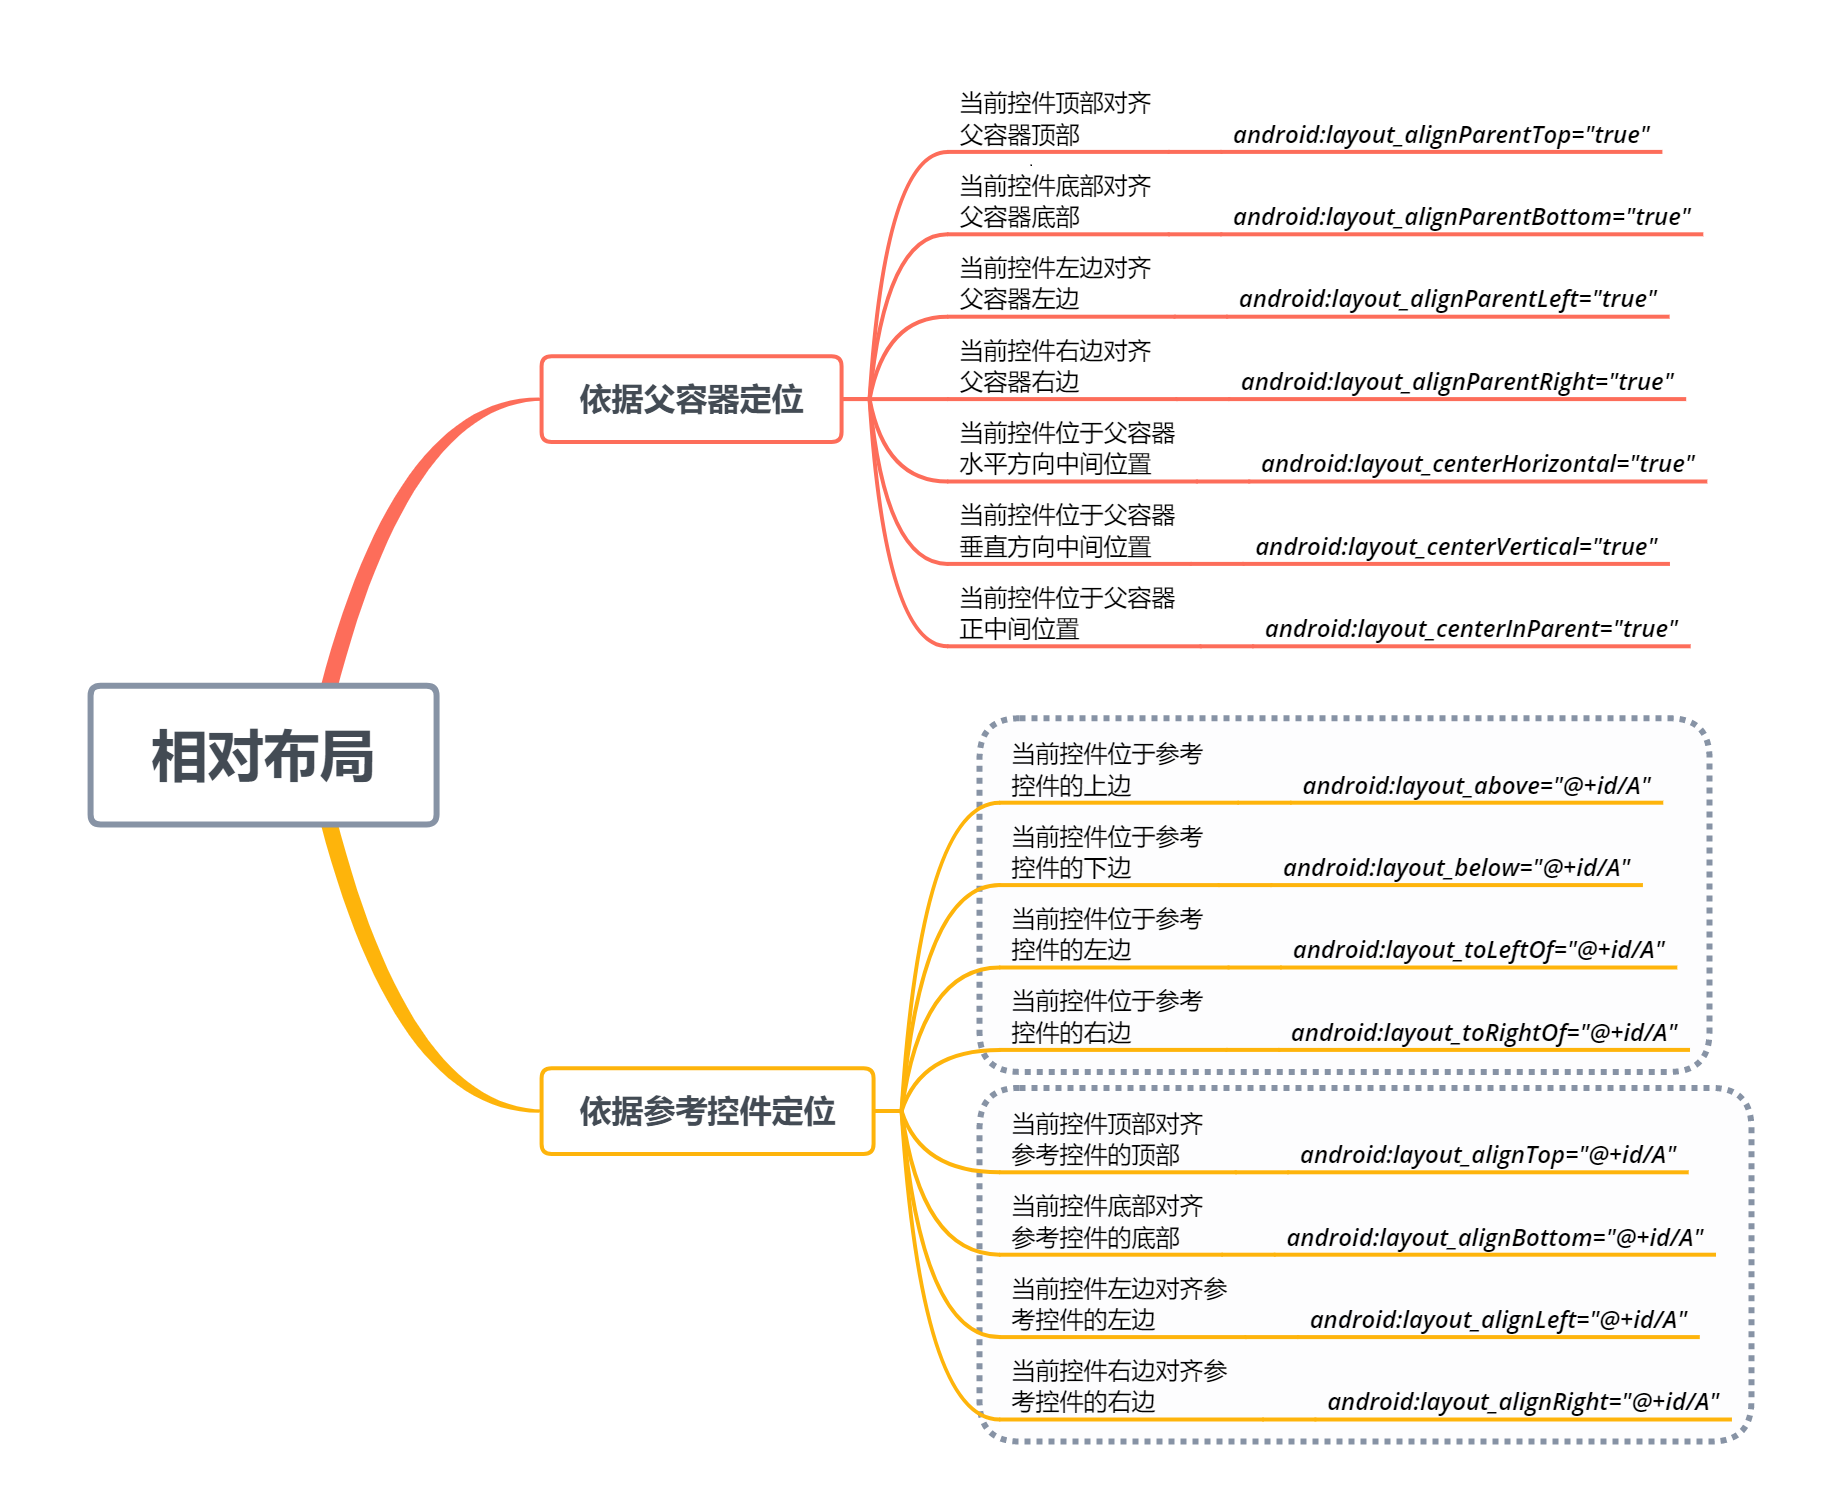
Relative Layout: ** Determines the position of another control according to the position of one control, that is, the position of another control relative to the current control.
TableLayout: TableLayout is suitable for multi-row multi-column layout. It lays out the position of the control by tabular layout, and each TableLayout is composed of multiple TableRow s (representing rows).
Grid Layout: ** is a new layout introduced after Android 4.0, which is somewhat similar to TableLayout above, but GridLayout is more useful and flexible than TableLayout.
Frame Layout: ** All controls put in are placed in the upper left area in turn, so the next control overlaps and overrides one control, and cannot specify an exact location for the control. Usually used to browse a single picture.
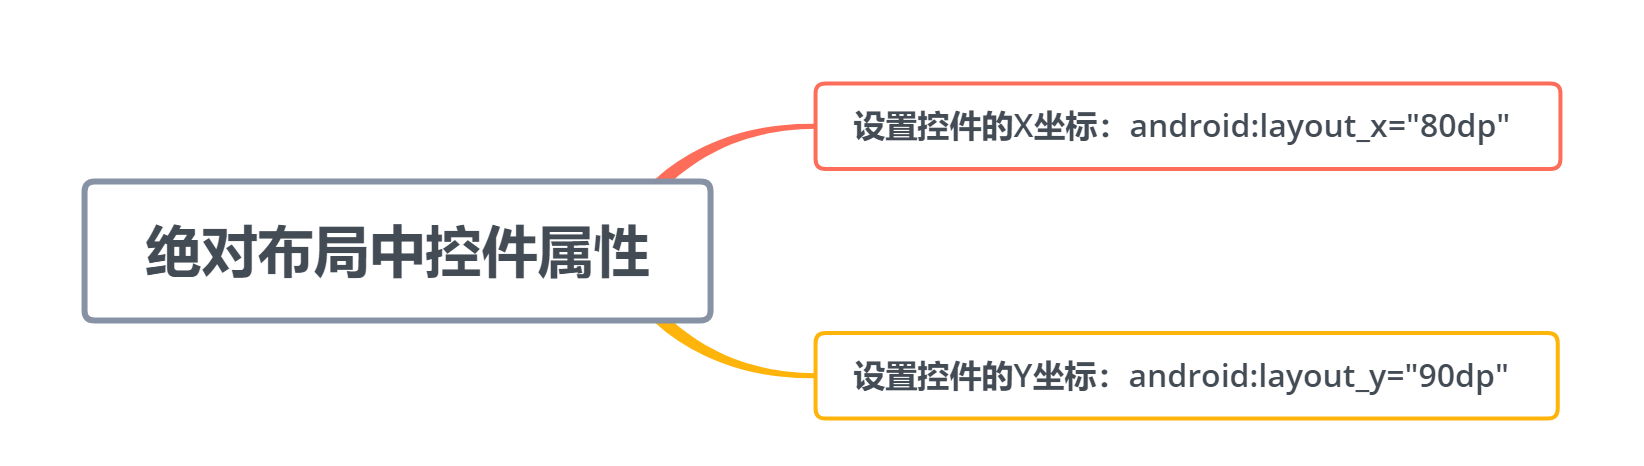
Absolute layout: ** This layout is not generally used. The top left corner of the screen is the origin (0,0), the horizontal axis is the X axis and increases to the right, and the vertical axis is the Y axis and increases downward. The X and Y coordinates of the control are set respectively according to the layout_x and layout_y attributes.
Constrained Layout: ** First of all, we will talk about the advantages of constrained layout over traditional layout: 1) using visual interface, dragging controls can complete the layout of the interface; 2) solving the problem of too many nested layouts, using constraints to specify the location and relationship of each control, which is somewhat similar to Relative Layout, but much stronger than Relative Layout.
2. Common attributes
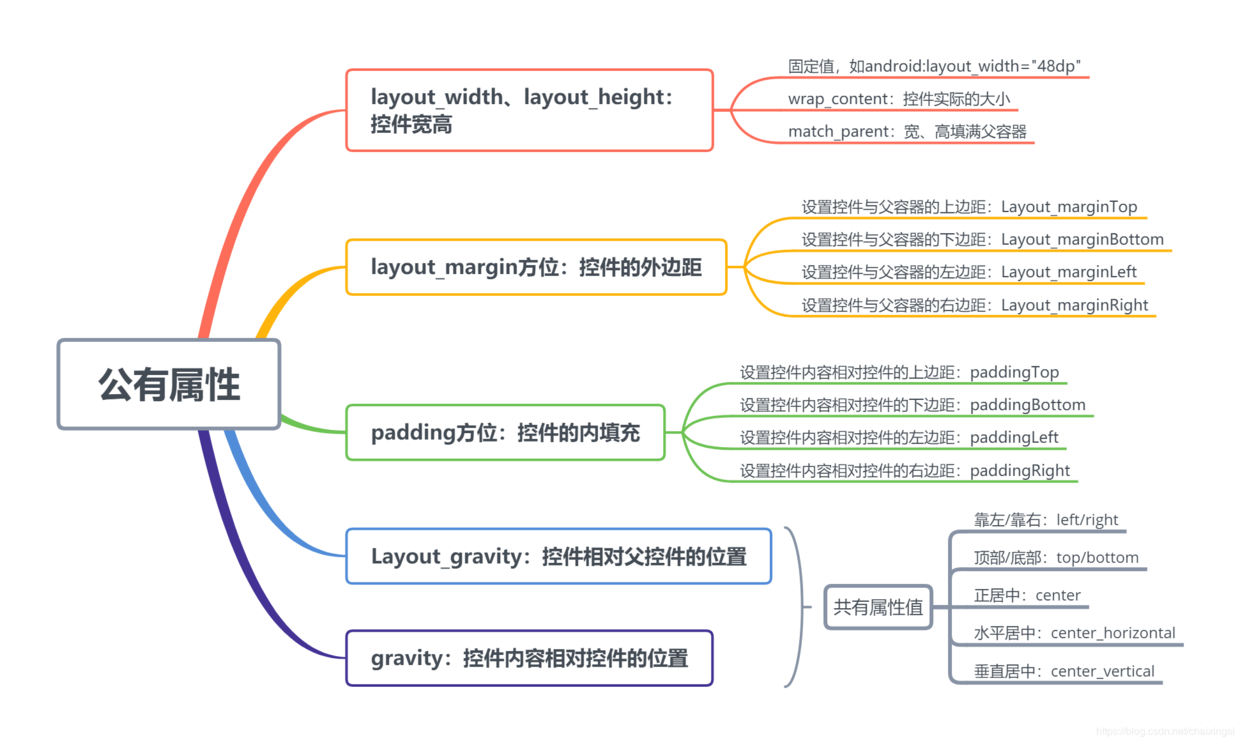
2.1 Public attributes for all layouts
2.2 Specific attributes of each layout
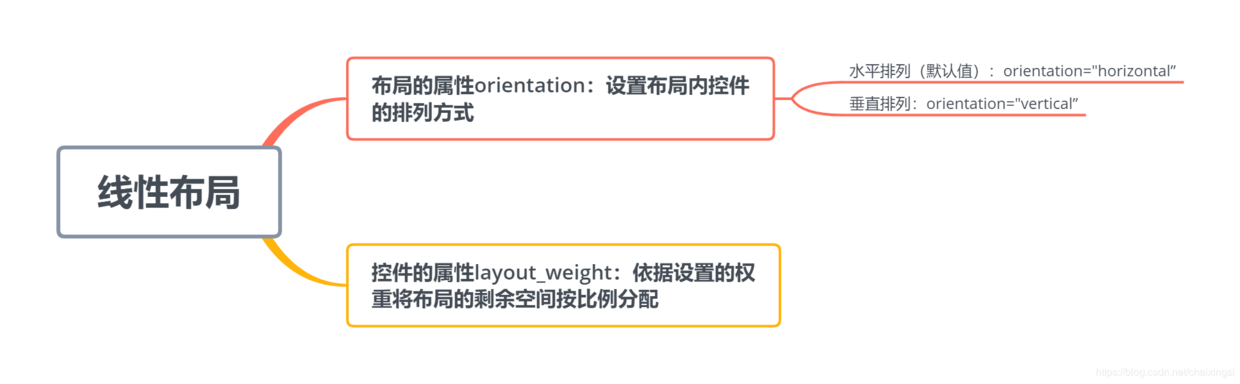
2.2.1 Linear Layout
-
Horizontal layout is adopted by default without specifying the direction of linear layout.
-
In order to allocate the remaining space proportionally, we usually set the layout_width or layout_height of the control to 0dp, and then set their weight values separately. [Consider only the commonly used ones here, as for the width setting to wrap_content or match_parent, please try it yourself.)
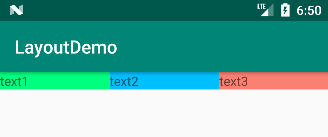
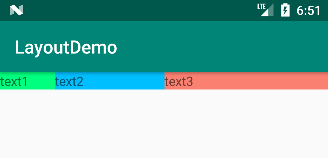
Example: There are three TextView s in the horizontal direction, set the weight to 1:1:1, then the code is as follows:
<LinearLayout
        android:layout_width="match_parent"
        android:layout_height="wrap_content"><!--Default horizontal direction without specified direction-->

        <TextView
            android:layout_width="0dp"
            android:layout_height="wrap_content"
            android:layout_weight="1"
            android:background="#00FF7F"
            android:text="text1" />

        <TextView
            android:layout_width="0dp"
            android:layout_height="wrap_content"
            android:layout_weight="1"
            android:background="#00BFFF"
            android:text="text2" />

        <TextView
            android:layout_width="0dp"
            android:layout_height="wrap_content"
            android:layout_weight="1"
            android:background="#FA8072"
            android:text="text3" />
    </LinearLayout>
The results are as follows:
The weight ratio is changed to 1:2:3, and the operation results are as follows.
2.2.2 Relative Layout
2.2.3 Table Layout
 Example: The xml layout code is as follows:
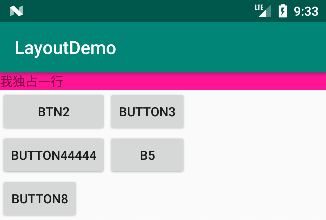
<?xml version="1.0" encoding="utf-8"?>
<TableLayout xmlns:android="http://schemas.android.com/apk/res/android"
    xmlns:tools="http://schemas.android.com/tools"
    android:layout_width="match_parent"
    android:layout_height="wrap_content"
    android:orientation="vertical"
    tools:context=".TableLayoutActivity">

    <TextView
        android:layout_height="wrap_content"
        android:background="#ff1493"
        android:text="I have a monopoly" /><!--The text box here has no width set and defaults to the width of the parent container.-->

    <TableRow
        android:layout_width="match_parent"
        android:layout_height="wrap_content">

        <Button android:text="button1" />

        <Button android:text="btn2" />

        <Button android:text="button3" />
    </TableRow>

    <TableRow
        android:layout_width="match_parent"
        android:layout_height="wrap_content">

        <!--Set up layout_column Property, where you skip Column 1 and place controls from Column 2-->
        <Button
            android:layout_column="1"
            android:text="button44444" /><!--The button has the longest text, which determines the width of the column.-->

        <Button android:text="b5" />
    </TableRow>

    <TableRow
        android:layout_width="match_parent"
        android:layout_height="wrap_content">

        <Button android:text="button6" />
    </TableRow>

    <TableRow
        android:layout_width="match_parent"
        android:layout_height="wrap_content">

        <!--Set up layout_span Property, where three cells are merged, that is, the button takes up three cells-->
        <Button
            android:layout_span="3"
            android:text="button7" />

        <Button android:text="button8" />
    </TableRow>

</TableLayout>
The results are as follows:
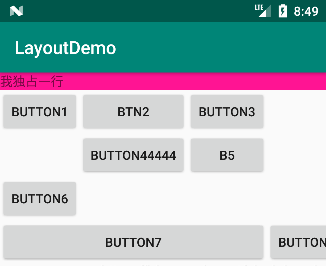
As can be seen from the above demonstration:
-
If you add controls directly to TableLayout, the control will fill one line, such as the text box in the first line.
-
To place multiple controls on a row, you need to add a TableRow container to the outer layer of the control, such as the number of buttons placed on lines 2, 3, 4, and 5.
-
The number of controls in a TableRow container determines how many columns the row has (as shown in Figure 1, 3, 2, 1, 2 columns), while the number of columns in a TableLayout is determined by the TableRow with the largest number of controls (the entire layout has three columns).
-
The width of a TableLayout column is determined by the widest cell in the column, such as the Button 44444 button that determines the width of the second column.
-
Set the layout_column property, where you skip Column 1 and place controls from Column 2.
-
Set the layout_span property, where three cells are merged, that is, the button takes up three cells.
Add the following layout attributes in turn: (1) Contraction of columns 1 and 2:
android:shrinkColumns="0,1"
The results are as follows: the incomplete button 8 is displayed completely, and the Button 1, Button 44444, Button 6 buttons are contracted.
(2) Hide Column 1:
android:collapseColumns="0"
The result is as follows: Since the fourth line has only one button, the entire fourth line is hidden.
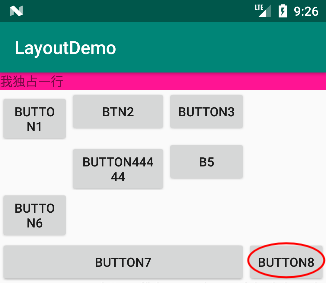
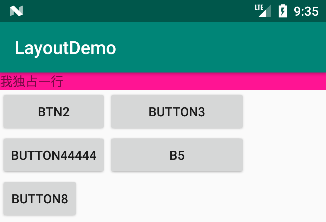
(3) Stretch Column 3:
android:stretchColumns="2"
The results are as follows: because only rows 2 and 3 have a third column, and Button 3 and B5 are stretched.
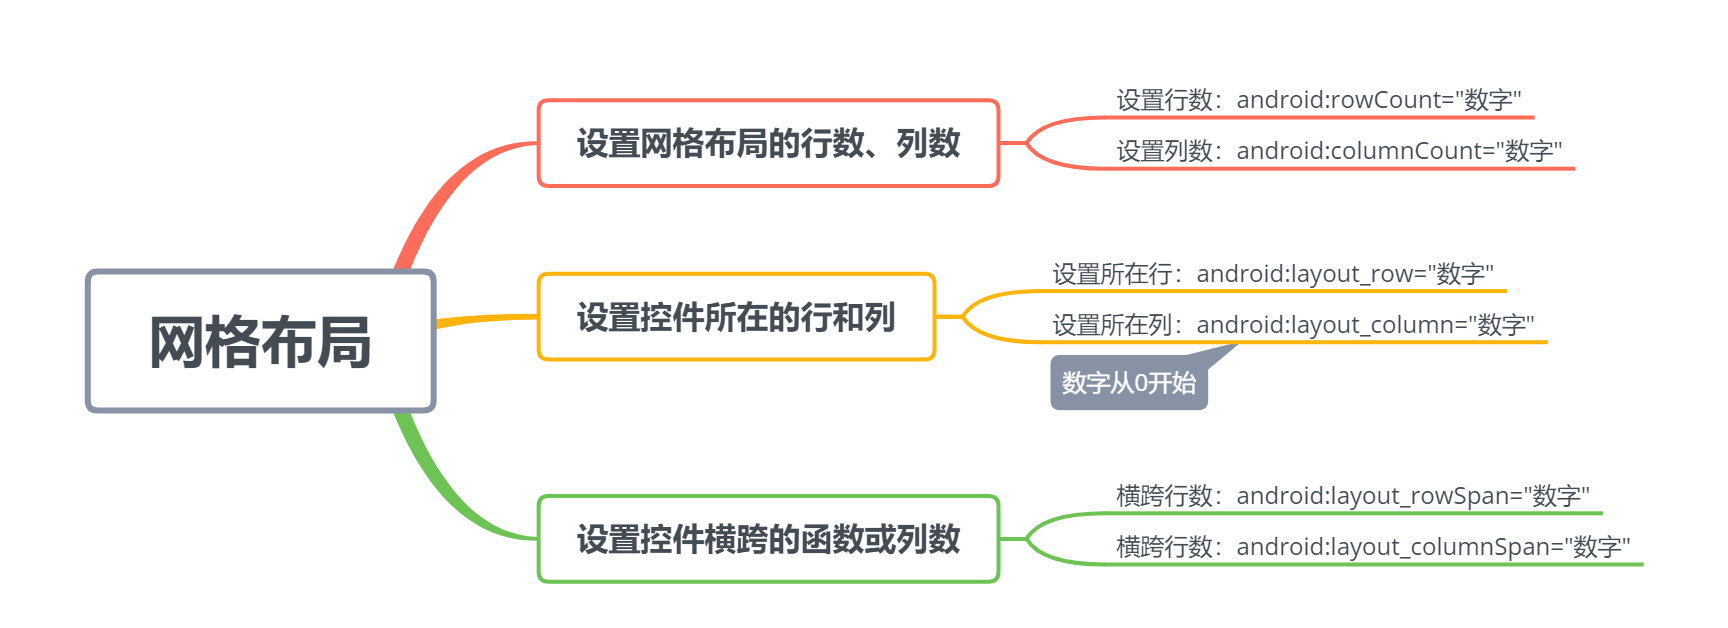
2.2.4 Grid Layout
The relevant properties of GridLayout are as follows:
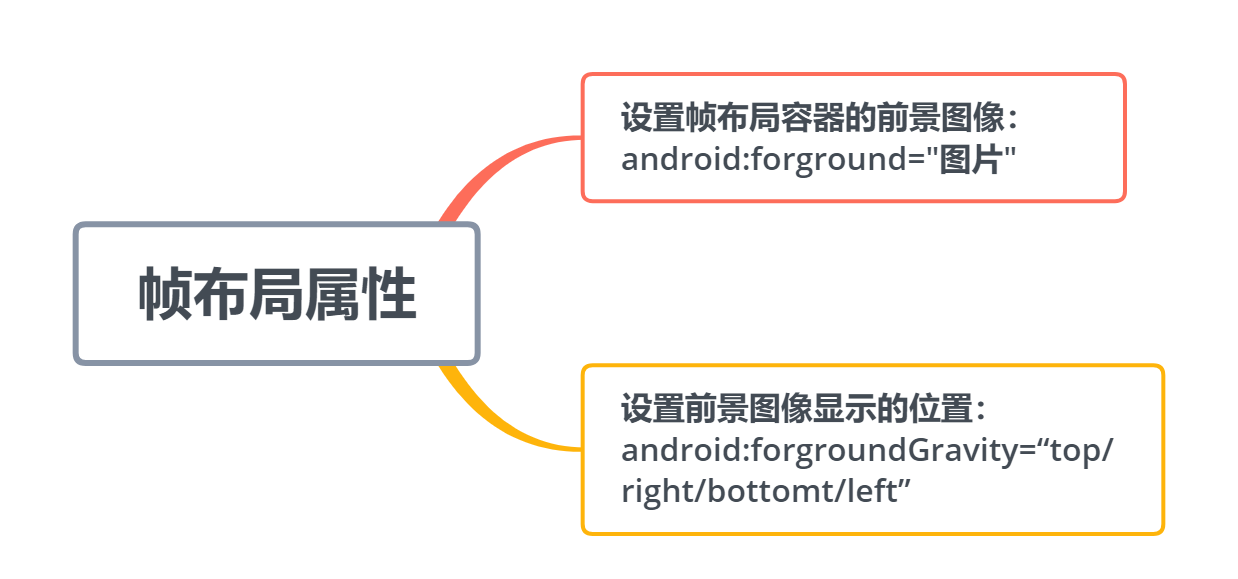
2.2.5 Frame Layout
-
Frame layout is the simplest of these layouts. Controls added to it will be placed in the upper left corner of the layout area by default.
-
Frame layout does not have any way of positioning, the latter control will override the former control;
-
The size of the frame layout is determined by the largest control in the control.
Note: Setting the position of the foreground image can be superimposed by two attributes, such as bottom|right.
2.2.6 Absolute Layout
Absolute layout is rarely used. There are generally two common control properties:
2.2.7 Constraint Layout Constraint layout is a layout recommended by Google, which includes dragging controls, adding constraints, setting attributes with Inspector, using Gidelines, and automatically adding constraints.
Last
If you see it here and think it's a good article, give it a compliment! _____________ Welcome to comment and discuss! If you think it's worth improving, please leave me a message. We will make serious inquiries, correct shortcomings, and regularly share technical dry goods free of charge. Interested partners can pay attention to it. Thank you!