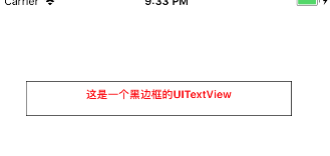
1. Create a UITextView with a border
override func viewDidLoad() {
        super.viewDidLoad()
        //Define control x:30 y:100 width:300 height:40
        let textView = UITextView(frame: CGRect(x: 30, y: 100, width: 300, height: 40))
        self.view.addSubview(textView)
        textView.layer.borderWidth = 1//Border width
        textView.layer.borderColor = UIColor.black.cgColor//Border color
        textView.text = "This is a black border UITextView"//Set text content
    }
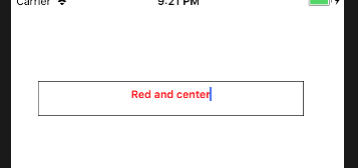
2. Set font property, font color textColor and alignment textAlignment
textView.font = UIFont.boldSystemFont(ofSize: 12)//Set font property
textView.textColor = UIColor.red//Set font color
textView.textAlignment = .center//Set content alignment
3. Set whether it is editable and whether the content is optional
The operation effect is as follows:textView.isEditable = false//textView cannot be edited textView.isSelectable = true//Content optional

4. Automatically link the phone number and web address in the text
textView.dataDetectorTypes = [] //No links
textView.dataDetectorTypes = UIDataDetectorTypes.phoneNumber //Only phone plus link
textView.dataDetectorTypes = UIDataDetectorTypes.link //Only URL and link
textView.dataDetectorTypes = UIDataDetectorTypes.all //Add both phone and website
To add a link, you first need to set textview to a non editable state, for example:
textView.isEditable = false//textView cannot be edited
textView.dataDetectorTypes = .all//Set link type
textView.text = "phone:13859222222,\n link:https://www.baidu.com "/ / set text content
5. Customize the selection menu
Often we can do some special operations besides copying and cutting after selecting the content, such as sharing to social media such as wechat. Let's give a simple example of a custom selection menu
The operation effect is as follows:class ViewController: UIViewController { override func viewDidLoad() { super.viewDidLoad() //Define control x:30 y:100 width:300 height:40 let textView = UITextView(frame: CGRect(x: 30, y: 100, width: 300, height: self.view.bounds.height - 100)) self.view.addSubview(textView) textView.layer.borderWidth = 1//Border width textView.layer.borderColor = UIColor.black.cgColor//Border color textView.font = UIFont.boldSystemFont(ofSize: 12)//Set font property textView.textColor = UIColor.black//Set font color textView.textAlignment = .center//Set content alignment textView.isSelectable = true//Content optional textView.isEditable = true//textView cannot be edited textView.dataDetectorTypes = .all//Set link type textView.text = "Be a happy person from tomorrow\n Feed horses, chop firewood, travel around the world\n From tomorrow, care about food and vegetables\n I have a house facing the sea\n From tomorrow, communicate with every relative\n Tell them about my happiness\n The happy lightning told me\n I will tell everyone\n Give each river and mountain a warm name"//Set text content let wx = UIMenuItem(title: "WeChat", action: #selector(openWX)) let menu = UIMenuController() menu.menuItems = [wx] } @objc func openWX(){ print("Open wechat") } override func didReceiveMemoryWarning() { super.didReceiveMemoryWarning() // Dispose of any resources that can be recreated. } }

This article just explains the most basic usage of UITextView, how to share the selected content to wechat through the user-defined selection menu, and interested partners can check the information by themselves