Super simple centos7 configuration Hadoop 2.7.7 + flume 1.8.0
Introduction of flume: https://blog.csdn.net/qq_40343117/article/details/100119574
1 - Download the installation package
Download address: http://www.apache.org/dist/flume/
Choose the right version for yourself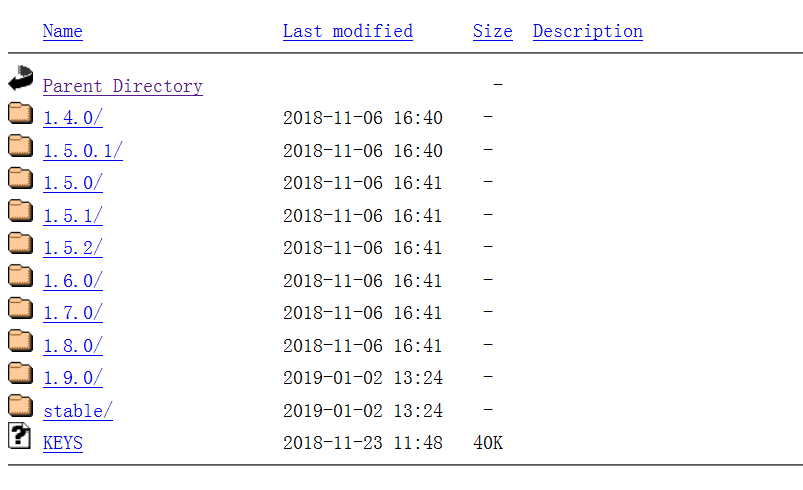
I chose 1.8.0, and I had to check my hadoop version and flume compatibility before installing it.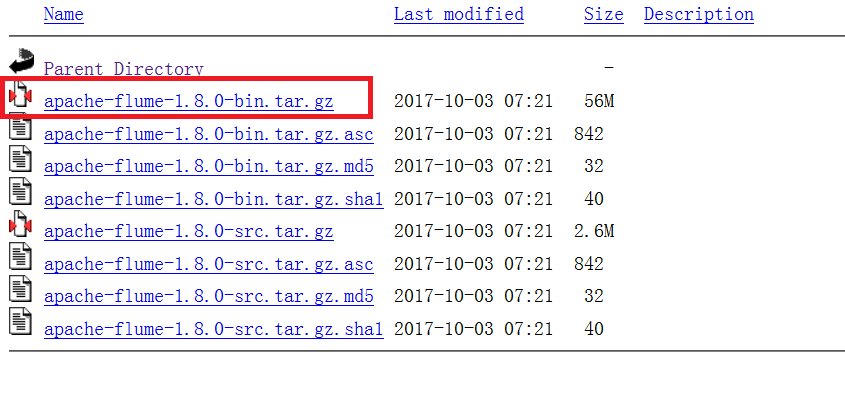
2 - Install Flume
1. Decompression installation package
As a small component, flume is easy to configure. First, we use the decompression command.
Tar-zxvf Installation Pack Storage Path-C The Path You Want to Unzip
 For example:
Tar-zxvf/home/h01/desktop/apache-flume-1.8.0-bin.tar.gz-C/usr/local/
Then wait for the end of decompression successfully, in order to operate conveniently, I will delete the version and suffix after decompression, leaving only a name, everyone is at will, everyone is not the same habit, but to pay attention to the following path name, must be changed into their own. -
2. Importing jar packages
In order for our flume and hadoop to interact, we go into the / hadoop/share/hadoop/common and / hadoop/share/hadoop/hdfs folders and find the six jar packages shown below and import them into flume/lib /.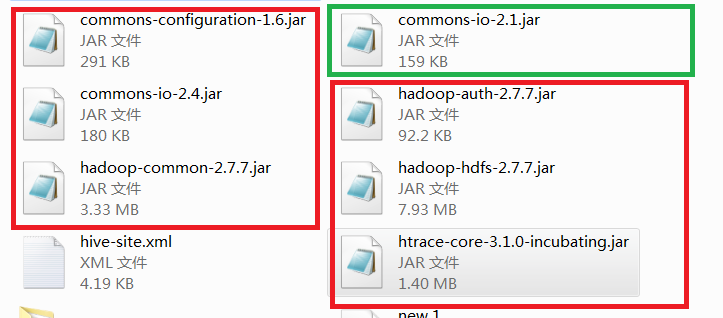 The red box is what we need. The green box is a duplicate jar package I found under the lib of flume. If there is a general problem when you install and install it, first copy the jar package in the original file and replace it with the jar package version of hadoop. Try it out. If there is incompatibility with the wrong product, replace it in time.
3. Configuration file
The configuration file of flume needs only one change. We enter the flume folder on the command line and enter
mv conf/flume-env.sh.template flume-env.sh
Rename the configuration file, otherwise the system will not recognize the. template file when it is executed, and then we enter it.
vi conf/flume-env.sh
To enter the configuration file, just add the Java path (java_home) of our virtual machine to it.
export JAVA_HOME=/usr/local/java/jdk1.8.0_221

So that our flume configuration is complete, let's go into the following small case to try it out.
3 - Examples
In the last blog, I introduced some general functions and structures of flume, so we know that flume is for collecting data and logs, how to embody it. Here I take hadoop as an example to introduce some methods to help you understand and master flume.
1. Monitoring Port
In this example, let's start flume to listen for a port, then send a message to the port through telnet service, so that any information received by the port under listening will be collected and displayed by flume.
1.1 Let's install telnet service
//Check whether telnet has been installed
yum list | grep telnet-server
yum list | grep xinetd

//Installation if not
yum -y install telnet-server.x86_64
yum -y install telnet.x86_64
yum -y install xinetd.x86_64

//Set up boot start

systemctl enable xinetd.service
systemctl enable telnet.socket

//Start up service

systemctl start telnet.socket
systemctl start xinetd
1.2 Determine whether the port is occupied
Sudo netstat-tunlp | grep port
1.3 Create a new file to run our flume
First of all, this file is built anywhere. It's better to have a folder in the flume folder for these things. I lazy in the conf. It's not advisable.
Enter the folder you built (cd command) and enter (of course, the name of the file is optional, as long as you don't write it wrong when running)
Create the Flume Agent configuration file flume-telnet-logger.conf under the folder.
touch flume-telnet-logger.conf
 Add content to the flume-telnet-logger.conf file.
vim flume-telnet-logger.conf
# Name the components on this agent
a1.sources = r1
a1.sinks = k1
a1.channels = c1

# Describe/configure the source
a1.sources.r1.type = netcat
a1.sources.r1.bind = localhost
a1.sources.r1.port = 44444

# Describe the sink
a1.sinks.k1.type = logger

# Use a channel which buffers events in memory
a1.channels.c1.type = memory
a1.channels.c1.capacity = 1000
a1.channels.c1.transactionCapacity = 100

# Bind the source and sink to the channel
a1.sources.r1.channels = c1
a1.sinks.k1.channel = c1
Let me draw a picture to explain to you: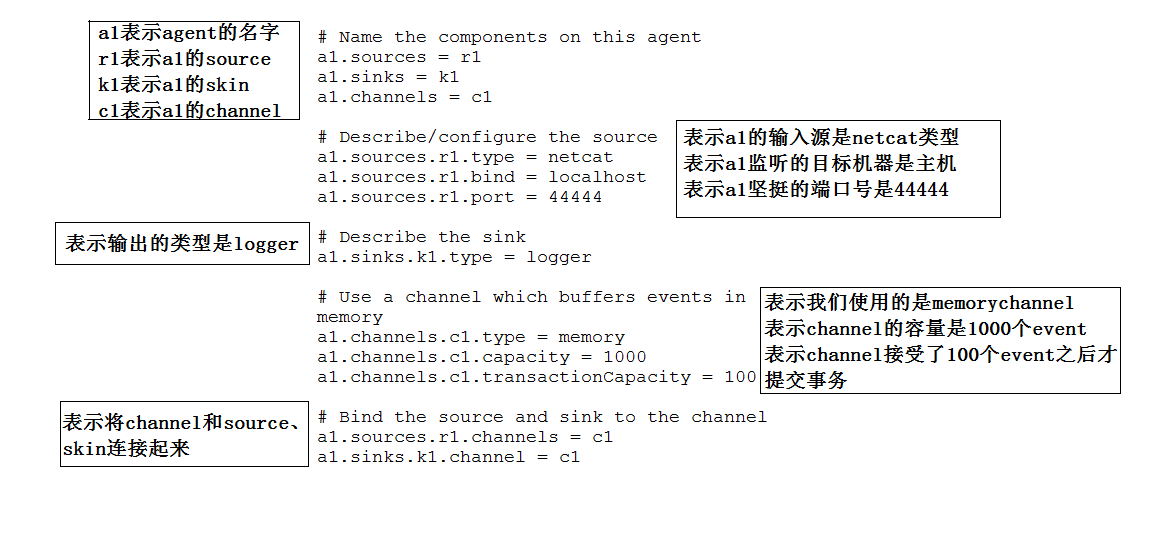 1.4 Run the files we have written
Enter the unzipped flume folder at the command line and enter
bin/flume-ng agent --conf conf/ --name a1 --conf-file conf/flume-telnet-logger.conf -Dflume.root.logger=INFO,console
Success is shown as follows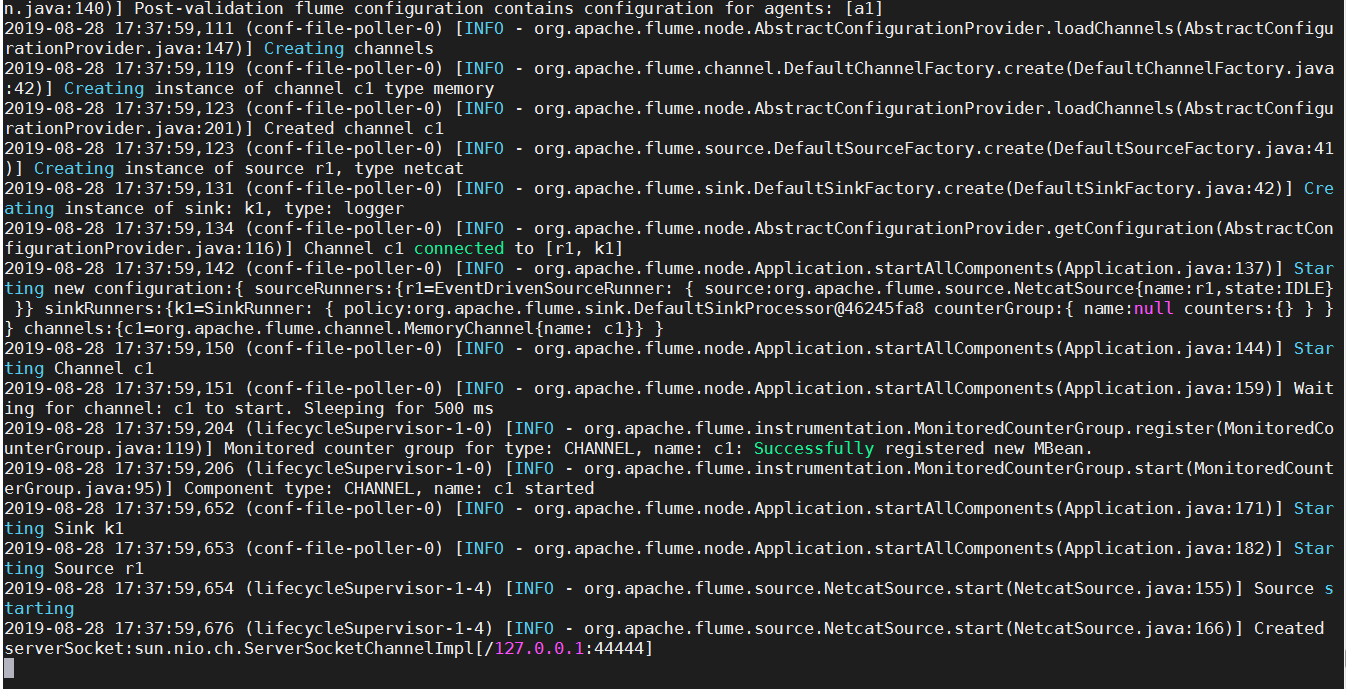 At the same time, we create a new terminal, enter telnet localhost 44444
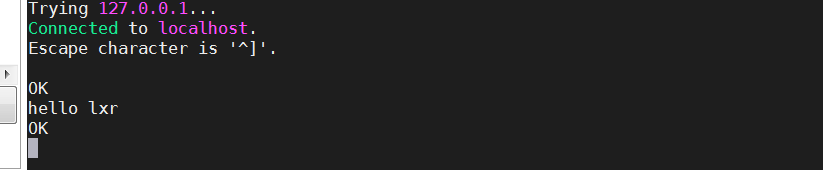 At the same time, our flume will listen on this port.
 Successful configuration!
2. Read local files to HDFS cluster
(Be sure to follow the steps above to import the JAR package)
2.1 Create Files
Command line entry to flume folder input
touch flume-file-hdfs.conf
Re-input
vim flume-file-hdfs.conf
Add the following
# Name the components on this agent
a2.sources = r2
a2.sinks = k2
a2.channels = c2

# Describe/configure the source
a2.sources.r2.type = exec
a2.sources.r2.command = tail -F /usr/local/hive/logs/hive.log
a2.sources.r2.shell = /bin/bash -c

# Describe the sink
a2.sinks.k2.type = hdfs
a2.sinks.k2.hdfs.path = hdfs://h02:9000/flume/%Y%m%d/%H
#Prefix for uploading files
a2.sinks.k2.hdfs.filePrefix = logs-
#Whether to scroll folders according to time
a2.sinks.k2.hdfs.round = true
#How much time to create a new folder
a2.sinks.k2.hdfs.roundValue = 1
#Redefining unit of time
a2.sinks.k2.hdfs.roundUnit = hour
#Whether to use local timestamp
a2.sinks.k2.hdfs.useLocalTimeStamp = true
#How many Event s are saved to flush to HDFS once
a2.sinks.k2.hdfs.batchSize = 1000
#Set file type to support compression
a2.sinks.k2.hdfs.fileType = DataStream
#How often to generate a new file
a2.sinks.k2.hdfs.rollInterval = 600
#Set the scroll size for each file
a2.sinks.k2.hdfs.rollSize = 134217700
#File scrolling is independent of the number of Event s
a2.sinks.k2.hdfs.rollCount = 0
#Minimum Redundancy Number
a2.sinks.k2.hdfs.minBlockReplicas = 1

# Use a channel which buffers events in memory
a2.channels.c2.type = memory
a2.channels.c2.capacity = 1000
a2.channels.c2.transactionCapacity = 100

# Bind the source and sink to the channel
a2.sources.r2.channels = c2
a2.sinks.k2.channel = c2
Introduce the drawings that are not mentioned above to you.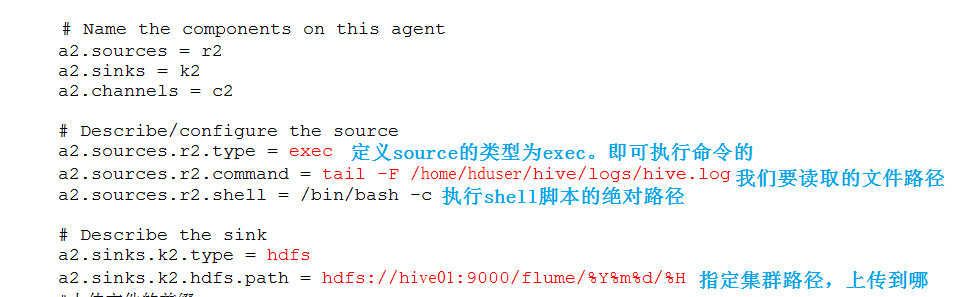 2.2 Running files
Enter bin/flume-ng agent--conf/name a2--conf-file conf/flume-file-hdfs.conf
(Note that interacting with hadoop must start hadoop services first)
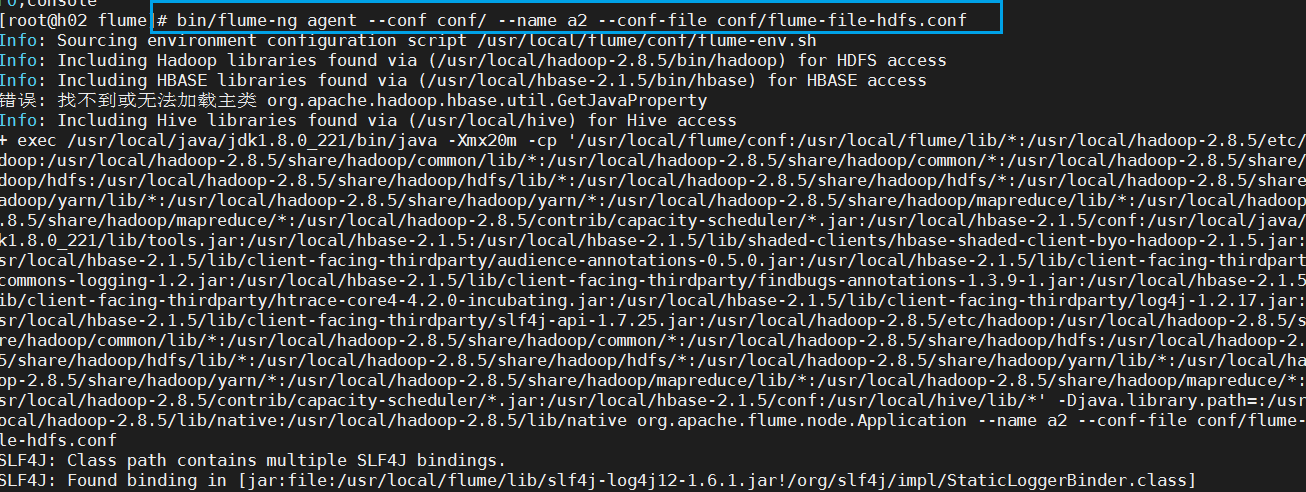 (Don't be surprised that it doesn't reflect when it runs out here.)
We build a new terminal to run hive After starting hive, we will automatically upload our log files
 Success!
3. Real-time reading directory files to HDFS
3.1 Documentation
Create a file
touch flume-dir-hdfs.conf
Open the file
vim flume-dir-hdfs.conf
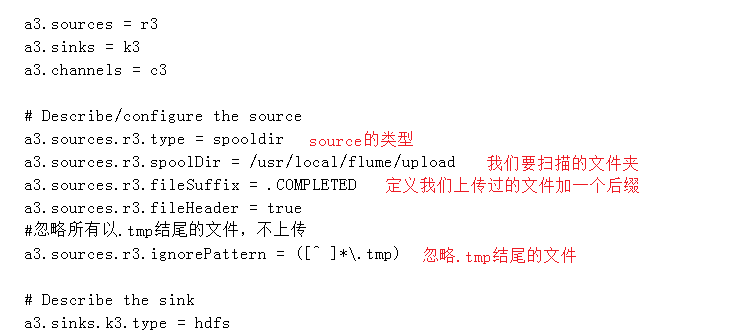
Add the following
a3.sources = r3
a3.sinks = k3
a3.channels = c3

# Describe/configure the source
a3.sources.r3.type = spooldir
a3.sources.r3.spoolDir = /usr/local/flume/upload
a3.sources.r3.fileSuffix = .COMPLETED
a3.sources.r3.fileHeader = true
#Ignore all files ending with. tmp and do not upload
a3.sources.r3.ignorePattern = ([^ ]*\.tmp)

# Describe the sink
a3.sinks.k3.type = hdfs
a3.sinks.k3.hdfs.path = hdfs://h02:9000/flume/upload/%Y%m%d/%H
#Prefix for uploading files
a3.sinks.k3.hdfs.filePrefix = upload-
#Whether to scroll folders according to time
a3.sinks.k3.hdfs.round = true
#How much time to create a new folder
a3.sinks.k3.hdfs.roundValue = 1
#Redefining unit of time
a3.sinks.k3.hdfs.roundUnit = minute
#Whether to use local timestamp
a3.sinks.k3.hdfs.useLocalTimeStamp = true
#How many Event s are saved to flush to HDFS once
a3.sinks.k3.hdfs.batchSize = 100
#Set file type to support compression
a3.sinks.k3.hdfs.fileType = DataStream
#How often to generate a new file
a3.sinks.k3.hdfs.rollInterval = 600
#Setting the scroll size for each file is about 128M
a3.sinks.k3.hdfs.rollSize = 134217700
#File scrolling is independent of the number of Event s
a3.sinks.k3.hdfs.rollCount = 0
#Minimum Redundancy Number
a3.sinks.k3.hdfs.minBlockReplicas = 1

# Use a channel which buffers events in memory
a3.channels.c3.type = memory
a3.channels.c3.capacity = 1000
a3.channels.c3.transactionCapacity = 100

# Bind the source and sink to the channel
a3.sources.r3.channels = c3
a3.sinks.k3.channel = c3
 3.2 Running Files
Enter bin/flume-ng agent--conf/name a3--conf-file conf/flume-dir-hdfs.conf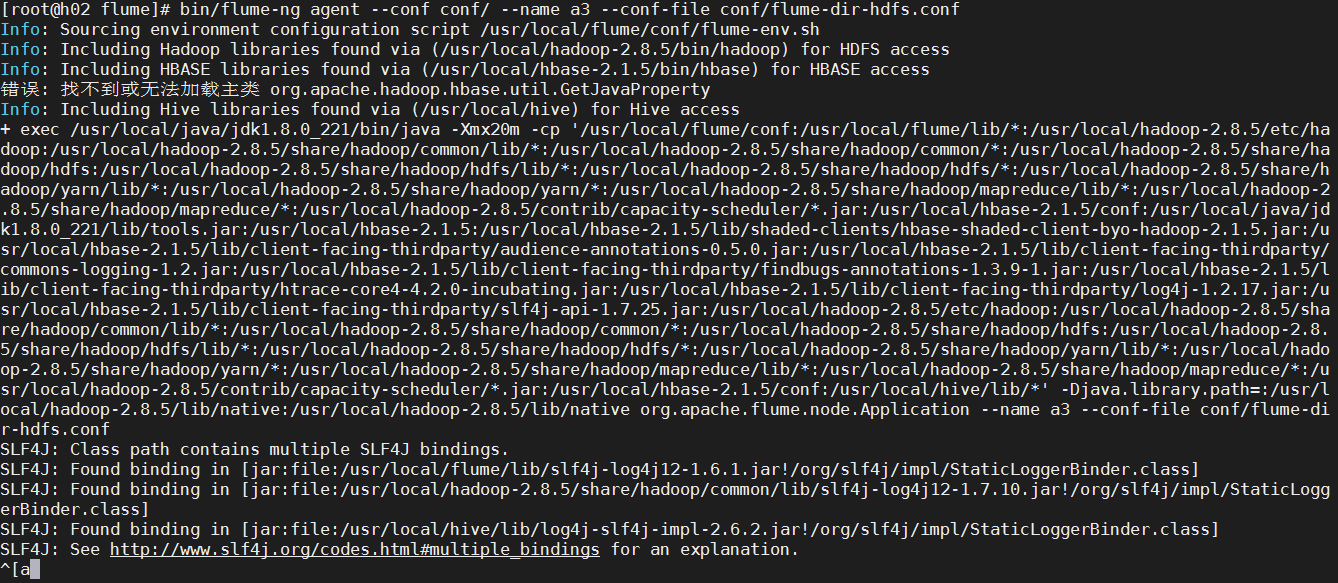 At the same time, we open upload for the file directory specified in our code
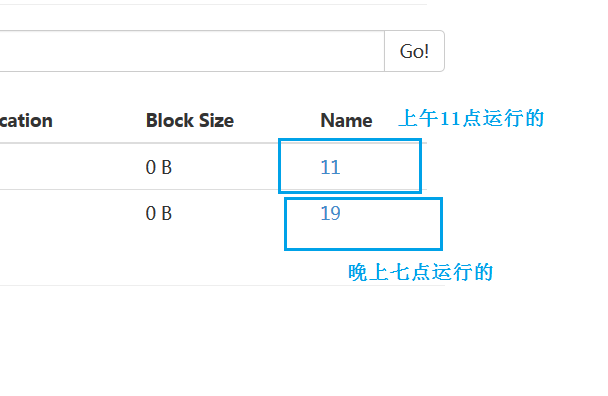
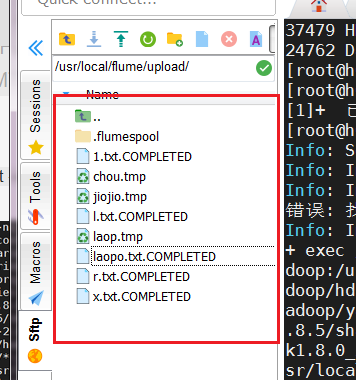 You will find that it has been executed according to our set rules and open the HDFS cluster.

 Success!