Chapter 7 System Administration-Permission Settings
1.Privilege Control, Getting Started and Advanced with SpringSecurity
[Goal]
Understanding the concepts of certification and authorization
[Path]
1: The concept of certification and authorization
- Authentication: Login (username and password)
- Authorization: Permissions to access system functions
2: Data model for permission module
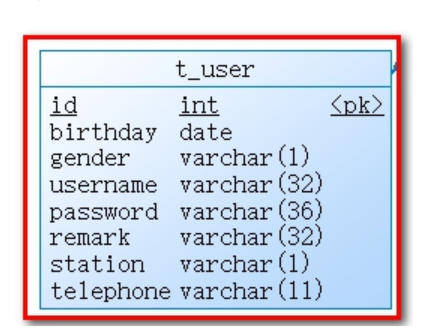
- User table
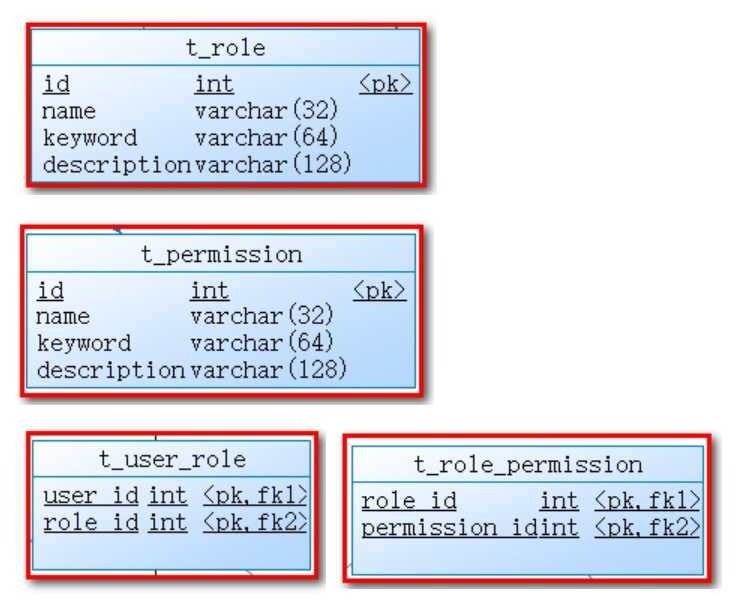
- Role Table
- Permission table
- Menu Table
User, role is many-to-many
Permissions, roles are many-to-many
Menu, role is many-to-many
1.1.Certification and Authorization Concepts [Understanding]
Previously, we have completed some of the functions of the Health Background Management System (health_web), such as check item management, check group management, meal management, appointment settings, etc. Next, we need to think about two questions:
Question 1: In a production environment, can we complete these functions without logging on to the background system?
The answer is obviously No. To operate these functions, you must first log on to the system. (User Logon System ->Authentication)
Question 2: Are all users able to operate all functions as long as the login is successful?
The answer is no, not all users can operate these functions. Different users may have different privileges, which requires authorization. (After the user logs in, authorize each user to access different functions in the system through authorization - authorization)
Authentication: The function provided by the system to identify users, usually providing a user name and password for login, is actually to authenticate. The purpose of authentication is to let the system know who you are.
Let's be clear: login to the system, you can access it, you can't access it without login. Verify that the username and password exist in the database ( t_user)
Authorization: After successful user authentication, users need to be authorized, which is to specify what functions the current user can operate on.
After the user logs on, the query obtains the permissions that the user has and binds to the user. When the permissions are validated, the permissions bound to the logged on user can be matched with the permissions demarcated by the accessed resource
The store's mineral water resource privilege is set at $3. The privilege to access this resource is set
How much money does the landing user have? The wife gives it and she authorizes it.
Authorization is for privilege validation. The set of privileges owned by the logged-in user
/checkitem/findPage.do Query check items Only health managers can access them
Employee A has no rights to sign in (see permissions for the package) Visit Inquiry Checks (/checkitem/findPage.do Health Manager)
Purpose of authentication and authorization to better protect resources (using background management functions)
This chapter is to control the rights of the background system, which is essentially to authenticate and authorize users.
1.2.Permission Module Data Model
The concepts of authentication and authorization have been analyzed before. To achieve the final control of rights, a table structure is required to support it:
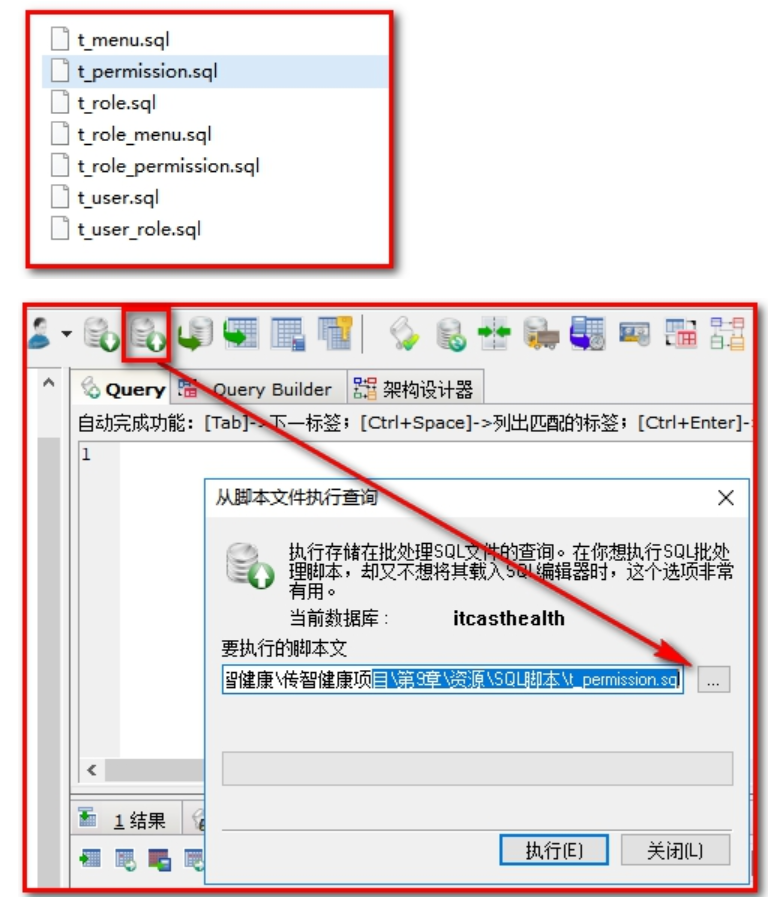
User table t_user, permission table t_permission, role table t_role, menu table t_menu, user role relationship table t_user_role, role permission relationship table t_role_permission, role menu relationship table t_role_menu.
The relationships between tables are as follows:

As you can see from the diagram above, there are seven tables involved in the permissions module. In these seven tables, the role table plays a crucial role and is at the core. We call role-based permission control RBAC because users, permissions, menus and roles are many-to-many relationships.

Next, we can analyze which tables are used in the authentication and authorization processes:
Authentication process: Only the user table is needed. When the user logs on, the user table t_user can be queried to verify whether the user entered the correct user name and password.
Authorization process: Users must complete the authentication before they can authorize. First they can query their roles according to the user, and then they can query the corresponding menu according to the role, which determines which menus the user can see. Then they can query the corresponding permissions according to the user's role, which determines what permissions the user has. So the authorization process uses the above seven tables.
[Summary]
-
Authentication and Authorization
- Authentication: Provide an account and password for login authentication, the system knows your identity
- Authorization: Different privileges, different privileges, and access to different functions of the system depending on the identity of the system (the functions of the system also require access privileges)
-
RBAC privilege module data model (role-based privilege control)
- User table
- Role Table
- Permission table
- Menu Table
User, role is a many-to-many user role table
Privileges, roles are many-to-many role privilege tables
Menu, Role is a many-to-many role menu table
A total of 7 tables
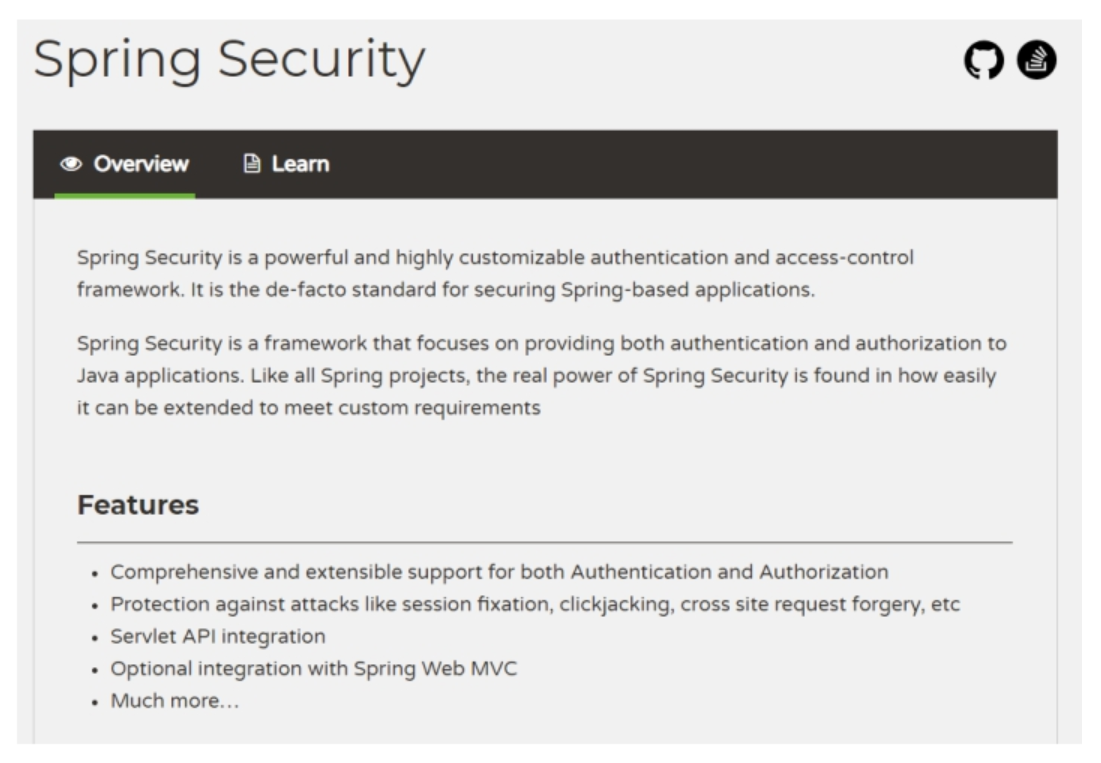
1.3.Introduction to Spring Security
[Goal]
Know what Spring Security is
[Path]
- Introduction to Spring Security
- Spring Security uses required coordinates
[Explanation]
Spring Security is the framework for security certification services provided by Spring. Using Spring Security can help us simplify the process of certification and authorization. https://spring.io/projects/spring-security
Corresponding maven coordinates:
<dependency>
  <groupId>org.springframework.security</groupId>
  <artifactId>spring-security-web</artifactId>
  <version>5.0.5.RELEASE</version>
</dependency>
<dependency>
  <groupId>org.springframework.security</groupId>
  <artifactId>spring-security-config</artifactId>
  <version>5.0.5.RELEASE</version>
</dependency>
In addition to Spring Security, the common permission framework includes Apache's shiro framework.
[Summary]
- SpringSecurity is a security framework for the Spring family that simplifies the authentication and authorization process within our development. (Login, access to url s, permission control secuirty helps us)
- SpringSecurity encapsulates Filter internally (only one filter - proxy filter needs to be configured in the web.xml container, and the real filter (12) is configured in the spring container)
- Common Security frameworks
- Spring's Spring Security configuration is complex and has a good father (spring) seamlessly integrated chain model
- Apache's Shirohttp://shiro.apache.org/ Simple Apache Write Integrated Appearer Mode
1.4. Starting Spring Security Case - [Key]
[Goal]
[Requirements]
Use Spring Security to control: Web sites (some pages) require login to access (authenticate)
[Path]
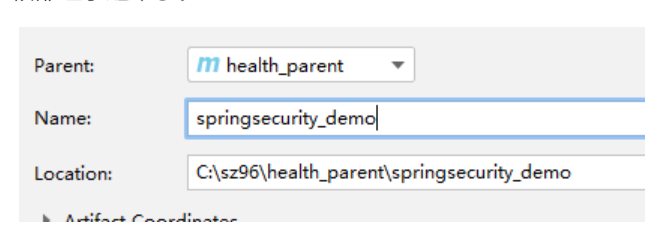
- Create a subproject of Maven health_parent, springsecurity_demo, import coordinates (health_interface dependent)
- Configure web.xml (front-end controller loads spring, SpringSecurity proxy filter)
- Create spring-security.xml (core configuration file that spring will load)
[Explanation]
1.4.1. Engineering Construction
Create a maven project, packaged in war, so for convenience we can make the starter case project dependent on health_interface, so the dependencies are inherited.
pom.xml
<?xml version="1.0" encoding="UTF-8"?>
<project xmlns="http://maven.apache.org/POM/4.0.0"
         xmlns:xsi="http://www.w3.org/2001/XMLSchema-instance"
         xsi:schemaLocation="http://maven.apache.org/POM/4.0.0 http://maven.apache.org/xsd/maven-4.0.0.xsd">
    <modelVersion>4.0.0</modelVersion>

    <groupId>com.itheima</groupId>
    <artifactId>springsecurity_demo</artifactId>
    <version>1.0-SNAPSHOT</version>

    <packaging>war</packaging>

    <properties>
        <project.build.sourceEncoding>UTF-8</project.build.sourceEncoding>
        <maven.compiler.source>1.8</maven.compiler.source>
        <maven.compiler.target>1.8</maven.compiler.target>
    </properties>

    <dependencies>
        <dependency>
            <groupId>com.itheima</groupId>
            <artifactId>health_interface</artifactId>
            <version>1.0-SNAPSHOT</version>
        </dependency>
    </dependencies>
</project>
Built-in index.html page with content of "Login Success"!!
1.4.2. Configuring web.xml
[Path]
1:DelegatingFilterProxy is used to integrate third-party frameworks (proxy filters, non-real filters, real filters need spring profiles)
2:springmvc Core Controller
The main configurations in web.xml are Dispatcher Servlet for Spring MVC and DelegatingFilterProxy (proxy filter, true filter in spring configuration file) for integrating Spring Security.
<?xml version="1.0" encoding="UTF-8"?>
<web-app xmlns="http://java.sun.com/xml/ns/javaee"
           xmlns:xsi="http://www.w3.org/2001/XMLSchema-instance"
           xsi:schemaLocation="http://java.sun.com/xml/ns/javaee
		  http://java.sun.com/xml/ns/javaee/web-app_3_0.xsd"
           version="3.0">

    <filter>
<!--  filter-name: Fixed as springSecurityFilterChain,Cannot modify. When the container starts,
From spring Get this in a container filtername Of bean Object ( security Created at startup bean name)
Can be modified: must be spring Configure one in the container bean Object is your modified name
      -->
        <filter-name>springSecurityFilterChain</filter-name>
<!--   Proxy filtering:
         I don't work myself, intercepted requests are forwarded to security Filter(springSecurityFilterChain)To process
 -->
        <filter-class>org.springframework.web.filter.DelegatingFilterProxy</filter-class>
    </filter>
    <filter-mapping>
        <filter-name>springSecurityFilterChain</filter-name>
        <url-pattern>/*</url-pattern>
    </filter-mapping>

<!-- Use DispatcherServlet Or use contextLoaderListener All the same, just start the container   -->
    <servlet>
        <servlet-name>dispatchServlet</servlet-name>
        <servlet-class>org.springframework.web.servlet.DispatcherServlet</servlet-class>
        <init-param>
            <param-name>contextConfigLocation</param-name>
            <param-value>classpath:spring-security.xml</param-value>
        </init-param>
        <load-on-startup>1</load-on-startup>
    </servlet>
    <servlet-mapping>
        <servlet-name>dispatchServlet</servlet-name>
        <url-pattern>*.do</url-pattern>
    </servlet-mapping>
</web-app>
1.4.3. Configure spring-security.xml
[Path]
1: Define which links can be released
2: Define which links are not allowed, that is, roles and privileges are required to allow them
3: Authentication management, define login account name and password, and grant access roles and privileges
The main configuration in spring-security.xml is the Interception Rules and Authentication Manager for Spring Security.
<?xml version="1.0" encoding="UTF-8"?>
<beans xmlns="http://www.springframework.org/schema/beans"
       xmlns:xsi="http://www.w3.org/2001/XMLSchema-instance"
       xmlns:security="http://www.springframework.org/schema/security"
       xsi:schemaLocation="http://www.springframework.org/schema/beans http://www.springframework.org/schema/beans/spring-beans.xsd http://www.springframework.org/schema/security http://www.springframework.org/schema/security/spring-security.xsd">
<!--
[Important
 All paths in this must be/Start, otherwise start error
-->
<!--  auto-config: Auto Configuration, Auto Generation login Page, login Processing, Exit Processing
        use-expressions: Whether to use spel Expression true: access A value of can fill in an expression(hasRole, hasAuthority, hasAny....)
                         false: ROEL_Role Name(Must be ROLE_Strike or start error), or security Several Constants Written to Death

 -->
<!--  Interception Rule Configuration  -->
    <security:http auto-config="true" use-expressions="false">
<!--  pattern="/**" Intercept all paths  access="ROLE_ADMIN"
      To access compliance pattern Of url The logon user must have ROLE_ADMIN Role, if not accessible

      security:intercept-url:  Multiple can be configured
 -->
        <security:intercept-url pattern="/**" access="ROLE_ADMIN"/>
    </security:http>

<!--  Authentication Manager  -->
    <security:authentication-manager>
<!--  Authentication Information Provider, Source of Authentication Information
      Provides a collection of login user information usernames, passwords, and permissions
      user-service-ref point spring One in Container bean object, Implement this UserDetailsService Object, Provide the user's name, password, permission set

      Once configured user-service-ref,Do not configure security:user-service
-->
        <security:authentication-provider>
<!--   Login user information is provided by us         -->
            <security:user-service>
<!--   security:user Hardcoding a user object in memory eliminates the need to query the database
       Queries from databases should be used in the future
       name: Username  password:Login password
       authorities: Specified permissions(Either role name or permission name) authorities With above access Consistent access

       {noop}In plain text, no operation Do not handle passwords
 -->
                <security:user name="admin" password="{noop}admin" authorities="ROLE_ADMIN"/>
            </security:user-service>
        </security:authentication-provider>
    </security:authentication-manager>
</beans>
{noop}: Indicates that the password currently in use is clear text. Indicates that the current password does not require encryption
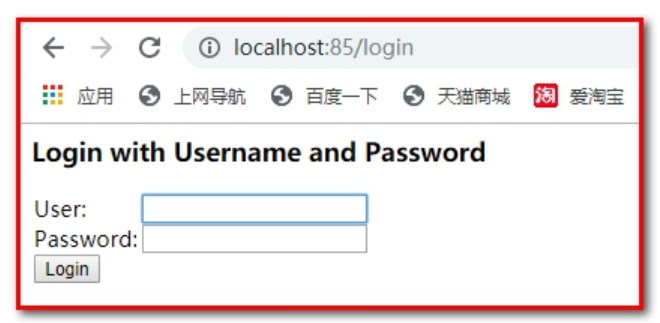
Automatically jump to the login page (provided automatically by springSecurity)
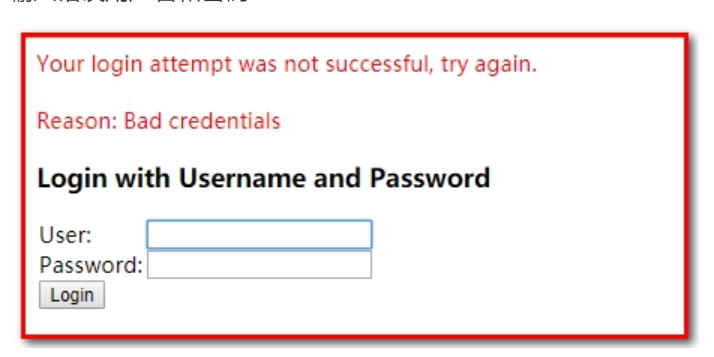
Enter the wrong username and password
Enter the correct user name and password (admin/admin)
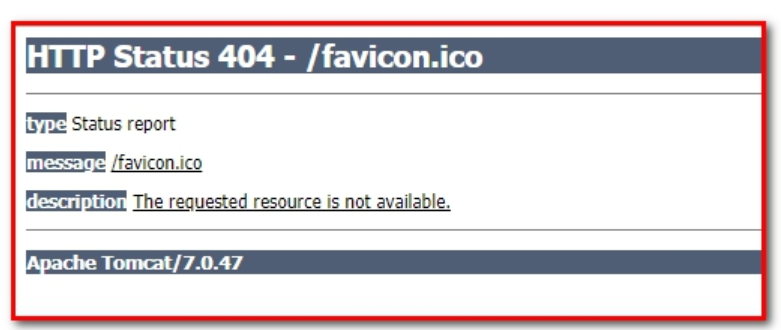
At this point, it indicates that you have not logged in to the successful page.
If you create a new index.html, you can normally access it
[Summary]
Use steps
- Create a Maven project, add coordinates
- Configure web.xml (front-end controller, springSecurity permission-related filter DelegatingFilterProxy, filter name cannot be modified, must be springSecurityFilterChain)
- Create spring-security.xml(security:http auto-configuration, authorization done by expression, access to all functions in the system only if you have role privileges for ROLE_ADMIN; authorization manager, specify user name admin, password {noop}admin, role privileges for ROLE_ADMIN)
Notice implementation
1. Permission-related filter names configured in web.xml cannot be changed (springSecurityFilterChain)
<filter>
   <filter-name>springSecurityFilterChain</filter-name>
   <filter-class>org.springframework.web.filter.DelegatingFilterProxy</filter-class>
</filter>
<filter-mapping>
   <filter-name>springSecurityFilterChain</filter-name>
   <url-pattern>/*</url-pattern>
</filter-mapping>
2. Password encryption is not specified in the entry case.Add {noop} when configuring passwords
<security:user-service>
   <security:user name="admin" password="{noop}admin" authorities="ROLE_ADMIN"/>
</security:user-service>
1.5.Spring Security Advanced
[Goal]
Previously, we have completed the Starting Case of Spring Security. From the Starting Case, we can see that Spring Security protects all the resources in our project. To access these resources, you must complete the certification and have the ROLE_ADMIN role.
However, the usage method in the entry case is far from our real production environment, and there are still some problems as follows:
1. We protect all the resources in the project (all request URL pattern=/**). In the real world, there are often some resources that can be accessed without authentication, that is, anonymously (static resources).
2. The login page is generated by a framework, and our projects tend to use their own login page.
3. Configure the user name and password directly in the configuration file, while the user name and password in the real production environment are often stored in the database.
4. Passwords configured in the configuration file are in plain text, which is very unsafe and needs to be encrypted in the real production environment.
These issues need to be improved in this chapter.
[Path]
1: Configure resources that can be accessed anonymously (resources that can be accessed by privilege roles without login)
2: Use the specified login page (login.html)
3: Query user information from database
4: Encrypt the password
5: Configure multiple checking rules (control access to pages)
6: Annotation mode permission control (permission control on the accessed Controller class)
7: Log out
[Explanation]
1.5.1. Configure resources that can be accessed anonymously
[Path]
1: Create a js, css directory in the project and provide any number of test files in both directories
2: Configure in the spring-security.xml file to specify which resources can be accessed anonymously
Step 1: Create a js, css directory in your project and provide any number of test files in both directories
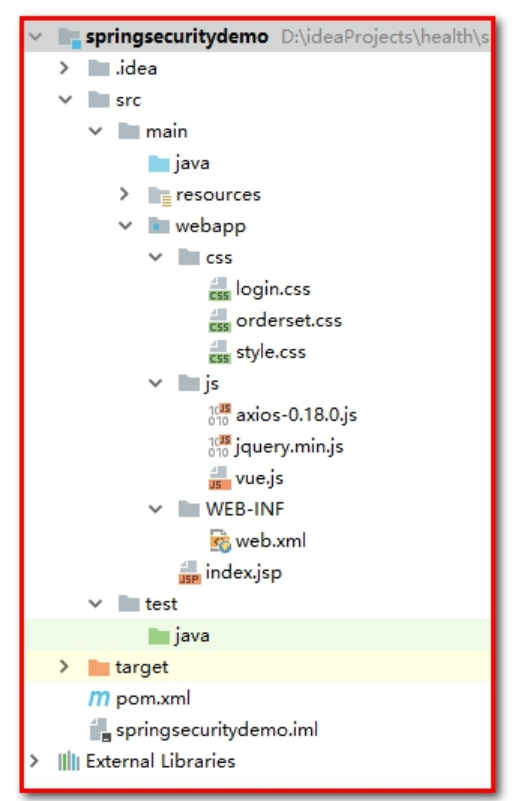
Visithttp://localhost:85/js/vue.js
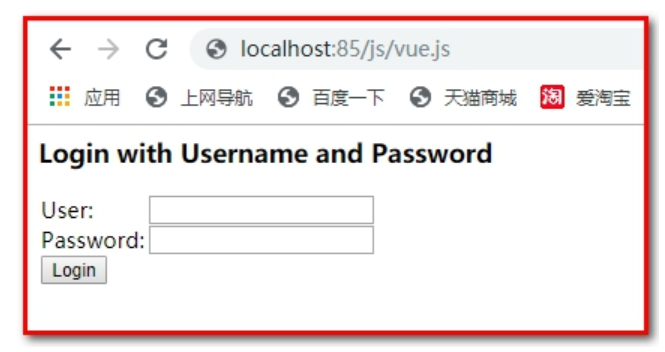
Step 2: Configure in the spring-security.xml file to specify which resources can be accessed anonymously
<!--
  http: Used to define related permission controls
  Specify which resources do not require permission checking and wildcards can be used
-->
<security:http security="none" pattern="/js/**" />
<security:http security="none" pattern="/css/**" />
From the configuration above, you can see that files in the js and css directories can be accessed arbitrarily without authentication.
1.5.2. Use the specified login page
[Path]
1: Provide login.html as the login page for the project
2: Modify the spring-security.xml file to specify that the login.html page can be accessed anonymously
3: Modify the spring-security.xml file to include the configuration of form login information
4: Modify the spring-security.xml file to close the csrfFilter filter
[Explanation]
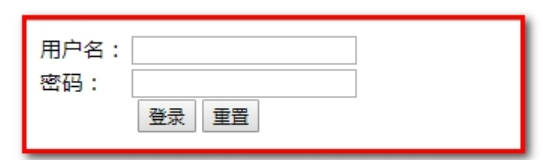
Step 1: Provide login.html as the login page for your project
1: User name is abc
2: Password is bbb
3: The login url is/login
<!DOCTYPE html>
<html lang="en">
<head>
    <meta charset="UTF-8">
    <title>Title</title>
</head>
<body>
<form name='f' action='/login' method='POST'>
    <table>
        <tr><td>User name:</td><td><input type='text' name='abc' value=''></td></tr>
        <tr><td>Password:</td><td><input type='password' name='bbb'/></td></tr>
        <tr><td colspan='2'><input name="submit" type="submit" value="Land"/></td></tr>
    </table>
</form>
</body>
</html>
Step 2: Modify the spring-security.xml file to specify that the login.html page can be accessed anonymously, otherwise it cannot be accessed.
<security:http security="none" pattern="/login.html" />
Step 3: Modify the spring-security.xml file to include the configuration of form login information
<!-- Login Configuration form-login
login-page: Landing Page
username-parameter: Parameter name of user name passed from front end
password-parameter: Parameter name of password passed from front end
login-processing-url: Processing landing requests url
default-target-url: Default page Jump after successful login, success.html -> login.html->success.html
always-use-default-target: true No matter which page you go to login.html,Run after landing default-target-url
success.html -> login.html-> index.html
authentication-failure-url: Pages Jumped After Logon Failure
-->
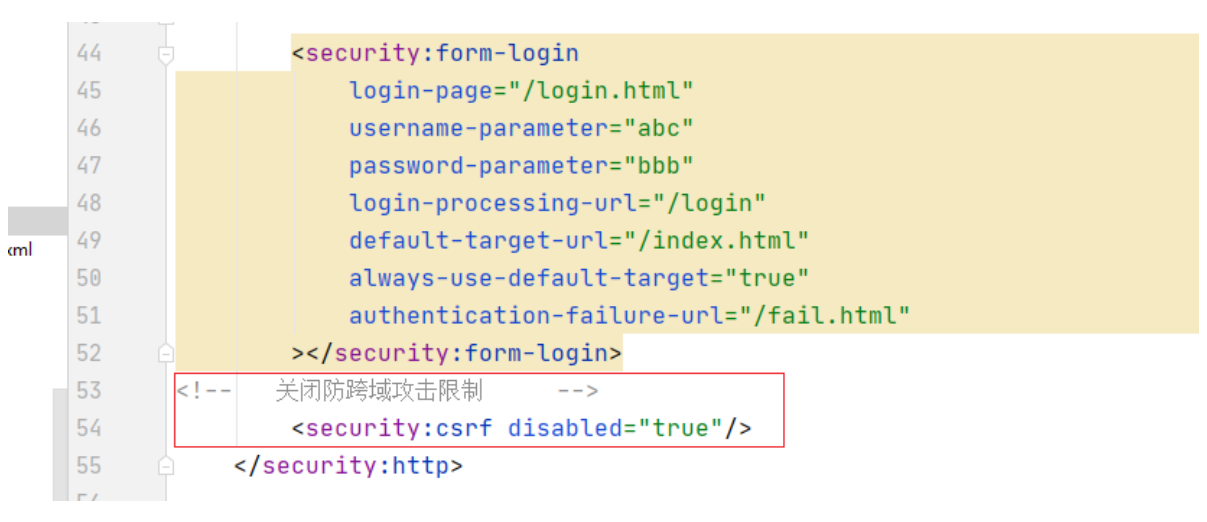
<security:form-login
login-page="/login.html"
username-parameter="abc"
password-parameter="bbb"
login-processing-url="/login"
default-target-url="/index.html"
always-use-default-target="true"
authentication-failure-url="/fail.html"
></security:form-login>
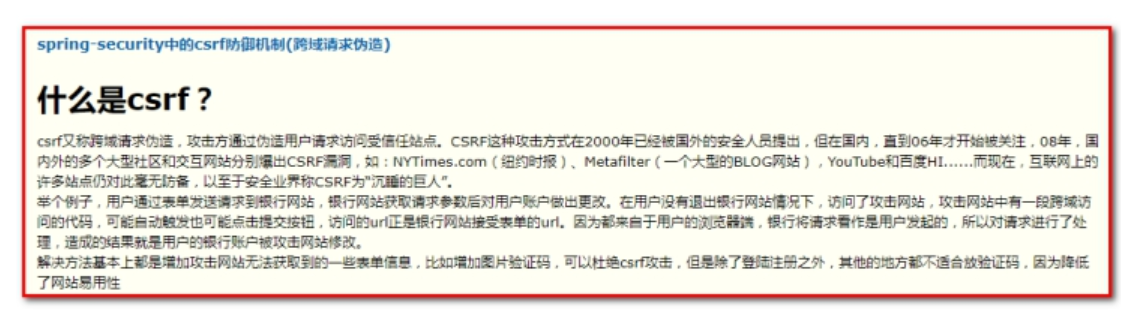
Step 4: Modify the spring-security.xml file and close the CsrfFilter filter
1.5.2.1.Note 1:
If the username and password are entered incorrectly/correctly. Throw an exception:
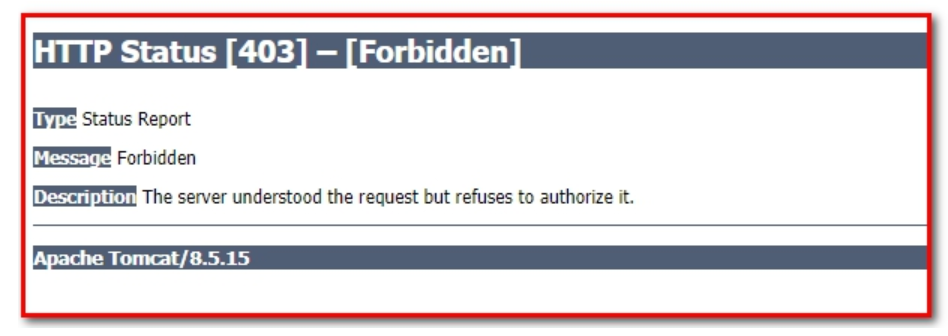
Analysis Reason:
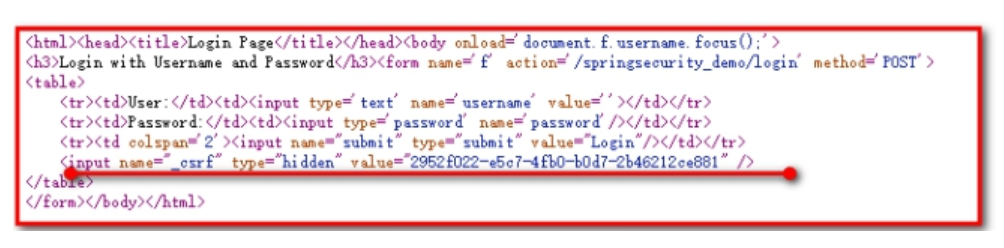
Spring-security uses a chain-stealing mechanism where _csrf uses token identifiers and random characters, which are randomly generated each time a page is visited and compared with the server. Successfully accessible, unsuccessfully inaccessible (403: Insufficient privileges).
Solution:
<!--Close the steal chain security request-->
<security:csrf disabled="true" />
1.5.2.2.Note 2:
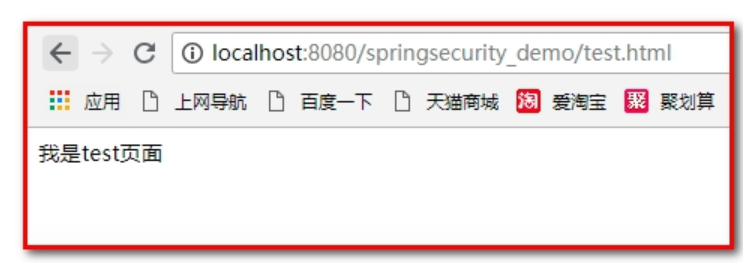
1: Create test.html
<!DOCTYPE html>
<html lang="en">
<head>
    <meta charset="UTF-8">
    <title>Title</title>
</head>
<body>
    I am test page
</body>
</html>
2: Visit the test.html page first and jump to login.html
3: What should I do if I use admin and admin to log in again and I jump to test.html?
Analysis Reason:
After successful login, instead of always jumping to the success page, you jump to the page you visited earlier.
Solution:
always-use-default-target="true"
<!--
    Logon Page Configuration
    login-page:Logon Page
    login-processing-url:Processing login addresses
    default-target-url:Default jump address after successful login
    authentication-failure-url:Login Failure Jump Address
    always-use-default-target="true": After successful login, always jump to default-target-url The specified address, which is the default address for successful login
 -->
<security:form-login login-page="/login.html"
                     username-parameter="username"
                     password-parameter="password"
                     login-processing-url="/login.do"
                     default-target-url="/index.html"
                     authentication-failure-url="/login.html"
                     always-use-default-target="true"
/>
1.5.3.Query user information from a database
[Path]
1: Define the UserService class to implement the UserDetailsService interface.
2: Modify the spring-security.xml configuration (register and inject UserService)
If we want to dynamically query user information from the database, we must provide an implementation class that implements the UserDetailsService interface as required by the spring security framework and configure it as required by the framework. The framework automatically calls the methods in the implementation class and automatically performs password validation.
Step 1: Define the UserService class to implement the UserDetailsService interface.
Implement class code:
package com.itheima.security;

import com.google.gson.internal.$Gson$Preconditions;
import com.itheima.health.pojo.Permission;
import com.itheima.health.pojo.Role;
import org.springframework.security.core.GrantedAuthority;
import org.springframework.security.core.authority.SimpleGrantedAuthority;
import org.springframework.security.core.userdetails.User;
import org.springframework.security.core.userdetails.UserDetails;
import org.springframework.security.core.userdetails.UserDetailsService;
import org.springframework.security.core.userdetails.UsernameNotFoundException;
import org.springframework.security.crypto.bcrypt.BCryptPasswordEncoder;
import org.springframework.stereotype.Component;

import java.util.ArrayList;
import java.util.HashSet;
import java.util.List;
import java.util.Set;

/**
 * Description: Services can also be injected into spring containers in the future
 * User: Eric
 */
public class UserService implements UserDetailsService {

    /**
     * Load user information by user name User logon
     * @param username
     * @return
     * @throws UsernameNotFoundException
     */
    @Override
    public UserDetails loadUserByUsername(String username) throws UsernameNotFoundException {
        //Provide the user's name, password, permission set
        // Query databases, roles, and permissions by user name
        com.itheima.health.pojo.User userInDB = findByUsername(username);
        // String username,
        // String password, password in database, password checking (security did it for us)
        // Collection<?Extends GrantedAuthority > authorities permission set
        List<GrantedAuthority> authorities = new ArrayList<GrantedAuthority>();

        // Traversing roles on users
        Set<Role> roles = userInDB.getRoles();
        if(null != roles){
            for (Role role : roles) {
                // Granted Permissions
                // The construction method requires a role name
                GrantedAuthority ga = new SimpleGrantedAuthority(role.getName());
                authorities.add(ga);
                for (Permission permission : role.getPermissions()) {
                    // Jurisdiction
                    ga = new SimpleGrantedAuthority(permission.getName());
                    authorities.add(ga);
                }
            }
        }

        // Authentication information, name, password, permission set for logged-in users
        User user = new User(username,"{noop}" + userInDB.getPassword(),authorities);

        return user;
    }

    /**
     * Assume querying from a database
     * @param username
     * @return
     */
    private com.itheima.health.pojo.User findByUsername (String username){
        if("admin".equals(username)) {
            com.itheima.health.pojo.User user = new com.itheima.health.pojo.User();
            user.setUsername("admin");
            user.setPassword("admin");

            Role role = new Role();
            role.setName("ROLE_ADMIN");
            Permission permission = new Permission();
            permission.setName("ADD_CHECKITEM");
            role.getPermissions().add(permission);

            Set<Role> roleList = new HashSet<Role>();
            roleList.add(role);

            user.setRoles(roleList);
            return user;
        }
        return null;
    }

    public static void main(String[] args) {
        BCryptPasswordEncoder encoder = new BCryptPasswordEncoder();
        // Encrypt Password
        //System.out.println(encoder.encode("1234"));

        // Verify password
        // Original Password
        // Encrypted password
        System.out.println(encoder.matches("1234", "$2a$10$P7Qx8eKUPX5lngz9UEstUOaDRldEWrj9Rbyox/ShyeoxvPbEHTvni"));
        System.out.println(encoder.matches("1234", "$2a$10$5q.0a0F0hRix8TBJxQ4DB.ekwGzPs3e47hoQVNR7cihi/Rob.G3T6"));
        System.out.println(encoder.matches("1234", "$2a$10$voh.1PJRXQazoijK72sIoOslpmLYPyB.6LtT7aUrXqUO5G8Aw43we"));

        System.out.println(encoder.matches("1234", "$2a$10$u/BcsUUqZNWUxdmDhbnoeeobJy6IBsL1Gn/S0dMxI2RbSgnMKJ.4a"));
    }
}
Step 2: spring-security.xml:
In this section, we provide the UserService implementation class and implement the UserDetailsService interface as required by the framework. Register the UserService in the spring configuration file and specify it as the processing class for querying user information based on user name during authentication. When we sign in, springThe security framework invokes the loadUserByUsername method of UserService to query user information and to perform authentication by comparing the passwords provided in this method with those entered on the user's page.
1.5.4.Encrypt password
Previously, the passwords we used were clear text, which is very insecure. Usually, the user's password needs to be encrypted before it can be saved to the database.
Common password encryption methods are:
3DES, AES, DES: Reversible encryption of the original password can be restored by decryption using symmetric encryption algorithm
MD5, SHA1: With one-way HASH algorithm, the original password can not be restored by calculation, but a rainbow table can be built for table lookup cracking
MD5 can be encrypted with salt to ensure security
public class TestMD5 {

    @Test
    public void testMD5(){
        // Passwords are also 1234 but become different
        System.out.println(MD5Utils.md5("1234xiaowang")); //a8231077b3d5b40ffadee7f4c8f66cb7
        System.out.println(MD5Utils.md5("1234xiaoli")); //7d5250d8620fcdb53b25f96a1c7be591
    }
}
The same password value, different salt values, different results of encryption.
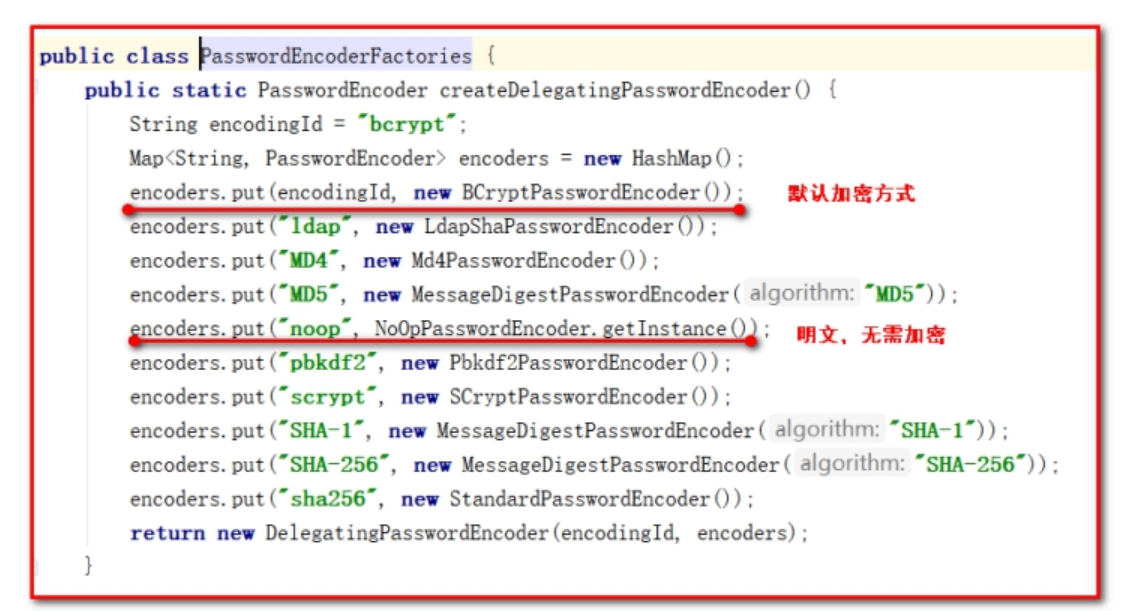
bcrypt: mix salt randomly into the final encrypted password and validate without providing the previous salt separately, thereby eliminating the need to handle the salt problem separately
The BCryptPasswordEncoder method in spring security uses SHA-256 +random salt+key to encrypt the password. The SHA family is a Hash algorithm, not an encryption algorithm. Using an encryption algorithm means decryption (this is the same as encoding/decoding), but with Hash processing, the process is irreversible.
(1) Encryption: When registering a user, hash the password entered by the user with SHA-256+random salt+key, get the hash value of the password, and then store it in the database.
(2) Password matches: When a user logs in, the password matching phase does not decrypt the password (because the password is processed by Hash and is not reversible)Instead, the password entered by the user is hash processed using the same algorithm, the hash value of the password is obtained, and then compared with the hash value of the password queried from the database. If both are the same, the password entered by the user is correct.
That's why hash algorithms are used instead of encryption algorithms when processing passwords, because hackers can't decipher codes even if the database is compromised.
Establish test code
package com.itheima.security.test;

import org.junit.Test;
import org.springframework.security.crypto.bcrypt.BCryptPasswordEncoder;

public class TestSpringSecurity {
    // SpringSecurity Salt Encryption
    @Test
    public void testSpringSecurity(){
        BCryptPasswordEncoder encoder = new BCryptPasswordEncoder();
        // Encrypt Password
        //System.out.println(encoder.encode("1234"));

        // Verify password
        // Original Password
        // Encrypted password
        System.out.println(encoder.matches("1234", "$2a$10$P7Qx8eKUPX5lngz9UEstUOaDRldEWrj9Rbyox/ShyeoxvPbEHTvni"));
        System.out.println(encoder.matches("1234", "$2a$10$5q.0a0F0hRix8TBJxQ4DB.ekwGzPs3e47hoQVNR7cihi/Rob.G3T6"));
        System.out.println(encoder.matches("1234", "$2a$10$voh.1PJRXQazoijK72sIoOslpmLYPyB.6LtT7aUrXqUO5G8Aw43we"));

        System.out.println(encoder.matches("1234", "$2a$10$u/BcsUUqZNWUxdmDhbnoeeobJy6IBsL1Gn/S0dMxI2RbSgnMKJ.4a"));
    }
}
The encrypted format is generally:
$2a$10$/bTVvqqlH9UiE0ZJZ7N2Me3RIgUCdgMheyTgV0B4cMCSokPa.6oCa
The encrypted string has a fixed length of 60 bits, where:
$is a separator and has no meaning;
2a is the bcrypt encrypted version number;
10 is the value of cost;
The next 22 bits are the salt value.
The next string is the password text.
Steps to achieve:
[Path]
1: Specify the password encryption object in the spring-security.xml file
2: Modify the UserService implementation class
[Explanation]
Step 1: Specify the password encryption object in the spring-security.xml file
<!--
3: Authentication management, define login account name and password, and grant access roles and privileges
authentication-manager: Authentication Manager for handling authentication operations
-->
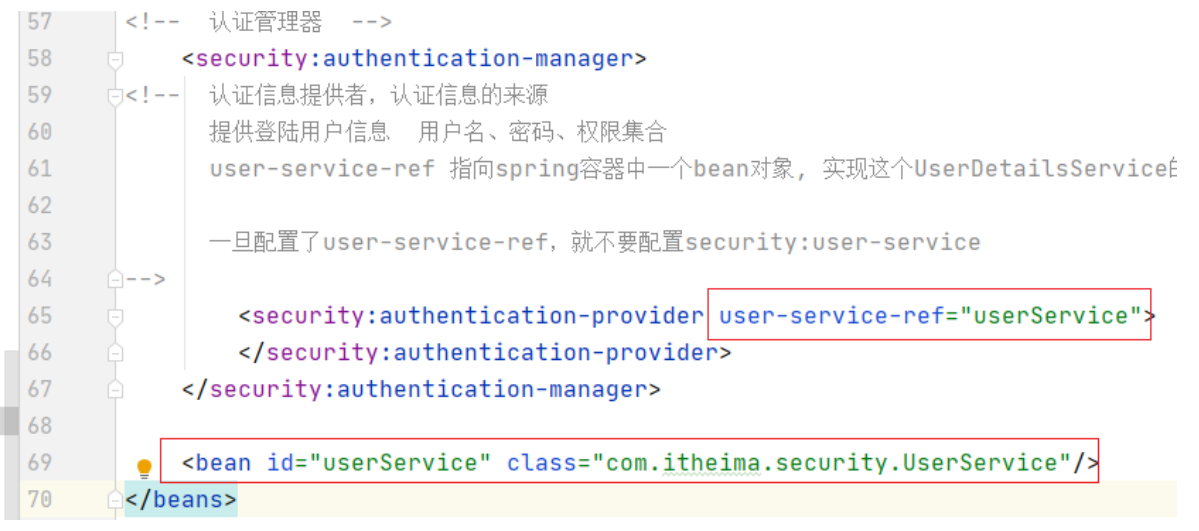
<security:authentication-manager>
<!--
authentication-provider: Certification Provider, Execute Specific Authentication Logic
-->
<security:authentication-provider user-service-ref="userService">
<!--Specify Password Encryption Policy-->
<security:password-encoder ref="encoder"></security:password-encoder>
</security:authentication-provider>
</security:authentication-manager>
<!--Configure Password Encryption Objects-->
<bean id="encoder"
class="org.springframework.security.crypto.bcrypt.BCryptPasswordEncoder" />
Step 2: Modify the UserService implementation class
package com.itheima.security;

import com.google.gson.internal.$Gson$Preconditions;
import com.itheima.health.pojo.Permission;
import com.itheima.health.pojo.Role;
import org.springframework.security.core.GrantedAuthority;
import org.springframework.security.core.authority.SimpleGrantedAuthority;
import org.springframework.security.core.userdetails.User;
import org.springframework.security.core.userdetails.UserDetails;
import org.springframework.security.core.userdetails.UserDetailsService;
import org.springframework.security.core.userdetails.UsernameNotFoundException;
import org.springframework.security.crypto.bcrypt.BCryptPasswordEncoder;
import org.springframework.stereotype.Component;

import java.util.ArrayList;
import java.util.HashSet;
import java.util.List;
import java.util.Set;

/**
 * Description: Services can also be injected into spring containers in the future
 * User: Eric
 */
public class UserService implements UserDetailsService {

    /**
     * Load user information by user name User logon
     * @param username
     * @return
     * @throws UsernameNotFoundException
     */
    @Override
    public UserDetails loadUserByUsername(String username) throws UsernameNotFoundException {
        //Provide the user's name, password, permission set
        // Query databases, roles, and permissions by user name
        com.itheima.health.pojo.User userInDB = findByUsername(username);
        // String username,
        // String password, password in database, password checking (security did it for us)
        // Collection<?Extends GrantedAuthority > authorities permission set
        List<GrantedAuthority> authorities = new ArrayList<GrantedAuthority>();

        // Traversing roles on users
        /*Set<Role> roles = userInDB.getRoles();
        if(null != roles){
            for (Role role : roles) {
                // Granted Permissions
                // The construction method requires a role name
                GrantedAuthority ga = new SimpleGrantedAuthority(role.getName());
                authorities.add(ga);
                for (Permission permission : role.getPermissions()) {
                    // Jurisdiction
                    ga = new SimpleGrantedAuthority(permission.getName());
                    authorities.add(ga);
                }
            }
        }*/

        //Test other forms of authentication
        GrantedAuthority ga = new SimpleGrantedAuthority("ROLE_ADMIN");
        authorities.add(ga);
        ga = new SimpleGrantedAuthority("add");
        authorities.add(ga);

        // Authentication information, name, password, permission set for logged-in users
        //User user = new User(username,"{noop}" + userInDB.getPassword(),authorities);
        // Remove {noop} after using encrypted passwords
        User user = new User(username,userInDB.getPassword(),authorities);

        return user;
    }

    /**
     * Assume querying from a database
     * @param username
     * @return
     */
    private com.itheima.health.pojo.User findByUsername (String username){
        if("admin".equals(username)) {
            com.itheima.health.pojo.User user = new com.itheima.health.pojo.User();
            user.setUsername("admin");
            //user.setPassword("admin");
            // Using the password encryptor encoder, the encrypted password
            user.setPassword("$2a$10$P7Qx8eKUPX5lngz9UEstUOaDRldEWrj9Rbyox/ShyeoxvPbEHTvni");

            Role role = new Role();
            role.setName("ROLE_ADMIN");
            Permission permission = new Permission();
            permission.setName("ADD_CHECKITEM");
            role.getPermissions().add(permission);

            Set<Role> roleList = new HashSet<Role>();
            roleList.add(role);

            user.setRoles(roleList);
            return user;
        }
        return null;
    }

    public static void main(String[] args) {
        BCryptPasswordEncoder encoder = new BCryptPasswordEncoder();
        // Encrypt Password
        //System.out.println(encoder.encode("1234"));

        // Verify password
        // Original Password
        // Encrypted password
        System.out.println(encoder.matches("1234", "$2a$10$P7Qx8eKUPX5lngz9UEstUOaDRldEWrj9Rbyox/ShyeoxvPbEHTvni"));
        System.out.println(encoder.matches("1234", "$2a$10$5q.0a0F0hRix8TBJxQ4DB.ekwGzPs3e47hoQVNR7cihi/Rob.G3T6"));
        System.out.println(encoder.matches("1234", "$2a$10$voh.1PJRXQazoijK72sIoOslpmLYPyB.6LtT7aUrXqUO5G8Aw43we"));

        System.out.println(encoder.matches("1234", "$2a$10$u/BcsUUqZNWUxdmDhbnoeeobJy6IBsL1Gn/S0dMxI2RbSgnMKJ.4a"));
    }
}
Summary using a password encryptor:
-
security.xml Add bean Encryptor
<!-- Encryptor-->
<bean id="encoder" class="org.springframework.security.crypto.bcrypt.BCryptPasswordEncoder"/>
-
security.xml uses an encryptor
<security:authentication-provider user-service-ref="userService"> <!-- provider call service To get authenticated user information --> <!-- <security:user-service> Write one user's information to death in memory authorities: Permissions owned by this user/role enable password: noop no operation Password Encryptor: Default BcyptPasswordEncoder <security:user name="admin" authorities="ROLE_ADMIN" password="{noop}admin"/> </security:user-service> --> <security:password-encoder ref="encoder"/> </security:authentication-provider> -
Modify the password of admin user in UserService to ciphertext, go to {noop}
1.5.5.Configure multiple validation rules (for pages)
For testing convenience, first create a few pages of a.html, b.html, c.html, d.html in your project
Modify the spring-security.xml file:
Prerequisite: <security:http auto-config="true" use-expressions="true">, turn on support for expressions
<!--Access as long as certification is passed-->
<security:intercept-url pattern="/index.html"  access="isAuthenticated()" />
<security:intercept-url pattern="/a.html"  access="isAuthenticated()" />

<!--Have add Permissions are accessible b.html page-->
<security:intercept-url pattern="/b.html"  access="hasAuthority('add')" />

<!--Have ROLE_ADMIN Roles are accessible c.html Page,
    Note: Although it is written here ADMIN Roles, frames are automatically prefixed ROLE_-->
<security:intercept-url pattern="/c.html"  access="hasRole('ADMIN')" />

<!--Have ROLE_ADMIN Roles are accessible d.html page-->
<security:intercept-url pattern="/d.html"  access="hasRole('ABC')" />
Test:
After login, you can access a.html,b.html,c.html, but not d.html (throwing 403 exceptions)
1.5.6.Annotation mode permission control (for classes)
In addition to configuring permission checking rules in the configuration file, Spring Security can also use annotations to control the invocation of methods in classes. For example, a method in Controller requires certain permissions to be accessible and can be controlled using annotations provided by the Spring Security framework.
[Path]
1: Configure component scan and mvc annotation drivers in the spring-security.xml file to scan Controller
2: Turn on permission annotation support in the spring-security.xml file
3: Create a Controller class and add a comment (@PreAuthorize) to the Controller's methods for permission control
Steps to achieve:
Step 1: Configure component scanning in the spring-security.xml file to scan Controller
<context:component-scan base-package="com.itheima"/>
<mvc:annotation-driven></mvc:annotation-driven>
Step 2: Turn on permission annotation support in the spring-security.xml file
<!--Turn on comment mode permission control-->
<security:global-method-security pre-post-annotations="enabled" />
Step 3: Create a Controller class and add a comment (@PreAuthorize) to the Controller's methods for permission control
package com.itheima.controller;
import org.springframework.security.access.prepost.PreAuthorize;
import org.springframework.stereotype.Controller;
import org.springframework.web.bind.annotation.RequestMapping;
@Controller
@RequestMapping("/hello")
public class HelloController {
@RequestMapping("/add")
@PreAuthorize("hasAuthority('add')")//Indicates that the user must have add permission to invoke the current method
public String add(){
System.out.println("add...");
return null;
}
@RequestMapping("/update")
@PreAuthorize("hasRole('ROLE_ADMIN')")//Indicates that the user must have the ROLE_ADMIN role to invoke the current method
public String update(){
System.out.println("update...");
return null;
}
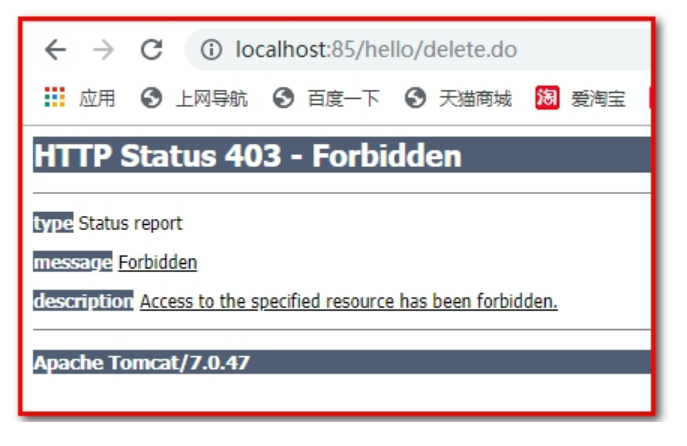
@RequestMapping("/delete")
@PreAuthorize("hasRole('ABC')")//Indicates that the user must have an ABC role to invoke the current method
public String delete(){
System.out.println("delete...");
return null;
}
}
Test delete method is not accessible
Summary:
-
Turn on annotation support
<security:global-method-security pre-post-annotations="enabled"/>
-
Use mvc:annotation-driven
-
Create controller and add sweeper context:component-scan
-
controller method@PreAuthorize(hasAuthority/hasRole)
-
Annotate
<!--<security:intercept-url pattern="/**" access="hasRole('ROLE_ADMIN')"/>-->
URL Intercept Rights Configuration, Coarse Grain
@PreAuthrize fine particles (specific method)@PreAuthrize on the controller class
If the class has PreAuthrize and the method has PreAuthrize, both conditions are met before access is possible
Recommendation: Use roles for permission control
1.5.7.Log out
The Spring Security framework records the current user authentication status as authenticated after the user has logged in. That means the user has successfully logged in. How can the user log out? We can configure the following in the spring-security.xml file:
[Path]
1:index.html Definition Exit Logon Link
2: Defined in spring-security.xml
[Explanation]
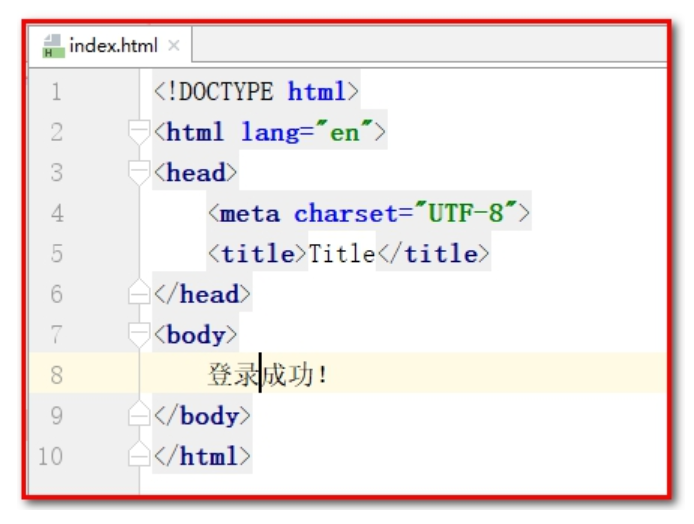
Step 1: index.html defines the exit login link
<!DOCTYPE html>
<html lang="en">
<head>
    <meta charset="UTF-8">
    <title>Title</title>
</head>
<body>
    Login successful!<br>
    <a href="/logout">Log out</a>
</body>
</html>
Step 2: Define in spring-security.xml:
<!--
  logout: Log out
  logout-url: Request path corresponding to exit logon operation
  logout-success-url: Jump Page After Logging Out
-->
<security:logout logout-url="/logout"
                 logout-success-url="/login.html" invalidate-session="true"/>
From the configuration above, you can see that if a user wants to log out, he or she only needs to request the URL address/logout.do, which invalidates the current session and jumps to the login.html page.
[Summary]
1: Configure resources that can be accessed anonymously (privilege roles can access them without logging in)
<security:http security="none" pattern="/js/**"></security:http>
<security:http security="none" pattern="/css/**"></security:http>
<security:http security="none" pattern="/login.html"></security:http>
2: Use the specified login page (login.html)
<security:form-login login-page="/login.html"
                     username-parameter="username"
                     password-parameter="password"
                     login-processing-url="/login"
                     default-target-url="/index.html"
                     authentication-failure-url="/login.html"
                     always-use-default-target="true"/>
<!--    Turn off cross-domain access restrictions    -->
<security:csrf disabled="true"/>
3: Query user information from database
Adding classes implements the UserDetailService interface, implements the loadByUsername method, and returns the UserDetails object (user name, password in the database, set of permissions owned by the user)
<security:authentication-manager>
    <security:authentication-provider user-service-ref="userService">
        <security:password-encoder ref="encoder"></security:password-encoder>
    </security:authentication-provider>
</security:authentication-manager>
4: Encrypt the password
<bean id="encoder" class="org.springframework.security.crypto.bcrypt.BCryptPasswordEncoder"></bean>

userDetail Medium password no longer used{noop},hold{noop}delete
5: Configure a variety of checking rules (control access to pages, multiple times, from top to top, as long as one is satisfied, it will be handled)
use-expressions="true"
<security:intercept-url pattern="/index.html" access="isAuthenticated()"></security:intercept-url>
<security:intercept-url pattern="/a.html" access="isAuthenticated()"></security:intercept-url>
<security:intercept-url pattern="/b.html" access="hasAuthority('add')"></security:intercept-url>
<security:intercept-url pattern="/c.html" access="hasRole('ROLE_ADMIN')"></security:intercept-url>
<security:intercept-url pattern="/d.html" access="hasRole('ABC')"></security:intercept-url>
6: Annotation mode permission control (permission control on the accessed Controller class)
<security:global-method-security pre-post-annotations="enabled"></security:global-method-security>
Also use notes:
Add on the method in the Controller class: @PreAuthorize(value = hasRole('ROLE_ADMIN'))
7: Log out
<security:logout logout-url="/logout" logout-success-url="/login.html" invalidate-session="true"></security:logout>
2.Use Spring Security in Projects
We have already learned how to use the Spring Security framework before. In this chapter, we need to apply the Spring Security framework to the background system for privilege control, which is essentially authentication and authorization.
Authentication and authorization require the support of seven tables involved in the privilege model mentioned in the previous lesson, because user information, privilege information, menu information, role information, association information and so on are all stored in these seven tables, that is, the data in these tables is the basis for our authentication and authorization. Therefore, it is necessary to manage these data before authenticating and authorizing.That is, we need to develop the following functions:
1. User data management (add delete check, user association role)
2. Role data management (add/delete check, role Association privilege, role Association menu)
3. Privilege data management (add, delete, change and check)
4. Menu data management (add delete check)
Due to time, we no longer implement code development for these data management. We can import the data directly into the database.
Import initial data for users, roles, permissions, menus
[Goal]
Use SpringSecurity to complete certification and authorization in intellectual health projects
[Path]
1: Import the SpringSecurity environment
(1) Adding dependencies in pom.xml
(2) Health_web.xml Add Proxy Filter
2: Achieving certification and authorization
(1) Import login.html into the webapp directory of the health_web project
(2) Authentication: SpringSecurityUserService.java
(3) Create UserService class, UserDao interface class, UserDao mapping file
(4) springmvc.xml (dubbo annotation scan expanded)
(5)spring-security.xml
- Static Resources
- Interception rules, all must be logged on before they can be accessed
- Landing Page Configuration
- Close csrf
- Framee Access Policy
- Exit Logon
- Turn on comment permission control
- Authentication Manager
- Certified Information Provider
- Encryptor
(6) springmvc.xml (import spring-security.xml)
(7) CheckItemController class (@PreAuthorize("hasAuthority('CHECKITEM_ADD'))): Complete permissions)
(8) Catching exceptions
3: Display user name
4: User Exit
[Explanation]
2.1.Import Spring Security Environment
[Path]
1:pom.xml Import Coordinates
2:web.xml Add Proxy Filter
2.1.1.Step 1: Import coordinates from pom.xml
Import the maven coordinates of Spring Security into the pom.xml of the health_parent parent parent project (introduced)
<dependency>
  <groupId>org.springframework.security</groupId>
  <artifactId>spring-security-web</artifactId>
  <version>${spring.security.version}</version>
</dependency>
<dependency>
  <groupId>org.springframework.security</groupId>
  <artifactId>spring-security-config</artifactId>
  <version>${spring.security.version}</version>
</dependency>
2.1.2.Step 2: Add a proxy filter to web.xml
Configure the filter DelegatingFilterProxy used to integrate the Spring Security framework in the health_web project's web.xml file
<filter>
    <!--
      DelegatingFilterProxy For integrating third-party frameworks (proxy filters, non-real filters, real filters need to be spring Profile)
      integration Spring Security The name of the filter must be springSecurityFilterChain,
      Otherwise it will throw NoSuchBeanDefinitionException abnormal
    -->
    <filter-name>springSecurityFilterChain</filter-name>
    <filter-class>org.springframework.web.filter.DelegatingFilterProxy</filter-class>
</filter>
<filter-mapping>
    <filter-name>springSecurityFilterChain</filter-name>
    <url-pattern>/*</url-pattern>
</filter-mapping>
2.2.Implement authentication and authorization
2.2.1.Step 1: Import the login.html page
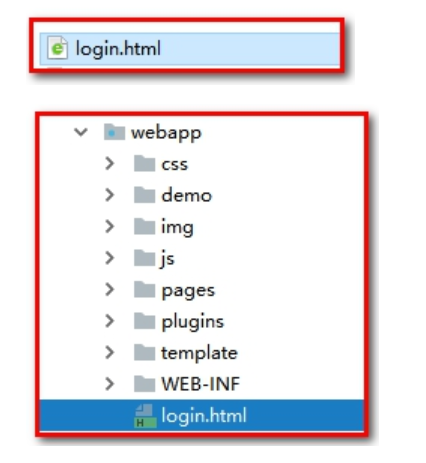
login.html is now an available page, and pages under pages must be authenticated before they can be accessed
2.2.2.Step 2: SpringSecurityUserService.java
Provide the Spring SecurityUserService as required by the Spring Security framework in the health_web project and implement the UserDetailsService interface
package com.itheima.health.security;
import com.alibaba.dubbo.config.annotation.Reference;
import com.itheima.health.pojo.Permission;
import com.itheima.health.pojo.Role;
import com.itheima.health.pojo.User;
import com.itheima.health.service.UserService;
import org.springframework.security.core.GrantedAuthority;
import org.springframework.security.core.authority.SimpleGrantedAuthority;
import org.springframework.security.core.userdetails.UserDetails;
import org.springframework.security.core.userdetails.UserDetailsService;
import org.springframework.security.core.userdetails.UsernameNotFoundException;
import org.springframework.stereotype.Component;
import java.util.ArrayList;
import java.util.List;
import java.util.Set;
/**
* Description: Logon User Authentication and Authorization
* Remember to register this class with the spring container
* User: Eric
*/
@Component
public class SpringSecurityUserService implements UserDetailsService {
@Reference
private UserService userService;
/**
* Provide login user information username password permission set authorities
* @param username
* @return
* @throws UsernameNotFoundException
*/
@Override
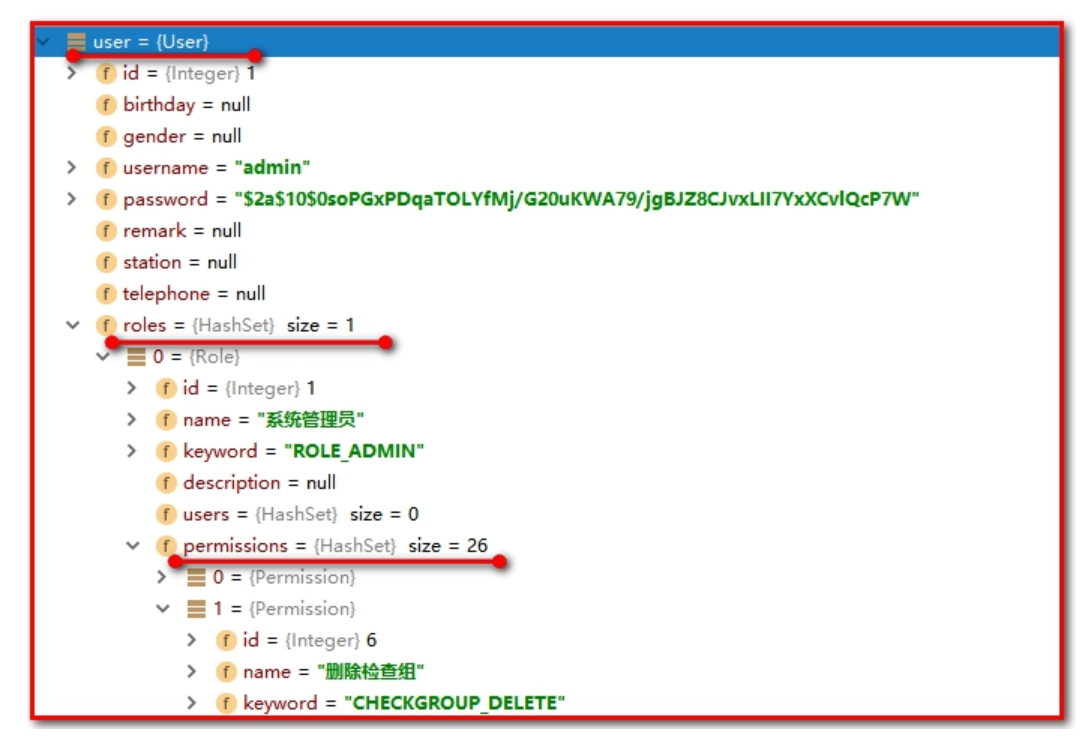
public UserDetails loadUserByUsername(String username) throws UsernameNotFoundException {
//Query user permission information based on the logged-in user name
//t_user -> t_user_role -> t_role -> t_role_permission -> t_permission
//Find roles owned by users and sets of privileges under roles
//User.roles (role set). permissions (permission set)
User user = userService.findByUsername(username);
if(null != user){
// User name
// Password
String password = user.getPassword();
// Permission Set
List<GrantedAuthority> authorities = new ArrayList<GrantedAuthority>();
// To grant authorization
// Roles owned by users
SimpleGrantedAuthority sai = null;
Set<Role> roles = user.getRoles();
if(null != roles){
for (Role role : roles) {
// Roles grant roles with keywords
sai = new SimpleGrantedAuthority(role.getKeyword());
authorities.add(sai);
// Permissions, all permissions under roles
Set<Permission> permissions = role.getPermissions();
if(null != permissions){
for (Permission permission : permissions) {
// Grant privileges
sai = new SimpleGrantedAuthority(permission.getKeyword());
authorities.add(sai);
}
}
}
}
return new org.springframework.security.core.userdetails.User(username,password,authorities);
}
// Return null, restrict access
return null;
}
}
Use debug to track debugging and view user s.
2.2.3.Step 3: Service, Dao interface, Mapper mapping file
Create UserService service interface, service implementation class, Dao interface, Mapper mapping file, etc.
[Path]
1:UserService.java interface
2:UserServiceImpl.java class
3:UserDao.java (Query users with user names)
4:RoleDao.java (Query Role Collection with User id)
5:PermissionDao.java (use role id to query permission set)
6:UserDao.xml (Query users with user names)
7:RoleDao.xml (Query role collection using user id)
8:PermissionDao.xml (use role id to query permission set)
[Explanation]
1: Service Interface
package com.itheima.health.service;

import com.itheima.health.pojo.User;

/**
 * Description: User Services (Enterprise Employees)
 * User: Eric
 */
public interface UserService {
    /**
     * Query user permission information based on the logged-in user name
     * @param username
     * @return
     */
    User findByUsername(String username);
}
2: Service Implementation Class
package com.itheima.health.service.impl;

import com.alibaba.dubbo.config.annotation.Service;
import com.itheima.health.dao.UserDao;
import com.itheima.health.pojo.User;
import com.itheima.health.service.UserService;
import org.springframework.beans.factory.annotation.Autowired;

/**
 * Description: No Description
 * User: Eric
 */
@Service(interfaceClass = UserService.class)
public class UserServiceImpl implements UserService {

    @Autowired
    private UserDao userDao;

    /**
     * Query user permission information based on the logged-in user name
     * @param username
     * @return
     */
    @Override
    public User findByUsername(String username) {
        return userDao.findByUsername(username);
    }
}
3:Dao Interface
(1)UserDao
package com.itheima.health.dao;

import com.itheima.health.pojo.User;

/**
 * Description: No Description
 * User: Eric
 */
public interface UserDao {
    /**
     * Query user permission information based on the logged-in user name
     * @param username
     * @return
     */
    User findByUsername(String username);
}
4:Mapper Mapping File
(1)UserDao.xml
<?xml version="1.0" encoding="UTF-8" ?>
<!DOCTYPE mapper
        PUBLIC "-//mybatis.org//DTD Mapper 3.0//EN"
        "http://mybatis.org/dtd/mybatis-3-mapper.dtd">

<mapper namespace="com.itheima.health.dao.UserDao">
    <select id="findByUsername" parameterType="String" resultMap="userRolePermissionMap">
        select u.id,u.username,u.password,
               ur.role_id, r.keyword role_keyword, r.name role_name,
               rp.permission_id, p.keyword permission_keyword, p.name permission_name
        From
            t_user u, t_user_role ur, t_role r,
            t_role_permission rp, t_permission p
        where u.id=ur.user_id and ur.role_id=r.id
        and r.id=rp.role_id and rp.permission_id=p.id
        and u.username=#{username}
    </select>

    <resultMap id="userRolePermissionMap" type="User">
        <id property="id" column="id"></id>
        <result property="username" column="username"/>
        <result property="password" column="password"/>
        <collection property="roles" ofType="Role">
            <id property="id" column="role_id"/>
            <result property="keyword" column="role_keyword"/>
            <result property="name" column="role_name"/>
            <collection property="permissions" ofType="Permission">
                <id property="id" column="permission_id"/>
                <result property="keyword" column="permission_keyword"/>
                <result property="name" column="permission_name"/>
            </collection>
        </collection>
    </resultMap>
</mapper>
2.2.4.Step 4: springmvc.xml
Modify the springmvc.xml file in the health_web project, and modify the package path for the dubbo bulk scan
Previous package scan
<!--Batch Scan-->
<dubbo:annotation package="com.itheima.health.controller" />
Current package scan
<!--Batch Scan-->
<dubbo:annotation package="com.itheima.health" />
**Note: **The package originally scanned here is com.itheima.controller, but now it is changed to com.itheima package in order to scan the SpringSecurityUserService that we defined above, because the service named UserService needs to be called remotely through dubbo in the loadUserByUsername method of SpringSecurityUserService.
2.2.5.Step 5: spring-security.xml
[Path]
1: Define which links can be released
2: Define which links are not allowed, that is, roles and privileges are required to allow them
3: Authentication management, define login account name and password, and grant access roles and privileges
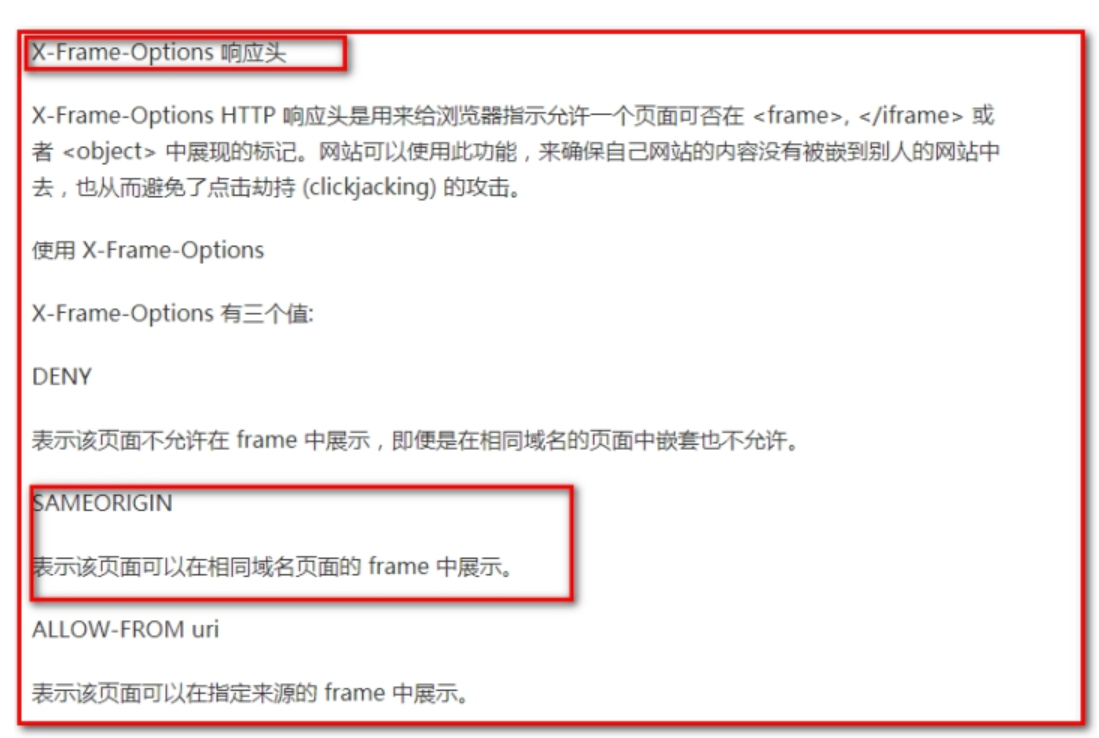
4: Set the page to access protected pages through iframe. By default, access is not allowed and security:frame-options policy="SAMEORIGIN" needs to be added
[Explanation]
Provide the spring-security.xml configuration file in the health_web project
<?xml version="1.0" encoding="UTF-8"?>
<beans xmlns="http://www.springframework.org/schema/beans"
       xmlns:xsi="http://www.w3.org/2001/XMLSchema-instance"
       xmlns:security="http://www.springframework.org/schema/security"
       xsi:schemaLocation="http://www.springframework.org/schema/beans http://www.springframework.org/schema/beans/spring-beans.xsd http://www.springframework.org/schema/security http://www.springframework.org/schema/security/spring-security.xsd">
<!--   Static Resources(css, img, js..., login.html)-->
    <security:http pattern="/css/**" security="none"/>
    <security:http pattern="/img/**" security="none"/>
    <security:http pattern="/js/**" security="none"/>
    <security:http pattern="/plugins/**" security="none"/>
    <security:http pattern="/login.html" security="none"/>

    <!--
   Interception Rules
       autoconfig userexpress
       intercepter-url  pattern access
       Landing Page
       Exit Logon
       Close csrf
       -->
    <security:http auto-config="true" use-expressions="true">
        <security:intercept-url pattern="/**" access="isAuthenticated()"/>
        <security:form-login login-page="/login.html"
                             login-processing-url="/login.do"
                             username-parameter="username"
                             password-parameter="password"
                             default-target-url="/pages/main.html"
                             always-use-default-target="true"/>
        <security:headers>
<!--   frame-options Nesting in Control Pages frame(Visit other pages to show the content of other pages on this page)
         policy Policies used:
             DENY: No access allowed
             SAMEORIGIN: Accessible in the same domain
             ALLOW-FROM: Appoint url Accessible
 -->
            <security:frame-options policy="SAMEORIGIN"/>
        </security:headers>
        <security:csrf disabled="true"/>

        <security:logout logout-url="/logout.do" logout-success-url="/login.html" invalidate-session="true"/>
    </security:http>
    <!--
   Authentication Information
       Authentication Manager
          Provider user-service-ref  springSecurityUserService implements UserDetailsService
          Configure Encryptors
     -->
    <security:authentication-manager>
        <security:authentication-provider user-service-ref="springSecurityUserService">
            <security:password-encoder ref="encoder"/>
        </security:authentication-provider>
    </security:authentication-manager>
   <!--register springSecurityUserService
   Register Password Encryptor-->
    <!--<bean id="springSecurityUserService" class="com.itheima.health.security.SpringSecurityUserService"/>-->
    <bean id="encoder" class="org.springframework.security.crypto.bcrypt.BCryptPasswordEncoder"/>

<!--  Permission Control Annotation Support  -->
    <security:global-method-security pre-post-annotations="enabled"/>
</beans>
Note here: If the following problems occur
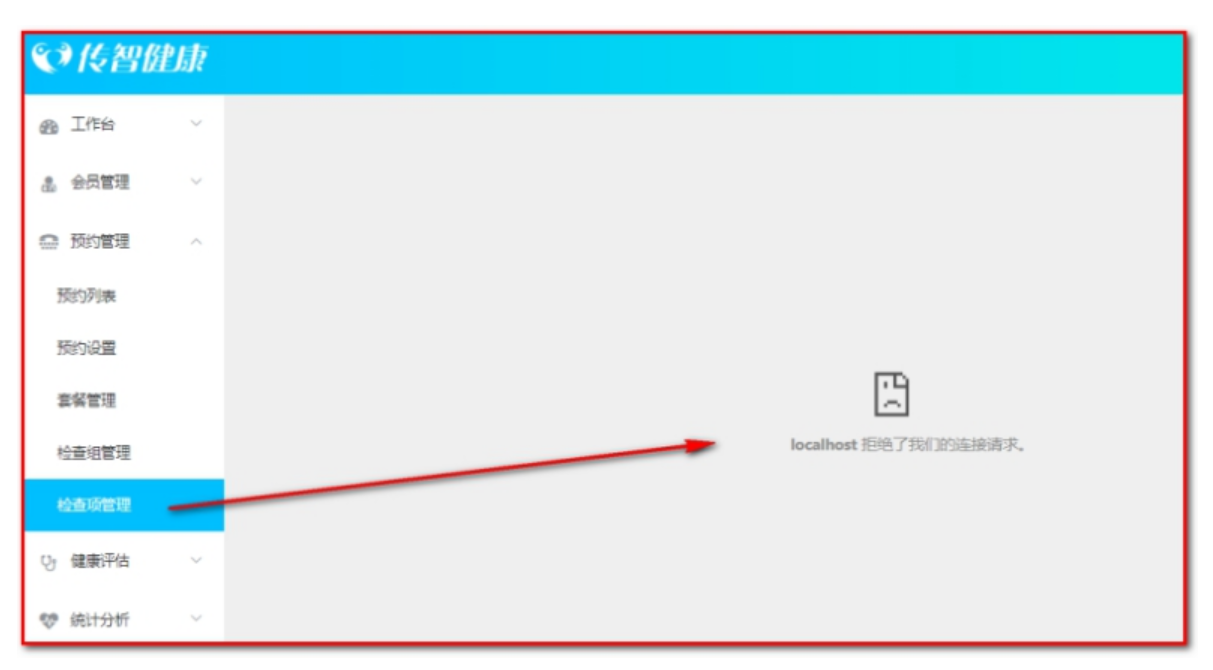
Add in spring-security.xml using the configuration below.
Place in <security:http auto-config="true" use-expressions="true">
<security:headers>
    <!--Settings on the page can be passed through iframe Access to protected pages, which are not allowed by default-->
    <security:frame-options policy="SAMEORIGIN"></security:frame-options>
</security:headers>
This is because we define in main.html that if you do not configure springSecurity, the HTML pages that iframe accesses are protected and not allowed.
<el-container>
    <iframe name="right" class="el-main" src="checkitem.html" width="100%" height="580px" frameborder="0"></iframe>
</el-container>
Remarks:
2.2.6.Step 6: springmvc.xml
Introducing the spring-security.xml file into the springmvc.xml file
<import resource="classpath:spring-security.xml"></import>
2.2.7.Step 7: CheckItemController class
Add a permission control comment to the Controller's method, using CheckItemController as an example
package com.itheima.health.controller;

import com.alibaba.dubbo.config.annotation.Reference;
import com.itheima.health.constant.MessageConstant;
import com.itheima.health.entity.PageResult;
import com.itheima.health.entity.QueryPageBean;
import com.itheima.health.entity.Result;
import com.itheima.health.pojo.CheckItem;
import com.itheima.health.service.CheckItemService;
import org.springframework.security.access.prepost.PreAuthorize;
import org.springframework.web.bind.annotation.*;

import java.util.List;

/**
 * Description: No Description
 * User: Eric
 */
@RestController
@RequestMapping("/checkitem")
public class CheckItemController {

    @Reference
    private CheckItemService checkItemService;

    @GetMapping("/findAll")
    public Result findAll(){
        // Invoke service to query all checks
        List<CheckItem> list = checkItemService.findAll();
        // Encapsulate returned results
        return new Result(true, MessageConstant.QUERY_CHECKITEM_SUCCESS,list);
    }

    /**
     * Add Checks
     * @param checkitem
     * @return
     */
    @PostMapping("/add")
    @PreAuthorize("hasAuthority('CHECKITEM_ADD')")
    public Result add(@RequestBody CheckItem checkitem){
        // Invoke Business Services
        checkItemService.add(checkitem);
        // Response results to front end
        return new Result(true, MessageConstant.ADD_CHECKITEM_SUCCESS);
    }

    /**
     * Paging Query
     */
    @PostMapping("/findPage")
    @PreAuthorize("hasAuthority('CHECKITEM_QUERY')")
    public Result findPage(@RequestBody QueryPageBean queryPageBean){
        // Call business to page
        PageResult<CheckItem> pageResult = checkItemService.findPage(queryPageBean);

        //return pageResult;
        // Return to page, wrap in Result, Unified Style
        return new Result(true, MessageConstant.QUERY_CHECKITEM_SUCCESS,pageResult);
    }

    /**
     * delete
     */
    @PostMapping("/deleteById")
    public Result deleteById(int id){
        // Invoke Business Services
        //try {
            checkItemService.deleteById(id);
        //} catch (Exception e) {
         //   e.printStackTrace();
        //}
        // Response results
        return new Result(true, MessageConstant.DELETE_CHECKITEM_SUCCESS);
    }

    /**
     * Query by id
     */
    @GetMapping("/findById")
    public Result findById(int id){
        CheckItem checkItem = checkItemService.findById(id);
        return new Result(true, MessageConstant.QUERY_CHECKITEM_SUCCESS,checkItem);
    }

    /**
     * Modify checks
     * @param checkitem
     * @return
     */
    @PostMapping("/update")
    public Result update(@RequestBody CheckItem checkitem){
        // Invoke Business Services
        checkItemService.update(checkitem);
        // Response results to front end
        return new Result(true, MessageConstant.EDIT_CHECKITEM_SUCCESS);
    }
}
2.2.8.Step 8: Exception capture
Modify HealthExceptionAdvice in the health_web project
package com.itheima.health.controller;

import com.itheima.health.entity.Result;
import com.itheima.health.exception.HealthException;
import org.springframework.security.access.AccessDeniedException;
import org.springframework.security.authentication.BadCredentialsException;
import org.springframework.security.authentication.InternalAuthenticationServiceException;
import org.springframework.web.bind.annotation.ExceptionHandler;
import org.springframework.web.bind.annotation.RestControllerAdvice;

/**
 * Description: No Description
 * User: Eric
 */
// As agreed with the front end, all returned is json data
@RestControllerAdvice
public class HealExceptionAdvice {

    /**
     * Custom outlier handling
     * @param he
     * @return
     */
    @ExceptionHandler(HealthException.class)
    public Result handleHealthException(HealthException he){
        return new Result(false, he.getMessage());
    }

    /**
     * All unknown exceptions
     * @param he
     * @return
     */
    @ExceptionHandler(Exception.class)
    public Result handleException(Exception he){
        he.printStackTrace();
        return new Result(false, "An unknown error occurred and the operation failed. Please contact your administrator");
    }

    /**
     * Password error
     * @param he
     * @return
     */
    @ExceptionHandler(BadCredentialsException.class)
    public Result handBadCredentialsException(BadCredentialsException he){
        return handleUserPassword();
    }

    /**
     * user name does not exist
     * @param he
     * @return
     */
    @ExceptionHandler(InternalAuthenticationServiceException.class)
    public Result handInternalAuthenticationServiceException(InternalAuthenticationServiceException he){
        return handleUserPassword();
    }

    private Result handleUserPassword(){
        return new Result(false, "ERROR Incorrect username or password");
    }

    /**
     * user name does not exist
     * @param he
     * @return
     */
    @ExceptionHandler(AccessDeniedException.class)
    public Result handAccessDeniedException(AccessDeniedException he){
        return new Result(false, "No privileges");
    }
}
2.3.Show user name
[Path]
1: introducing js
2: Define the loginUsername attribute
3: Using the hook function, call ajax, query the logged-in user (obtained from SpringSecurity), and assign the username attribute
4: Modify the page to display user information using {{loginUsername}}
[Explanation]
We have already done the authentication and authorization before, if the user authentication succeeds, we need to show the current user's username on the page. Spring Security saves the user information to the context object provided by the framework after the authentication succeeds, so here we can call the API provided by the Spring Security framework to get the username of the current user and display it on the page.
Steps to achieve:
Step 1: Modify in the main.html page, define username model data, display user name based on VUE data binding, send ajax request to get username
(1): introducing js
<script src="../js/axios-0.18.0.js"></script>
(2): Define the loginUsername attribute
(3): Using the hook function mounted, call ajax
(4) Display user name

The page ends up as follows
<!DOCTYPE html>
<html>
<head>
<!-- page meta -->
<meta charset="utf-8">
<meta http-equiv="X-UA-Compatible" content="IE=edge">
<title>Wise Health</title>
<meta name="description" content="Wise Health">
<meta name="keywords" content="Wise Health">
<meta content="width=device-width,initial-scale=1,maximum-scale=1,user-scalable=no" name="viewport">
<!-- Introducing Styles -->
<link rel="stylesheet" href="../plugins/elementui/index.css">
<link rel="stylesheet" href="../plugins/font-awesome/css/font-awesome.min.css">
<link rel="stylesheet" href="../css/style.css">
<style type="text/css">
.el-main{
position: absolute;
top: 70px;
bottom: 0px;
left: 200px;
right: 10px;
padding: 0;
}
</style>
</head>
<body class="hold-transition skin-purple sidebar-mini">
<div id="app">
<el-container>
<el-header class="main-header" style="height:70px;">
<nav class="navbar navbar-static-top" :class=''>
<!-- Logo -->
<a href="#" class="logo" style="text-align:center">
<span class="logo-lg"><img src="../img/logo.png"></span>
</a>
<div class="right-menu">
<span class="help"><i class="fa fa-exclamation-circle" aria-hidden="true"></i>Help</span>
<el-dropdown class="avatar-container right-menu-item" trigger="click">
<div class="avatar-wrapper">
<img src="../img/user2-160x160.jpg" class="user-avatar">
{{loginUsername}}
</div>
<el-dropdown-menu slot="dropdown">
<el-dropdown-item divided>
<span style="display:block;">Change Password</span>
</el-dropdown-item>
<el-dropdown-item divided>
<span style="display:block;"><a href="/logout.do">Sign out</a> </span>
</el-dropdown-item>
</el-dropdown-menu>
</el-dropdown>
</div>
</nav>
</el-header>
<el-container>
<el-aside width="200px">
<el-menu>
<el-submenu v-for="menu in menuList" :index="menu.path">
<template slot="title">
<i class="fa" :class="menu.icon"></i>
{{menu.title}}
</template>
<template v-for="child in menu.children">
<el-menu-item :index="child.path">
<a :href="child.linkUrl" target="right">{{child.title}}</a>
</el-menu-item>
</template>
</el-submenu>
</el-menu>
</el-aside>
<el-container>
<iframe name="right" class="el-main" src="ordersetting.html" width="100%" height="580px" frameborder="0"></iframe>
</el-container>
</el-container>
</el-container>
</div>
</body>
<!-- Introducing component libraries -->
<script src="../js/vue.js"></script>
<script src="../plugins/elementui/index.js"></script>
<script type="text/javascript" src="../js/jquery.min.js"></script>
<script src="../js/axios-0.18.0.js"></script>
<script>
new Vue({
el: '#app',
data:{
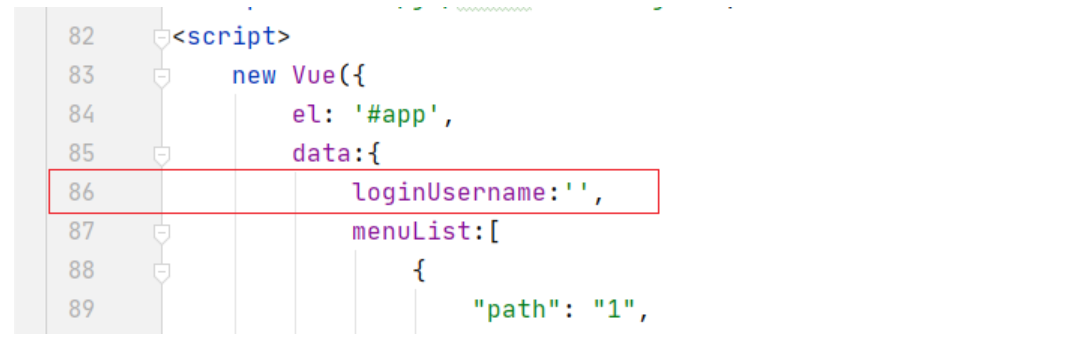
loginUsername:'',
menuList:[
{
"path": "1",
"title": "Workbench",
"icon":"fa-dashboard",
"children": []
},
{
"path": "2",
"title": "Member Management",
"icon":"fa-user-md",
"children": [
{
"path": "/2-1",
"title": "Membership File",
"linkUrl":"member.html",
"children":[]
},
{
"path": "/2-2",
"title": "Check Upload",
"children":[]
},
{
"path": "/2-3",
"title": "Membership statistics",
"linkUrl":"all-item-list.html",
"children":[]
},
]
},
{
"path": "3",
"title": "Booking Management",
"icon":"fa-tty",
"children": [
{
"path": "/3-1",
"title": "Subscribe List",
"linkUrl":"ordersettinglist.html",
"children":[]
},
{
"path": "/3-2",
"title": "Reservation Settings",
"linkUrl":"ordersetting.html",
"children":[]
},
{
"path": "/3-3",
"title": "Meal Management",
"linkUrl":"setmeal.html",
"children":[]
},
{
"path": "/3-4",
"title": "Check Group Management",
"linkUrl":"checkgroup.html",
"children":[]
},
{
"path": "/3-5",
"title": "Check Item Management",
"linkUrl":"/pages/checkitem.html",
"children":[]
},
]
},
{
"path": "4",
"title": "Health Assessment",
"icon":"fa-stethoscope",
"children":[
{
"path": "/4-1",
"title": "Physical Constitution Identification of Traditional Chinese Medicine",
"linkUrl":"all-medical-list.html",
"children":[]
},
]
},
{
"path": "5", //Routing Path for Menu Item
"title": "statistical analysis", //Menu item name
"icon":"fa-heartbeat",
"children":[//Is there a submenu or [] if not
{
"path": "/5-1",
"title": "Membership statistics",
"linkUrl":"/pages/report_member.html",
"children":[]
},
{
"path": "/5-2",
"title": "Reservation plan percentage",
"linkUrl":"/pages/report_setmeal.html",
"children":[]
},
{
"path": "/5-3",
"title": "Operational Data Statistics",
"linkUrl":"/pages/report_business.html",
"children":[]
}
]
}
]
},
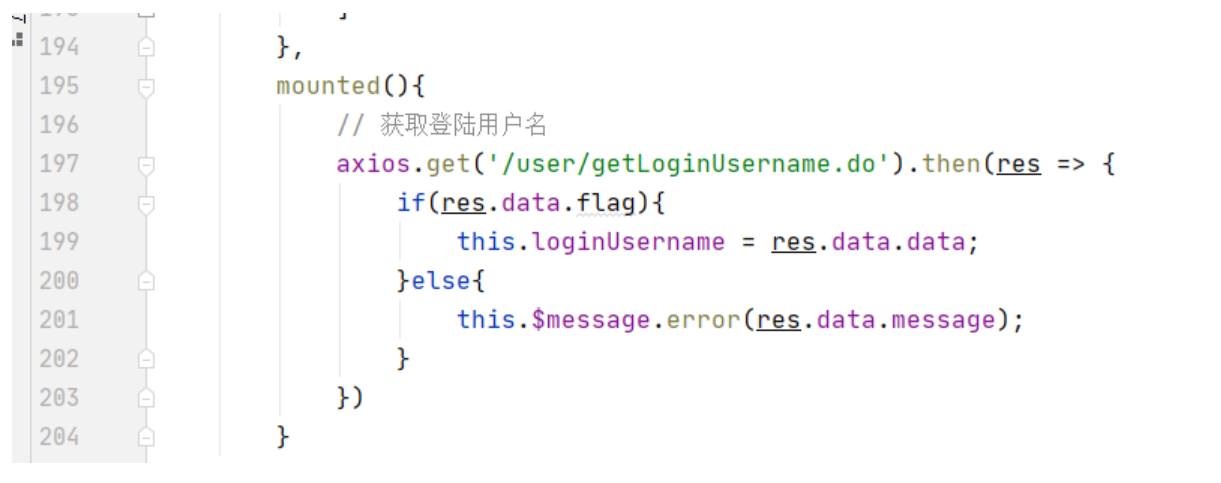
mounted(){
// Get logon user name
axios.get('/user/getUsername.do').then(res => {
if(res.data.flag){
this.loginUsername = res.data.data;
}else{
this.$message.error(res.data.message);
}
})
}
});
$(function() {
var wd = 200;
$(".el-main").css('width', $('body').width() - wd + 'px');
});
</script>
</html>
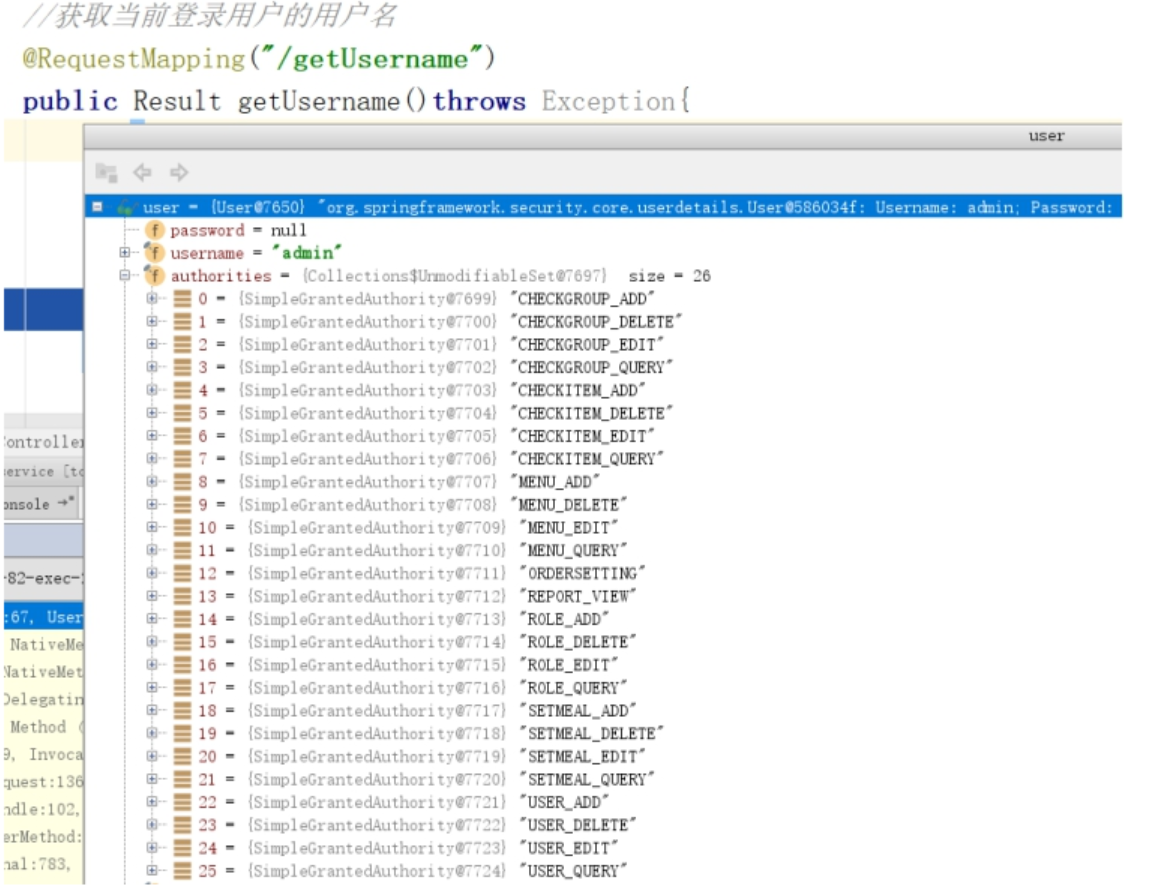
Step 2: Create a UserController and provide the getUsername method
package com.itheima.health.controller;

import com.itheima.health.constant.MessageConstant;
import com.itheima.health.entity.Result;
import org.springframework.security.core.context.SecurityContextHolder;
import org.springframework.security.core.userdetails.User;
import org.springframework.web.bind.annotation.GetMapping;
import org.springframework.web.bind.annotation.RequestMapping;
import org.springframework.web.bind.annotation.RestController;

/**
 * Description: No Description
 * User: Eric
 */
@RestController
@RequestMapping("/user")
public class UserController {

    /**
     * Get logon user name
     */
    @GetMapping("/getUsername")
    public Result getUsername(){
        // Get authentication information for logged-in users
        User loginUser = (User) SecurityContextHolder.getContext().getAuthentication().getPrincipal();
        // Username
        String username = loginUser.getUsername();
        // Return to Front End
        return new Result(true, MessageConstant.GET_USERNAME_SUCCESS,username);
    }
}
You can see user-related information saved by the Spring Security framework in its context by debug debugging:
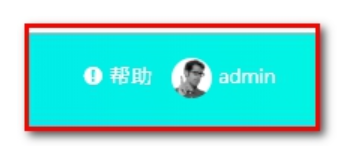
Show current logon:
2.4.User Exit
[Path]
1: Add hyperlinks to the Exit menu provided in main.html
2: Configure in the spring-security.xml file
[Explanation]
Step 1: Add a hyperlink to the Exit menu provided in main.html
<el-dropdown-item divided>
        <span style="display:block;"><a href="/logout.do">Sign out</a></span>
</el-dropdown-item>
Step 2: Configure in the spring-security.xml file
<!--
  logout: Log out
  logout-url: Request path corresponding to exit logon operation
  logout-success-url: Jump Page After Logging Out
-->
<security:logout logout-url="/logout.do"
                 logout-success-url="/login.html" invalidate-session="true"/>
[Summary]
1: Import the SpringSecurity environment
(1) Adding dependencies in pom.xml
(2) web.xml Add Proxy Filter
2: Achieving certification and authorization
(1) Import login.html login page under webapp directory
(2) Authentication: SpringSecurityUserService (@Component), which implements the UserDetailsService interface
(3) Create UserService class, UserDao interface class, UserDao mapping file (use user name to query current user information, including roles and permissions set)
(4) springmvc.xml (dubbo annotation scan expanded to SpringSecurityUserService)
(5) spring-security.xml (key copy)
- Static Resource Filtering
- Intercept rules security:http auto-config..., intercept-url, form-login, form-logout, csrf, security:header
- Turn on annotation support
- Turn off cross-domain access restrictions
- Authentication Manager->Provider user-service-ref->Encryptor
- Encryptor
(6) springmvc.xml (import spring-security.xml)
(7) CheckItemController class (@PreAuthorize("hasAuthority('CHECKITEM_ADD')): Complete permission control on Methods in the class), hasAuthority permission check (t_permission.keyword), hasRole role check (t_role.keyword)
(8) checkitem.html (error messages can be prompted if you do not have permission)
Exception catch HealthExceptionHandler, AccessDeniedException, return result without permission
3: Display user name
Obtain authenticated user information from the SecurityContextHolder object, page defines a vue's data variable industry receipt, uses an interpolation expression to display the page, and sends a request when the page loads (vue created axios)
// Get authentication information for logged-in users
User loginUser = (User) SecurityContextHolder.getContext().getAuthentication().getPrincipal();
Get landing user information in jsp
${sessionScope.SPRING_SECURITY_CONTEXT.authentication.principal.username}
4: User Exit
Call / logout.do security to help us