Environment: Cent OS 7.0 (Virtual Machine Environment), Nginx 1.9.8, Redis 3.2.1
1. Background
When using Nginx+Tomcat for load balancing, because Nginx distributes different requests to a Tomcat, Tomcat runs in different containers, because session s are out of sync or lost.
2. Installation and Configuration of Nginx
1. Nginx Installation
Resources on the Web provide more information on installing Nginx, such as the simplest:
(1) Obtain nginx,stay http://nginx.org/download/You can get the latest version of the current download on, for example:

wget http://nginx.org/download/nginx-1.9.8.tar.gz


(2)decompression tar -xvf nginx-1.9.8.tar.gzPackage.

(3)Enter the uncompressed directory and execute./configure --prefix=/usr/local/nginx-1.9.8 take Nginx Install to/usr/local/nginx-1.9.8Catalog

(4)make & make install- 1
- 2
- 3
- 4
- 5
- 6
- 7
- 8
- 9
- 10
- 1
- 2
- 3
- 4
- 5
- 6
- 7
- 8
- 9
- 10
The installation process installs Nginx into the / usr/local/nginx-1.9.8 directory and starts Nginx test Can I start normally?
2. Modify Nginx to configure multiple Tomcat servers
2.1. Modify the conf/nginx.conf file and add upstream above the server tag as follows:
 upstream mynginxserver {
    #The weigth parameter represents the weight, and the higher the weight, the greater the probability of being assigned
    #Squid on this machine opens port 3128
        server 127.0.0.1:8080 weight=1;
        server 127.0.0.1:8060 weight=1;
    }
- 1
- 2
- 3
- 4
- 5
- 6
- 7
- 1
- 2
- 3
- 4
- 5
- 6
- 7
Here you specify two Tomcat instances under this machine. Ports are 8080, 8060, weights are 1, Tomcat instances are configured behind, mynginxserver is named as you like, used below
2.2. Configure server tags;
 server {
        listen       80;
        server_name  192.168.1.149;

        #charset koi8-r;

        #access_log  logs/host.access.log  main;

        location / {
           # root   html;
           # index  index.html index.htm;
           proxy_pass http://mynginxserver;
        }


        error_page   500 502 503 504  /50x.html;
        location = /50x.html {
            root   html;
        }
- 1
- 2
- 3
- 4
- 5
- 6
- 7
- 8
- 9
- 10
- 11
- 12
- 13
- 14
- 15
- 16
- 17
- 18
- 19
- 20
- 1
- 2
- 3
- 4
- 5
- 6
- 7
- 8
- 9
- 10
- 11
- 12
- 13
- 14
- 15
- 16
- 17
- 18
- 19
- 20
2.3. The complete content after configuration is as follows (the commented configuration content was deleted from version 1.9.8):
worker_processes  1;

events {
    worker_connections  1024;
}

http {
    include       mime.types;
    default_type  application/octet-stream;

    sendfile        on;

    keepalive_timeout  65;

    upstream mynginxserver {
        server 127.0.0.1:8080 weight=1;
        server 127.0.0.1:8060 weight=1;
    }

    server {
        listen       80;
        server_name  192.168.1.149;

        location / {
           proxy_pass http://mynginxserver;
        }

        error_page   500 502 503 504  /50x.html;
        location = /50x.html {
            root   html;
        }
    }
}
- 1
- 2
- 3
- 4
- 5
- 6
- 7
- 8
- 9
- 10
- 11
- 12
- 13
- 14
- 15
- 16
- 17
- 18
- 19
- 20
- 21
- 22
- 23
- 24
- 25
- 26
- 27
- 28
- 29
- 30
- 31
- 32
- 33
- 34
- 1
- 2
- 3
- 4
- 5
- 6
- 7
- 8
- 9
- 10
- 11
- 12
- 13
- 14
- 15
- 16
- 17
- 18
- 19
- 20
- 21
- 22
- 23
- 24
- 25
- 26
- 27
- 28
- 29
- 30
- 31
- 32
- 33
- 34
2.4. Refer to
https://www.nginx.com/resources/wiki/start/topics/examples/full/
3. Configuration of multiple instances of Tomcat
1. Decompress apache-tomcat-7.0.67.zip to get apache-tomcat-7.0.67
[root@localhost www]# unzip apache-tomcat-7.0.67.zip
- 1
- 2
- 1
- 2
2. Rename apache-tomcat-7.0.67 to tomcat1
[root@localhost www]# mv apache-tomcat-7.0.67 tomcat1
- 1
- 2
- 1
- 2
Repeat the 1 and 2 processes to get Tomcat 1 and tomcat2 as follows:

3. Modify Tomcat1's port to 8080 and deploy the project file
Edit conf/server.xml under tomcat, modify the port number to 8080,
Self-written for test Nginx reverse proxy web project war package download address: http://download.csdn.net/detail/u010870518/9585683
After downloading, place the unzipped compiled project file in the tomcat1/webapps/ROOT/directory:
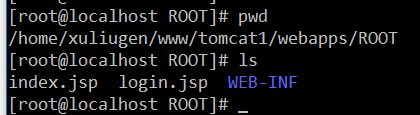
Modify the index.jsp and login.jsp files to identify specific Tomcat containers, respectively
4. Modify Tomcat2's port to 8060 and deploy the project file
Edit conf/server.xml under tomcat, modify port number to 8060, then, as in 3 above, download the war content, place it under tomcat2/webapps/ROOT/and modify index.jsp and login.jsp to identify the specific Tomcat container
5. Start tomcat1 and tomcat2, respectively
6. Restart the Nginx service and access the IP address: 192.168.1.149:80 (this is the IP address of the virtual machine being accessed)
7. Viewing effects
You can see that Nginx has already been distributed requests and forwarded to a specific Tomcat
4. Installation and Configuration of Redis
Due to the length, please refer to my writing: http://blog.csdn.net/xlgen157387/article/details/52022793
5. Use of tomcat-redis-session-manager open source projects
1. Open source project address: https://github.com/jcoleman/tomcat-redis-session-manager
2. After downloading the code, you need to recompile it, generate the jar you need, create any maven project, and copy the code under src to the specific location as follows:
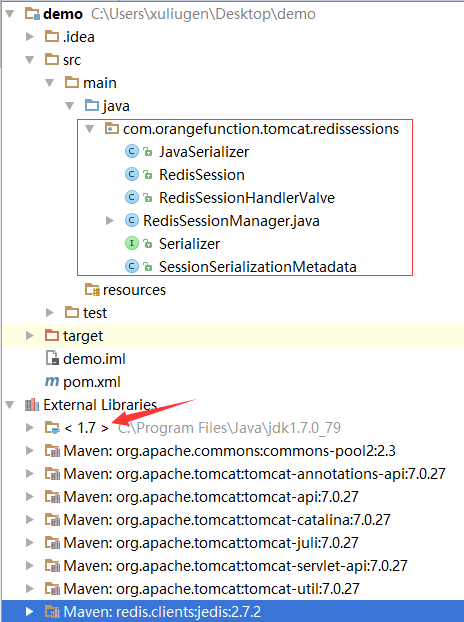
The pom.xml file for maven is as follows:
<?xml version="1.0" encoding="UTF-8"?>
<project xmlns="http://maven.apache.org/POM/4.0.0"
         xmlns:xsi="http://www.w3.org/2001/XMLSchema-instance"
         xsi:schemaLocation="http://maven.apache.org/POM/4.0.0 http://maven.apache.org/xsd/maven-4.0.0.xsd">
    <modelVersion>4.0.0</modelVersion>

    <groupId>com.ufind.session</groupId>
    <artifactId>tomcat-redis-session</artifactId>
    <version>1.0-SNAPSHOT</version>

    <dependencies>
        <dependency>
            <groupId>org.apache.tomcat</groupId>
            <artifactId>tomcat-catalina</artifactId>
            <version>7.0.27</version>
        </dependency>
        <dependency>
            <groupId>redis.clients</groupId>
            <artifactId>jedis</artifactId>
            <version>2.7.2</version>
        </dependency>
    </dependencies>

    <build>
        <plugins>
            <plugin>
                <groupId>org.apache.maven.plugins</groupId>
                <artifactId>maven-compiler-plugin</artifactId>
                <version>3.0</version>
                <configuration>
                    <source>1.7</source>
                    <target>1.7</target>
                    <encoding>UTF-8</encoding>
                </configuration>
            </plugin>
        </plugins>
    </build>

</project>- 1
- 2
- 3
- 4
- 5
- 6
- 7
- 8
- 9
- 10
- 11
- 12
- 13
- 14
- 15
- 16
- 17
- 18
- 19
- 20
- 21
- 22
- 23
- 24
- 25
- 26
- 27
- 28
- 29
- 30
- 31
- 32
- 33
- 34
- 35
- 36
- 37
- 38
- 39
- 1
- 2
- 3
- 4
- 5
- 6
- 7
- 8
- 9
- 10
- 11
- 12
- 13
- 14
- 15
- 16
- 17
- 18
- 19
- 20
- 21
- 22
- 23
- 24
- 25
- 26
- 27
- 28
- 29
- 30
- 31
- 32
- 33
- 34
- 35
- 36
- 37
- 38
- 39
3. Then open the terminal and execute mvn clean and mvn install to package the compiled code as tomcat- Redis-session-1.0-SNAPSHOT.jar
4. Place three jar packages, tomcat-redis-session-1.0-SNAPSHOT.jar, jedis-2.7.2.jar, commons-pool2-2.0.jar, in the lib directory under Tomcat 1 and tomcat2 instances, respectively.
Download these three jar s for free: http://download.csdn.net/detail/u010870518/9585716
5. Modify conf/contex.xml file under tomcat instance
<?xml version='1.0' encoding='utf-8'?>
<Context>
    <WatchedResource>WEB-INF/web.xml</WatchedResource>

    <!-- tomcat-redis-session Sharing Configuration -->
    <Valve className="com.orangefunction.tomcat.redissessions.RedisSessionHandlerValve" />
        <Manager className="com.orangefunction.tomcat.redissessions.RedisSessionManager"
         host="192.168.1.149"
         port="6379"
         database="0"
         maxInactiveInterval="60" />

</Context> - 1
- 2
- 3
- 4
- 5
- 6
- 7
- 8
- 9
- 10
- 11
- 12
- 13
- 1
- 2
- 3
- 4
- 5
- 6
- 7
- 8
- 9
- 10
- 11
- 12
- 13
If Redis is configured with access, add a password:
<?xml version='1.0' encoding='utf-8'?>
<Context>
    <WatchedResource>WEB-INF/web.xml</WatchedResource>

    <!-- tomcat-redis-session Sharing Configuration -->
    <Valve className="com.orangefunction.tomcat.redissessions.RedisSessionHandlerValve" />
        <Manager className="com.orangefunction.tomcat.redissessions.RedisSessionManager"
         host="192.168.1.149"
         port="6379"
         database="0"
         password="redispassword"
         maxInactiveInterval="60" />

</Context> - 1
- 2
- 3
- 4
- 5
- 6
- 7
- 8
- 9
- 10
- 11
- 12
- 13
- 14
- 1
- 2
- 3
- 4
- 5
- 6
- 7
- 8
- 9
- 10
- 11
- 12
- 13
- 14
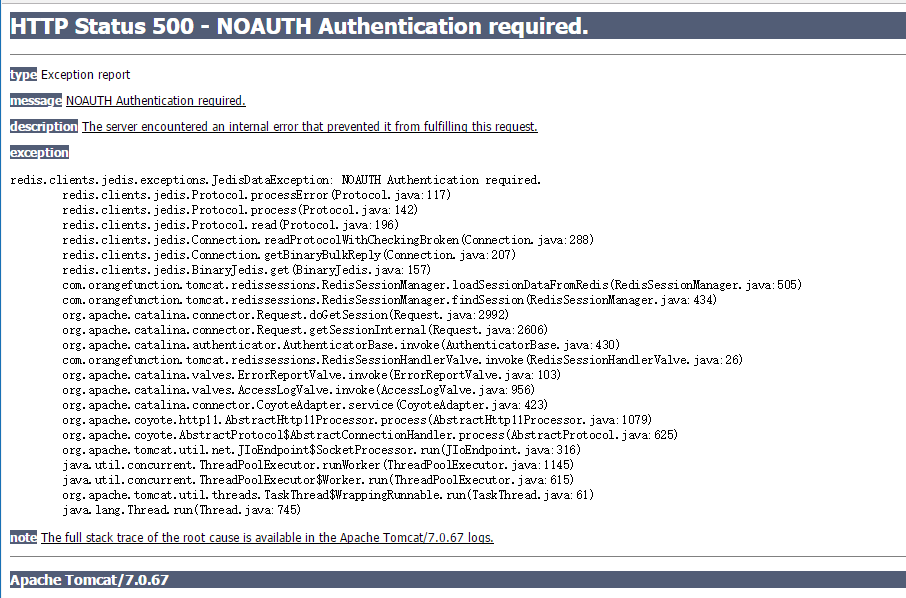
If you do not set the password, you will get an error as follows:
6. Effect demonstration
A landing request for a case demo that puts user information in session after successful landing and displays in the interface (tomcat1 instance, tomcat2 instance just identified in the h2 tag)
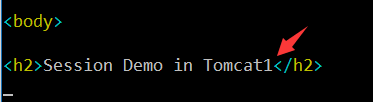
1. login.jsp file:
<body>
<h2>Session Demo in Tomcat1</h2>
<form action="/user?type=login" method="post">
    //User name:<input type="text" name="userName"/><br/>
    //Password:<input type="password" name="userPassword"/><br/>
    <input type="submit" value="login">
</form>
</body>
- 1
- 2
- 3
- 4
- 5
- 6
- 7
- 8
- 9
- 1
- 2
- 3
- 4
- 5
- 6
- 7
- 8
- 9
2. index.jsp displays the information after login on the interface
<body>

<h2>Session Demo in Tomcat1</h2>

<%
    User user = (User) request.getSession().getAttribute("USER");
    if (user == null) {
%>
//User is empty, no login!!!
<%
} else {
%>
//Welcome: <%=user.getUserName()%>
<%
    }
%>

</body>- 1
- 2
- 3
- 4
- 5
- 6
- 7
- 8
- 9
- 10
- 11
- 12
- 13
- 14
- 15
- 16
- 17
- 18
- 1
- 2
- 3
- 4
- 5
- 6
- 7
- 8
- 9
- 10
- 11
- 12
- 13
- 14
- 15
- 16
- 17
- 18
3. Serlet Processing Request Code
public class UserServlet extends BaseServlet {

    public String login(HttpServletRequest request, HttpServletResponse response)
            throws ServletException, IOException {

        User user = new User();
        user.setUserName(request.getParameter("userName"));
        user.setUserPassword(request.getParameter("userPassword"));
        request.getSession().setAttribute("USER", user);

        return "index.jsp";
    }

}- 1
- 2
- 3
- 4
- 5
- 6
- 7
- 8
- 9
- 10
- 11
- 12
- 13
- 14
- 1
- 2
- 3
- 4
- 5
- 6
- 7
- 8
- 9
- 10
- 11
- 12
- 13
- 14
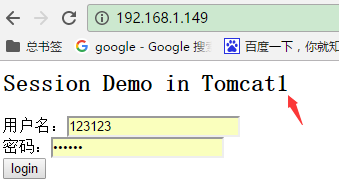
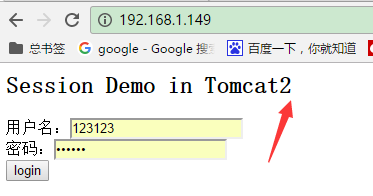
4. The effect is as follows:
You can see that the tomcat that refreshes the request at the time of login has been distributed by Nginx, and session has been shared in two more tomcta s after login
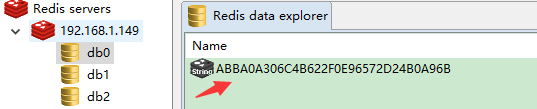
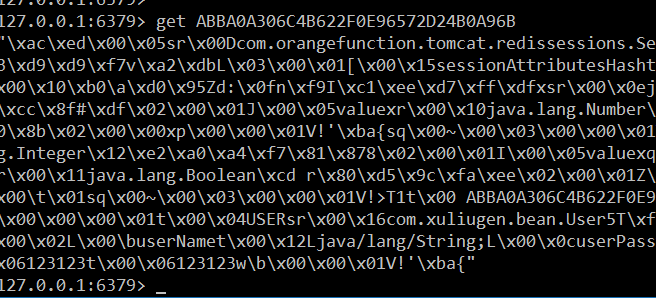
5. View Redis's storage of session s
The default database used when configuring the contex.xml file is 0, which is visible through the redis-cli tool
7. Summary
tomcat-redis-session-manager is a distributed session storage framework that is completely transparent to users. Users can use it simply by configuring it in tomcat. Our business code is the same as that of a single instance. That is, when writing code, you don't have to worry about what you are writing.Code for multiple Tomcat instances, fully transparent.
To get a simple understanding of how the framework works, we first need to know that sessionId information in the request is parsed and stored in the request's parameter list during the session operation.Then when the session is retrieved from request, if there is a session Id, the session is retrieved from the session pool based on the Id. If the session Id does not exist or the session fails, a new session is created and session information is put into the session pool for next use.
If we want to write a project like tomcat-redis-session-manager by ourselves, we should know Tomcat's Session management mechanism, which is managed by default by Tomcat's Session. If not set, it is controlled by Tomcat's own Standard Manager class, from which we can customize oneManager, the main override is the specific operations written in org.apache.catalina.session.ManagerBase.
This is also the basic principle of tomcat-redis-session-manager, pointing tomcat's session storage location to Redis
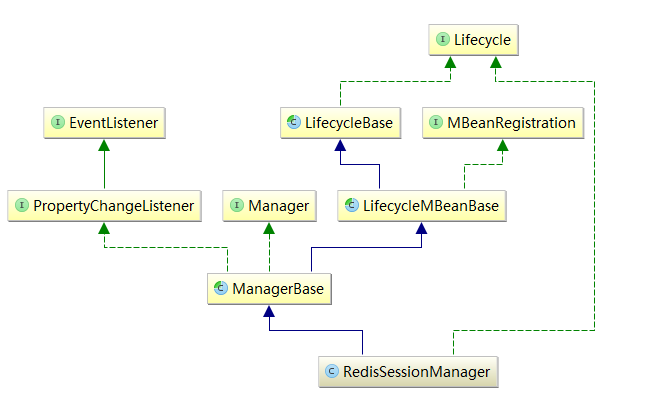
RedisSessionManager inherits org.apache.catalina.session.ManagerBase and overrides add, findSession, createEmptySession, remove, and so on. It also points the addition or deletion of sessions to the operation of Redis data store.
Interested in referring to a Tomcat session management mechanism: http://www.cnblogs.com/interdrp/p/4935614.html