| Start learning big data again - Hbase - day 56 Phoenix |

Phoenix overview
Hbase is suitable for storing a large number of NOSQL data with low requirements for relational operations. Due to the limitations of Hbase design, it is not possible to directly use the native API to perform the operations such as condition judgment and aggregation commonly used in relational databases. Hbase is excellent. Some teams seek to provide a more common developer oriented operation mode on Hbase, such as Apache Phoenix.
Phoenix based on Hbase provides business oriented developers with query operations on Hbase in the way of standard SQL, and supports most of the features of standard SQL: conditional operation, grouping, paging, and other advanced query syntax.
1. Phoenix Construction and basic operation
preparation:
Phoenix 4.15 HBase 1.4.6 hadoop 2.7.6
1. Close the hbase cluster and execute in the master
stop-hbase.sh
2. Upload and decompress configuration environment variables
decompression
tar -xvf apache-phoenix-4.15.0-HBase-1.4-bin.tar.gz -C /usr/local/soft/
Rename
mv apache-phoenix-4.15.0-HBase-1.4-bin phoenix-4.15.0
3. Copy phoenix-4.15.0-HBase-1.4-server.jar to the hbase lib directory of all nodes
scp /usr/local/soft/phoenix-4.15.0/phoenix-4.15.0-HBase-1.4-server.jar master:/usr/local/soft/hbase-1.4.6/lib/

scp /usr/local/soft/phoenix-4.15.0/phoenix-4.15.0-HBase-1.4-server.jar node1:/usr/local/soft/hbase-1.4.6/lib/

scp /usr/local/soft/phoenix-4.15.0/phoenix-4.15.0-HBase-1.4-server.jar node2:/usr/local/soft/hbase-1.4.6/lib/
4. Start hbase and execute it in the master
start-hbase.sh
5. Configure environment variables
vim /etc/profile

PHOENIX_HOME=/usr/local/soft/phoenix-4.15.0
:$PHOENIX_HOME/bin
source /etc/profile
2. Phoenix use
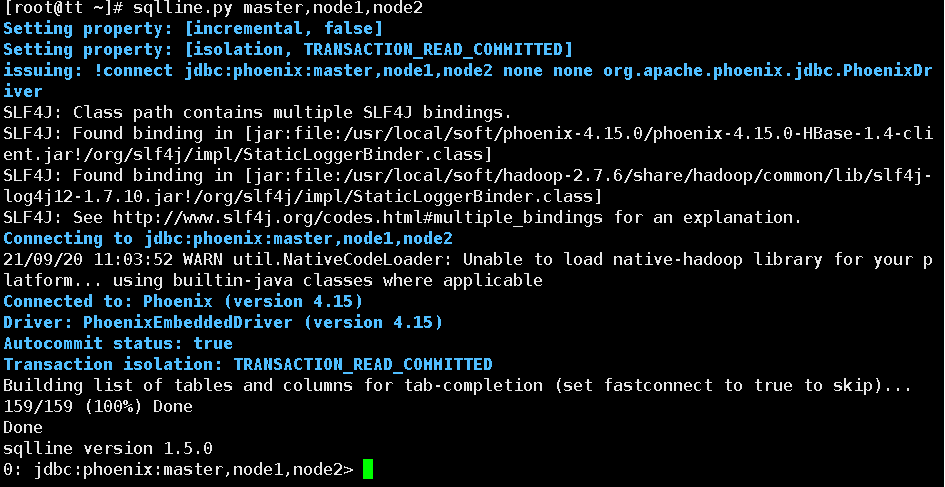
1. Connect sqlline
sqlline.py master,node1,node2
The following scenarios are considered successful
# appear
163/163 (100%) Done
Done
sqlline version 1.5.0
0: jdbc:phoenix:master,node1,node2>
2. Common commands
# 1. Create table

CREATE TABLE IF NOT EXISTS STUDENT (
 id VARCHAR NOT NULL PRIMARY KEY,
 name VARCHAR,
 age BIGINT,
 gender VARCHAR ,
 clazz VARCHAR
);

# 2. Show all tables
 !table

# 3. Insert data
upsert into STUDENT values('1500100004','Ge Deyao',24,'male','Science class 3');
upsert into STUDENT values('1500100005','Xuanguqin',24,'male','Science class 6');
upsert into STUDENT values('1500100006','Yi Yanchang',24,'female','Science class 3');


# 4. Query data, support most sql syntax,
select * from STUDENT ;
select * from STUDENT where age=24;
select gender ,count(*) from STUDENT group by gender;
select * from student order by gender;

# 5. Delete data
delete from STUDENT where id='1500100004';


# 6. Delete table
drop table STUDENT;


# 7. Exit command line
!quit
See the official website for more syntax 👉 Official website link👈
3. phoenix table mapping
by default, tables created directly in hbase cannot be viewed through phoenix
if you need to operate the table directly created in hbase in phoenix, you need to map the table in phoenix. There are two mapping methods: View mapping and table mapping
3.1. View mapping
the view created by Phoenix is read-only, so it can only be used for query. You can't modify the source data through the view
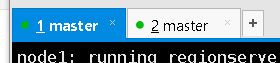
Case: Xshell opens two master sessions, one connected to Hbase and the other connected to Phoenix
# The first one enters the hbase command line through the hbase shell
hbase shell

# Create hbase table
create 'test','name','company'

# insert data
put 'test','001','name:firstname','zhangsan'
put 'test','001','name:lastname','zhangsan'
put 'test','001','company:name','Number plus'
put 'test','001','company:address','Hefei'


# The second session creates a view in phoenix, and the primary key corresponds to the rowkey in hbase

create view "test" (
empid varchar primary key,
"name"."firstname" varchar,
"name"."lastname"  varchar,
"company"."name"  varchar,
"company"."address" varchar
);


CREATE view "students" (
 id VARCHAR NOT NULL PRIMARY KEY,
 "info"."name" VARCHAR,
 "info"."age" VARCHAR,
 "info"."gender" VARCHAR ,
 "info"."clazz" VARCHAR
) column_encoded_bytes=0;

# When querying data in phoenix, the table name is enclosed in double quotation marks (view mapping is completed)
select * from "test";

# Delete view (table mapping after deletion)
drop view "test";
3.2 table mapping
There are two types of table mapping to HBase created using Apache Phoenix:
1) When a table already exists in HBase, you can create an associated table in a similar way to creating a view. You only need to change the create view to create table.
2) When there is no table in HBase, you can directly use the create table instruction to create the required table, and the description of HBase table structure can be displayed as needed in the create instruction.
In case 1), if the test table already exists on the previous basis, the table mapping statement is as follows:
create table "test" (
empid varchar primary key,
"name"."firstname" varchar,
"name"."lastname"varchar,
"company"."name"  varchar,
"company"."address" varchar
)column_encoded_bytes=0;

upsert into  "test"  values('1','2','3','4','5');

CREATE table  "students" (
 id VARCHAR NOT NULL PRIMARY KEY,
 "info"."name" VARCHAR,
 "info"."age" VARCHAR,
 "info"."gender" VARCHAR ,
 "info"."clazz" VARCHAR
) column_encoded_bytes=0;

upsert into "students" values('1500110004','Ge Deyao','24','male','Science class 3');
for the associated table created with create table, if the table is modified, the source data will also change. At the same time, if the associated table is deleted, the source table will also be deleted. But the view will not. If the view is deleted, the source data will not change.
3. Phoenix secondary index
Demand background:
for Hbase, the only way to accurately locate a row of records is to query through rowkey. If you do not search data through rowkey, you must compare the values of each row row row by row. For large tables, the cost of full table scanning is unacceptable.

1. Enable index support (configuration phase)
# Shut down hbase cluster
stop-hbase.sh
# Add the following configuration in / usr/local/soft/hbase-1.4.6/conf/hbase-site.xml

<property>
  <name>hbase.regionserver.wal.codec</name>
  <value>org.apache.hadoop.hbase.regionserver.wal.IndexedWALEditCodec</value>
</property>
<property>
    <name>hbase.rpc.timeout</name>
    <value>60000000</value>
</property>
<property>
    <name>hbase.client.scanner.timeout.period</name>
    <value>60000000</value>
</property>
<property>
    <name>phoenix.query.timeoutMs</name>
    <value>60000000</value>
</property>
# Synchronize to all nodes
scp hbase-site.xml node1:`pwd`
scp hbase-site.xml node2:`pwd`
# Modify hbase-site.xml in the bin directory under the phoenix directory

<property>
    <name>hbase.rpc.timeout</name>
    <value>60000000</value>
</property>
<property>
    <name>hbase.client.scanner.timeout.period</name>
    <value>60000000</value>
</property>
<property>
    <name>phoenix.query.timeoutMs</name>
    <value>60000000</value>
</property>
# Start hbase
start-hbase.sh
# Re enter phoenix client
sqlline.sql master,node1,node2
2. Create index
2.1. Global index
the global index is suitable for scenarios with more reads and less writes. If a global index is used, reading data basically does not lose performance, and all performance losses come from writing data. The addition, deletion and modification of the data table will update the related index table (if the data is deleted, the data in the index table will also be deleted; if the data is increased, the data in the index table will also be increased)
note: for the global index, by default, Phoenix will not use the index table if the column retrieved in the query statement is not in the index table, unless hint is used.
Case:
1. Create sql file of Telecom table (under local Linux)
vim DIANXIN.sql
# Create DIANXIN.sql and write SQL statements
CREATE TABLE IF NOT EXISTS DIANXIN (
     mdn VARCHAR ,
     start_date VARCHAR ,
     end_date VARCHAR ,
     county VARCHAR,
     x DOUBLE ,
     y  DOUBLE,
     bsid VARCHAR,
     grid_id  VARCHAR,
     biz_type VARCHAR,
     event_type VARCHAR ,
     data_source VARCHAR ,
     CONSTRAINT PK PRIMARY KEY (mdn,start_date)
) column_encoded_bytes=0;
2. Upload DIANXIN.csv (from window to / usr / local / soft / data on the master)
3. Import data and create index
# Import data
psql.py master,node1,node2 DIANXIN.sql DIANXIN.csv

# Create global index
CREATE INDEX DIANXIN_INDEX ON DIANXIN ( end_date );

# Query data (index not effective)
select * from DIANXIN where end_date = '20180503154014';

# Force use of index (index effective) hint
select /*+ INDEX(DIANXIN DIANXIN_INDEX) */  * from DIANXIN where end_date = '20180503154014';

select /*+ INDEX(DIANXIN DIANXIN_INDEX) */  * from DIANXIN where end_date = '20180503154014'  and start_date = '20180503154614';

# Fetch index column, (index effective)
select end_date from DIANXIN where end_date = '20180503154014';

# Create multi column index
CREATE INDEX DIANXIN_INDEX1 ON DIANXIN ( end_date,COUNTY );

# Multi condition query (index validation)
select end_date,MDN,COUNTY from DIANXIN where end_date = '20180503154014' and COUNTY = '8340104';

# Query all columns (index not effective)
select  * from DIANXIN where end_date = '20180503154014'  and COUNTY = '8340104';

# Query all columns (index effective)
select /*+ INDEX(DIANXIN DIANXIN_INDEX1) */ * from DIANXIN where end_date = '20180503154014' and COUNTY = '8340104';

# Single condition (index not effective)
select end_date from DIANXIN where  COUNTY = '8340103';
2.2 local index
local indexes are suitable for scenarios with more writes and less reads, or scenarios with limited storage space. Like the global index, Phoenix will automatically select whether to use the local index when querying. Because the index data and the original data are stored on the same machine, the local index avoids the overhead of network data transmission, so it is more suitable for the scenario of multiple writes. Since it is impossible to determine in advance which Region the data is in, you need to check the data in each Region when reading the data, resulting in some performance loss.
note: for local indexes, the index table will be used regardless of whether hint is specified in the query or whether the query columns are all in the index table.
@ Create local index
CREATE LOCAL INDEX DIANXIN_LOCAL_IDEX ON DIANXIN(grid_id);

# Index validation
select grid_id from dianxin where grid_id='117285031820040';

# Index validation
select * from dianxin where grid_id='117285031820040';
2.3 coverage index
overwrite index is to store the original data in the index data table, so that the query results can be returned directly without going to the original table of HBase to obtain data.
note: both the select column and the where column in the query need to appear in the index.
# Create overlay index
CREATE INDEX DIANXIN_INDEX_COVER ON DIANXIN ( x,y ) INCLUDE ( county );

# Query all columns (index not effective)
select * from dianxin where x=117.288 and y =31.822;

# Force use of index (index takes effect)
select /*+ INDEX(DIANXIN DIANXIN_INDEX_COVER) */ * from dianxin where x=117.288 and y =31.822;

# The column in the query index (effective index) mdn is part of the RowKey of the DIANXIN table
select x,y,county from dianxin where x=117.288 and y =31.822;
select mdn,x,y,county from dianxin where x=117.288 and y =31.822;

# Query criteria must be placed in the index. Columns in select can be placed in INCLUDE (save data in the index)
select /*+ INDEX(DIANXIN DIANXIN_INDEX_COVER) */ x,y,count(*) from dianxin group by x,y;
4,JDBC
Import dependencies in pom.xml
# Import dependency

<dependency>
    <groupId>org.apache.phoenix</groupId>
    <artifactId>phoenix-core</artifactId>
    <version>4.15.0-HBase-1.4</version>
</dependency>
code:
Connection conn = DriverManager.getConnection("jdbc:phoenix:master,node1,node2:2181");
Statement stat = conn.createStatement();
ResultSet rs = stat.executeQuery("select * from dianxin limit 10");
while(rs.next()){
	String mdn = rs.getString("mdn");
	System.out.println(mdn);
}
stat.close();
conn.close();
Previous chapter - Hbase - day 55 talking about bloom filter, Hbase reading and writing, HA of Hbase and Mapreduce reading and writing Hbase data
Next chapter - update with luck

long press the reminder key, and see you in the next chapter
