1. What is Spring mvc?
Spring MVC: It is a component of Spring's basic architecture, a follow-up product of Spring Framework Work, and has been integrated into Spring Web Flow, so we hardly need any other configuration for later integration with Spring.
SpringMVC is an MVC framework similar to Struts2. In practice, it receives browser request responses, processes data, and returns to the page for display, but it is much easier to get started than Struts2.Moreover, due to the security issues exposed by Struts2, SpringMVC has become the framework of preference for most enterprises.
2. Components of Spring MVC:
1. Front-end controller Dispatcher Servlet
Role: Receive requests and response results equivalent to forwarders
Dispatcher Servlet reduces coupling between other components
2. Processor Mapper HandlerMapping
Role: Find Handler based on requested URL
3. Processor Adapter HandlerAdapter
Role: Execute the Handler according to the specific rules required by the Handler Adapter
Note: When writing a Handler, follow the rules required by the Handler Adapter so that the adapter Handler Adapter can execute the Handler correctly
4. Processor Handler
5. View Resolver View Resolver
Role: Parse the view into a real view based on its logical name
6. View View
View is an interface whose implementation classes support different view types (jsp, freemarker, pdf.)
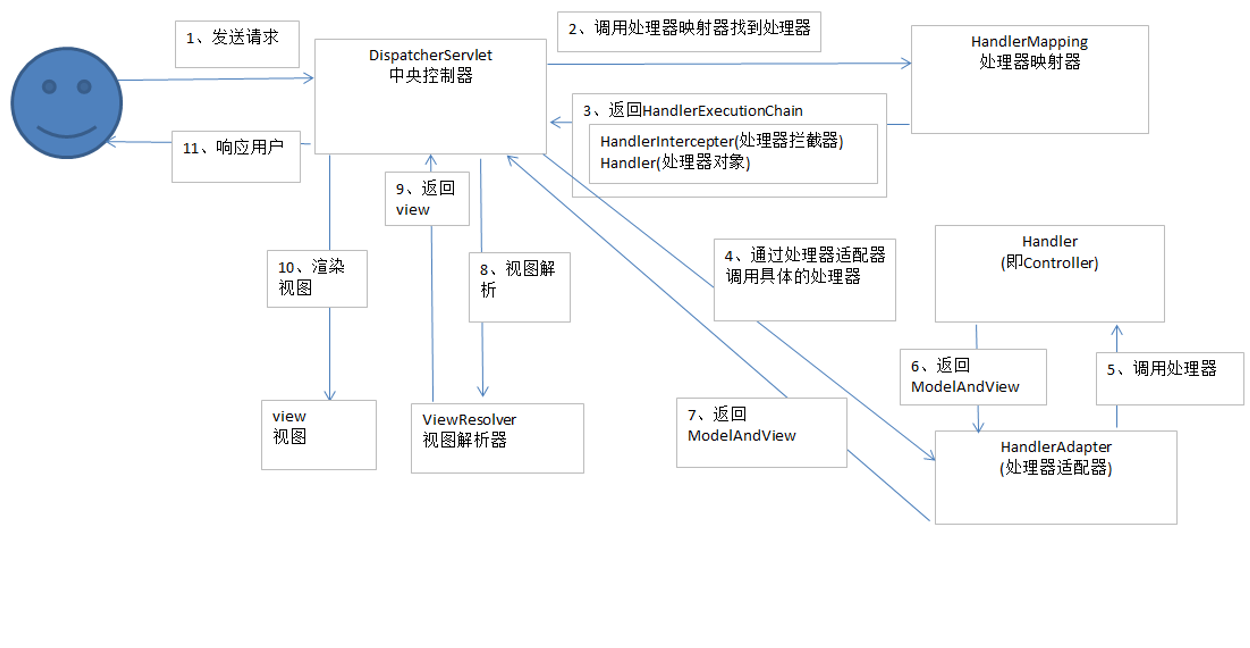
3. SpringMVC Workflow Schematic Diagram:

SpringMVC process:
-
1. Users send requests to the front-end controller Dispatcher Servlet.
-
2. Dispatcher Servlet receives a request to call the HandlerMapping processor mapper.
-
3. Processor mapper HandlerMapping finds specific processors (which can be found based on xml configuration and annotations), generates processor objects and processor interceptors (if any) and returns them to Dispatcher Servlet.
-
4. Dispatcher Servlet calls Handler Adapter processor adapter.
-
5. The HandlerAdapter adapts to call a specific processor (Controller, also known as a back-end controller).
-
6. Controller execution completes and returns to ModelAndView.
-
7. HandlerAdapter returns the controller execution result ModelAndView to Dispatcher Servlet.
-
8. Dispatcher Servlet passes ModelAndView to ViewReslover View Parser.
-
9. ViewReslover parses and returns the specific View.
-
10. Dispatcher Servlet renders the view based on the View (that is, fills the view with model data).
-
11. Dispatcher Servlet responds to the user.
4. Cases
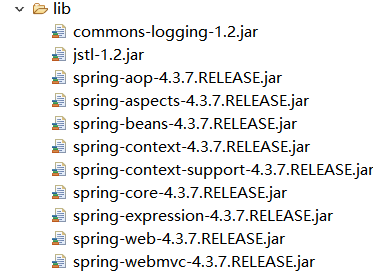
1. Import related jar packages:

2. web.xml file configuration
<!-- Springmvc Front End Configuration -->
  <servlet>
  	<servlet-name>springmvc</servlet-name>
  	<servlet-class>org.springframework.web.servlet.DispatcherServlet</servlet-class>
  	<!-- contextConfigLocation To configure Springmvc Loaded configuration files (configure processor mappers, adapters, etc.)
		//If contextConfigLocation is not configured, the default load is/WEB-INF/servlet name-servlet.xml(springmvc-servlet.xml)
	 -->
  	<init-param>
  		<param-name>contextConfigLocation</param-name>
  		<param-value>classpath:spring-servlet.xml</param-value>
  	</init-param>
  </servlet>
  <servlet-mapping>
  	<servlet-name>springmvc</servlet-name>
  	<url-pattern>/</url-pattern>
  </servlet-mapping>
3. Create a configuration file, spring-servlet.xml, whose name can be customized.And configure the processor and mapper.
<beans xmlns="http://www.springframework.org/schema/beans"
	xmlns:xsi="http://www.w3.org/2001/XMLSchema-instance"
	xsi:schemaLocation="http://www.springframework.org/schema/beans
 http://www.springframework.org/schema/beans/spring-beans.xsd">

	<!-- The processor mapper will bean Of name As url Find,
	              //You need to specify beanname (that is, url) when configuring Handler to implement all mappers
		 HandlerMapping Interface.
	 -->
	<bean class="org.springframework.web.servlet.handler.BeanNameUrlHandlerMapping" />

	<!-- To configure Controller Adapter -->
	<bean class="org.springframework.web.servlet.mvc.SimpleControllerHandlerAdapter"></bean>
</beans>
4. Create a custom Controller
/**
 * Custom Controller
 * Controller interface must be implemented
 * @author Ye Xiaomo
 *
 */
public class UserController implements Controller{

	@Override
	public ModelAndView handleRequest(HttpServletRequest request, HttpServletResponse response) throws Exception {
		System.out.println("This method was called...");
		ModelAndView view = new ModelAndView();
		view.setViewName("/index.jsp");
		return view;
	}
}
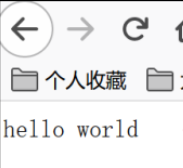
5. Test results

---------------------------------------------------------------------------------------------------------------
5. Use annotations
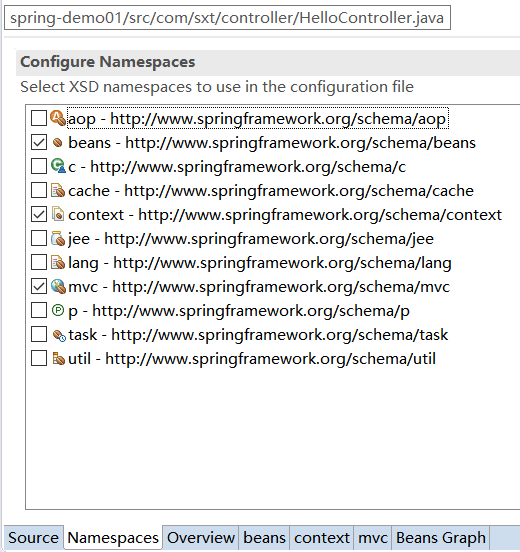
1. Modify Profile Open Notes

2. Configure as follows
Configure in the spring-servlet.xml file:
<!--Turn on automatic package scanning-->
   <context:component-scan base-package="com.sxt.controller"/>
   <!--Turn on the use of annotations-->
   <mvc:annotation-driven/>
3. Use notes in Controller:
@Controller
public class HelloController {

	@RequestMapping("/h1")
	@ResponseBody
	public void hello(Integer id, String name, String address, String[] hobby) {
		for (String string : hobby) {
			System.out.println(string);
		}
	}

	@RequestMapping("/h2")
	@ResponseBody
	public void user(User user) {
		System.out.println(user);
	}
}