I. Preface
From today on, we will start our web development. The previous article used SpringBoot Take-off Series - Build Environment with idea (2) We have explained how to develop, of course, this is the beginning of the construction, and then we will start to develop in detail, including the use of various starters in spring boot, the real functions used are available in our actual project.
As mentioned here, the development of spring boot is modular. Each module can correspond to a starter. For example, the web development module corresponds to spring-boot-starter-web. In addition, there are modules for accessing database, Redis module and so on. What functions we need to introduce is what module, so we can introduce what module. Project management is also very convenient, and the organization of the project is more clear.
First of all, we need to build a web project, so we need to select the web module first, which is necessary, and then we need to introduce the module one by one.
2. SpringBoot Web development conventions
2.1 Configuration Agreement
As the saying goes, spring boot itself is designed in a way that conventions outweigh configurations. Many configurations have become our conventions (default configurations). Although we can change them, we still need to know. Next, we briefly introduce the principle of automatic configuration of spring boot, which is the implementation method of the Convention in spring boot.
First of all, spring boot will configure the beans mapped with a prefix in the configuration file, so that our configuration becomes a bean when the program starts and is more convenient to use. By default, spring boot will be configurated with a Configuration and a Properties class, as follows:
xxxxAutoConfiguration: Help US configure components automatically in containers;
xxxxProperties: configuration class to encapsulate the content of configuration file;
Each AutoConfiguration corresponds to a Property, which is how all configurations in spring boot are implemented. The xxxAutoConfiguration class is a component of the container that is added to the container; they are used for automatic configuration; and xxx Properties are bean s that accept configuration.
We take Http Encoding AutoConfiguration (Http Coding AutoConfiguration) as an example to explain the principle of automatic configuration:
@Configuration   //Represents that this is a configuration class. Like previous configuration files, components can also be added to containers.
@EnableConfigurationProperties(HttpEncodingProperties.class)  //Starting the specified class ConfigurationProperties Functions; the corresponding values in the configuration file and HttpEncodingProperties Bind; and bind. HttpEncodingProperties Add to ioc Container

@ConditionalOnWebApplication //Spring Bottom@Conditional Annotations ( Spring Annotation version), according to different conditions, if the specified conditions are met, the configuration in the entire configuration class will take effect;    Determine whether the current application is web Application, if so, the current configuration class takes effect

@ConditionalOnClass(CharacterEncodingFilter.class)  //Determine whether the current project has this class CharacterEncodingFilter;SpringMVC Filters for scrambling resolution;

@ConditionalOnProperty(prefix = "spring.http.encoding", value = "enabled", matchIfMissing = true)  //Determine whether a configuration exists in the configuration file  spring.http.encoding.enabled;If it does not exist, judgment is also valid.
//Even if we don't configure it in our configuration file pring.http.encoding.enabled=true,It also takes effect by default.
public class HttpEncodingAutoConfiguration {

      //He already has SpringBoot The configuration file maps
      private final HttpEncodingProperties properties;

   //With only one parametric constructor, the value of the parameter is taken from the container.
      public HttpEncodingAutoConfiguration(HttpEncodingProperties properties) {
        this.properties = properties;
    }

    @Bean   //To add a component to the container, some values of the component need to be from properties Get in
    @ConditionalOnMissingBean(CharacterEncodingFilter.class) //Judging that the container does not have this component?
    public CharacterEncodingFilter characterEncodingFilter() {
        CharacterEncodingFilter filter = new OrderedCharacterEncodingFilter();
        filter.setEncoding(this.properties.getCharset().name());
        filter.setForceRequestEncoding(this.properties.shouldForce(Type.REQUEST));
        filter.setForceResponseEncoding(this.properties.shouldForce(Type.RESPONSE));
        return filter;
    }
So spring boot has many such classes. By default, we only focus on prefix for configuration. This is the configuration key that we need to override to modify the default configuration of spring boot in the future.
2.2 Static Resource Mapping Convention
First, we can look at the configuration class of static resources. As we said above, the prefix is spring.resources:
@ConfigurationProperties(prefix = "spring.resources", ignoreUnknownFields = false)
public class ResourceProperties implements ResourceLoaderAware {
  //You can set parameters related to static resources, cache time, etc.
}
Specific code will no longer be posted, let's just say the result. If we use maven management to download our static resource packages, such as jquery.js or something, then our default access path is / webjars /**, all go to classpath:/META-INF/resources/webjars / find resources.
webjars: http://www.webjars.org/ Static resources are introduced in the form of jar packages. For example, if we introduce the jquery.js library, we can write as follows in pom.xml:
<! - Introduce jquery-webjar - > When accessing, just write the name of the resource under webjars.
<dependency>
    <groupId>org.webjars</groupId>
    <artifactId>jquery</artifactId>
    <version>3.3.1</version>
</dependency>
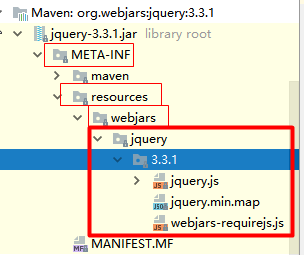
Access address: localhost:8080/webjars/jquery/3.3.1/jquery.js
If we access our static resources in a normal way, such as html, css, js, etc., all access paths will be found in the lower path, classpath: our resources folder. Priority: / META-INF/resources > Resources > static > public.
"classpath:/META-INF/resources/",
"classpath:/resources/",
"classpath:/static/",
"classpath:/public/"
"/": The root path of the current project
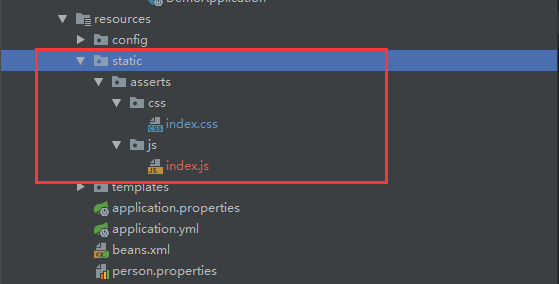
http://localhost:8080/asserts/css/index.css Corresponds to static/asserts/css/index.css.
3. Template Engine
3.1 introduction
The word template engine may sound very big. In fact, we have been in touch with it before. The earliest one is jsp, and the more advanced ones are Velocity, Freemarker and Thymeleaf. In fact, most of the functions of template engine have the following characteristics. We can use a diagram to explain them:
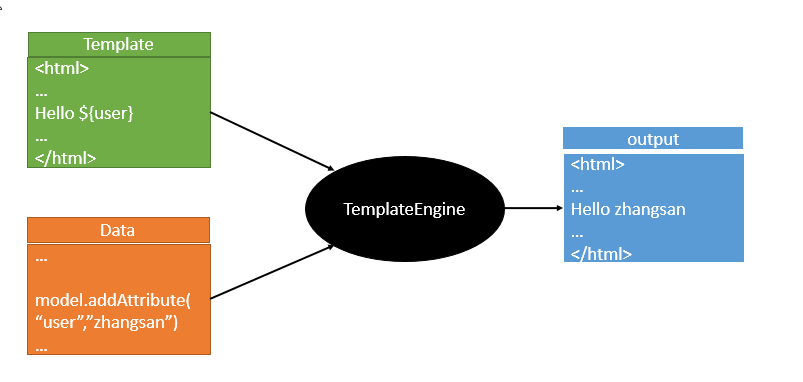
It's all data + expression. The principle of generating html is very simple, but we can see which is easier to write and more powerful. springboot recommends using Thymeleaf as a template engine.
3.2 Introducing Thymeleaf
First, dependencies are introduced:
<dependency>
      <groupId>org.springframework.boot</groupId>
      <artifactId>spring-boot-starter-thymeleaf</artifactId>
</dependency>
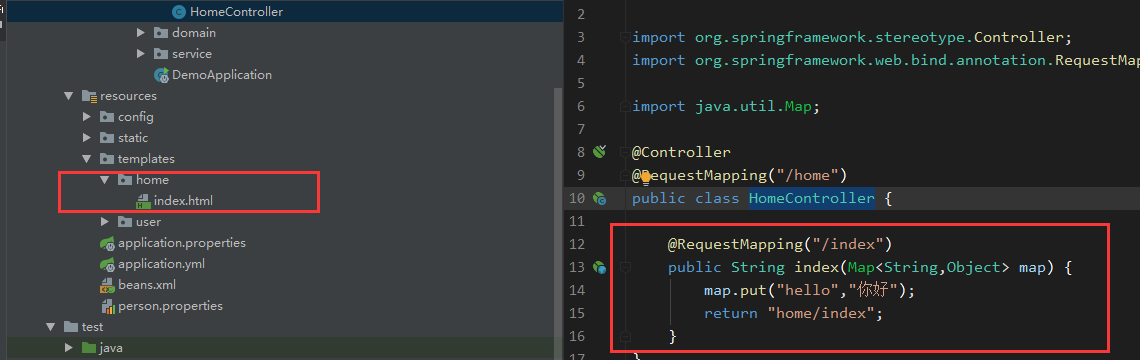
Then add the Templates folder under the resources folder and an index.html below, because the default configuration thymeleaf uses a prefix of classpath:/templates and a suffix of. html.
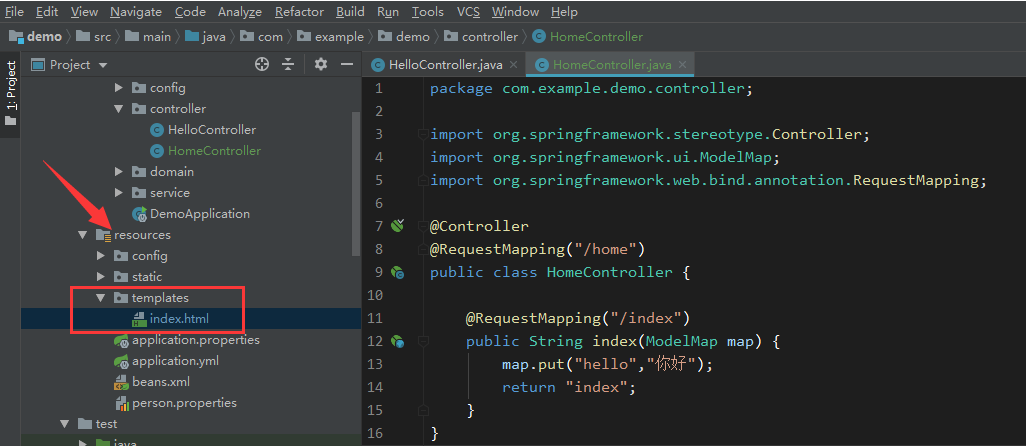
Then we add a HomeController, set to the mvc controller, annotated with @Controller, and if you use RestController, you go straight back to the string instead of looking for the view.
@Controller
@RequestMapping("/home")
public class HomeController {

    @RequestMapping("/index")
    public String index(ModelMap map) {
        map.put("hello","Hello");
        return "index";
    }
}
Then modify the index.html template to write thymeleaf syntax:
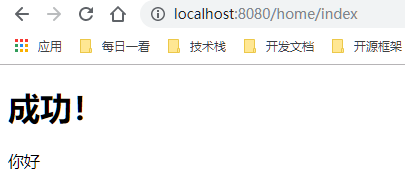
<!DOCTYPE html>
<html lang="en" xmlns:th="http://www.thymeleaf.org">
<head>
    <meta charset="UTF-8">
    <title>Title</title>
</head>
<body>
    <h1>Success!</h1>
    <!--th:text take div The text content is set to -->
    <div th:text="${hello}">This is a welcome message.</div>
</body>
</html>
xmlns:th="http://www.thymeleaf.org" is an import namespace, which allows us to code with thymeleaf grammar prompts, and we have to say that the grammar is the same as vue.
We can see the effect by visiting http://localhost:8080/home/index directly.
3.3 Set default startup page
When we visit a site domain name, we can set by default which page to jump to, which is also the most basic operation of many websites.
Next, we add a configuration class WebConfig to set the startup page:
@Configuration
public class WebConfig extends WebMvcConfigurerAdapter {

    //Be-all WebMvcConfigurerAdapter Components all work together.
    @Bean //Register components in containers
    public WebMvcConfigurerAdapter webMvcConfigurerAdapter(){
        WebMvcConfigurerAdapter adapter = new WebMvcConfigurerAdapter() {
            @Override
            public void addViewControllers(ViewControllerRegistry registry) {
                registry.addViewController("/").setViewName("forward:/home/index");
                registry.addViewController("/index.html").setViewName("forward:/home/index");
            }
        };
        return adapter;
    }
}
The above code means that when we visit / or / index.html, by default, we forward to / home/index path. We just set the home/index page directly.
3.4 Thymeleaf grammar
3.4.1 Standard Expressions
Using ${}, like ognl expressions, is also to take care of our jsp development habits.
java code:
@Controller
@RequestMapping("/home")
public class HomeController {

    @RequestMapping("/index")
    public String index(Map<String,Object> map) {
        map.put("hello","How do you do");
        Person person = new Person();
        person.setName("zhangsan");
        person.setAge(25);
        map.put("person",person);
        return "home/index";
    }
}
html code:
<body>
    <h1>Success!</h1>
    <!--th:text take div The text content is set to -->
    <div th:text="${hello}">This is a welcome message.</div>
    <br>

    <p>Full name:<span th:text="${person.name}"></span></p>
    <p>Age:<span th:text="${person.age}"></span></p>
</body>
3.4.2 Selection of Variable Expressions
Selecting variable expressions, also known as asterisk variable expressions, uses the th:object attribute to bind objects.
html code:
<p>==========Select Variable Expressions===========</p>
<div th:object="${person}">
    <div th:text="*{name}"></div>
    <div th:text="*{age}"></div>
</div>
Selection variable expression uses th:object to represent the object to be selected, then * to represent the object, and {} to write the attributes in the object.
You can also use *{person.name} to get data directly, except that ${} is to get data in a fine-grained map, and * is to get data on the selected object.
<p>==========Select Variable Expressions===========</p>
<div >
    <div th:text="*{person.name}"></div>
    <div th:text="*{person.age}"></div>
</div>
3.4.3 url expression
Generate a url address or a path. It can be used in <script src=".">, <link href=".">, <a href="."> and so on.
<p>==========Url Expression===========</p>
<div >
    <!--Relative path-->
    <a th:href="@{'person?name='+${person.name}}" >Address 1</a>
    <!--The root path relative to the project-->
    <a th:href="@{'/person?name='+${person.name}}" >Address 2</a>
</div>
<script th:src="@{'/asserts/js/index.js'}"></script>
Almost all html attributes can be replaced by th:xxx. After thymeleaf parsing, the original html attributes and values will be replaced directly.
3.4.4 Built-in Objects
thymeleaf provides some built-in objects that we can use directly to access some request information.
#request:
${#request.getContextPath()}
${#request.getAttribute("name")}
#session:
{#session.getAttribute("loginUser")}
{#session.id}
3.4.5 Tool Objects
Tool objects can help us format the same data and simply process one data.
- # dates: A practical method for java.util.Date objects, <span: text="${dates. format (curDate,'yyyy-MM-dd HH: mm: ss')}"></span>
- # calendars: Similar to dates, but a java.util.Calendar object.
- # numbers: A practical way to format data objects.
- # strings: A practical method of string objects. contains,startsWith,prepending/appending, etc.
- # Objects: A practical way to manipulate objects.
- # bools: A practical method for evaluating Boolean values.
- # Arays: A practical method of arrays.
- # lists: A practical method of list s.
- # set: A Practical Method of set.
- # The Practical Method of maps:map
- # aggregates: A practical way to create aggregates for arrays or collections.
3.4.6 thymeleaf template fragments and layout pages
1. Template fragments: we can introduce a written html fragment, which is equivalent to jsp:include function. For example, we can reuse both the head and the tail. We can also introduce a page as a layout page, which will be used in future pages.
We can use th:fragment to define a template, and th:insert, th:replace, th:include to replace the template.
Among them:
- th:insert 3.0 + version added.
- th:replace 2.0+ 3.0 + is available.
- th:include is no longer recommended in version 3.0.
The syntax format of these three commands is template ename:: [domselector].
Let's first add the template fragment/footer.html:
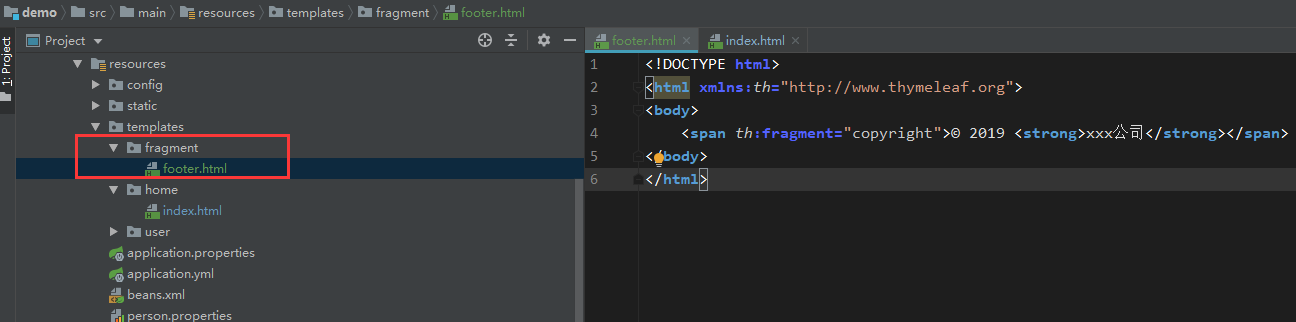
<html xmlns:th="http://www.thymeleaf.org">
<body>
    <span th:fragment="copyright">© 2019 <strong>xxx company</strong></span>
</body>
</html>
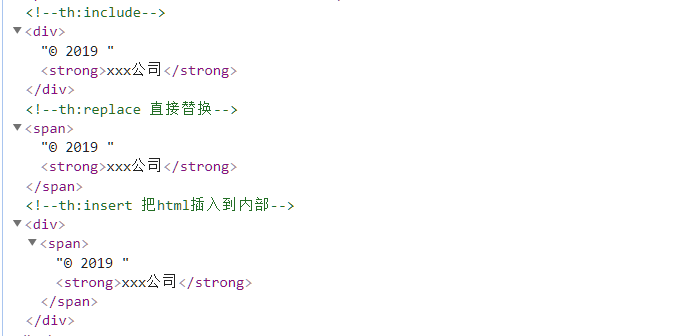
home/index.html refers to templates:
<!--th:include-->
<div th:include="fragment/footer :: copyright"></div>
<!--th:replace Direct substitution-->
<div th:replace="fragment/footer :: copyright"></div>
<!--th:insert hold html Insert into the interior-->
<div th:insert="fragment/footer :: copyright"></div>
The three commands generate the html structure as follows, slightly different:
2. Layout Page: Set up a master page. Other pages use this page as the master page, which has the meaning of the parent class.
First, you need to add layout package dependencies:
<dependency>
    <groupId>nz.net.ultraq.thymeleaf</groupId>
    <artifactId>thymeleaf-layout-dialect</artifactId>
    <version>2.2.2</version>
</dependency>
Add a layout page (parent page):
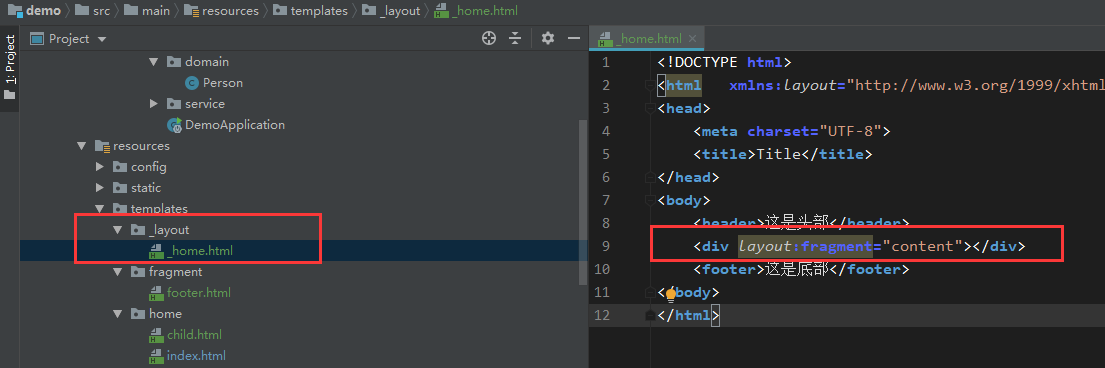
html code:
<!DOCTYPE html>
<html   xmlns:layout="http://www.w3.org/1999/xhtml">
<head>
    <meta charset="UTF-8">
    <title>Title</title>
</head>
<body>
    <header>This is the head.</header>
    <div layout:fragment="content"></div>
    <footer>This is the bottom.</footer>
</body>
</html>
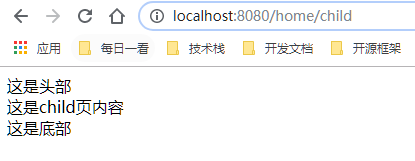
Add a child page with this _home.html as the parent page:
Where: layout:decorator="_layout/_home" indicates the path of the layout page, layout:fragment="content" indicates the location in the layout page to be replaced.

html code:
<!DOCTYPE html>
<html lang="en" xmlns:layout="http://www.w3.org/1999/xhtml" layout:decorator="_layout/_home">
<head>
    <meta charset="UTF-8">
    <title>Title</title>
</head>
<body>
    <div layout:fragment="content">
        //This is the content of the child page.
    </div>
</div>
</body>
</html>
Output:
Four, summary
This paper introduces the basic process of web development, including static files, template engine, etc. Now we have done the preparatory work of web development, then we can write business functions, and then we will do a simple CRUD to understand the basic process of the Web.