Foreword: As everyone who has used Springboot knows, Springboot uses the idea that conventions are larger than configurations, and provides a lot of operations to simplify the configuration, so we can get rid of the heavy configuration of SpringMVC projects by configuring the appropriate parameter values for the specified parameters on the.properties or.yml file, and Springboot will be applied automatically; I personally think Springboot is superiorThe advantage is to provide a fast and convenient development mode, such as the Quick Development Service Interface, package the jar package through mvn, and start the service through the java-jar command line (built-in server). Springboot also supports the development and deployment of web projects (including various front-end resources such as html, css, js) to external servers, but it needs to be done at this pointAdjust appropriately;
Last year, I received an application-class project and I owe myself the opportunity to develop a web project using Springboot. The project directory structure is as follows: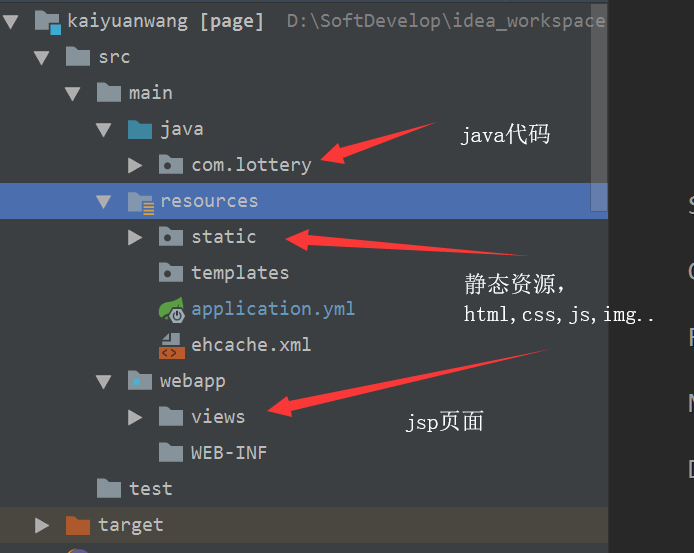
It is extremely convenient to send, but when deploying, you need to pack a package of war s to deploy to the external server, you need to change the configuration and make appropriate adjustments. This paper takes this as an opportunity to record the operation process for yourself and later!
To clarify the ideas, there are several places to deal with:
1. Because warpackages are commonly used on the server, the way the project is packaged here is jar packages->warpackages
2. Use external servers, so remove Springboot's built-in servers
3. Because some jar packages are already included in the external server, they should be removed properly
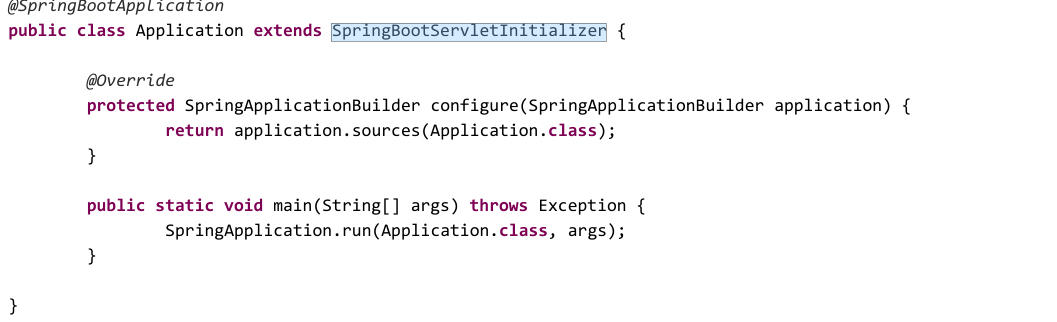
4. Important: When the Springboot project starts, the Spring container is created, which contains a large number of Servlet, Filter and Spring Beans objects. At this time, because external servers are used, we need to bind the objects in the Spring container to the server. We use the officially recommended way to have the startup class inherit the SpringBootServletInitiallizer and override the configure method.The official demo is as follows:
Start with the following steps, starting with creating a Springboot project and ending with final browser access:
1. Minimize the creation of a new Springboot project and adjust it appropriately. After the completion of the new project, pom.xml and the project directory structure are as follows:
<?xml version="1.0" encoding="UTF-8"?>
<project xmlns="http://maven.apache.org/POM/4.0.0" xmlns:xsi="http://www.w3.org/2001/XMLSchema-instance"
         xsi:schemaLocation="http://maven.apache.org/POM/4.0.0 http://maven.apache.org/xsd/maven-4.0.0.xsd">
    <modelVersion>4.0.0</modelVersion>
    <parent>
        <groupId>org.springframework.boot</groupId>
        <artifactId>spring-boot-starter-parent</artifactId>
        <version>2.1.4.RELEASE</version>
        <relativePath/>
    </parent>
    <groupId>com.dongnao</groupId>
    <artifactId>springboot-tomcat-deployment-demo</artifactId>
    <version>0.0.1</version>
    <packaging>jar</packaging>
    <name>springboot-tomcat-deployment-demo</name>
    <description>Demo project for Spring Boot</description>
    <properties>
        <java.version>1.8</java.version>
    </properties>
    <dependencies>
        <dependency>
            <groupId>org.springframework.boot</groupId>
            <artifactId>spring-boot-starter-web</artifactId>
        </dependency>
    </dependencies>
    <build>
        <plugins>
            <plugin>
                <groupId>org.springframework.boot</groupId>
                <artifactId>spring-boot-maven-plugin</artifactId>
            </plugin>
        </plugins>
    </build>
</project>
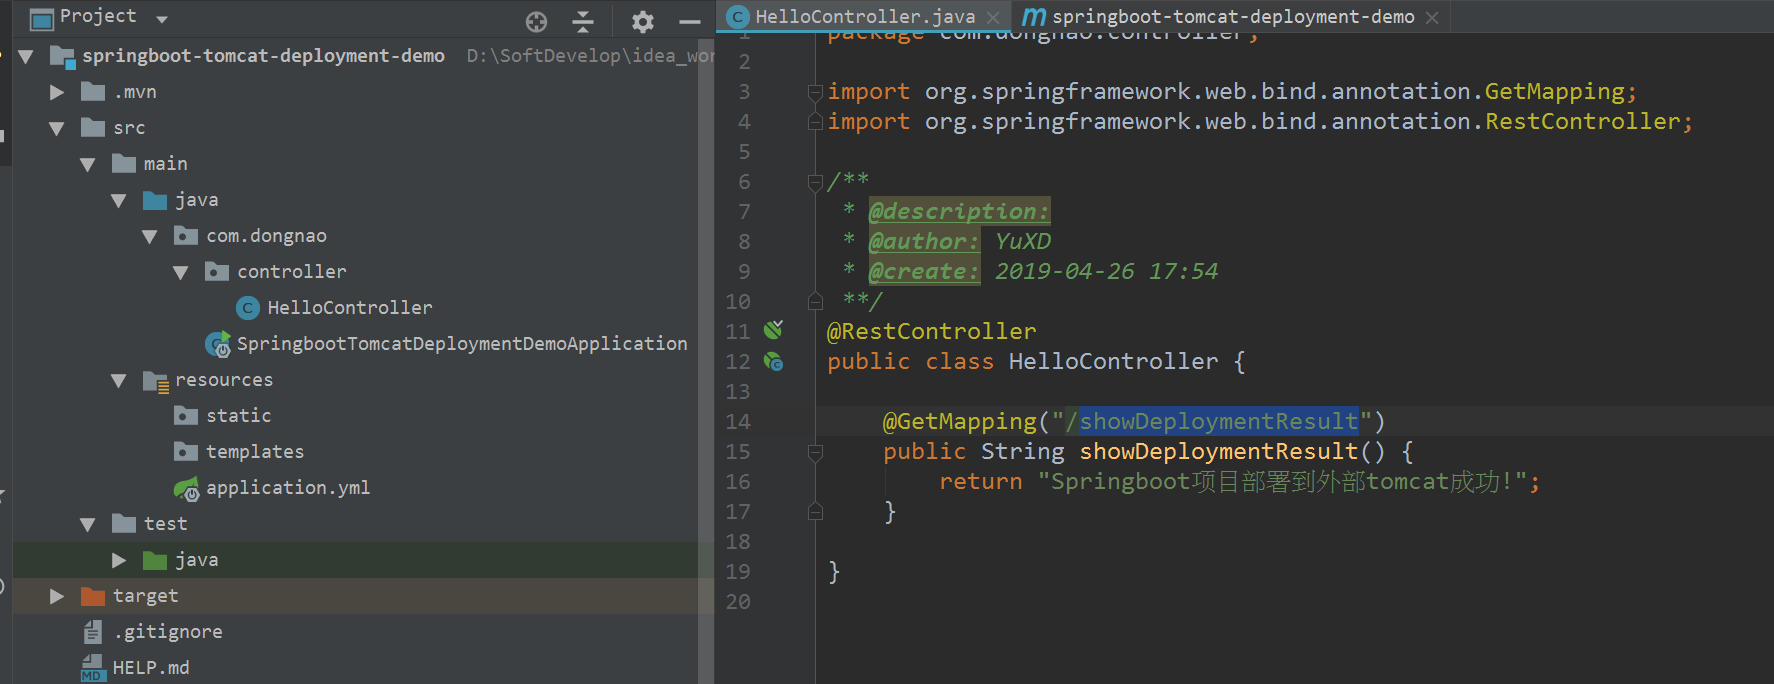
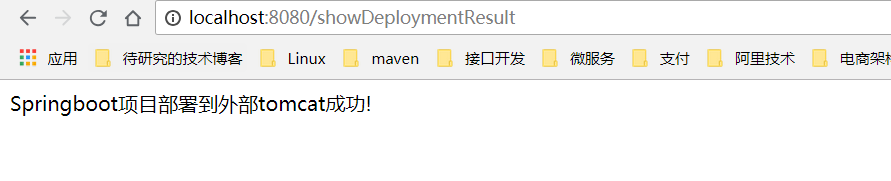
2. Create a new HelloController.java, code as shown above, start the Springboot project, test if the new project is ok, the result is as follows:
3. Modify the Springboot project startup class so that it inherits the SpringBootServletInitializer and overrides the configure method, modifying the code as follows:
package com.dongnao;

import org.springframework.boot.SpringApplication;
import org.springframework.boot.autoconfigure.SpringBootApplication;
import org.springframework.boot.builder.SpringApplicationBuilder;
import org.springframework.boot.web.servlet.support.SpringBootServletInitializer;

@SpringBootApplication
public class SpringbootTomcatDeploymentDemoApplication extends SpringBootServletInitializer {

    public static void main(String[] args) {
        SpringApplication.run(SpringbootTomcatDeploymentDemoApplication.class, args);
    }

    @Override
    protected SpringApplicationBuilder configure(SpringApplicationBuilder builder) {
        return builder.sources(SpringbootTomcatDeploymentDemoApplication.class);
    }
}
4. Modify the pom.xml, modify the way the project is packaged, remove the springboot built-in tomcat server, adjust the lib folder of tomcat appropriately, but it is referenced in the project. To be clear, since tomcat server already provides some generic jar packages, we will identify them in maven. The modified pom.xml is as follows:
<?xml version="1.0" encoding="UTF-8"?>
<project xmlns="http://maven.apache.org/POM/4.0.0" xmlns:xsi="http://www.w3.org/2001/XMLSchema-instance"
         xsi:schemaLocation="http://maven.apache.org/POM/4.0.0 http://maven.apache.org/xsd/maven-4.0.0.xsd">
    <modelVersion>4.0.0</modelVersion>
    <parent>
        <groupId>org.springframework.boot</groupId>
        <artifactId>spring-boot-starter-parent</artifactId>
        <version>2.1.4.RELEASE</version>
        <relativePath/>
    </parent>
    <groupId>com.dongnao</groupId>
    <artifactId>springboot-tomcat-deployment-demo</artifactId>
    <version>0.0.1</version>
    <!-- Specify how the project is packaged -->
    <packaging>war</packaging>
    <name>springboot-tomcat-deployment-demo</name>
    <description>Demo project for Spring Boot</description>
    <properties>
        <project.build.sourceEncoding>UTF-8</project.build.sourceEncoding>
        <project.reporting.outputEncoding>UTF-8</project.reporting.outputEncoding>
        <java.version>1.8</java.version>
    </properties>
    <dependencies>
        <dependency>
            <groupId>org.springframework.boot</groupId>
            <artifactId>spring-boot-starter-web</artifactId>
        </dependency>
        <!-- remove Springboot Built-in tomcat The server -->
        <dependency>
            <groupId>org.springframework.boot</groupId>
            <artifactId>spring-boot-starter-tomcat</artifactId>
            <scope>provided</scope>
        </dependency>
        <!-- The following three dependency Add as it should, not necessarily, here for demonstration -->
        <dependency>
            <groupId>javax.servlet</groupId>
            <artifactId>javax.servlet-api</artifactId>
            <version>3.1.0</version>
            <scope>provided</scope>
        </dependency>
        <dependency>
            <groupId>jstl</groupId>
            <artifactId>jstl</artifactId>
            <version>1.2</version>
        </dependency>
        <dependency>
            <groupId>taglibs</groupId>
            <artifactId>standard</artifactId>
            <version>1.1.2</version>
        </dependency>
    </dependencies>
    <build>
        <finalName>springboot-deploy</finalName>
        <plugins>
            <!-- To configure war Packaging Plugins -->
            <plugin>
                <groupId>org.apache.maven.plugins</groupId>
                <artifactId>maven-war-plugin</artifactId>
                <version>2.6</version>
                <configuration>
                    <!-- Prohibit when in project web.xml Throw an exception when nonexistent -->
                    <failOnMissingWebXml>false</failOnMissingWebXml>
                </configuration>
            </plugin>
            <!-- Configure compilation plug-ins -->
            <plugin>
                <groupId>org.apache.maven.plugins</groupId>
                <artifactId>maven-compiler-plugin</artifactId>
                <version>3.1</version>
                <configuration>
                    <source>1.8</source>
                    <target>1.8</target>
                </configuration>
            </plugin>
        </plugins>
    </build>
</project>
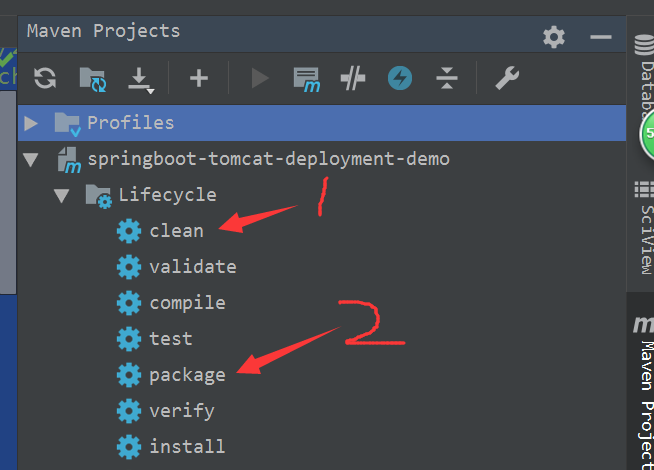
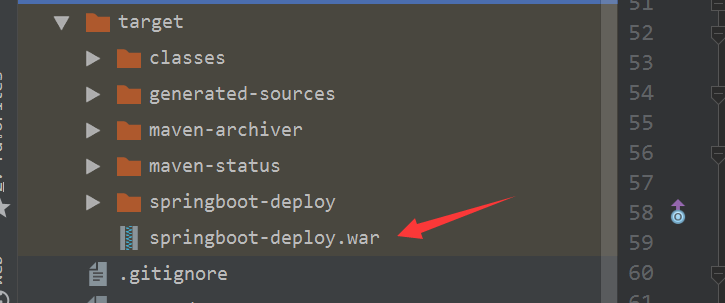
5. Through the maven tool class of idea development tools in turn, do the following 1,2 operations to get the war package, as shown in the figure, this is what we want to put in the server:
6. Find a Tomcat server, put the warpackage under the tomcat/webapps folder, start the server, and after the server starts successfully, use: server address + port + warname + interface name, my is: http://localhost:8080/springboot-deploy/showDeploymentResult The results are as follows:
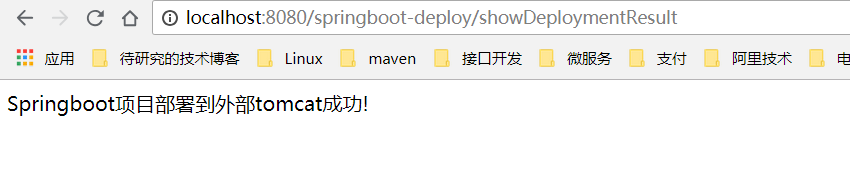
Okay, the conversion was successful!