
Preface
Last article SpringBoot: A Brief Introduction to Integrated Shiro In this article, we briefly describe the basic concepts of Shiro and Shiro's internal process. Next, I will briefly describe the basic content and usage scenarios of this blog.
This blog mainly talks about integrating Shiro in SpringBoot 2.0, using INI file to complete login authentication (only authentication and unauthorized), using scenarios to deal with fewer users of the system, and account password is fixed.
Integrated environment: Mac | JDK 1.8 | SpringBoot 2.0
The advantages and disadvantages of INI file must be seen, because this is the first step of your architecture program!
INI file advantages: easy to understand, easy to integrate.
Disadvantage of INI file: Hard-coded authentication and authorization information is written in INI file, which has poor maintainability.
Building Shiro Basic Environment
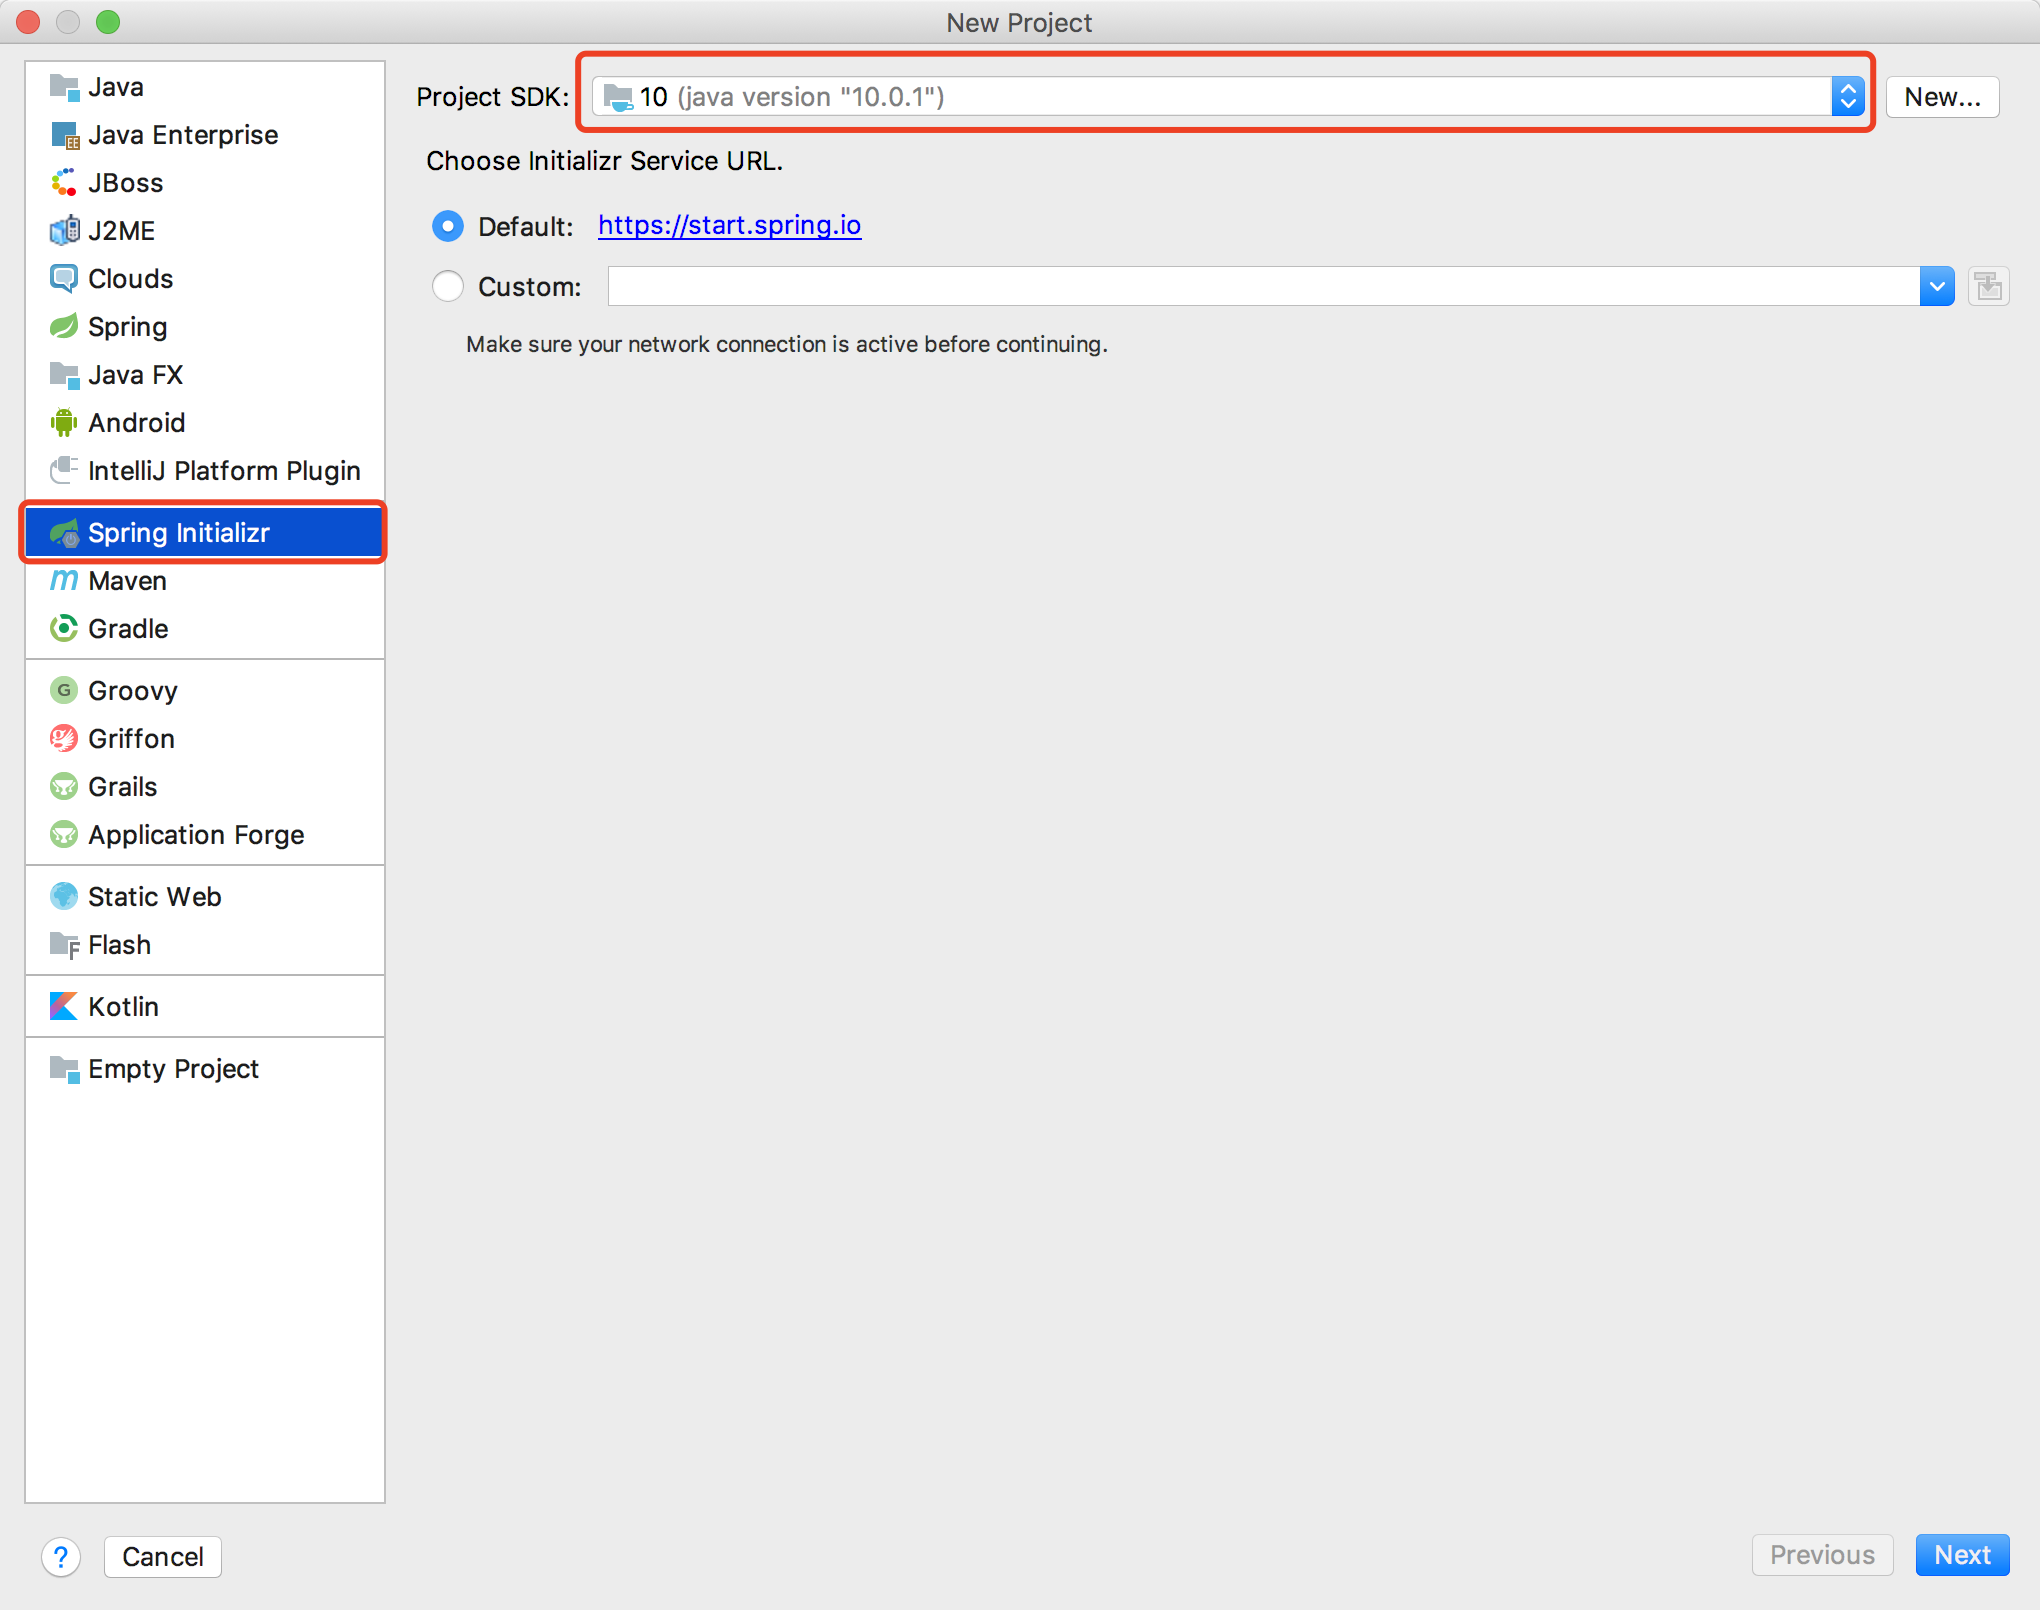
First of all, we use IDEA to create a SpringBoot 2.0 web project (I won't talk about JDK here). The process is as follows.
- Select the Spring Book template, create Spring Boot, and click Next.
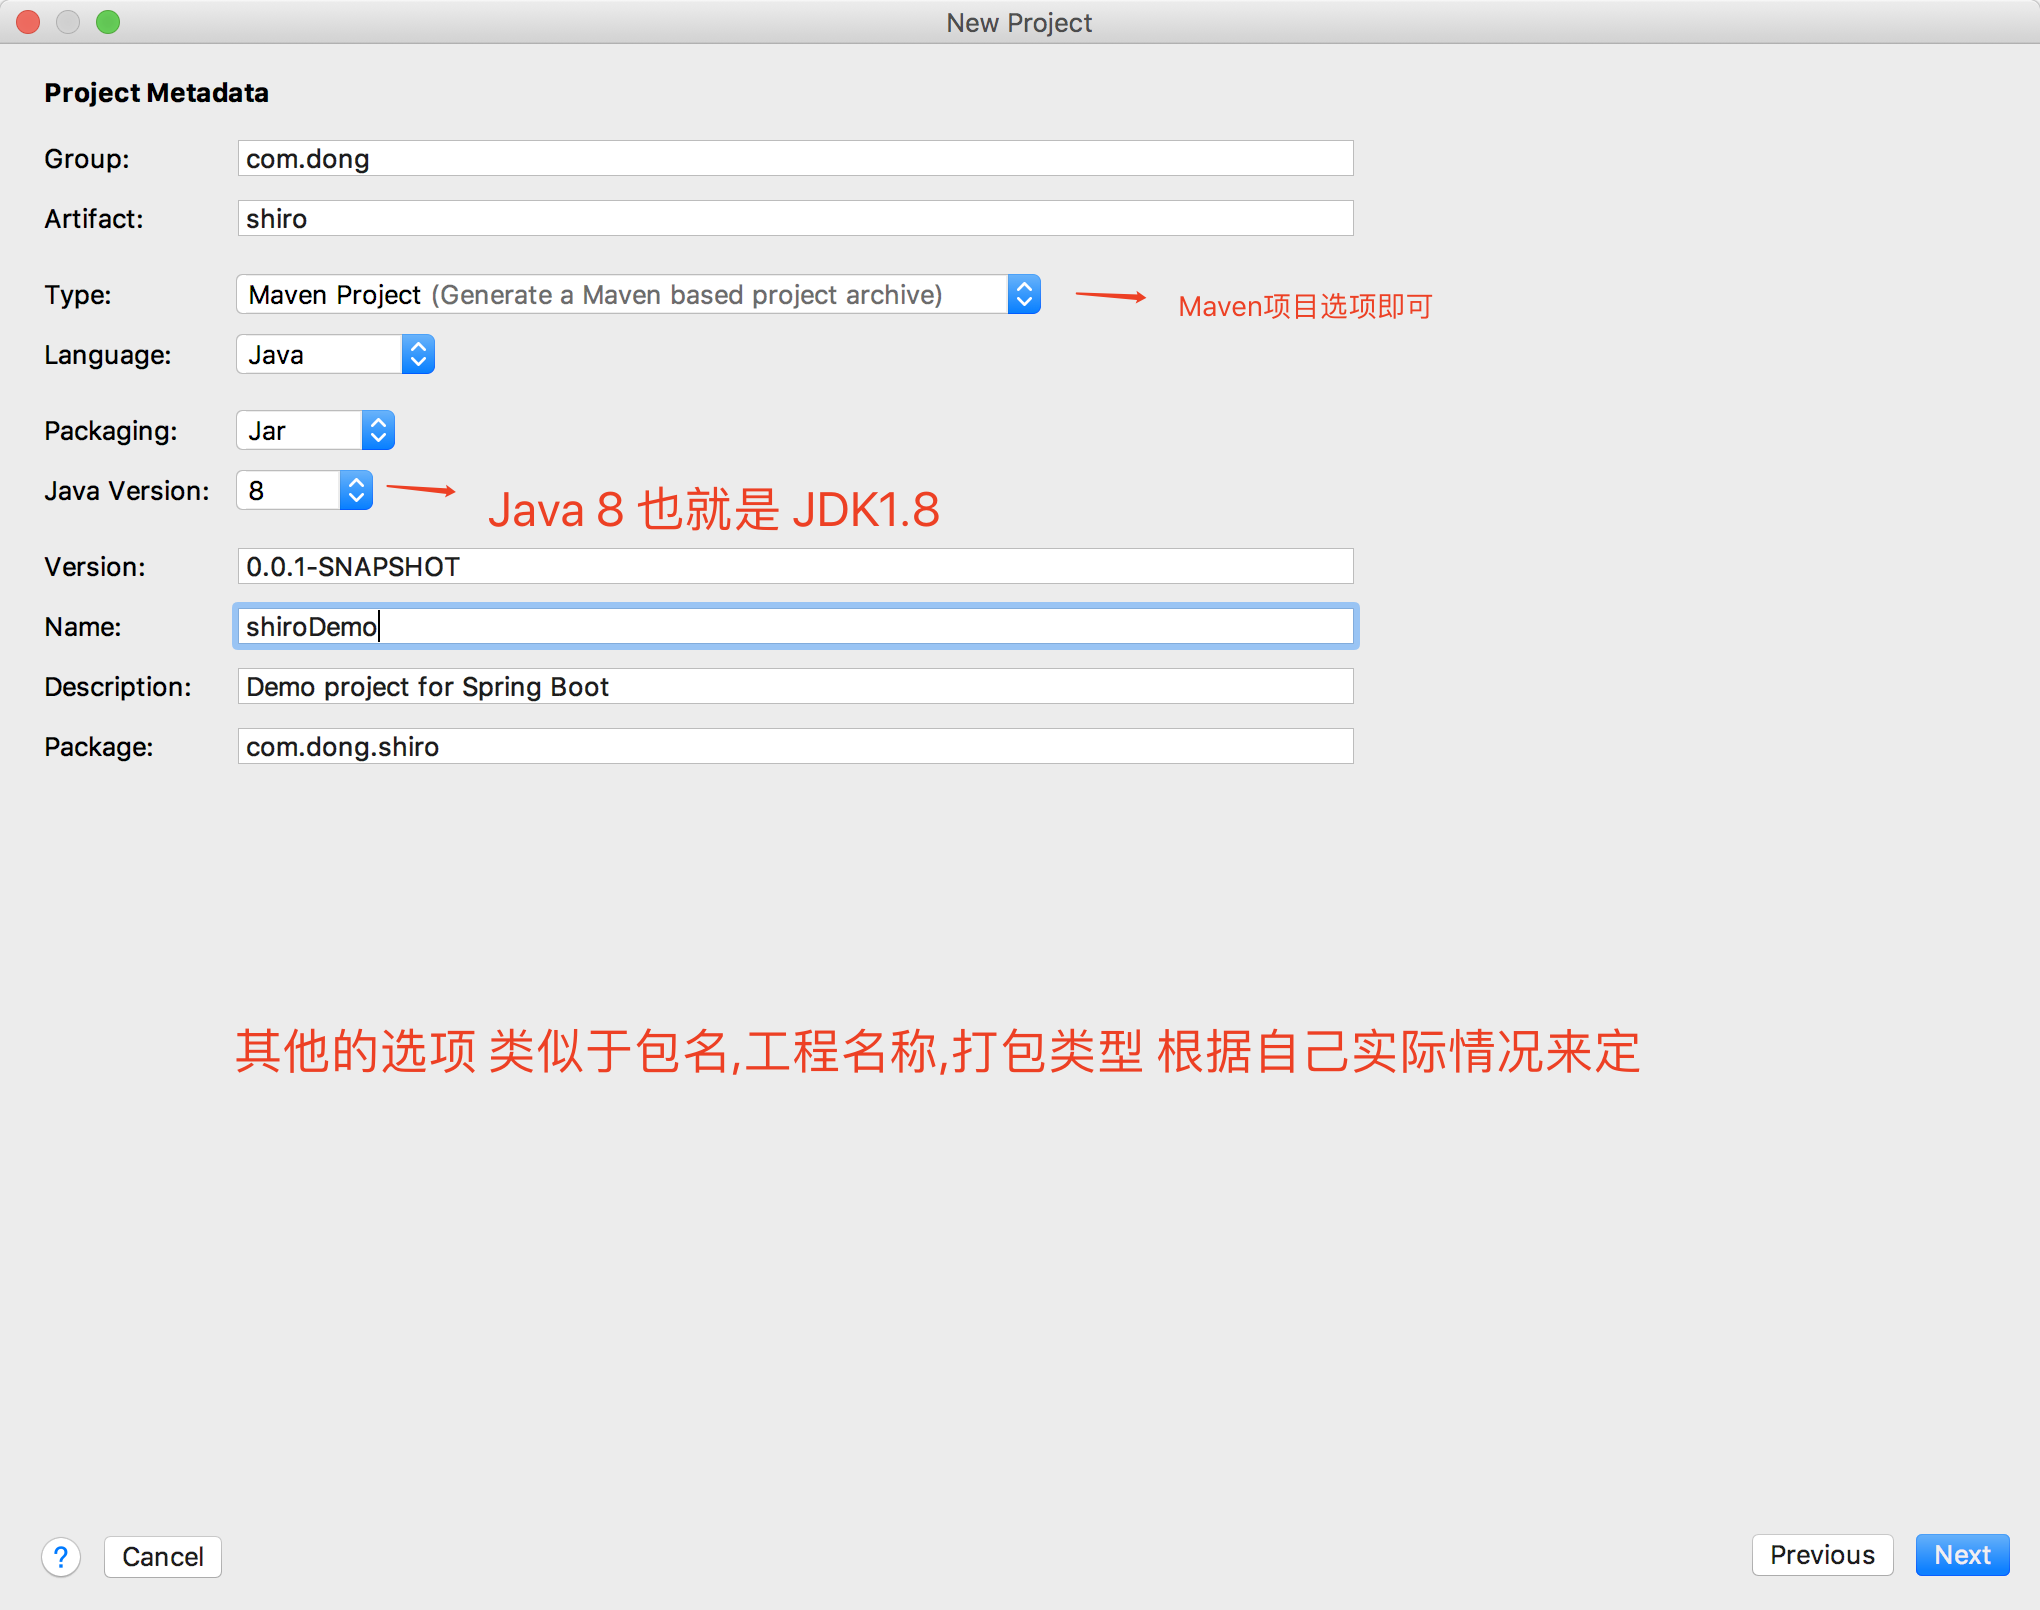
- Set up the basic configuration information for the Spring Book project. Click Next.
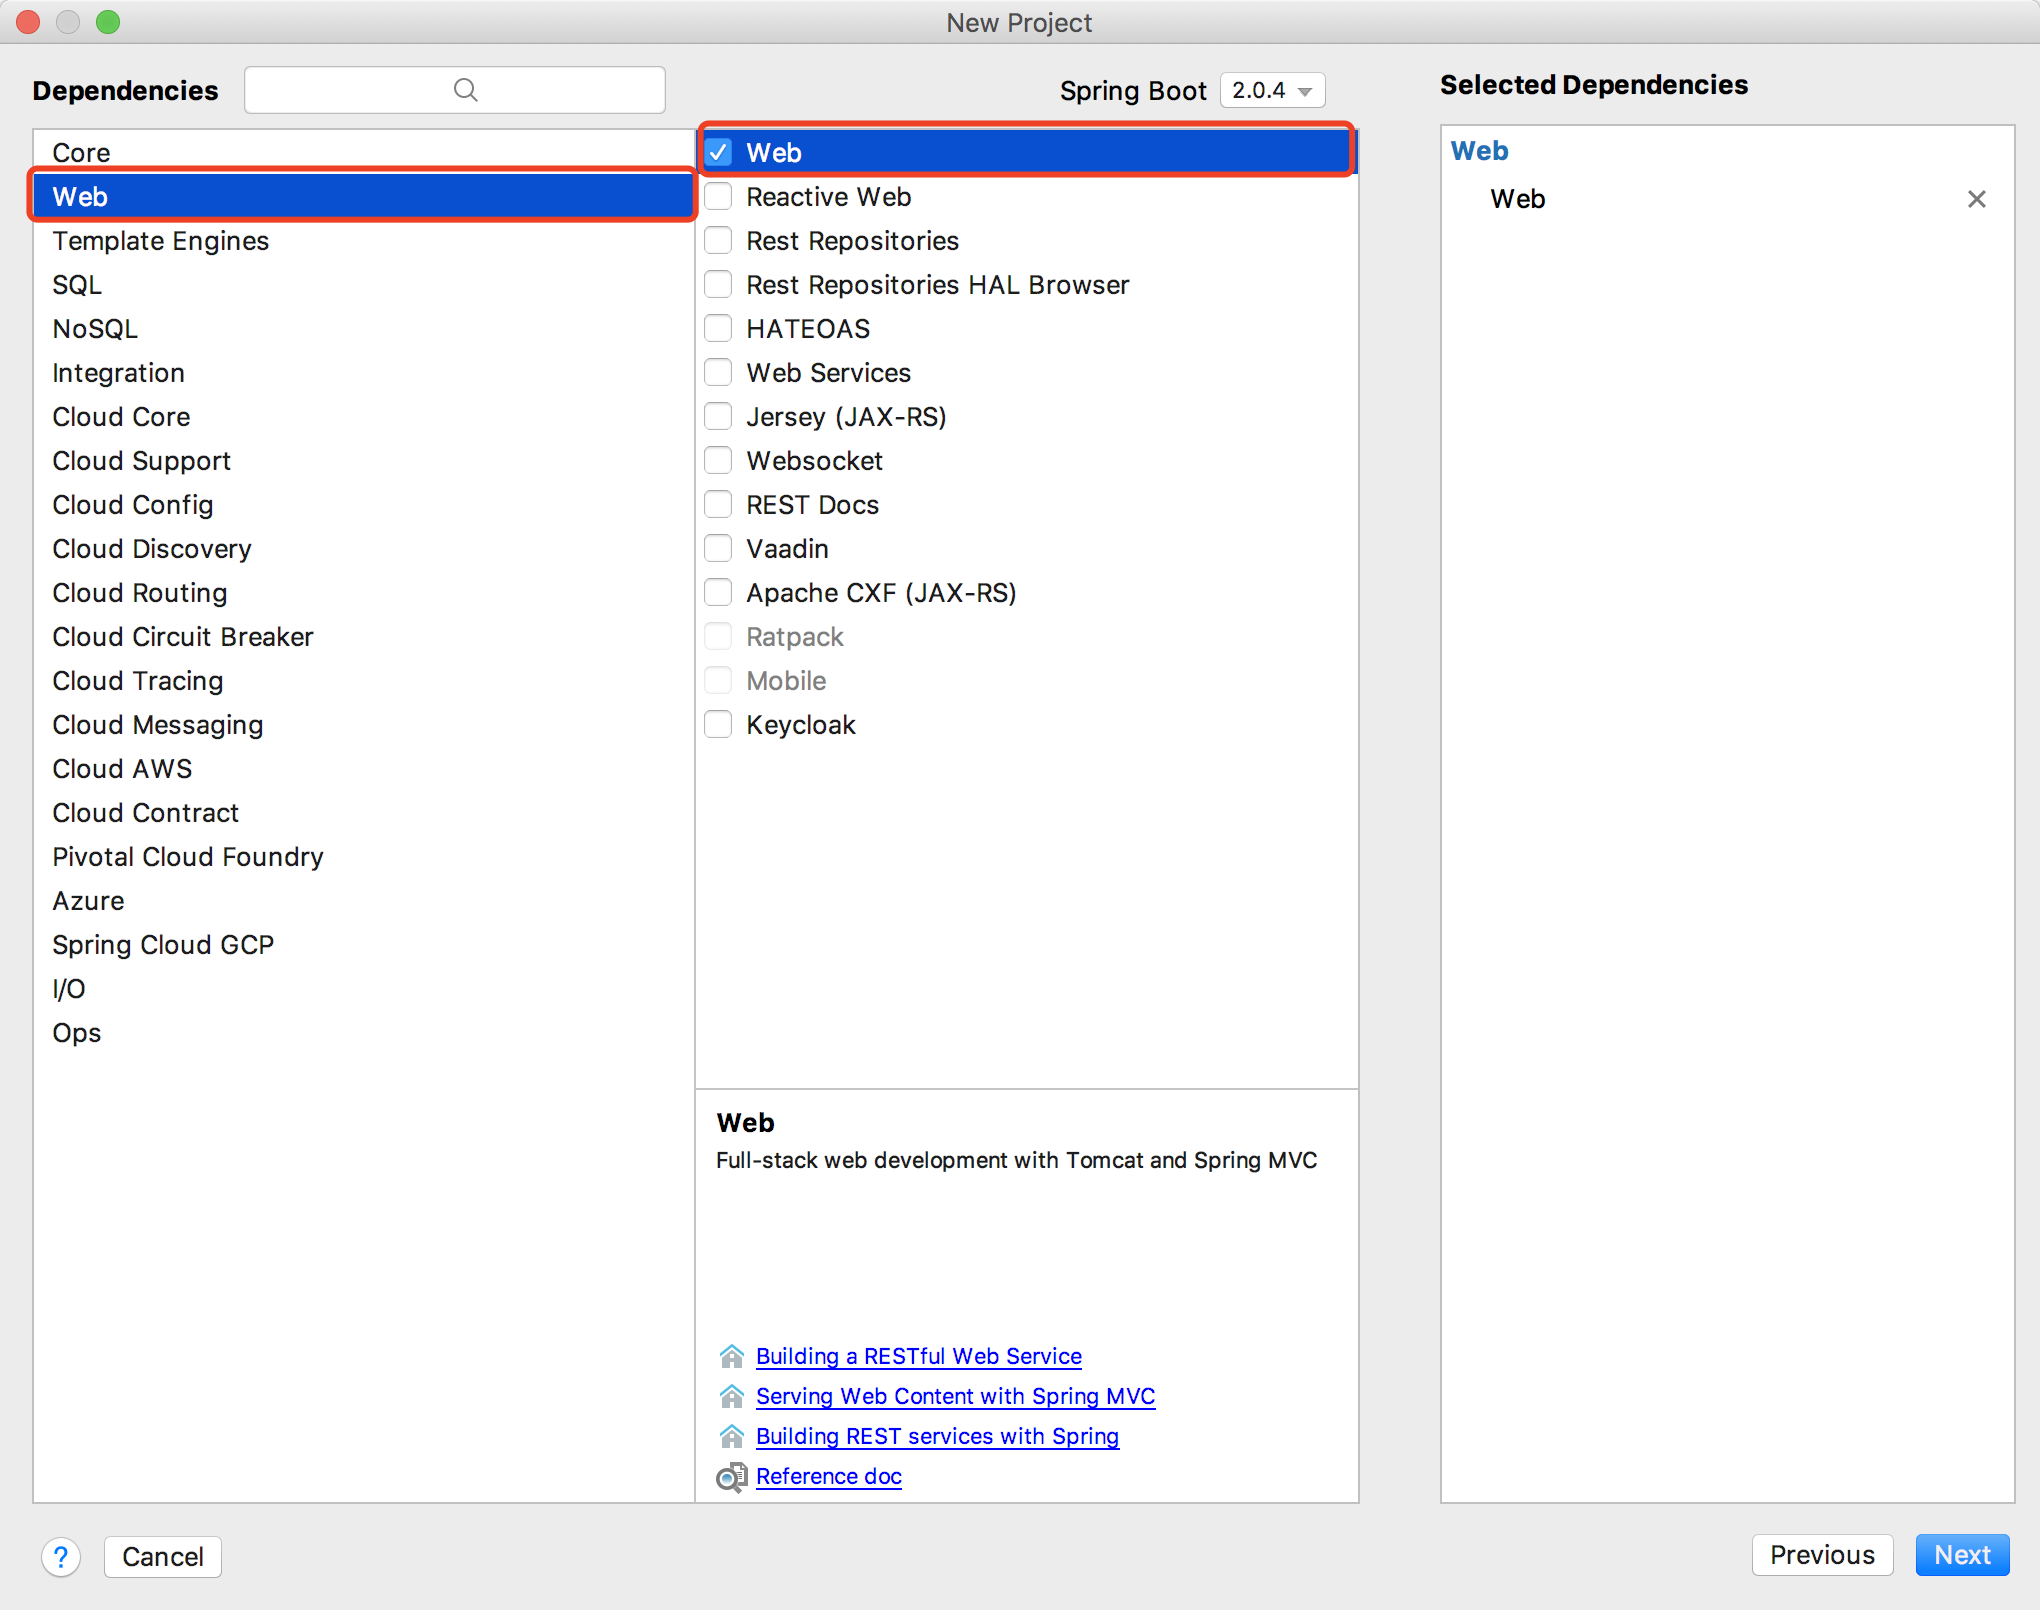
- Choose the module contained in Spring Boot, because we only need to do demonstration function here, so we only choose the Web module, of course, the actual project we need to select the module we need according to our needs. Click Next to complete the project creation.
- Then open the project and wait for a while, because you use the Web module, Maven needs to download the dependent Jar package. At the same time, we need to import Shiro's dependent Jar package, because Spring Book already supports Shiro. So we can import the following dependent module directly.
        <!-- shiro User Rights Management -->
        <dependency>
            <groupId>org.apache.shiro</groupId>
            <artifactId>shiro-spring-boot-starter</artifactId>
            <version>1.4.0</version>
        </dependency>
Configure the INI file authentication section
When all the projects are configured, we run the Shiro project and find that it can't run successfully. The error message is as follows.
***************************
APPLICATION FAILED TO START
***************************

Description:

No bean of type 'org.apache.shiro.realm.Realm' found.

Action:

Please create bean of type 'Realm' or add a shiro.ini in the root classpath (src/main/resources/shiro.ini) or in the META-INF folder (src/main/resources/META-INF/shiro.ini).
This is because we did not configure the INI file, so we created a file named shiro.ini under resources or src/main/resources/META-INF folder according to the prompt, and added our user authentication information. As shown in the following figure.

Then, we write the following user information into shiro.ini file, where the user root password is 123456 and the user admin password is admin.
[users]
root=123456
admin=admin
Authentication Logic Code
The following diagram is described in the previous blog. The INI file of the previous module is Realm in the corresponding diagram. Now all we need to do is to assemble the Subject body and configure Secruity Manager.
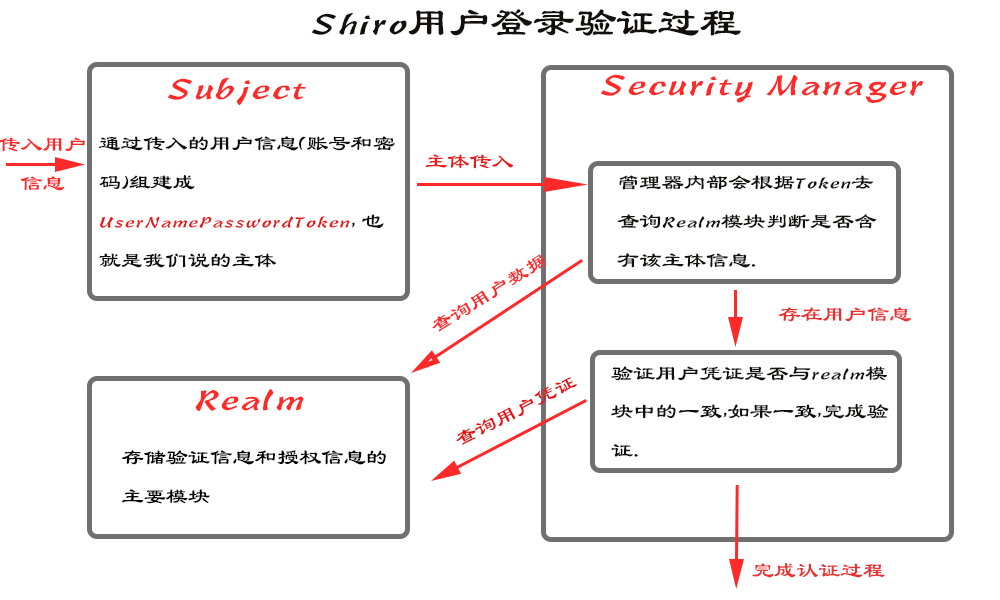
To ensure the logic of the code, we extract the validation logic into a class. Then we start to create a Security Manager based on the INI file and bind it to Security Utils. The overall code is shown below.
        //Initialize the SecurityManager object
        Factory<SecurityManager> factory = new IniSecurityManagerFactory("classpath:shiro.ini");

        //Get the SecurityManager instance object through the SecurityManager factory object.
        SecurityManager securityManager =  factory.getInstance();

        // Bind the security manager instance to Security Utils
        SecurityUtils.setSecurityManager(securityManager);
Next, we begin to retrieve our Subject subject and configure our user information token token token, as shown below.
        //Build Subject Body.
        Subject subject = SecurityUtils.getSubject();

        //Create token tokens
        UsernamePasswordToken token = new UsernamePasswordToken(userName,passWord);
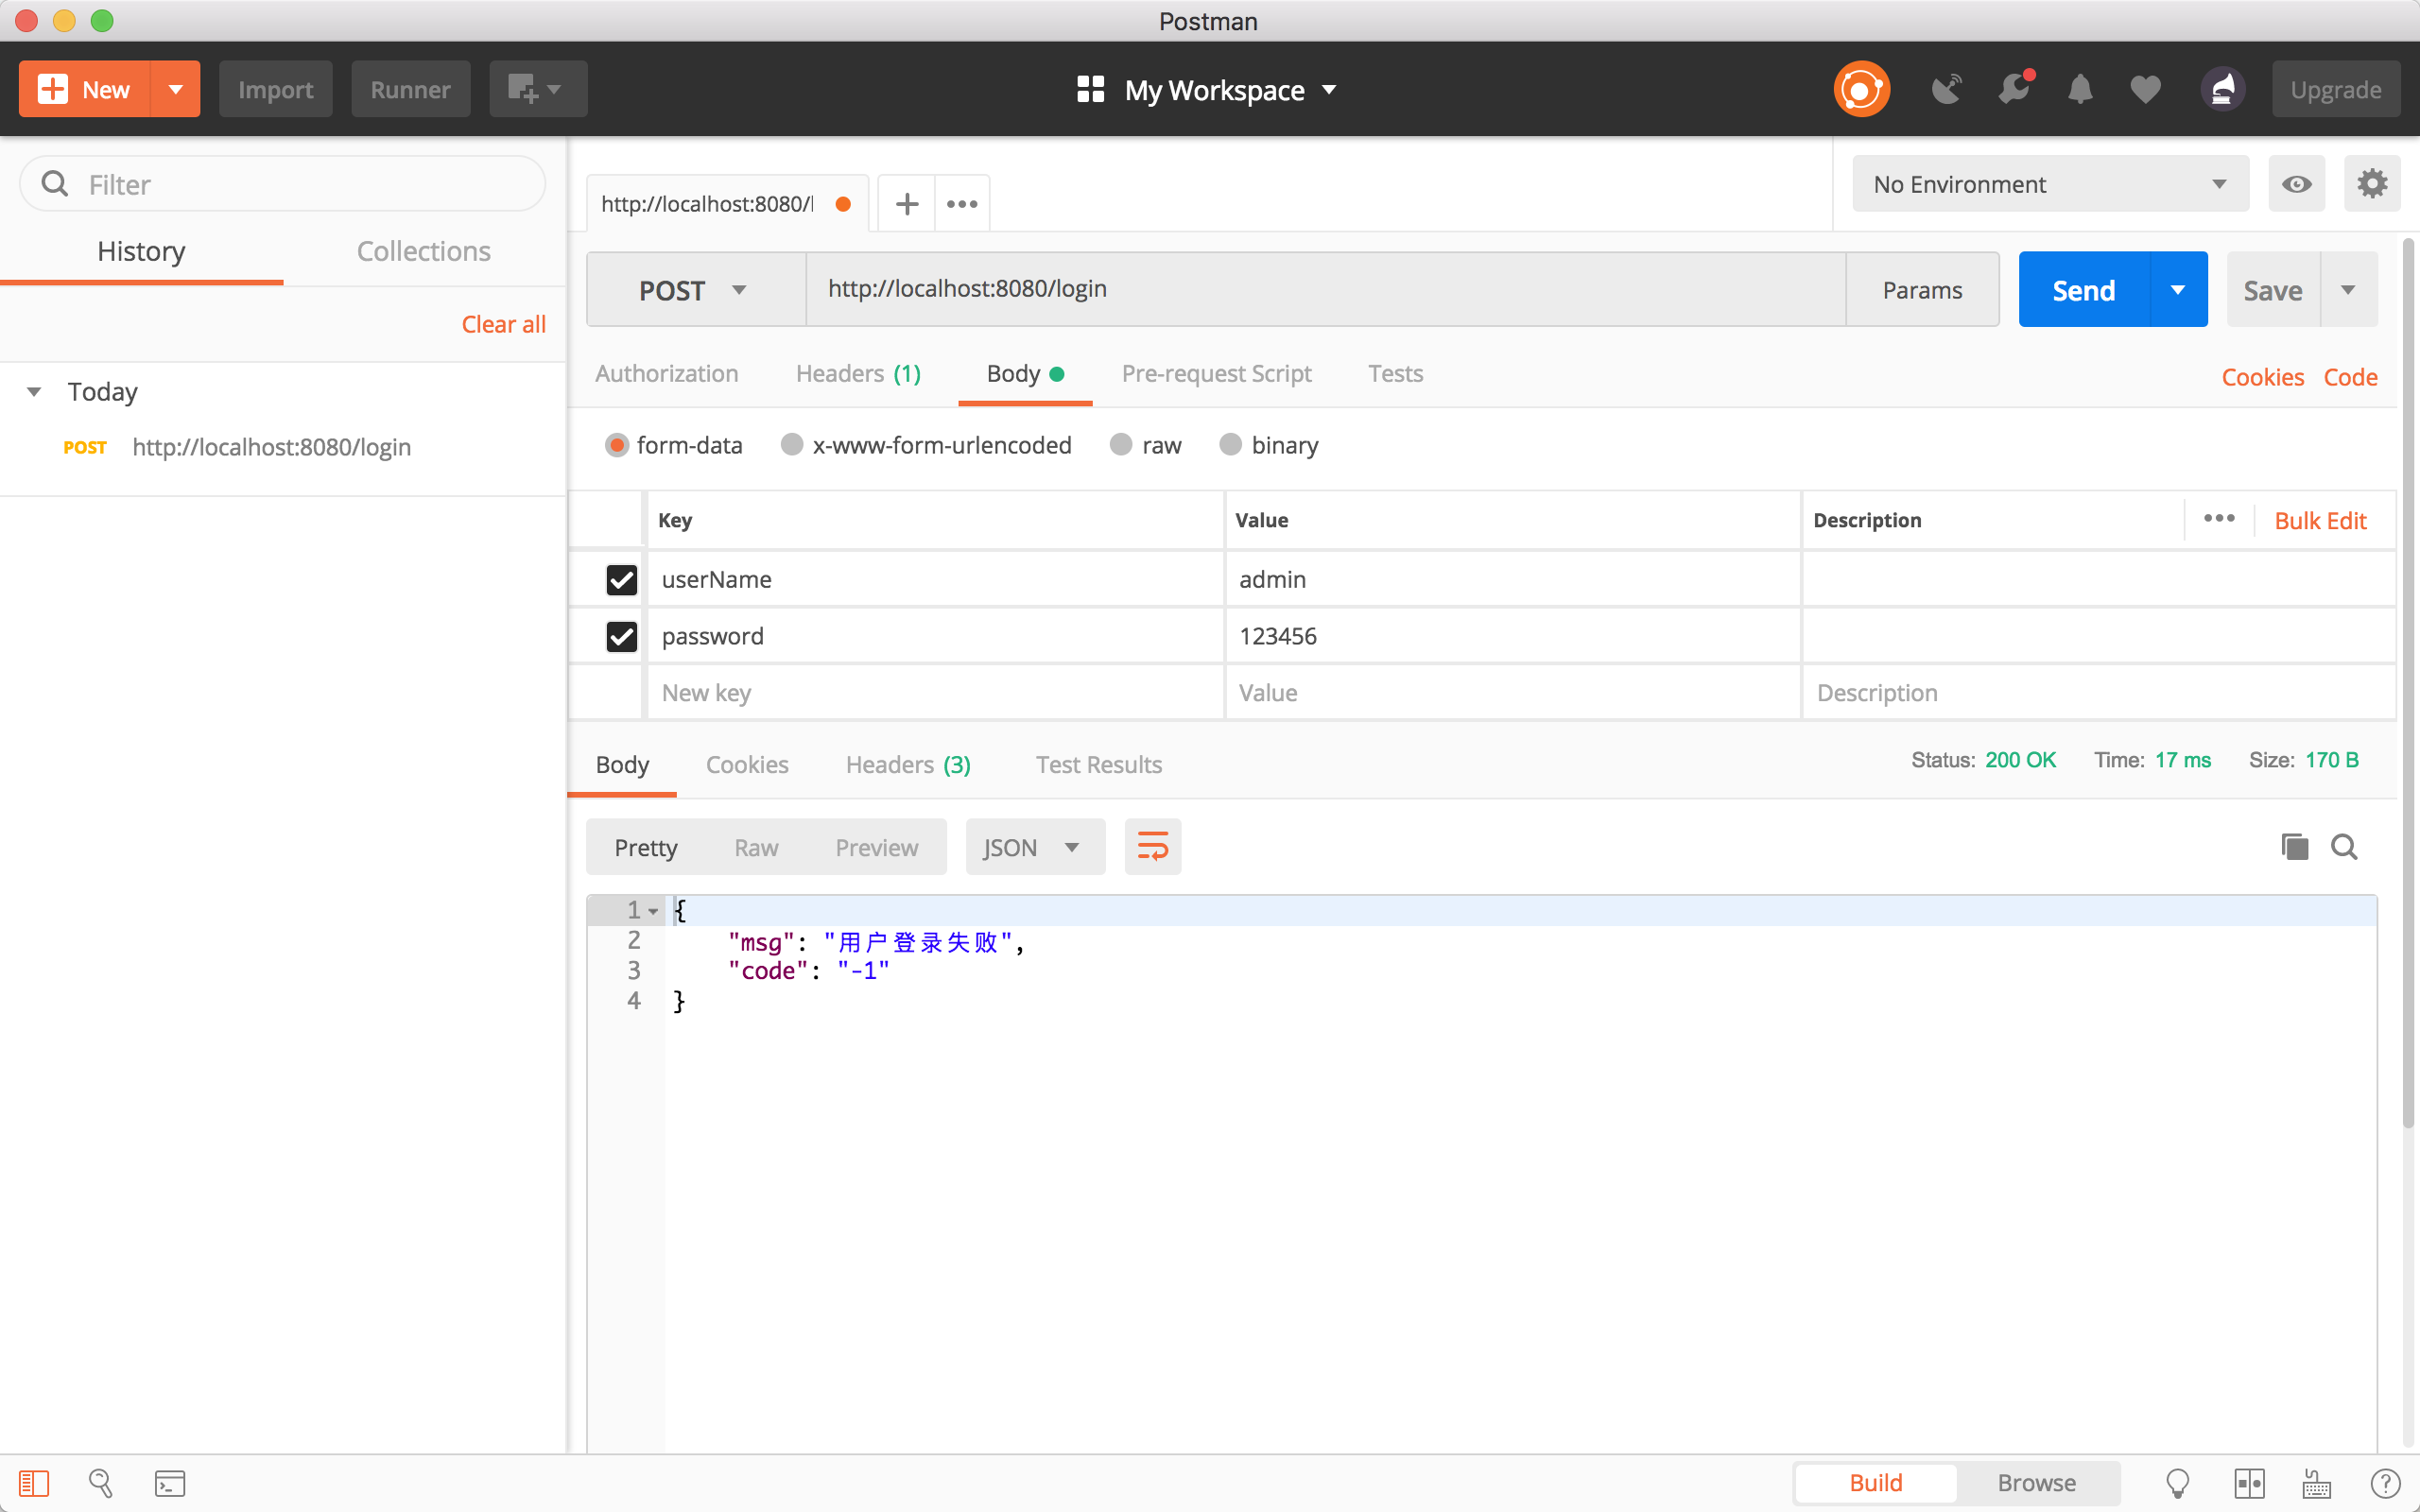
Next, we need token token authentication. Here I need to explain that there are two cases of unsuccessful user login: one is that the user does not exist, the other is that the user password is incorrect. So we need crash to make the corresponding error, and then return the data through different error types. Here I use a unified error representation. No subdivision processing. The specific code is as follows. Show.
        //User login operation.
        try{
            subject.login(token);
            resultMap.put("code","200");
            resultMap.put("msg","User logged in successfully");
        }catch (AuthenticationException e){
            //Logon failure reason 1 user does not exist 2 user password is incorrect
            e.printStackTrace();
            resultMap.put("code","-1");
            resultMap.put("msg","User login failure");
        }
The above three steps are completed: building Secruity Manager object, building Subject subject and completing authentication process through Realm. Next we need to encapsulate it, so the whole code of MyShiro is as follows.
import org.apache.shiro.SecurityUtils;
import org.apache.shiro.authc.AuthenticationException;
import org.apache.shiro.authc.UsernamePasswordToken;
import org.apache.shiro.config.IniSecurityManagerFactory;
import org.apache.shiro.mgt.SecurityManager;
import org.apache.shiro.subject.Subject;
import org.apache.shiro.util.Factory;
import org.springframework.stereotype.Component;

import java.util.HashMap;
import java.util.Map;


@Component
public class MyShiro {


    public Map<String,Object> userLoginAction (String userName,String passWord){

        Map<String,Object> resultMap = new HashMap<>();

        //Initialize the SecurityManager object
        Factory<SecurityManager> factory = new IniSecurityManagerFactory("classpath:shiro.ini");

        //Get the SecurityManager instance object through the SecurityManager factory object.
        SecurityManager securityManager =  factory.getInstance();

        // Bind the security manager instance to Security Utils
        SecurityUtils.setSecurityManager(securityManager);

        //Build Subject Body.
        Subject subject = SecurityUtils.getSubject();

        //Create token tokens
        UsernamePasswordToken token = new UsernamePasswordToken(userName,passWord);

        //User login operation.
        try{
            subject.login(token);
            resultMap.put("code","200");
            resultMap.put("msg","User logged in successfully");
        }catch (AuthenticationException e){
            //Logon failure reason 1 user does not exist 2 user password is incorrect
            resultMap.put("code","-1");
            resultMap.put("msg","User login failure");
        }
        return resultMap;

    }
}
The reason for adding @Component is to facilitate automated creation in the next module.
User login interface
Above, we have finished encapsulating the authentication process. Next, we write a simple user login interface to verify whether our shiro can be used properly.
First of all, create a user login interface controller UserLoginController, import MyShiro. And create a user login interface method. The code is too simple, I will just describe here, the overall code is as follows.
import org.springframework.beans.factory.annotation.Autowired;
import org.springframework.web.bind.annotation.RequestMapping;
import org.springframework.web.bind.annotation.RequestMethod;
import org.springframework.web.bind.annotation.RequestParam;
import org.springframework.web.bind.annotation.RestController;

import java.util.HashMap;
import java.util.Map;

@RestController
public class UserLoginController {

    @Autowired
    MyShiro myShiro;

    @RequestMapping(value = "/login",method = RequestMethod.POST)
    public Map<String,Object> userLoginAction (@RequestParam(value = "userName") String userName,
                                               @RequestParam(value = "password") String password){

        Map<String,Object> resultMap = myShiro.userLoginAction(userName,password);

        return resultMap;

    }

}
Next we run our project and see if our users can log in successfully.
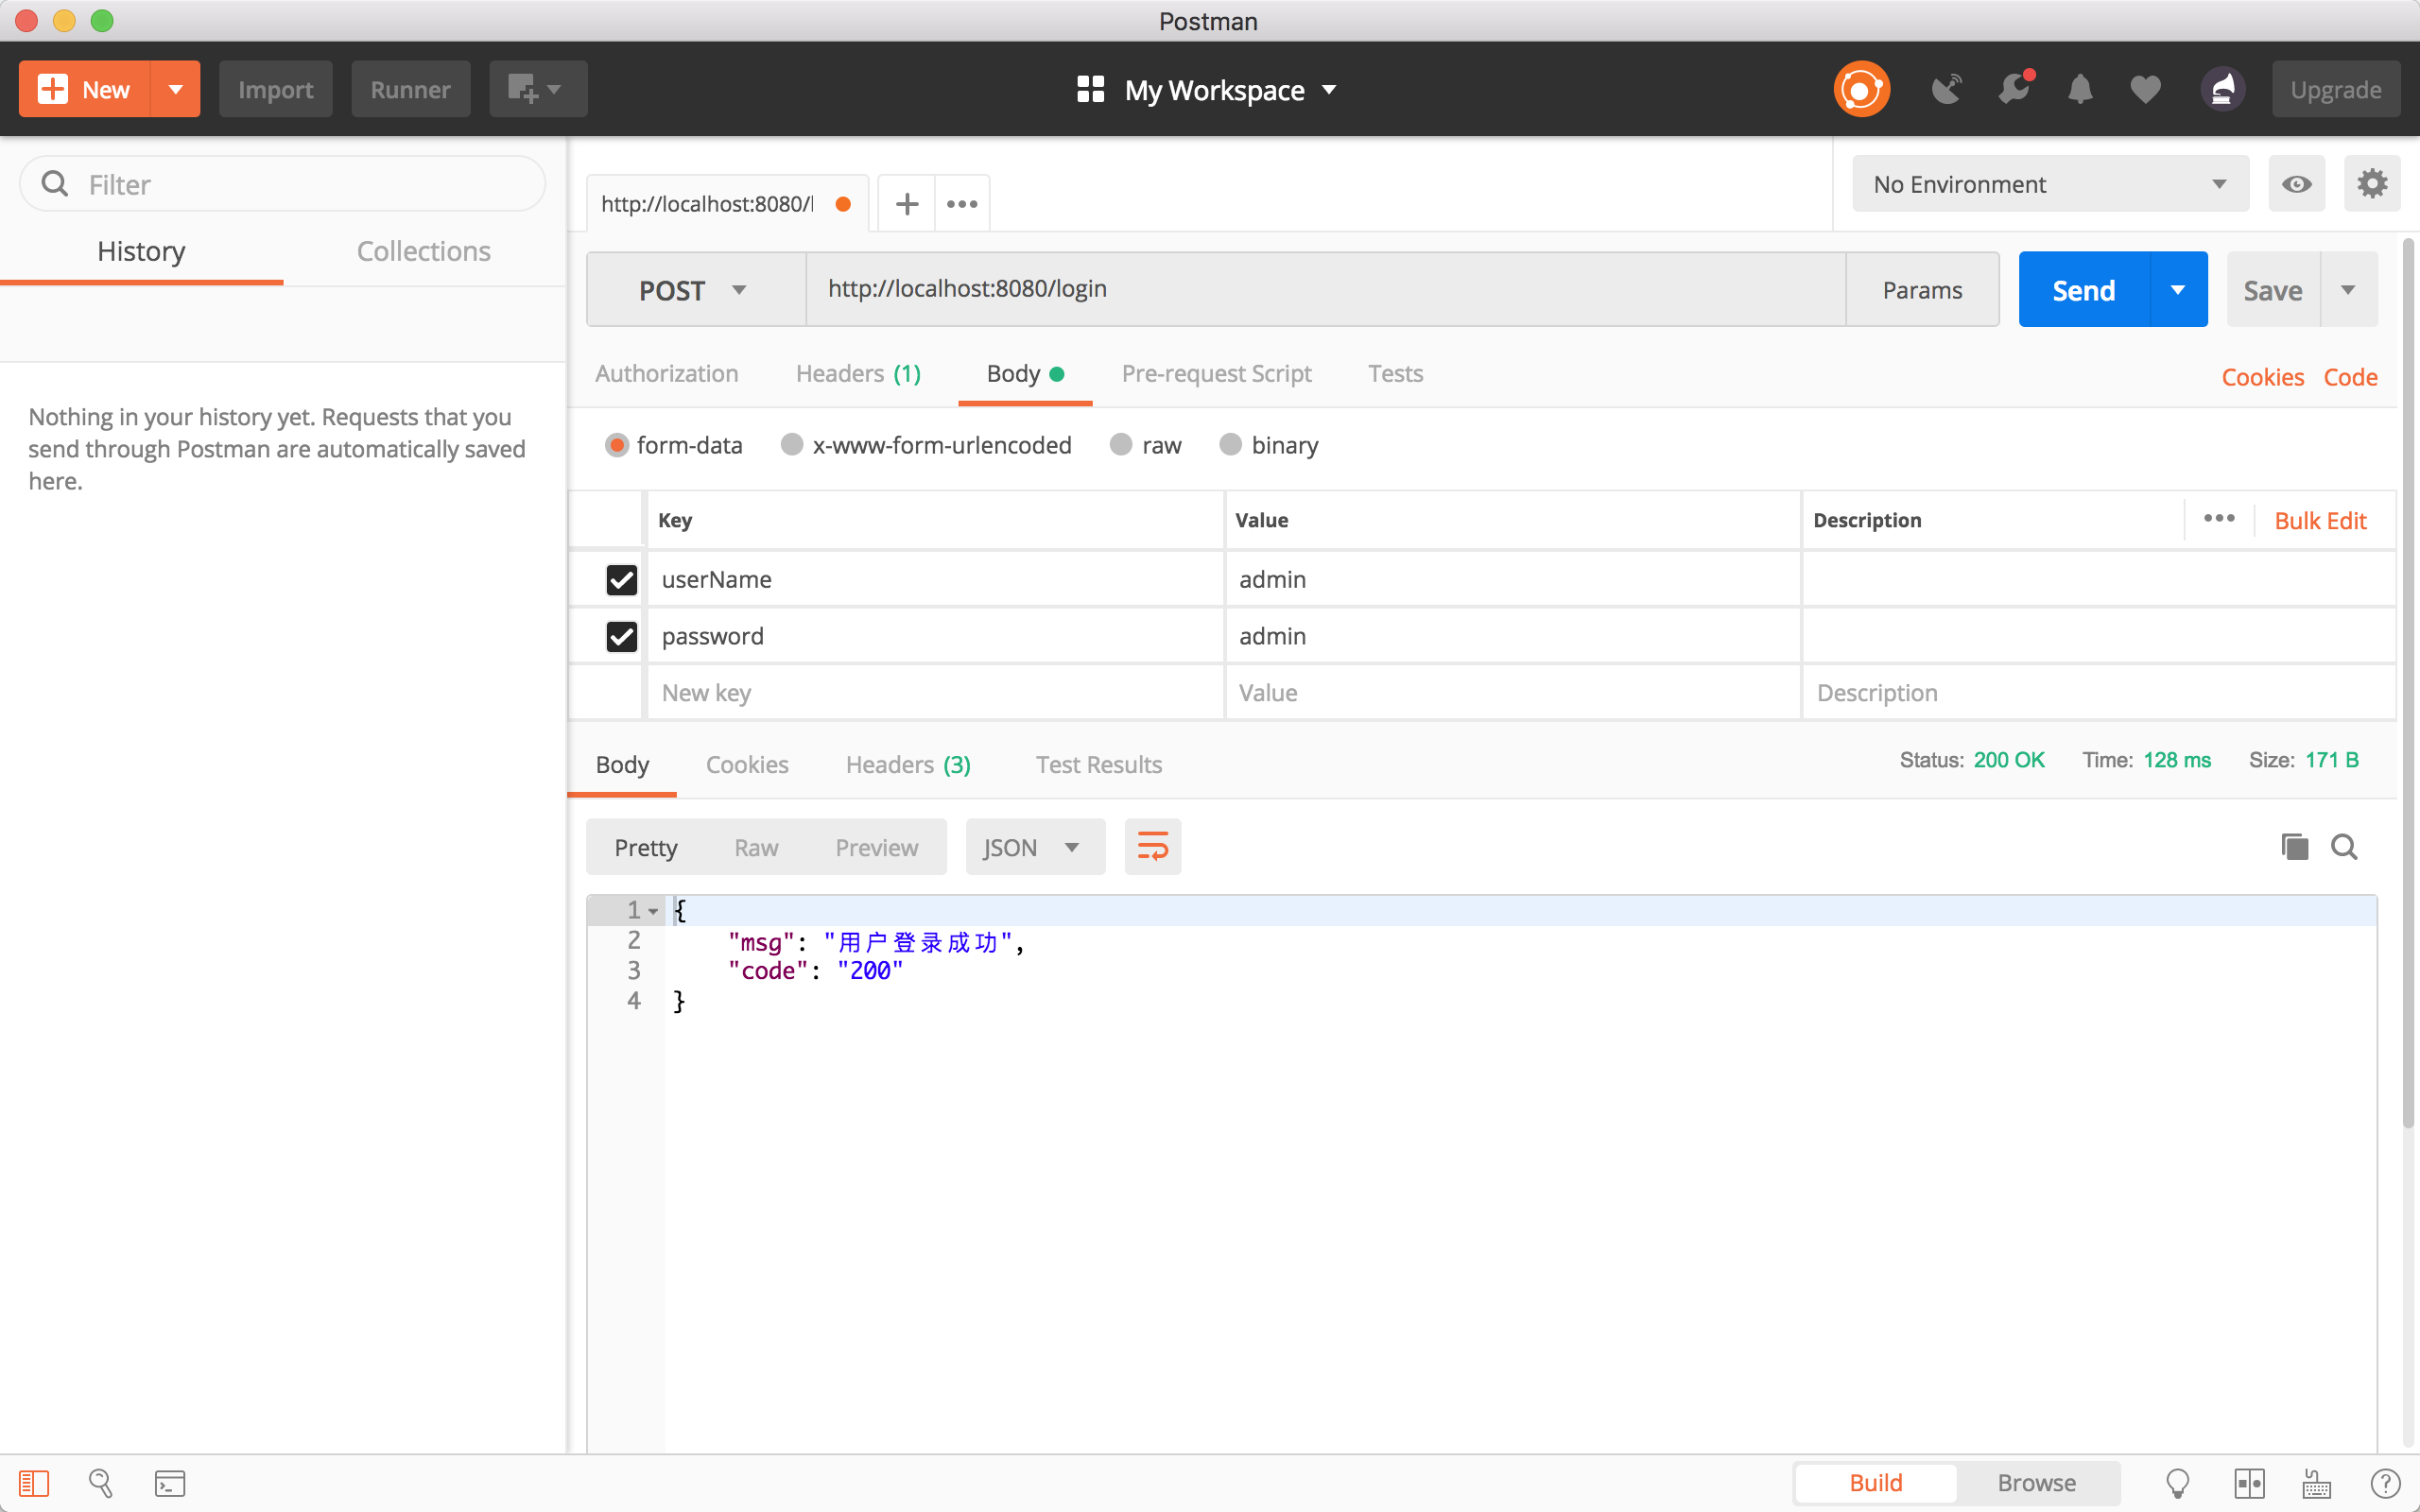
epilogue
At this point, SpringBoot 2.0 integration Shiro's INI certification chapter is over, using INI files to do user authentication operation is still very simple. Next article, we will see how to use INI files for authorization operation, welcome to continue to pay attention, if there are any questions, welcome to discuss with Sao Tong ~Thank you.