Catalog
3.Mybatis automatically generates code
3.2 Add plug-ins to pom.xml file
4.1 Ordinary Single Table Operation
4.2 Operation of Self-increasing Primary Key Table
5.1 Annotation on @EnableTransaction Management
5.2 Location of @Transactional annotation
5.4 On the Dissemination of Things
8.2 Adding Automatic Configuration Classes
8.3 Instructions for Interface Configuration
8.4 Interface Description Document
1. Fast initialization
SpringBoot infrastructure can be built through Here is the online interface configuration After generation, it can be imported directly locally.
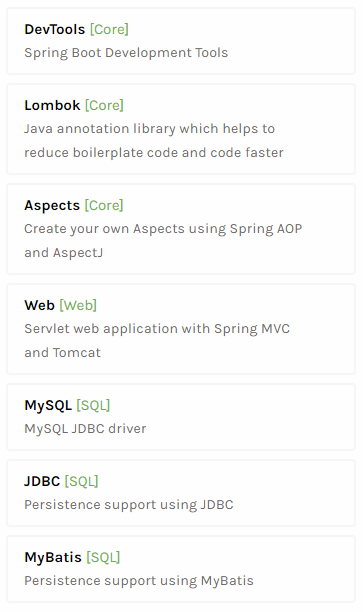
In Dependencies, click See all to select the jar package that needs a class. In general, you can choose the following:
After the selection, click Generate Project to generate the basic project, download it to the local area and import it into idea.
2.pom.xml file
<?xml version="1.0" encoding="UTF-8"?>
<project xmlns="http://maven.apache.org/POM/4.0.0" xmlns:xsi="http://www.w3.org/2001/XMLSchema-instance"
         xsi:schemaLocation="http://maven.apache.org/POM/4.0.0 http://maven.apache.org/xsd/maven-4.0.0.xsd">
    <modelVersion>4.0.0</modelVersion>
    <parent>
        <groupId>org.springframework.boot</groupId>
        <artifactId>spring-boot-starter-parent</artifactId>
        <version>2.1.4.RELEASE</version>
        <relativePath/> <!-- lookup parent from repository -->
    </parent>
    <groupId>com.tydic</groupId>
    <artifactId>cloud_wind</artifactId>
    <version>0.0.1-SNAPSHOT</version>
    <name>cloud_wind</name>
    <description>Demo project for Spring Boot</description>
    <!--Packing mode, which can be configured as jar perhaps war-->
    <packaging>jar</packaging>

    <properties>
        <java.version>1.8</java.version>
    </properties>

    <dependencies>
        <dependency>
            <groupId>org.springframework.boot</groupId>
            <artifactId>spring-boot-starter-aop</artifactId>
        </dependency>
        <dependency>
            <groupId>org.springframework.boot</groupId>
            <artifactId>spring-boot-starter-jdbc</artifactId>
        </dependency>
        <dependency>
            <groupId>org.springframework.boot</groupId>
            <artifactId>spring-boot-starter-web</artifactId>
        </dependency>
        <dependency>
            <groupId>org.mybatis.spring.boot</groupId>
            <artifactId>mybatis-spring-boot-starter</artifactId>
            <version>2.0.1</version>
        </dependency>

        <dependency>
            <groupId>org.springframework.boot</groupId>
            <artifactId>spring-boot-devtools</artifactId>
            <scope>runtime</scope>
        </dependency>
        <dependency>
            <groupId>mysql</groupId>
            <artifactId>mysql-connector-java</artifactId>
            <scope>runtime</scope>
        </dependency>
        <dependency>
            <groupId>com.alibaba</groupId>
            <artifactId>druid</artifactId>
            <version>1.0.29</version>
        </dependency>
        <dependency>
            <groupId>org.projectlombok</groupId>
            <artifactId>lombok</artifactId>
            <optional>true</optional>
        </dependency>
        <dependency>
            <groupId>org.springframework.boot</groupId>
            <artifactId>spring-boot-starter-test</artifactId>
            <scope>test</scope>
        </dependency>
    </dependencies>

    <build>
        <plugins>
            <plugin>
                <groupId>org.springframework.boot</groupId>
                <artifactId>spring-boot-maven-plugin</artifactId>
            </plugin>
            <!--Add to mybatis generator maven Plug-in unit,Automatic production mybatis Corresponding entity classes-->
            <plugin>
                <groupId>org.mybatis.generator</groupId>
                <artifactId>mybatis-generator-maven-plugin</artifactId>
                <configuration>
                    <!--generatorConfig.xml file location-->
                    <configurationFile>src/main/resources/mybatis-generator/generatorConfig.xml</configurationFile>
                    <verbose>true</verbose>
                    <overwrite>true</overwrite>
                </configuration>
                <executions>
                    <execution>
                        <id>Generate MyBatis Artifacts</id>
                        <goals>
                            <goal>generate</goal>
                        </goals>
                        <phase>generate-sources</phase>
                    </execution>
                </executions>
                <dependencies>
                    <dependency>
                        <groupId>mysql</groupId>
                        <artifactId>mysql-connector-java</artifactId>
                        <version>5.1.44</version>
                        <scope>runtime</scope>
                    </dependency>
                </dependencies>
            </plugin>
        </plugins>
    </build>
</project>
Some dependencies are added later, such as druid related packages.
3.Mybatis automatically generates code
Mybatis needs to use xml and Mapper mapping to complete normal use. In the past, when using hibernate, the hbm files of tables can be generated by eclipse automatic reverse engineering. Mybatis also provides similar functions. Through the maven plug-in, the entity classes, corresponding Mapper and xml files of each table can be automatically generated.
A detailed introduction to the Mybatis Generator configuration file, Reference here The blogger has written in great detail. The following is my use in the project as required.
3.1 New Generator COnfig file
Create a new mybatis-generator directory under the resources directory, and then create a new generatorConfig.xml file, which reads as follows:
<?xml version="1.0" encoding="UTF-8"?>
<!DOCTYPE generatorConfiguration
        PUBLIC "-//mybatis.org//DTD MyBatis Generator Configuration 1.0//EN"
        "http://mybatis.org/dtd/mybatis-generator-config_1_0.dtd">
<!-- Configuration Generator -->
<generatorConfiguration>
    <!--implement generator Plug-in generation file command: call mvn mybatis-generator:generate -e -->
    <!--classPathEntry:Database JDBC drive,Change to your own drive location. -->
    <!--<classPathEntry location="E:\mybatis\mysql-connector-java-5.1.24-bin.jar" /> -->

    <!-- One database one context -->
    <!--defaultModelType="flat" Big data fields, no tables -->
    <context id="MysqlTables" targetRuntime="MyBatis3Simple" defaultModelType="flat">
        <!-- Automatic recognition of database keywords, default false,If set to true,according to SqlReservedWords List of keywords defined in the
        //Generally keep the default value, encounter the database keyword (Java keyword), use column Override override coverage - >.
        <property name="autoDelimitKeywords" value="true"/>
        <!-- Generated Java Coding of files -->
        <property name="javaFileEncoding" value="utf-8"/>
        <!-- beginningDelimiter and endingDelimiter: Symbols that specify a database for marking database object names, such as ORACLE It's double quotation marks. MYSQL The default is`Anti quotation marks; -->
        <property name="beginningDelimiter" value="`"/>
        <property name="endingDelimiter" value="`"/>

        <!-- Format java Code -->
        <property name="javaFormatter" value="org.mybatis.generator.api.dom.DefaultJavaFormatter"/>
        <!-- Format XML Code -->
        <property name="xmlFormatter" value="org.mybatis.generator.api.dom.DefaultXmlFormatter"/>
        <plugin type="org.mybatis.generator.plugins.SerializablePlugin"/>
        <plugin type="org.mybatis.generator.plugins.ToStringPlugin"/>

        <!-- Notes -->
        <commentGenerator>
            <property name="suppressAllComments" value="false"/><!-- Whether to cancel the comment -->
            <property name="suppressDate" value="true"/> <!-- Whether to generate annotation generation timestamp-->
        </commentGenerator>

        <!-- jdbc Connect -->
        <jdbcConnection driverClass="com.mysql.jdbc.Driver"
                        connectionURL="jdbc:mysql://130.76.53.161:3306/customer"
                        userId="root"
                        password="root"/>
        <!-- Type conversion -->
        <javaTypeResolver>
            <!-- Whether to use bigDecimal, false The following types can be automatically converted( Long, Integer, Short, etc.) -->
            <property name="forceBigDecimals" value="false"/>
        </javaTypeResolver>

        <!-- Generate Entity Class Address -->
        <javaModelGenerator targetPackage="com.tydic.cloud_wind.models" targetProject="src/main/java">
            <property name="enableSubPackages" value="false"/>
            <property name="trimStrings" value="true"/>
        </javaModelGenerator>
        <!-- generate mapxml file -->
        <sqlMapGenerator targetPackage="mapper" targetProject="src/main/resources">
            <property name="enableSubPackages" value="false"/>
        </sqlMapGenerator>
        <!-- generate mapxml Corresponding client,That's the interface. dao -->
        <javaClientGenerator targetPackage="com.tydic.cloud_wind.dao" targetProject="src/main/java" type="XMLMAPPER">
            <property name="enableSubPackages" value="true"/>
        </javaClientGenerator>
        <!-- table There can be multiple,Each table in the database can write one table,tableName Represents the database table to match,Can also be in tableName Use in attributes%Wildcards to match all database tables,Only matching tables generate files automatically -->
        <!--If you want to generate a table rule tableName="table_name"-->
        <table tableName="%"
               enableCountByExample="true"
               enableUpdateByExample="true"
               enableDeleteByExample="true"
               enableSelectByExample="true"
               selectByExampleQueryId="true">
            <property name="useActualColumnNames" value="false"/>
        </table>
    </context>
</generatorConfiguration>
I have a few doubts when I use it:
(1) What is the target Runtime of context? Must MyBatis 3 Simple be used?
Not only MyBatis 3SImple, but MyBatis 3, the difference is:
  targetRuntime:
        1,MyBatis3: Default values, generated based on MyBatis3.x The content of the above version, including XXXBySample;
        2,MyBatis3Simple: Similar MyBatis3,Just don't generate XXXBySample;
(2) If the table structure is added later, can I add tables one by one?
Yes, in the configuration file, you can configure separate tables with respect to table configuration, as follows:
<table tableName="user_info" domainObjectName="UserInfo"></table>
Note that modifying the corresponding directories in the targetProject and the corresponding folders need to be created in advance, such as the mapper/models/dao folders in the relevant packages or directories.
3.2 Add plug-ins to pom.xml file
Add the plugins under build as follows
<!--Add to mybatis generator maven Plug-in unit,Automatic production mybatis Corresponding entity classes-->
            <plugin>
                <groupId>org.mybatis.generator</groupId>
                <artifactId>mybatis-generator-maven-plugin</artifactId>
                <configuration>
                    <!--generatorConfig.xml file location-->
                    <configurationFile>src/main/resources/mybatis-generator/generatorConfig.xml</configurationFile>
                    <verbose>true</verbose>
                    <overwrite>true</overwrite>
                </configuration>
                <executions>
                    <execution>
                        <id>Generate MyBatis Artifacts</id>
                        <goals>
                            <goal>generate</goal>
                        </goals>
                        <phase>generate-sources</phase>
                    </execution>
                </executions>
                <dependencies>
                    <dependency>
                        <groupId>mysql</groupId>
                        <artifactId>mysql-connector-java</artifactId>
                        <version>5.1.44</version>
                        <scope>runtime</scope>
                    </dependency>
                </dependencies>
            </plugin>
The main purpose is to specify the location of the generator Config configuration file.
3.3 Start Generating
There are two modes of operation. The first is to complete the operation through interface in idea, as follows:

After clicking the button, you can see the generated files in each directory. A table corresponds to a dao, Mapper, xml file.
You can also use the maven command directly, as follows
mvn mybatis-generator:generate
3.4 use
After the relevant code is generated, there is no connection with SpringBoot, because the generation of related entity classes and mapping files has nothing to do with the Springboot framework itself. maven can also be generated by itself. So, after the generation of related files, we need some other configurations.
(1) Add annotations to the startup class
/**
 * Configuring MapperScan eliminates the need to add @Mapper annotations to every Mapper file
 */
@SpringBootApplication
@MapperScan("com.tydic.cloud_wind.dao")
public class CloudWindApplication {
	public static void main(String[] args) {
		SpringApplication.run(CloudWindApplication.class, args);
	}

}
(2) Mapping file specifying mapper
Add the following line settings in application.properties
#Specify mapper mapping file location
mybatis.mapper-locations=classpath:/mapper/*Mapper.xml
#Specify the location of the models. If resultType in the mapper.xml file specifies the specific package path, you don't need to set it here.
#mybatis.type-aliases-package=com.tydic.cloud_wind.models
With regard to the configuration of mybatis.type-aliases-package, if it is generated automatically, there is no need to configure it, because we open an xml file at will, and we can see that its namespace specifies all the Mapper files under the specific package path, but sometimes we can also customize some Mapper files and xml files, if namespace only specifies the class name. Instead of specifying a specific package path, you need to configure mybatis. type - aliases - package in application.properties, so that xml files can automatically map to Mapper files.
4. Query sample
Before writing query code, we need to set up mybatis data source information and edit application.properties as follows:
#Database Configuration
spring.datasource.type=com.alibaba.druid.pool.DruidDataSource
spring.datasource.url=jdbc:mysql://130.76.53.161:3306/customer?useUnicode=true&characterEncoding=utf8
spring.datasource.username=root
spring.datasource.password=root
#spring.datasource.filters=stat,wall,log4j

#mybatis configuration
#Opening the first level cache of the second level cache is mapper level, and the second level cache is namespaces level. The so-called cache means that the same query does not leave the database unless a clear cache action is triggered.
mybatis.configuration.cache-enabled=true
mybatis.configuration.default-statement-timeout=3000
mybatis.configuration.map-underscore-to-camel-case=true
mybatis.configuration.use-generated-keys=true
#Specify mapper mapping file location
mybatis.mapper-locations=classpath:/mapper/*Mapper.xml
#Specify the location of the models. If resultType in the mapper.xml file specifies the specific package path, you don't need to set it here.
#mybatis.type-aliases-package=com.tydic.cloud_wind.models
#Open the function of printing sql query log
mybatis.configuration.log-impl=org.apache.ibatis.logging.stdout.StdOutImpl
4.1 Ordinary Single Table Operation
Mapper files generated by each table under dao have five methods:
public interface DdMsgPushMapper {
    int deleteByPrimaryKey(Integer id);
    int insert(DdMsgPush record);
    DdMsgPush selectByPrimaryKey(Integer id);
    List<DdMsgPush> selectAll();
    int updateByPrimaryKey(DdMsgPush record);
}
When we use it, it is very convenient to construct the corresponding entity class, and then complete the addition, deletion and modification of the single table. Let's look at some simple examples. We add a MybatisService class under the service package. Some sample queries are substituted as follows:
@Service
@Transactional
public class MybatisService
{
    @Autowired
    private TmpDispUserMapper   tMapper;

    //Simple Query - Direct Query All
    public void simpleSelect()
    {
        List<TmpDispUser> rList = tMapper.selectAll();
        System.out.println(rList.size());
        for (TmpDispUser tU : rList)
        {
            System.out.println(tU.toString());
        }
    }

    //Simple Query - Query by id
    public void findUserById(Integer id)
    {
        TmpDispUser tUser = tMapper.selectByPrimaryKey(id);
        System.out.println(tUser.toString());
    }

    //Normal addition
    public void addUser()
    {
        TmpDispUser tUser = new TmpDispUser();
        tUser.setName("Liu ddd Liu Yangyang");
        tUser.setTel("18654745d21");
        Integer rId = tMapper.insert(tUser);
        //Add useGeneratedKeys="true" keyProperty="id" to insert in Mapper.xml, and tUser.getId() can get the self-increasing ID after insertion.
        System.out.println(tUser.toString());
        System.out.println(rId);
    }
}
As you can see, the operation is still very simple and convenient. However, in actual development, there are more application scenarios for joint query and multi-table operation.
4.2 Operation of Self-increasing Primary Key Table
If the primary key of the related table in the database is self-increasing, how to operate? Look at the code addUser method above, which is an example of manipulating the self-increasing primary key table by constructing an entity class and then calling the insert method to insert. The following points should be noted:
(1) Members of entity classes corresponding to self-increasing primary keys do not need to adjust the set method, just empty.
(2) The corresponding xml file modifies the insert statement by adding userGeneratedKeys="true" keyProperty="id", and keyProperty specifies the primary key name of the corresponding table. As follows:
  <insert id="insert" parameterType="com.tydic.cloud_wind.models.TmpDispUser" useGeneratedKeys="true" keyProperty="id">
    insert into tmp_disp_user (id, `name`, tel
      )
    values (#{id,jdbcType=INTEGER}, #{name,jdbcType=VARCHAR}, #{tel,jdbcType=VARCHAR}
      )
  </insert>
After the insert operation is completed, the primary key id inserted into the record can be obtained directly by calling the get method for the entity object.
4.3 Joint Query
As mentioned earlier, in actual development, multi-table joint query and irregular query are often more than single-table operation. For me, I prefer to use Map as the result of query. Here is a record of Mybatis's custom query development. There are some schemes on the Internet that are accomplished through the construction of entity classes. For example, when an association query is made, all the largest classes of an entity class will be used and returned. This has advantages and disadvantages. The advantage is that the object can be manipulated directly. The inconvenience lies in the large amount of code and the development of classes is always needed. Reference here.
Joint query or custom query has two ways, one is to configure the query sql through xml file, the other is to use annotations.
(1) Customize xml
That is, we can write the relevant xml files ourselves, and then specify the corresponding Mapper interface files. Let's start with an example:
I added a CommDaoMapper interface under the dao package, defining the following methods:
/**
 * Common three query methods
 * 1.The result is Map < String, Object >
 * 2.The result is List < Map < String, Object >.
 * 3.Paging query
 */
public interface CommDaoMapper
{
    //Individual parameter query, the parameter is Map
    Map<String,Object> selectByParams(String p1);
    //Individual parameter query, list is entity class
    TmpServerUser selectByParamsWithBean(String p1);
    //Map query parameter, the parameter is List
    List<Map<String,Object>> selectWithList(Map<String,Object> p1);
    //Independent entry, table name is dynamic, and exit is List
    List<Map<String,Object>> selectWithListByDt(Map<String,Object> p1);
}
Then add a new CommDaoMapper.xml file in the resources/mapper directory, which reads as follows:
<?xml version="1.0" encoding="UTF-8" ?>
<!DOCTYPE mapper PUBLIC "-//mybatis.org//DTD Mapper 3.0//EN" "http://mybatis.org/dtd/mybatis-3-mapper.dtd" >
<mapper namespace="com.tydic.cloud_wind.dao.CommDaoMapper" >

    <!--Multiple Independent Parameter Queries-->
    <!--One Map Query mode-->
    <!--Dynamically specify the way to indicate the query-->
    <!--Multi-table Joint Query-->
    <!--Paging query-->
    <select id="selectByParams"
            resultType="java.util.Map"
            parameterType="java.lang.String" >
        select id,s_id,name,tel
        from tmp_server_user
        where id = #{0}
    </select>
    <select id="selectByParamsWithBean"
            resultType="com.tydic.cloud_wind.models.TmpServerUser"
            parameterType="java.lang.String" >
        select *
        from tmp_server_user
        where id = #{0}
    </select>
    <select id="selectWithList"
            resultType="java.util.Map"
            parameterType="java.util.Map" >
        select *
        from tmp_disp_user a,tmp_server_user b
        where a.id=b.id and a.name like '%' || #{u_name} || '%'
    </select>
    <select id="selectWithListByDt"
            resultType="java.util.Map"
            parameterType="java.util.Map" >
        select *
        from ${t_name} a
        where a.name like '%' || #{u_name} || '%'
    </select>
</mapper>
Then write a test method in Mybatis Service as follows:
    @Autowired
    private CommDaoMapper       cMapper;
    //Custom Queries
    public void selectWithDsign()
    {
        //selectByParams
        Map<String,Object> rMap = cMapper.selectByParams("2");
        System.out.println(rMap.toString());
        //selectByParamsWithBean
        TmpServerUser tUser = cMapper.selectByParamsWithBean("2");
        System.out.println(tUser.toString());
        //selectWithList
        Map<String,Object> p1 = new HashMap<>();
        p1.put("u_name","ocean");
        List<Map<String,Object>> rList = cMapper.selectWithList(p1);
        System.out.println(rList.toString());
        //selectWithListByDt
        Map<String,Object> p2 = new HashMap<>();
        p2.put("t_name","tmp_disp_user");
        p2.put("u_name","ocean");
        List<Map<String,Object>> rL2 = cMapper.selectWithListByDt(p2);
        System.out.println(rL2);
    }
Here is a note that when using Map to pass parameters, you can use parameters directly by {parameter name} and {number in parameter order} when directly passing parameters independently.
The parameters can be passed either ${} or {}, which differs from each other in that:
# To a large extent, sql injection can be prevented by treating intruded values as strings.
$is to display the incoming data directly as sql statements, that is, sql needs to be dynamic, parameters are table names, keywords, or order by to use $, (pre-compiled)
# {}: Resolves to a parameter marker for a JDBC prepared statement, and a #{} is resolved to a parameter placeholder.
${}: Just for a pure broken string replacement, variable substitution will occur during the dynamic SQL parsing phase.
(2) Annotation
Personally, annotations are simpler and do not need to configure xml files. Of course, some advanced features of mybatis can not be used without configuring xml files. Each has its own advantages and disadvantages, such as the following:
public interface CommDaoMapper
{
    //- Operate the database through annotations, without corresponding xml files
    @Select("select * from tmp_disp_user")
    List<TmpDispUser> findAllTmpUser();

    @Select("select * from tmp_disp_user where id= #{id}")
    TmpDispUser findTmpUserById(@Param("id") int id);

    @Update("update tmp_disp_user set name=#{name} where id=#{id}")
    int updateTmpUser(TmpDispUser tUser);

    @Select("select * from tmp_disp_user a,tmp_server_user b where a.id=b.id and a.name like '%' || #{u_name} || '%'")
    List<Map<String,Object>> findWithList(Map<String,Object> p1);

    @Select("select * from ${t_name} a where a.name like '%' || #{u_name} || '%'")
    List<Map<String,Object>> findWithListByDt(Map<String,Object> p1);
}
That's all right. It's very simple.
4.4 Paging Query
MyBatis's paging queries recommend using the page helper plug-in. This plug-in is very useful. It can complete paging without intrusion, without modifying the original full query sql statements and xml files. You just need to set up paging information when you use it. Specific reference here.
(1) Increasing dependencies in pom.xml
<dependency>
	<groupId>com.github.pagehelper</groupId>
	<artifactId>pagehelper-spring-boot-starter</artifactId>
	<version>1.2.7</version>
</dependency>
(2) Writing automatic configuration classes
@Configuration//Add this class to the spring container
public class PageHelperConfig {
    @Bean//Add this annotation to spring container automatic configuration
    public PageHelper pageHelper() {
        PageHelper pageHelper = new PageHelper();
        Properties properties = new Properties();
        properties.setProperty("offsetAsPageNum", "true");
        properties.setProperty("rowBoundsWithCount", "true");
        properties.setProperty("reasonable", "true");
        properties.setProperty("dialect","mysql");
        pageHelper.setProperties(properties);
        return pageHelper;
    }
}
(3) Use examples
It is very convenient to use, just add the startPage method before calling the original normal query, as follows:
public void testFY1()
{
     //xml form paging query
     PageHelper.startPage(1,5);
     List<QeUserAsk> rList = qAsk.selectAll();
     System.out.println(rList);
}
This is the first page of the query, each page 5 data. selectAll is the sql that queries the full amount of data. So it can be said that it is a non-intrusive paging plug-in, which is very convenient.
Note: A method can only use a startPage and its corresponding query once, not multiple queries.
5. About things
There are many excellent blog posts on SpringBoot's event management and distribution network. Here are some good ones. I mainly record some points and understandings that I met in the course of my study.
Analysis of the Principle of Transaction Relevance
Transaction Related Database-Transactions and Locks
Transaction Processing Mechanism of SpringBook
[Transaction Related] Seven Communication Behaviors of SpringBoot Database Transactions
spring transaction @Transactional method call in the same class does not take effect
5.1 Annotation on @EnableTransaction Management
Many blog posts on the Internet mention that to use things, you need to open things through the @Enable Transaction Management annotation, and then use the @Transactional annotation on the corresponding classes. Actually @Enable Transaction Management is not required. SpringBoot will turn on the automatically configured event manager. If you use JDBC or JPA as database access technology, you will automatically turn on the annotation @Enable Transaction Management, so you don't need to display calls anymore. Just add the @Transactional annotation to the class that manages things.
5.2 Location of @Transactional annotation
Annotations are best placed on classes rather than methods. If they are placed on methods, there may be bug s, such as:
Method 1 and method 2 in class A add annotations to method 1. Method 2 does not add annotations to method 1, but method 1 is called in method 2. After that, we test if something goes wrong.
Things don't roll back. Because when we call method 2, method 2 is not intercepted, and method 1 in method 2 belongs to class internal calls and does not touch method interception, so things fail.
5.3 On try/catch
Don't try/catch in the method of controlling things in service, because if you intercept exceptions by yourself, the interceptor will not work properly, and then the transaction will fail. The best way is to throw exceptions out, deal with them in the control layer, or deal with them globally through the aspect.
5.4 On the Dissemination of Things
SpringBoot has 7 propagation behavior, the default is REQUIRED(0). That is, if there is something at present, use the current thing. Otherwise, create a new thing operation sub-method. In the process of method nesting execution, as long as there is an error, all of them will fall back.
REQUIRES_NEW(3) is also commonly used. Whether or not the current transaction exists, new transaction operation methods will be created. New transactions can have new lock and isolation levels, and are independent of the current transaction. Whoever makes a mistake, who retreats.
There is also NESTED(6), when the current method calls a submethod, if an exception occurs to the submethod, only the SQL executed by the roller method is rolled back, not the transaction of the current method.
6.druid monitoring
Write an automatic configuration class, the code is as follows:
package com.tydic.cloud_wind.config;

import com.alibaba.druid.pool.DruidDataSource;
import com.alibaba.druid.support.http.StatViewServlet;
import com.alibaba.druid.support.http.WebStatFilter;
import org.springframework.boot.context.properties.ConfigurationProperties;
import org.springframework.boot.web.servlet.FilterRegistrationBean;
import org.springframework.boot.web.servlet.ServletRegistrationBean;
import org.springframework.context.annotation.Bean;
import org.springframework.context.annotation.Configuration;

import javax.sql.DataSource;

/**
 * @Author: Zhouc52
 * @Description:
 * @Date: Create in 10:40 2019/4/19
 * @Modified by:
 * After the project starts normally, the browser enters:
 * http://127.0.0.1:8080/druid  Enter username password to access
 */
@Configuration
public class DruidConfig
{
    @Bean public ServletRegistrationBean druidServlet()
    {
        // Configuration processing of WEB monitoring
        ServletRegistrationBean servletRegistrationBean = new ServletRegistrationBean(new StatViewServlet(), "/druid/*"); // Now we're going to do configuration processing for druid monitoring
        servletRegistrationBean.addInitParameter("allow", "127.0.0.1,192.168.1.116"); // White list
        servletRegistrationBean.addInitParameter("deny", "192.168.1.200"); // Blacklist
        servletRegistrationBean.addInitParameter("loginUsername", "admin"); // User name
        servletRegistrationBean.addInitParameter("loginPassword", "admin"); // Password
        servletRegistrationBean.addInitParameter("resetEnable", "false"); // Is it possible to reset the data source?
        return servletRegistrationBean;
    }

    @Bean public FilterRegistrationBean filterRegistrationBean()
    {
        FilterRegistrationBean filterRegistrationBean = new FilterRegistrationBean();
        filterRegistrationBean.setFilter(new WebStatFilter());
        filterRegistrationBean.addUrlPatterns("/*"); // All requests are monitored and processed
        filterRegistrationBean.addInitParameter("exclusions", "*.js,*.gif,*.jpg,*.css,/druid/*");
        return filterRegistrationBean;
    }

    /**
        Here @Bean, without parameters, enters the monitoring page of druid and sees an error message that the data source is not set.
        But the error disappears when the front desk operation requests the database once. The problem is that mybatis can stand alone SpringBoot.
        To use it, you need to specify the method of closing and initializing the data source. Otherwise, druid will fail to get the data source for the first time until Spring requests it.
        After that, druid retrieves the data source taken over by SpringBoot from SpringBoot, so it displays normally.
     */

    @Bean(destroyMethod = "close",initMethod = "init")
    @ConfigurationProperties(prefix = "spring.datasource")
    public DataSource druidDataSource()
    {
        return new DruidDataSource();
    }
}
After the project starts, enter directly in the browser:
http://127.0.0.1:8080/druid
Enter the username and password, and you can access it. This monitoring is very powerful. The screenshot is as follows:
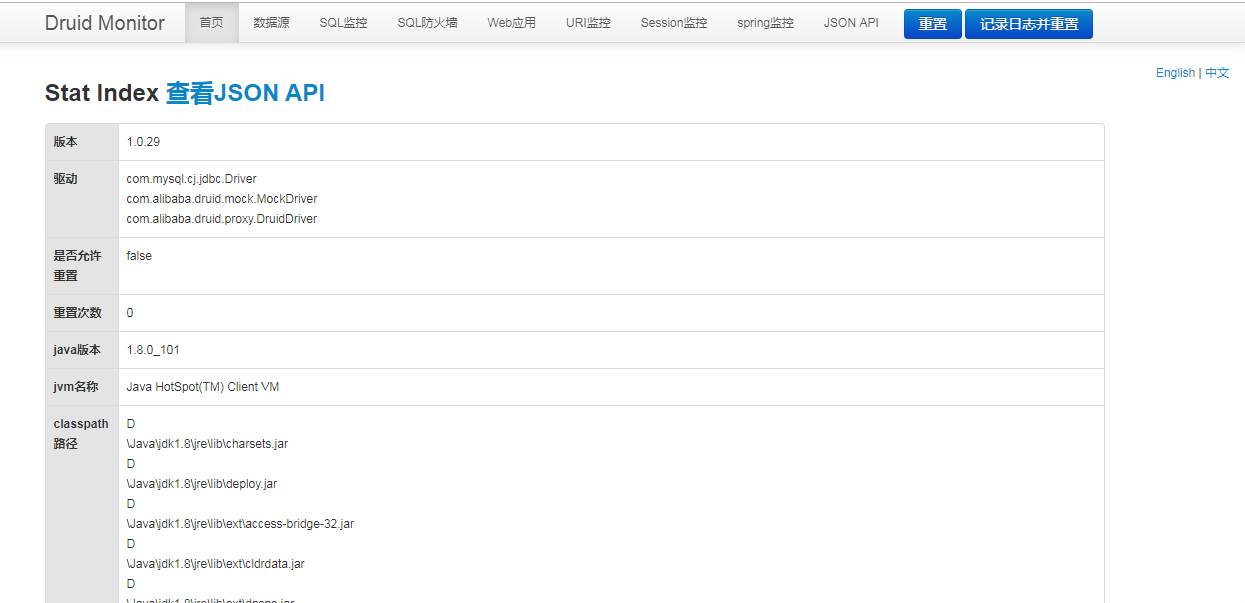
When druidDataSource sets the @Bean annotation, add parameters. Otherwise, you will find the following errors when you first enter the click data source:

7.Controller
The controller is declared through the @RestController annotation, and I have written several examples here, because the controller mainly involves the input and output parameters of the interface. SpringBoot automatically converts us to JSON objects if we take a reference. For example:
package com.tydic.cloud_wind.controller;

import com.tydic.cloud_wind.models.TestLable;
import org.springframework.web.bind.annotation.*;

import javax.servlet.http.HttpServletRequest;
import java.util.HashMap;
import java.util.Map;

/**
 * Several Situation of Participation
 * 1.Getting parameters using HttpServletRequest req
 * 2.Obtain parameters using the @RequestParam annotation
 * 3.Use @RequestBody to get parameters
 */

@RestController
@RequestMapping("/index")
public class IndexController
{
    /**
     * Content-type = application/x-www-form-urlencoded at the time of the front-end request; charset = UTF-8
     * You can use post or get with parameter names p1,p2
     * It can be a submission form or a normal ajax submission
     * If you use axios, you need to use QS.stringify(params) normalization
     * params:
     * {
     *     "p1":"1",
     *     "p2":"2"
     * }
     *
     */
    @RequestMapping(value = "/t1",method = {RequestMethod.GET,RequestMethod.POST})
    public Object test1(HttpServletRequest req)
    {
        String p1 = req.getParameter("p1");
        String p2 = req.getParameter("p2");
        Map<String,Object> rMap=new HashMap<>();
        rMap.put("code","0");
        rMap.put("des","Success!");
        rMap.put("result","Parameter 1="+p1+",Parameter 2="+p2);
        return rMap;
    }

    /**
     * As with the t1 rule, it should be noted that some articles say that @RequestParam can't receive parameters for POST requests, but it's not.
     * As long as Content-type=application/x-www-form-urlencoded;charset=UTF-8, it is possible.
     */
    @RequestMapping(value = "/t2",method = {RequestMethod.GET,RequestMethod.POST})
    public Object test2(@RequestParam String p1,@RequestParam String p2)
    {
        Map<String,Object> rMap=new HashMap<>();
        rMap.put("code","0");
        rMap.put("des","Success!");
        rMap.put("result","Parameter 1="+p1+",Parameter 2="+p2);
        return rMap;
    }

    /**
     * Set Content-type=application/json when the front-end requests
     * Support post requests only
     * If axios submission is used, then direct submission is enough, and QS.stringify(params) specification must not be used any more.
     * No, the end does not receive the parameters. In this way, SpringBoot automatically converts the input parameters into objects.
     */
    @PostMapping(value = "/t3")
    public Object test3(@RequestBody Map<String,Object> p1)
    {
        System.out.println(p1.toString());
        Map<String,Object> rMap=new HashMap<>();
        rMap.put("code","0");
        rMap.put("des","Success!");
        rMap.put("result",p1);
        return rMap;
    }

    /**
     * Unlike the test3 method, you can also specify Content-type=text/plain or other formats
     * Received entry String is what it is, and will not do any special treatment.
     */
    @PostMapping(value="/t4")
    public Object test4(@RequestBody String p1)
    {
        System.out.println(p1);
        Map<String,Object> rMap=new HashMap<>();
        rMap.put("code","0");
        rMap.put("des","Success!");
        rMap.put("result",p1);
        return rMap;
    }

    /**
     * The difference with test3 is that the json format of the entry must be paired with the entity class, otherwise the entry parameters can not be obtained.
     *
     */
    @PostMapping(value="/t5")
    public Object test5(@RequestBody TestLable p1)
    {
        System.out.println(p1.toString());
        Map<String,Object> rMap=new HashMap<>();
        rMap.put("code","0");
        rMap.put("result",p1);
        return rMap;
    }
}
8.Swagger
Swagger is absolutely a magic weapon. Before using Swagger, the description of the interface needs to be defined and described through word documents. To write out and enter parameters clearly, for the interface docking party, it also needs to use various tools to test the interface.
But after the project integrates Swagger, all of this can be eliminated. Swagger is a visual interface document description plug-in. It only needs the interface developer to add relevant annotations to the interface code and the interface caller.
You can see all the interface instructions through the interface platform, and the online testing function provided by the platform is simply too refreshing to add. Below is a record of how Swagger was introduced into the project and how it was used.
8.1 Adding maven dependencies
<!-- Swagger2 -->
<dependency>
	<groupId>io.springfox</groupId>
	<artifactId>springfox-swagger2</artifactId>
	<version>2.4.0</version>
</dependency>
<dependency>
	<groupId>io.springfox</groupId>
	<artifactId>springfox-swagger-ui</artifactId>
	<version>2.4.0</version>
</dependency>
8.2 Adding Automatic Configuration Classes
@Configuration
@EnableSwagger2
public class Swagger2
{
    @Bean
    public Docket createRestApi(){
        return new Docket(DocumentationType.SWAGGER_2)
                .apiInfo(apiInfo())
                .select()
                .apis(RequestHandlerSelectors.basePackage("com.tydic.cloud_wind"))
                .paths(PathSelectors.any())
                .build();
    }
    //The port number to access the url is the same as the port number of the service, except that there is an additional / swagger-ui.html at the end.
    private ApiInfo apiInfo(){
        return new ApiInfoBuilder()
                .title("Spring Boot Foundation Framework Integration Swagger2")
                .description("Use Swagger2 Test Interface and Interface Description View")
                .termsOfServiceUrl("http://localhost:8080/swagger-ui.html")
                .contact(new Contact("zhouc52","http://sina.com","49763652@qq.com"))
                .version("1.0")
                .build();
    }
}
Pay attention to the settings of the basePackage. Make sure they are set correctly, or you can't see the relevant interface instructions.
8.3 Instructions for Interface Configuration
@RestController
@RequestMapping("/index")
@Api(value = "indexController Controller correlation api" , description = "Here is the description information. You can fill it in by yourself.")
public class IndexController
{
    /**
     * Content-type = application/x-www-form-urlencoded at the time of the front-end request; charset = UTF-8
     * You can use post or get with parameter names p1,p2
     * It can be a submission form or a normal ajax submission
     * If you use axios, you need to use QS.stringify(params) normalization
     * params:
     * {
     *     "p1":"1",
     *     "p2":"2"
     * }
     *
     */
    @ApiOperation(value="Test Interface 1",notes = "Test Interface 1, Access Pass HttpServletRequest req Mode acquisition")
    @ApiImplicitParams({
            @ApiImplicitParam(name="p1",value = "Parameter 1",dataType = "String",paramType = "query",required = true),
            @ApiImplicitParam(name="p2",value = "Parameter 2",dataType = "String",paramType = "query")
    })
    @RequestMapping(value = "/t1",method = {RequestMethod.GET,RequestMethod.POST})
    public Object test1(HttpServletRequest req)
    {
        String p1 = req.getParameter("p1");
        String p2 = req.getParameter("p2");
        Map<String,Object> rMap=new HashMap<>();
        rMap.put("code","0");
        rMap.put("des","Success!");
        rMap.put("result","Parameter 1="+p1+",Parameter 2="+p2);
        return rMap;
    }

    /**
     * As with the t1 rule, it should be noted that some articles say that @RequestParam can't receive parameters for POST requests, but it's not.
     * As long as Content-type=application/x-www-form-urlencoded;charset=UTF-8, it is possible.
     */
    @ApiOperation(value="Test Interface 2",notes = "Test Interface 2, Access Pass@RequestParam Mode acquisition")
    @ApiImplicitParams({
            @ApiImplicitParam(name="p1",value = "Parameter 1",dataType = "String",paramType = "query",required = true),
            @ApiImplicitParam(name="p2",value = "Parameter 2",dataType = "String",paramType = "query")
    })
    @RequestMapping(value = "/t2",method = {RequestMethod.GET,RequestMethod.POST})
    public Object test2(@RequestParam String p1,@RequestParam String p2)
    {
        Map<String,Object> rMap=new HashMap<>();
        rMap.put("code","0");
        rMap.put("des","Success!");
        rMap.put("result","Parameter 1="+p1+",Parameter 2="+p2);
        return rMap;
    }

    /**
     * Set Content-type=application/json when the front-end requests
     * Support post requests only
     * If axios submission is used, then direct submission is enough, and QS.stringify(params) specification must not be used any more.
     * No, the end does not receive the parameters. In this way, SpringBoot automatically converts the input parameters into objects.
     */
    @ApiOperation(value="Test Interface 3",notes = "Test Interface 3, Access Pass@RequestBody Get objects")
    @ApiImplicitParam(name = "p1",value = "Inquiring Map object")
    @PostMapping(value = "/t3")
    public Object test3(@RequestBody Map<String,Object> p1)
    {
        System.out.println(p1.toString());
        Map<String,Object> rMap=new HashMap<>();
        rMap.put("code","0");
        rMap.put("des","Success!");
        rMap.put("result",p1);
        return rMap;
    }

    /**
     * Unlike the test3 method, you can also specify Content-type=text/plain or other formats
     * Received entry String is what it is, and will not do any special treatment.
     */
    @PostMapping(value="/t4")
    public Object test4(@RequestBody String p1)
    {
        System.out.println(p1);
        Map<String,Object> rMap=new HashMap<>();
        rMap.put("code","0");
        rMap.put("des","Success!");
        rMap.put("result",p1);
        return rMap;
    }

    /**
     * The difference with test3 is that the json format of the entry must be paired with the entity class, otherwise the entry parameters can not be obtained.
     *
     */
    @ApiOperation(value="Test Interface 5",notes = "Test Interface 5, Entry is passed by Entity Class@RequestBody Get objects")
    @ApiImplicitParam(name = "p1",value = "Entity class",dataType = "TestLable")
    @PostMapping(value="/t5")
    public Object test5(@RequestBody TestLable p1)
    {
        System.out.println(p1.toString());
        Map<String,Object> rMap=new HashMap<>();
        rMap.put("code","0");
        rMap.put("result",p1);
        return rMap;
    }
}
8.4 Interface Description Document
Enter in the browser: http://localhost:8080/swagger-ui.html

9. About restful
Restful api is a specification, not a new technology. My simple understanding of restful is that through url, you can directly see what resources the request is. In short, it used to emphasize actions, but now it emphasizes resources.
Then different actions are identified by using different http requests, such as: get is a query, post is to submit modifications, delete, put is to modify, and so on. Then the end of the url is the resource identifier.
But in reality, this method is not very ideal, such as: I want to mass deletion how to do? One of my actions is to update the status of multiple orders. How to design it at this time? Wait.
In fact, our usual http post request is also restful api, but it is not standard, but it is a good solution to meet the needs and solve the problem quickly.
This blog post is also very good. You can refer to it.
Reference
[1] Detailed configuration of Mybatis Generator
[2] SpringBoot integrates MyBatis
[3] Springboot mybatis generate automatically generates entity classes and Mapper
[4] SpringBoot - -- Use MyBatis annotation to add, delete and modify data
[5] The difference between $and # in Mybatis