Learning objectives
- Cross domain request
- File upload
- Mail processing
Cross domain request
1. How to understand cross domain
What is cross domain?
Cross domain refers to the mutual access between different domain names, which is determined by the browser's homology policy. It is a security measure imposed by the browser on JavaScript to prevent malicious file damage.
Homology policy: homology policy is an agreement. It is the core and basic security policy of the browser. If the homology policy is missing, the normal function of the browser may be affected.
The so-called homology means that the protocol, domain name and port number are completely consistent. One inconsistency will cause cross domain problems.
Cross domain principle:
- The cross domain request can be sent normally, and the server can accept the request and return the result normally, but the result is intercepted.
- Cross domain only exists in browsers, not in other platforms, such as Android / java/ios.
- The reason why cross domain occurs is that it is limited by the same origin policy. The same origin policy requires the same source for normal communication, that is, the protocol, domain name and port number are completely consistent.
URL: unified resource locator, which is the unified resource locator of www, that is, the network address. Its general format is: protocol type: / / server address: port number / path.
This is what we call cross domain.
2. Three cross domain solutions in sprinboot
Cross domain technology CORS:
CORS is a W3C standard, whose full name is "cross origin resource sharing". It allows browsers to issue XMLHttpRequest requests to cross source servers, thus overcoming the limitation that AJAX can only be used from the same source.
SpringBoot supports Cross very well. At present, there are three Cross domain methods.
1. CrossOrigin annotation
//@CrossOrigin means that all URL s can access this resource
@CrossOrigin(origins = "http://127.0.0.1:8093 ") / / indicates that only this url is allowed to access this controller across domains
@RestController
@RequestMapping("/testCorss")
public class CorssOriginController {

    //This annotation can be applied to the method
    //@CrossOrigin(origins = "http://127.0.0.1:8093")
    @GetMapping("/getString")
    public String getString(){
        return "Cross domain success!";
    }

}
Code Description: @ CrossOrigin annotation is very convenient to use. It can be used on methods or classes. If you don't set its value attribute or origins attribute, all URL s / domains can be accessed by default.
- The value attribute can set multiple URL s.
- The origins property can also set multiple URL s.
- The maxAge property specifies the maximum duration of the cache before preparing the response. This is the validity period of the probe request.
- The allowCredentials property indicates whether the user can send and process cookie s. The default is false
- The allowedHeaders property indicates which request headers are allowed.
- The methods property indicates the methods that allow requests. The default values are get, post, and head.
2. Implement WebMvcConfigurer
public class MyWebMvcConfig implements WebMvcConfigurer {
    @Override
    public void addCorsMappings(CorsRegistry registry) {
        registry.addMapping("/testCross/**")
                .allowedHeaders("*")
                .allowedMethods("*")
                .allowCredentials(true)
                .allowedOrigins("http://localhost:8093")
                .maxAge(2000);
    }
}
There's nothing to say about this. Just rewrite the addcorsmapping method and configure the parameters, which are similar to those in the above annotation. This configuration belongs to the global configuration, and all interfaces configured follow this rule. The above annotation method only works for classes or methods. Addmapping is to set the URL in that format to work, that is, the path following the URL.
3. Filter configuration
import org.springframework.boot.web.servlet.FilterRegistrationBean;
import org.springframework.context.annotation.Bean;
import org.springframework.context.annotation.Configuration;
import org.springframework.web.cors.CorsConfiguration;
import org.springframework.web.cors.UrlBasedCorsConfigurationSource;
import org.springframework.web.filter.CorsFilter;

@Configuration
public class Filter {
    @Bean
    public FilterRegistrationBean corsFilter() {
        UrlBasedCorsConfigurationSource source = new UrlBasedCorsConfigurationSource();
        CorsConfiguration config = new CorsConfiguration();
        config.setAllowCredentials(true);
        config.addAllowedOrigin("http://localhost:8093");//* Indicates that all are allowed
        config.addAllowedHeader("*");
        config.addAllowedMethod("*");
        source.registerCorsConfiguration("/**", config); // The CORS configuration is valid for all interfaces
        FilterRegistrationBean bean = new FilterRegistrationBean(new CorsFilter(source));
        bean.setOrder(0);
        return bean;
    }

}
There is another way to use filter configuration to achieve cross domain
package com.example.democrossorigin.config;

import org.springframework.context.annotation.Configuration;
import org.springframework.stereotype.Component;

import javax.servlet.*;
import javax.servlet.FilterConfig;
import javax.servlet.http.HttpServletRequest;
import javax.servlet.http.HttpServletResponse;
import java.io.IOException;

@Configuration
public class CorssFilter implements Filter {

    @Override
    public void doFilter(ServletRequest request, ServletResponse response, FilterChain chain)
            throws IOException, ServletException {
        HttpServletResponse res = (HttpServletResponse) response;
        res.addHeader("Access-Control-Allow-Credentials", "true");
        res.addHeader("Access-Control-Allow-Origin", "http://localhost:8093");
        res.addHeader("Access-Control-Allow-Methods", "GET, POST, DELETE, PUT");
        res.addHeader("Access-Control-Allow-Headers", "Content-Type,X-CAF-Authorization-Token,sessionToken,X-TOKEN");
        chain.doFilter(request, response);
    }
    @Override
    public void destroy() {
    }
    @Override
    public void init(FilterConfig filterConfig) throws ServletException {
    }
}
3. Cross domain testing
We are creating a new SpringBoot web project, and then create a new. html in static in the resources folder
The code is as follows
<!DOCTYPE html>
<html lang="en">
<head>
    <meta charset="UTF-8">
    <title>Title</title>
    <script src="https://cdn.bootcss.com/jquery/3.4.1/jquery.js"></script>
</head>
<body>
<div id="test"></div>
<input type="button" value="test data" onclick="getString()"/>
</body>
<script>

    function getString() {
        $.ajax({
            url:'http://localhost:8092/testCorss/getString',
            type:'get',
            data:{},
            success:function (msg) {
                $("#test").html(msg);
            }
        })
    }
</script>
</html>
We simulate an ajax request to request our 8092 port to run the new project results
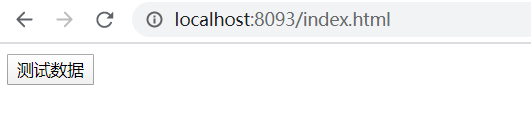
Click test to initiate a request
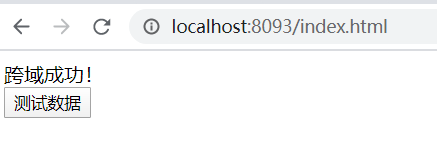
If we successfully get the data of another project from one project, it means that our cross domain is successful.
File upload
1. Project construction and configuration
Let's just create a project that contains web dependencies. Then you need to upload some settings in the configuration file.
server:
  port: 8095

spring:
  servlet:
    multipart:
      max-file-size: 10MB
      max-request-size: 30MB
- Max file size sets the maximum acceptable file size, remember MB, or KB
- Max request size sets the size of all files uploaded at one time.
The default size is 1MB
In addition to using the configuration file, you can also use java configuration, as follows
@Bean
public MultipartConfigElement multipartConfigElement() {
    MultipartConfigFactory factory = new MultipartConfigFactory();
    //The maximum value of a single file uploaded is KB, which is set to 10MB here
    DataSize maxSize = DataSize.ofMegabytes(10);
    DataSize requestMaxSize = DataSize.ofMegabytes(30);
    factory.setMaxFileSize(maxSize);
    ///Set the total size of files uploaded at one time
    factory.setMaxRequestSize(requestMaxSize);
    return factory.createMultipartConfig();
}
This method can be placed in the startup class or in a configuration class, so that the project can be loaded normally when it is started.
2. File upload
For single file upload, we need to use the back-end to accept and store the file in the project or define the path ourselves. Here, the image is used as the uploaded file. And upload the file to the project.
@RestController
@RequestMapping("/file")
public class FileController {
    @PostMapping("/uploadFile")
    public String uploadFile(MultipartFile file, HttpServletRequest request)  {
        if (file.isEmpty()){
            return "The uploaded file cannot be empty! Please upload again";
        }
        if (file.getSize()<=0){
            return "The uploaded file size needs to be greater than 0 kb";
        }
        System.out.println(file.getContentType());//image/png
        Date date = new Date();
        Long time = date.getTime();
        String originFileName = file.getOriginalFilename();//Gets the name of the original file
        String newFileName = time+originFileName;
        //Gets the absolute path where the project runs
        String filePath = System.getProperty("user.dir");


        // Parent child items
        //String newFilePath = filePath + "\ \ current project name \ \ src\main\resources\static\images \ \";

        //Individual items
        String newFilePath = filePath+"\\src\\main\\resources\\static\\images\\";

        //Of course, you can also set an absolute path for image upload and file upload.
        //For example: D:\images\
        File file1 = new File(newFilePath);

        if (!file1.exists()){
            file1.mkdirs();
        }
        FileOutputStream fileOutputStream = null;
        try {
            fileOutputStream = new FileOutputStream(newFilePath+newFileName);
            fileOutputStream.write(file.getBytes());
            fileOutputStream.flush();
            fileOutputStream.close();
            return "localhost:8095/images/"+newFileName;
        } catch (java.io.IOException e) {
            e.printStackTrace();
        }
        return "Upload failed";
    }
}
Code Description:
In the code, we can use the parameter file to judge whether the file is empty, or take out the suffix of the file to judge whether the file type meets our requirements. Using the getContentType() method, if you upload png images, the printed images are image/png, and other types of images are other types. In order to distinguish images, we can use the number obtained by the getTime method of the current time as the prefix of the image, or use other numbers or strings. I don't want to say it. The code word is too tired. Next, get the running path of the current project, followed by the storage location of the files we need to upload, which is generally under the resources file. Then judge whether the folder where the file is stored exists. If it does not exist, you need to create a file. Then, the byte stream is used to write the data to the file and return the Accessible path.
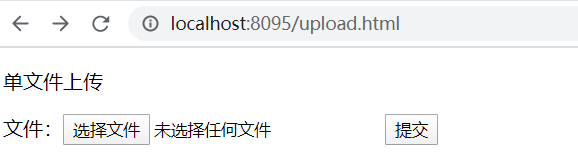
For the front-end code, I created an upload.html file directly under the static directory, and then we wrote the contents in the file
<p>Single file upload</p>
<form action="/file/uploadFile" method="POST" enctype="multipart/form-data">
    File:<input type="file" name="file"/>
    <input type="submit" />
</form>
Its action corresponds to the path of the corresponding method in our controller to access the uploaded file. The method attribute is post, which is consistent with the back end. The name attribute of the input box with type file must be consistent with the MultipartFile in the controller. If it is inconsistent, the back end cannot receive data. If you have written the back-end and the front-end and back-end parameters are inconsistent, you can add a comment to the back-end parameters@ The annotation RequestParam("file") is placed in front of MultipartFile, so that you can correctly receive data even if your parameter name is not file.
After uploading the file, the returned path should not directly access the image, and 404 will be displayed. We need to add the following configuration.
@Configuration
public class ResourceConfigAdapter implements WebMvcConfigurer {


    @Override
    public void addResourceHandlers(ResourceHandlerRegistry registry) {
        //Get the real path of the file
        String path = System.getProperty("user.dir")+"\\src\\main\\resources\\static\\images\\";
        String os = System.getProperty("os.name");
        if (os.toLowerCase().startsWith("win")) {
            registry.addResourceHandler("/images/**").
                    addResourceLocations("file:" + path);
        }

    }
}
The java Dynamic Configuration here is more flexible than the yml configuration. When you know the location of the file to be stored, you can add the configuration in the yml file yourself. Then we run the project as follows:
Upload a picture and return the Accessible path

Then we copy the URL to the browser, run it, and you can access the image.
This is a single file upload, and then you may need to upload multiple files. It's very simple. Just make a cycle at the back end, and then use the MultipartFile array to accept files and make some modifications to the front end.
 @PostMapping("/uploadFiles")
public String uploadFiles(MultipartFile[] files,HttpServletRequest request) {
    StringBuilder paths = new StringBuilder();
    for (MultipartFile file:files) {
        //The code in the middle is the same as above
        try {
            //This can be modified according to the actual situation. You can use array
            paths.append("localhost:8095/images/"+newFileName+"\n");
        } catch (java.io.IOException e) {
            e.printStackTrace();
        }
    }
    return paths.toString();
}
Slightly modify the front end
<p>Multi file upload</p>

<form action="/file/uploadFiles" method="POST" enctype="multipart/form-data">
    File:<input type="file" name="files" multiple="multiple"/>
    <input type="submit"/>
</form>
This completes the upload of multiple files. When uploading, you need to press and hold the Ctrl key, and then select multiple files to upload.
Mail processing
1. Introduction to SMTP protocol
SMTP is a protocol that provides reliable and effective e-mail transmission. SMTP is a mail service based on FTP file transfer service. It is mainly used for mail information transmission between systems and provides notification of letters. SMTP is independent of specific transmission subsystem and only needs reliable and orderly data flow channel support. One of the important characteristics of SMTP is that it can transmit mail across the network, that is, "SMTP mail relay". Using SMTP, mail transmission between the same network processing processes can be realized, and mail transmission between a processing process and other networks can also be realized through repeaters or gateways.
In short: these mail sending functions we use have a special e-mail server between them, which is similar to the post office. You send the mail to the post office, and the post office will send it to the corresponding post office according to your mailing address, and then the receiver will go to the post office to pick up the mail. The mail server is a post office between the Internet. Different networks can also send e-mail.
The Spring framework encapsulates the java mail service. SpringBoot further encapsulates the mail service on the basis of Spring, making it more convenient and flexible for SpringBoot to send mail.
2. Start the SMTP service and obtain the authorization code
Here we take QQ mailbox as an example. To send QQ email in SpringBoot, you must first turn on the SMTP function of QQ mailbox, which is turned off by default. The specific operations are as follows. Go to email → settings → account, and then find the following:

Open the first one. I've already opened it here, so I don't need to open it again. As for the POP3 protocol, it's a protocol for reading mail from the mail server. Through the POP3 protocol, the recipient doesn't need to participate in the mail reading process with the mail server, which simplifies the user's operation. The recipient can process mail "offline" and receive it conveniently, Read email.
Then we need to obtain an authorization code after opening it, which we need to use in writing mail configuration later. Obtaining the authorization code may require authentication or something. Save the authorization code.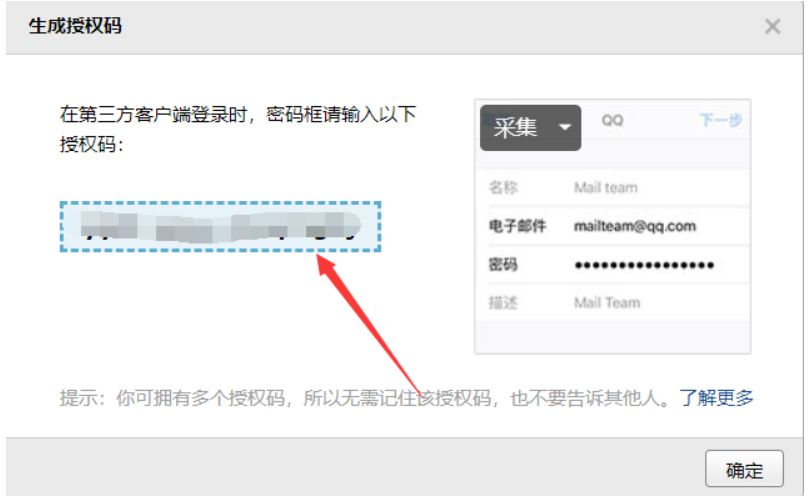
3. Dependency import and configuration description
Dependent import:
<dependency>
    <groupId>org.springframework.boot</groupId>
    <artifactId>spring-boot-starter-mail</artifactId>
</dependency>
To facilitate testing, we also need to import the starter web dependency.
Profile:
spring:
  mail:
    host: smtp.qq.com
    username: 517022877@qq.com
    password: zxcvbnmkj
    properties:
      mail:
        smtp:
          socketFactory:
            class: javax.net.ssl.SSLSocketFactory
##         ssl:
##           enable :true
    default-encoding: utf-8
Configuration Description:
- host is your email server address,
- username is your email account with suffix
- password is the authorization code you just copied. I wrote it here;
- Default encoding sets the mail code to utf-8;
- properties: additional configurations. I have written two here. Only one of them is enough. Turn on ssl encryption to ensure a secure connection.
3. Email sending
1. Simple mail sending
Write a controller or add tests directly to the test module
@RestController
public class MailController {
    @Autowired
    JavaMailSenderImpl javaMailSender;
    @RequestMapping("/mail")
    public String sendMail(){
        SimpleMailMessage message = new SimpleMailMessage();
        //Mail Settings
        message.setSubject("Mail subject");
        message.setText("Mail content");
        message.setTo("xxxxxxx@139.com","111111111@qq.com");
        message.setFrom("qzstudynote@qq.com");
        javaMailSender.send(message);
        return "Simple mail sent successfully!"
    }
}
Code Description: JavaMailSenderImpl is an implementation class used to send mail in SpringBoot. We need to inject it into the bean for use. There are some methods in it. Only a few are shown here. Others are also very simple, such as sending date, CC, etc. Multiple recipients can be set, as above.
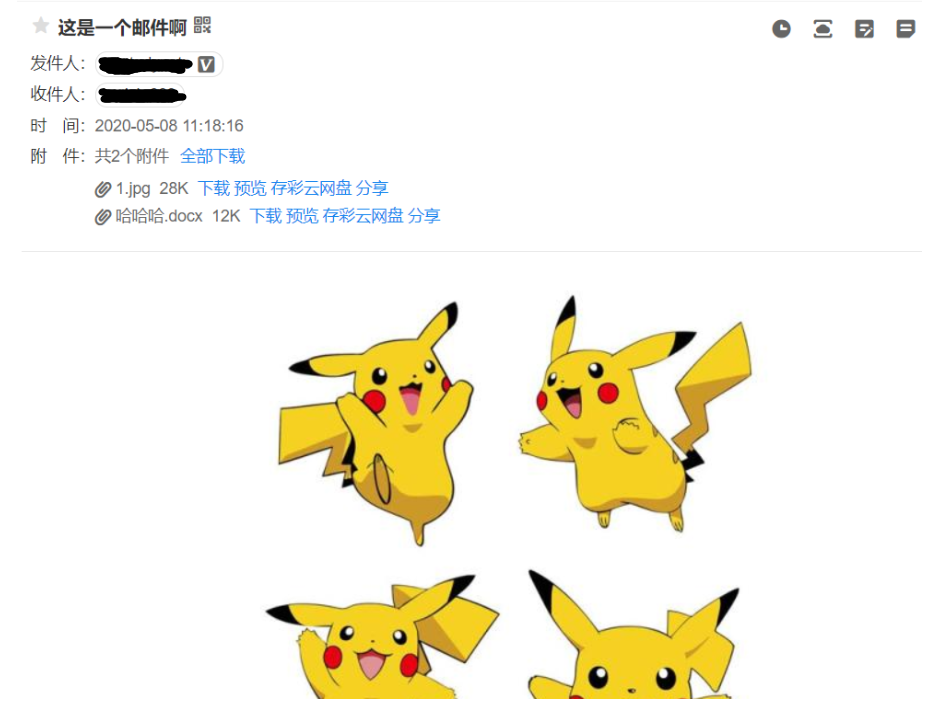
2. Send email with attachment content and text with pictures
@RequestMapping("/mineMail")
public String sendMineMail() throws MessagingException {
     //1. Create a complex message
        MimeMessage mimeMessage = javaMailSender.createMimeMessage();
        MimeMessageHelper helper = new MimeMessageHelper(mimeMessage, true);
        //Mail subject
        helper.setSubject("This is an email");
        //Add picture to text
        helper.addInline("image1",new FileSystemResource("D:\\images\\spring\\1.jpg"));
        //Mail content
        helper.setText("<a href='https://Www.cnblogs. COM / swzx-1213 / > Baidu < / a > < img SRC ='cid: image1 '> < / img > ", true);
        helper.setTo("xxxxx@139.com");
        helper.setFrom("517022877@qq.com");
        //Add pictures to attachments
        helper.addAttachment("1.jpg",new File("D:\\images\\spring\\1.jpg"));
        //Add word document to attachment
        helper.addAttachment("Ha ha ha.docx",new File("D:\\images\\spring\\Ha ha ha.docx"));

        javaMailSender.send(mimeMessage);
       return "Complex mail sending!";
}
Code Description:
- Create a MimeMessage mail, but we also need to create a tool class MimeMessageHelper, which is equivalent to a proxy class. The attribute configuration of mail is implemented by this tool class.
- addInline(), the first parameter is a contentId,String type, which is equivalent to a key, and the second parameter is a Resource object, a Resource object. Here we pass a FileSystemResource object for local images. Of course, here we say that the parameters of the addInline method we use are like this, and there are other parameter types, called overloading.
- setText(), the first parameter used here is the text string, and the second parameter is whether to parse the html syntax in the text.
- The addAttachment() method is used to add attachments. Attachments are different from the pictures we added earlier. Attachments are used as non downloaded files, while resource files are directly displayed in the body. Screenshot of testing with my own mailbox:
3. Send thymeleaf template as mail
thymeleaf dependency needs to be introduced into the project, and: xmlns:th should be added to the new html file=“ http://www.thymeleaf.org ”, no thymeleaf, please move to the previous article.
<dependency>
    <groupId>org.springframework.boot</groupId>
    <artifactId>spring-boot-starter-thymeleaf</artifactId>
</dependency>
Here, an email HTML 5 file is created under templates.
<!DOCTYPE html>
<html lang="en" xmlns:th="http://www.thymeleaf.org">
<head>
    <meta charset="UTF-8">
    <title>Title</title>
</head>

<p th:text="${name}"></p>
<a th:text="This is a link" th:href="${link}"></a>
<img th:src="${image1}">
</body>
</html>
Add another method to the controller.
@RequestMapping("/thyMail")
    public String sendThymeleafMail() throws MessagingException {
        MimeMessage mimeMessage = javaMailSender.createMimeMessage();
        MimeMessageHelper messageHelper = new MimeMessageHelper(mimeMessage);
        messageHelper.setSubject("This is a thymeleaf Template mail");
        messageHelper.setTo("xxxxxxxx@139.com");
        messageHelper.setFrom("517022877@qq.com");
        Context context = new Context();
        context.setVariable("name","This is a new one thymeleaf Template");
        context.setVariable("link","https://www.baidu.com");
        context.setVariable("image1","http://img12.360buyimg.com/babel/s1180x940_jfs/t1/155480/1/2178/40498/5f86d482E94d83a6e/1be5e41a4caf106b.jpg.webp");
        String value = templateEngine.process("email.html",context);
        messageHelper.setText(value,true);
        javaMailSender.send(mimeMessage);
        return "Template mail sent successfully";
    }
Code Description:
- Context belongs to the org.thymeleaf.context package.
- context.setVariable(), the first parameter is String and the second is Object type. The first parameter corresponds to the parameter with the same name on the thymeleaf template.
- **templateEngine.process() * * converts the html file of the specified path into String type and returns.
Test: