SpringBoot 2.x based on Spring Framework 5.x
The environmental requirements are as follows:
JDK1.8 or above
Maven 3.2 or above
I use Eclipse here. IDEA is a powerful tool, but I'm not used to it
To create a SpringBoot project manually:
Premise: the computer has Maven and JDK installed and configured in Eclipse
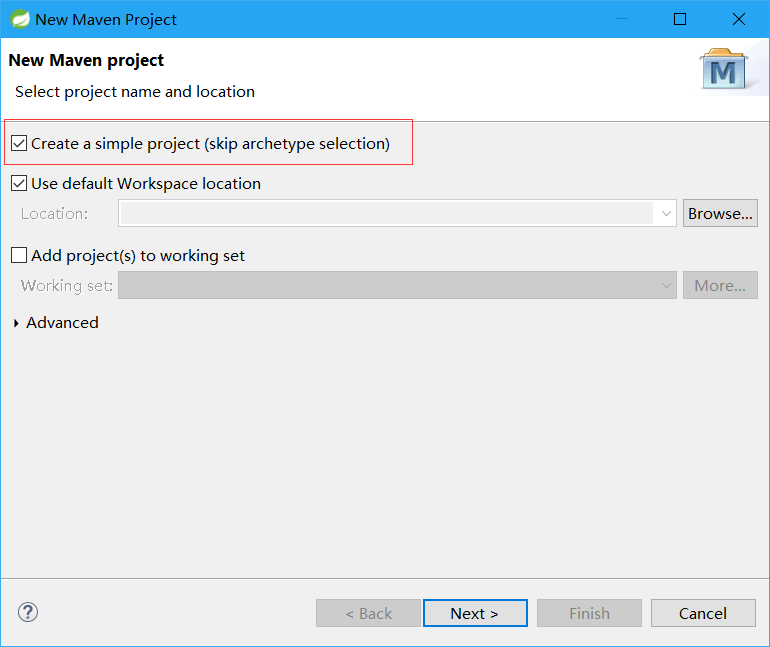
Open eclipse - > New - > Maven project:
Check this
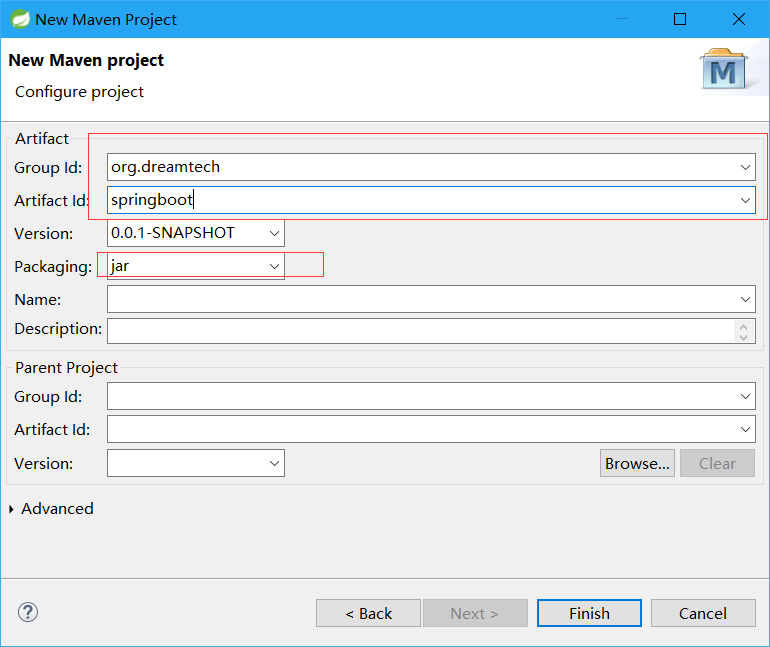
Next step: just define the ID by yourself. Note that the jar package is checked here
Modify pom.xml:
<project xmlns="http://maven.apache.org/POM/4.0.0"
    xmlns:xsi="http://www.w3.org/2001/XMLSchema-instance"
    xsi:schemaLocation="http://maven.apache.org/POM/4.0.0 http://maven.apache.org/xsd/maven-4.0.0.xsd">
    <modelVersion>4.0.0</modelVersion>
    <groupId>org.dreamtech</groupId>
    <artifactId>springboot</artifactId>
    <version>0.0.1-SNAPSHOT</version>
    <parent>
        <groupId>org.springframework.boot</groupId>
        <artifactId>spring-boot-starter-parent</artifactId>
        <version>2.0.1.RELEASE</version>
    </parent>
    <dependencies>
        <dependency>
            <groupId>org.springframework.boot</groupId>
            <artifactId>spring-boot-starter-web</artifactId>
        </dependency>
    </dependencies>
</project>
After saving, if there is an error in the project, don't panic: right click Maven - > update project
Create a new package, a new class, and the following code:
package org.dreamtech.springboot.controller;

import org.springframework.boot.SpringApplication;
import org.springframework.boot.autoconfigure.EnableAutoConfiguration;
import org.springframework.stereotype.Controller;
import org.springframework.web.bind.annotation.RequestMapping;
import org.springframework.web.bind.annotation.ResponseBody;

@Controller
@EnableAutoConfiguration
public class SampleController {

    @RequestMapping("/")
    @ResponseBody
    String home() {
        return "Hello World!";
    }

    public static void main(String[] args) throws Exception {
        SpringApplication.run(SampleController.class, args);
    }
}
Right click Run As Java Application
Visit: http://localhost:8080/
Hello World done!
Automatically create project:
Visit: https://start.spring.io/
Pay attention to selecting Web dependency
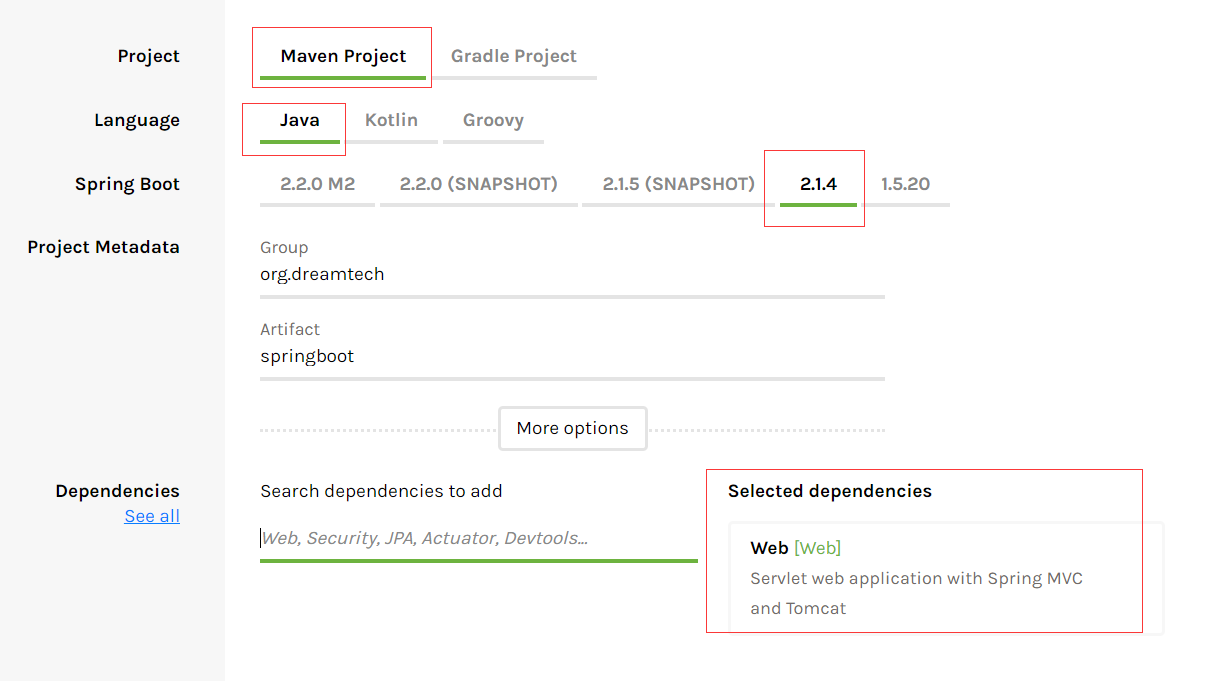
Generate, download, extract, and then import in Eclipse: (Import Exist Maven Project)
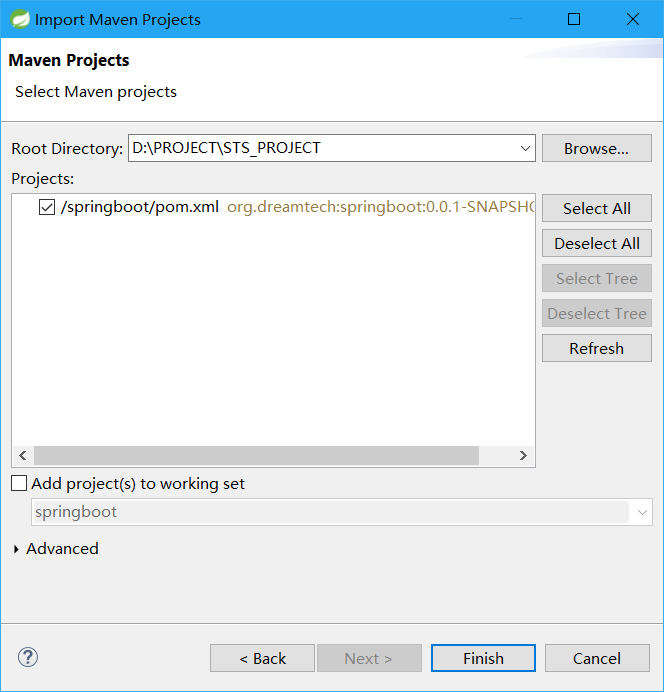
After importing, you can start it directly. However, if you visit localhost:8080, an error will be displayed because there is no Controller defined
Just define yourself
Take a look at the automatically generated pom.xml:
<?xml version="1.0" encoding="UTF-8"?>
<project xmlns="http://maven.apache.org/POM/4.0.0"
    xmlns:xsi="http://www.w3.org/2001/XMLSchema-instance"
    xsi:schemaLocation="http://maven.apache.org/POM/4.0.0 http://maven.apache.org/xsd/maven-4.0.0.xsd">
    <modelVersion>4.0.0</modelVersion>
    <!-- Here you can press Ctrl Click in to view the parent dependency information -->
    <parent>
        <groupId>org.springframework.boot</groupId>
        <artifactId>spring-boot-starter-parent</artifactId>
        <version>2.1.4.RELEASE</version>
        <relativePath />
    </parent>
    <groupId>org.dreamtech</groupId>
    <artifactId>springboot</artifactId>
    <version>0.0.1-SNAPSHOT</version>
    <name>springboot</name>
    <description>Demo project for Spring Boot</description>
    <!-- You can configure the project here -->
    <properties>
        <!-- Definition JDK1.8 -->
        <java.version>1.8</java.version>
    </properties>

    <!-- SpringBoot rely on -->
    <dependencies>
        <dependency>
            <groupId>org.springframework.boot</groupId>
            <artifactId>spring-boot-starter-web</artifactId>
        </dependency>

        <dependency>
            <groupId>org.springframework.boot</groupId>
            <artifactId>spring-boot-starter-test</artifactId>
            <scope>test</scope>
        </dependency>
    </dependencies>

    <!-- Maven Build plug-ins -->
    <build>
        <plugins>
            <plugin>
                <groupId>org.springframework.boot</groupId>
                <artifactId>spring-boot-maven-plugin</artifactId>
            </plugin>
        </plugins>
    </build>

</project>
View the auto generated main class: the difference between the manual mode and the auto generated main class is that there is less Controller
package org.dreamtech.springboot;

import org.springframework.boot.SpringApplication;
import org.springframework.boot.autoconfigure.SpringBootApplication;

@SpringBootApplication
public class SpringbootApplication {

    public static void main(String[] args) {
        SpringApplication.run(SpringbootApplication.class, args);
    }

}
The automatically generated application.properties and other files will be discussed later
Recommendation: use automatic tools instead of manual methods
This section is relatively simple. It's Hello World of SpringBoot, so it's short. I'm sorry