The notes of this article are from the dark horse video https://www.bilibili.com/video/BV1vt4y1i7zA , relevant information can be obtained in the comment area of the video. This information includes the background management system for preparing a semi-finished product in advance. If you want to improve another part, you need to use spring security.
1. Get to know Spring Security
1.1.Spring Security concept
Spring Security is a security framework implemented by spring based on servlet filter and AOP. It provides perfect authentication mechanism and method level authorization function. It is a very excellent permission management framework. Its official website is: https://spring.io/projects/spring-security.
1.2. Concept of authority management
(1) Permission management generally refers to that users can access and only access their authorized resources according to the security rules or security policies set by the system. Permission management appears in almost any system, provided that a system with user and password authentication is required.
(2) In the concept of permission management, there are two very important terms:
| authentication | After successfully logging in the system through user name and password, the system will get the role identity of the current user. |
|---|---|
| to grant authorization | According to the role of the current user, the system grants him / her the corresponding permission resources that can be operated. |
1.3. Three objects are required to complete permission management
| user | It mainly includes user name, password and role information of the current user, which can realize authentication operation. |
|---|---|
| role | It mainly includes role name, role description and permission information owned by the current role, which can realize authorization operation. |
| jurisdiction | Permission can also be called menu, which mainly contains the current permission name, url address and other information, which can realize the dynamic display of menu. |
Note: among the three objects, users and roles are many to many, roles and permissions are many to many, and users and permissions are not directly related. They are associated through roles.
2.Spring Security - easy to get started
2.1. Create a web project and import the jar package
(1) The web project is ready in advance and does not need to be created.
(2) Import Spring Security dependencies in the pom.xml file
<!--Import Spring Security dependent jar package-->
<dependency>
    <groupId>org.springframework.security</groupId>
    <artifactId>spring-security-config</artifactId>
    <version>5.1.5.RELEASE</version>
</dependency>
<dependency>
    <groupId>org.springframework.security</groupId>
    <artifactId>spring-security-taglibs</artifactId>
    <version>5.1.5.RELEASE</version>
</dependency>
2.2. Configure Spring Security filter chain in web.xml
<!--Spring Security Filter chain. Note that the filter name must be springSecurityFilterChain-->
<filter>
    <filter-name>springSecurityFilterChain</filter-name>
    <filter-class>org.springframework.web.filter.DelegatingFilterProxy</filter-class>
</filter>
<filter-mapping>
    <filter-name>springSecurityFilterChain</filter-name>
    <url-pattern>/*</url-pattern>
</filter-mapping>
2.3. Write Spring Security configuration file spring-security.xml
<?xml version="1.0" encoding="UTF-8"?>
<beans xmlns="http://www.springframework.org/schema/beans"
       xmlns:xsi="http://www.w3.org/2001/XMLSchema-instance"
       xmlns:context="http://www.springframework.org/schema/context"
       xmlns:aop="http://www.springframework.org/schema/aop"
       xmlns:tx="http://www.springframework.org/schema/tx"
       xmlns:security="http://www.springframework.org/schema/security"
       xsi:schemaLocation="http://www.springframework.org/schema/beans
        http://www.springframework.org/schema/beans/spring-beans.xsd
        http://www.springframework.org/schema/context
        http://www.springframework.org/schema/context/spring-context.xsd
        http://www.springframework.org/schema/aop
        http://www.springframework.org/schema/aop/spring-aop.xsd
        http://www.springframework.org/schema/tx
        http://www.springframework.org/schema/tx/spring-tx.xsd
        http://www.springframework.org/schema/security
        http://www.springframework.org/schema/security/spring-security.xsd">

    <!--Settings can be used spring of el Expression configuration Spring Security And automatically generate corresponding configuration components (filters)-->
    <!--
        auto-config="true"  Indicates automatic loading springsecurity Configuration file for
        use-expressions="true" Indicates use spring of el Expression to configure springsecurity
    -->
    <security:http auto-config="true" use-expressions="true">
        <!--use spring of el Expression to specify that all resource accesses to the project must have ROLE_USER or ROLE_ADMIN role-->
        <security:intercept-url pattern="/**" access="hasAnyRole('ROLE_USER','ROLE_ADMIN')"/>
    </security:http>

    <!--set up Spring Security Source of authentication user information-->
    <!-- springsecurity The default authentication must be encrypted, plus{noop}Indicates that authentication is not encrypted.-->
    <security:authentication-manager>
        <security:authentication-provider>
            <security:user-service>
                <security:user name="user" password="{noop}user"
                               authorities="ROLE_USER" />
                <security:user name="admin" password="{noop}admin"
                               authorities="ROLE_ADMIN" />
            </security:user-service>
        </security:authentication-provider>
    </security:authentication-manager>
</beans>
2.4. Import the spring-security.xml configuration file into applicationContext.xml
<!--introduce SpringSecurity Master profile-->
<import resource="classpath:spring-security.xml"/>
2.5. Start the project
(1) At this time, after starting the project, it is found that the page in the browser is also the following login page (which is provided by Spring Security). The reason is that only role is set in spring-security.xml_ User or role_ The admin role can access all resources, but the project does not get these roles before accessing the index.jsp page by default, so it will jump to the login page provided by Spring Security in advance.
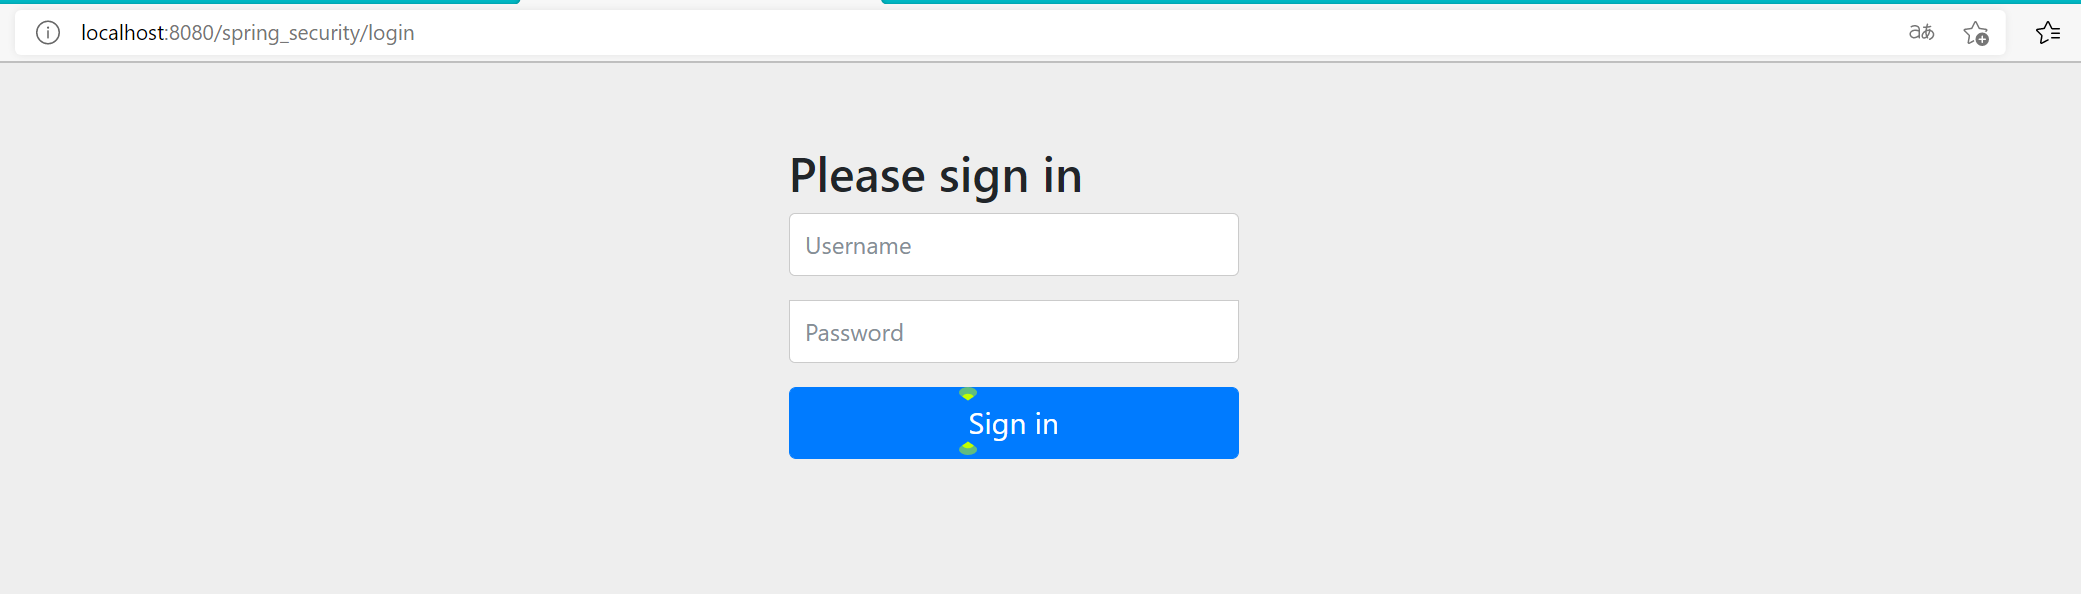
(2) However, you can log in according to the advance authenticated user information in spring-security.xml, that is, you can log in by entering the user name user (or admin) and password user (or admin).

3.Spring Security - filter chain
3.1. Introduction to common spring security filters
(1)org.springframework.security.web.context.SecurityContextPersistenceFilter
A very important filter, SecurityContextPersistenceFilter, mainly uses SecurityContextRepository to save or update a SecurityContext in the session, and gives the SecurityContext to future filters to establish the required context for subsequent filters. The SecurityContext stores the authentication and permission information of the current user.
(2)org.springframework.security.web.context.request.async.WebAsyncManagerIntegrationFilter
This filter is used to integrate SecurityContext into WebAsyncManager in Spring asynchronous execution mechanism
(3)org.springframework.security.web.header.HeaderWriterFilter
Add corresponding information to the requested Header, which can be controlled by using security:headers inside the http tag
(4)org.springframework.security.web.csrf.CsrfFilter
csrf is also called cross domain request forgery. Spring security will verify whether all post requests contain the token information of csrf generated by the system. If not, an error will be reported. It can prevent csrf attacks.
(5)org.springframework.security.web.authentication.logout.LogoutFilter
Match the request with the URL of / logout to exit the user and clear the authentication information.
(6)org.springframework.security.web.authentication.UsernamePasswordAuthenticationFilter
The authentication operation depends on this filter. The default matching URL is / login and must be a POST request.
(7)org.springframework.security.web.authentication.ui.DefaultLoginPageGeneratingFilter
If no authentication page is specified in the configuration file, a default authentication page is generated by the filter.
(8)org.springframework.security.web.authentication.ui.DefaultLogoutPageGeneratingFilter
This filter can produce a default exit login page
(9)org.springframework.security.web.authentication.www.BasicAuthenticationFilter
This filter will automatically parse the header information in the HTTP request whose header name is Authentication and starts with Basic.
(10)org.springframework.security.web.savedrequest.RequestCacheAwareFilter
A RequestCache is maintained internally through HttpSessionRequestCache to cache HttpServletRequest
(11)org.springframework.security.web.servletapi.SecurityContextHolderAwareRequestFilter
The ServletRequest is wrapped once, so that the request has a richer API
(12)org.springframework.security.web.authentication.AnonymousAuthenticationFilter
When the authentication information in the SecurityContextHolder is empty, an anonymous user will be created and stored in the SecurityContextHolder. In order to be compatible with unlisted access, spring security also goes through a set of authentication process, which is just an anonymous identity.
(13)org.springframework.security.web.session.SessionManagementFilter
The SecurityContextRepository limits the number of sessions opened by the same user
(14)org.springframework.security.web.access.ExceptionTranslationFilter
The exception conversion filter is located behind the entire springSecurityFilterChain and is used to convert exceptions in the entire link
(15)org.springframework.security.web.access.intercept.FilterSecurityInterceptor
Obtain the authorization information of the configured resource access, and determine whether it has permission according to the user information stored in the SecurityContextHolder.
3.2. Spring Security filter chain loading principle
3.2.1.DelegatingFilterProxy
Previously, a filter DelegatingFilterProxy named springSecurityFilterChain was configured in web.xml. Next, the important codes in the DelegatingFilterProxy source code are described directly. Some unimportant codes are deleted. Just pay attention to the comments.
public class DelegatingFilterProxy extends GenericFilterBean {
	@Nullable
	private String contextAttribute;
	@Nullable
	private WebApplicationContext webApplicationContext;
	@Nullable
	private String targetBeanName;
	private boolean targetFilterLifecycle;
	@Nullable
	private volatile Filter delegate;//Note: this filter is the real loaded filter
	private final Object delegateMonitor;

	//Note: doFilter is the inlet of the filter. Look directly from here!
	public void doFilter(ServletRequest request, ServletResponse response, FilterChain
		filterChain) throws ServletException, IOException {
		Filter delegateToUse = this.delegate;
		if (delegateToUse == null) {
			synchronized(this.delegateMonitor) {
				delegateToUse = this.delegate;
				if (delegateToUse == null) {
					WebApplicationContext wac = this.findWebApplicationContext();
					if (wac == null) {
						throw new IllegalStateException("No WebApplicationContext found: no ContextLoaderListener or DispatcherServlet registered?");
					}
					//Step 1: the most important step in doFilter is to initialize the private filter attribute delegate above
					delegateToUse = this.initDelegate(wac);
				}
				this.delegate = delegateToUse;
			}
		}
		//Step 3: execute the FilterChainProxy filter
		this.invokeDelegate(delegateToUse, request, response, filterChain);
	}

	//Step 2: directly see who the final loaded filter is
	protected Filter initDelegate(WebApplicationContext wac) throws ServletException {
		//debug learns that the targetbean name is: springSecurityFilterChain
		String targetBeanName = this.getTargetBeanName();
		Assert.state(targetBeanName != null, "No target bean name set");
		//debug knows that the delegate object is FilterChainProxy
		Filter delegate = (Filter)wac.getBean(targetBeanName, Filter.class);
		if (this.isTargetFilterLifecycle()) {
			delegate.init(this.getFilterConfig());
		}
		return delegate;
	}

	protected void invokeDelegate(Filter delegate, ServletRequest request, ServletResponse
		response, FilterChain filterChain) throws ServletException, IOException {
		delegate.doFilter(request, response, filterChain);
	}
}
The debug results of the second step are as follows:
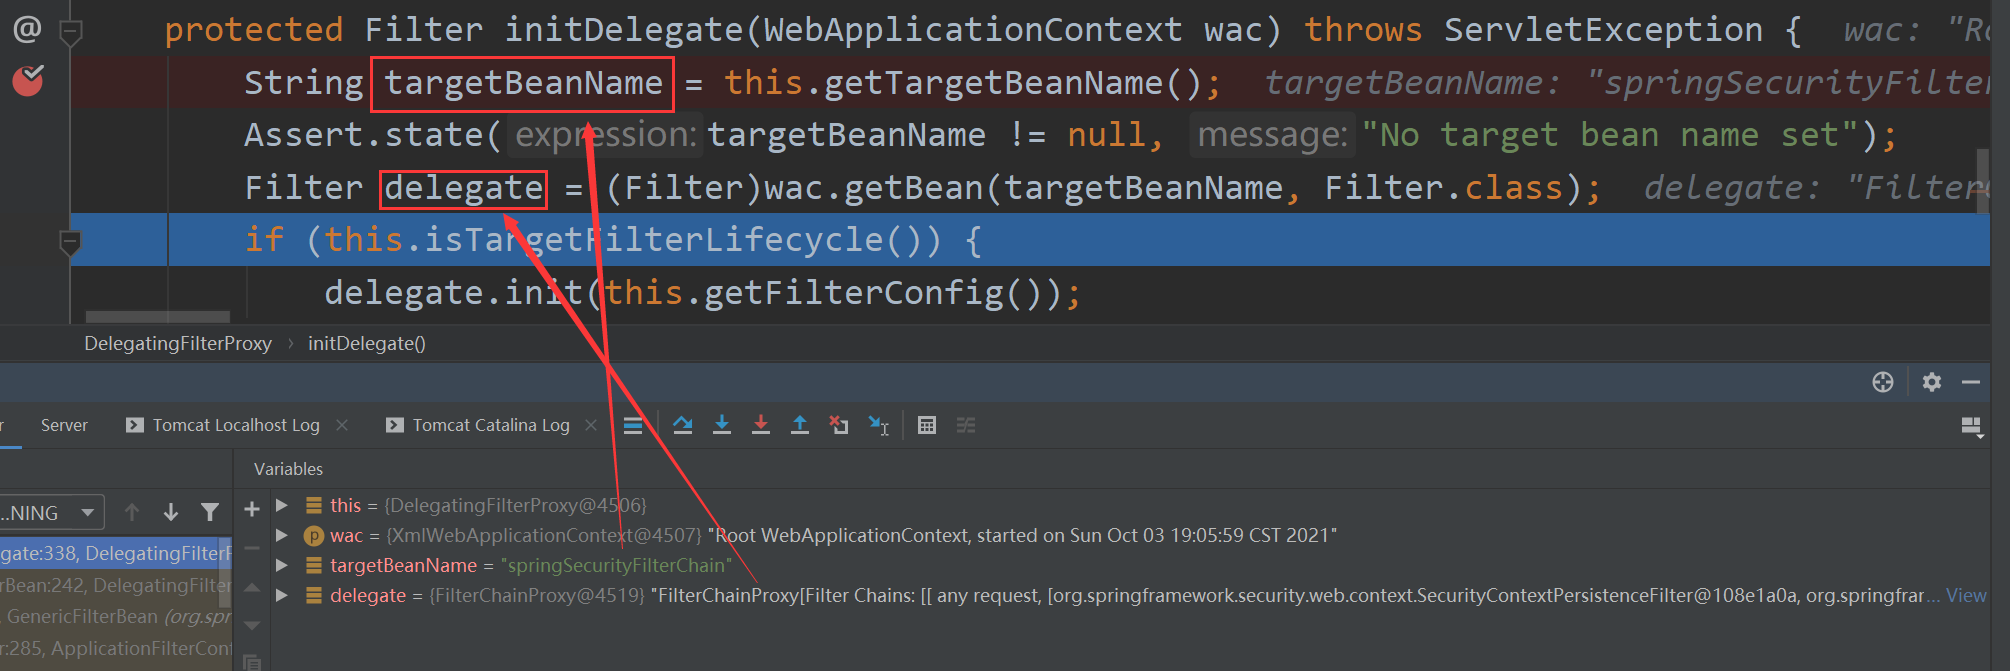
Therefore, DelegatingFilterProxy obtains a FilterChainProxy filter through springSecurityFilterChain, and finally executes the filter in step 3.
3.2.2.FilterChainProxy
public class FilterChainProxy extends GenericFilterBean {
	private static final Log logger = LogFactory.getLog(FilterChainProxy.class);
	private static final String FILTER_APPLIED = FilterChainProxy.class.getName().concat(".APPLIED");
	private List<SecurityFilterChain> filterChains;
	private FilterChainProxy.FilterChainValidator filterChainValidator;
	private HttpFirewall firewall;

	//Yi!? You can instantiate a FilterChainProxy object through an object called SecurityFilterChain
	//What is this FilterChainProxy? Can it be a real filter chain object? Keep this question first!
	public FilterChainProxy(SecurityFilterChain chain) {
		this(Arrays.asList(chain));
	}
	//SecurityFilterChain again! The suspicion is even greater!
	public FilterChainProxy(List<SecurityFilterChain> filterChains) {
		this.filterChainValidator = new FilterChainProxy.NullFilterChainValidator();
		this.firewall = new StrictHttpFirewall();
		this.filterChains = filterChains;
	}
	//Note: look directly from doFilter
	public void doFilter(ServletRequest request, ServletResponse response, FilterChain chain)
		throws IOException, ServletException {
		boolean clearContext = request.getAttribute(FILTER_APPLIED) == null;
		if (clearContext) {
			try {
			request.setAttribute(FILTER_APPLIED, Boolean.TRUE);
				this.doFilterInternal(request, response, chain);
			} finally {
			SecurityContextHolder.clearContext();
				request.removeAttribute(FILTER_APPLIED);
			}
		} else {
		//Step 1: call the following doFilterInternal method for specific operation
		this.doFilterInternal(request, response, chain);
		}
	}

	private void doFilterInternal(ServletRequest request, ServletResponse response, FilterChain chain)
		throws IOException, ServletException {
		FirewalledRequest fwRequest =
		this.firewall.getFirewalledRequest((HttpServletRequest)request);
		HttpServletResponse fwResponse =
		this.firewall.getFirewalledResponse((HttpServletResponse)response);
		//Step 2: encapsulate the filter chain to be executed, so many filters are encapsulated here!
		List<Filter> filters = this.getFilters((HttpServletRequest)fwRequest);
		if (filters != null && filters.size() != 0) {
			FilterChainProxy.VirtualFilterChain vfc = new
			FilterChainProxy.VirtualFilterChain(fwRequest, chain, filters);
			//Step 4: load the filter chain
			vfc.doFilter(fwRequest, fwResponse);
		} else {
			if (logger.isDebugEnabled()) {
			logger.debug(UrlUtils.buildRequestUrl(fwRequest) + (filters == null ? " has no
			matching filters" : " has an empty filter list"));
			}
			fwRequest.reset();
			chain.doFilter(fwRequest, fwResponse);
		}
	}

	private List<Filter> getFilters(HttpServletRequest request) {
		Iterator var2 = this.filterChains.iterator();
		//Step 3: encapsulate the filter chain into SecurityFilterChain!
		SecurityFilterChain chain;
		do {
			if (!var2.hasNext()) {
				return null;
			}
			chain = (SecurityFilterChain)var2.next();
		} while(!chain.matches(request));
		return chain.getFilters();
	}
}
The debug result of the second step is shown in the figure below. All 15 filters are here!
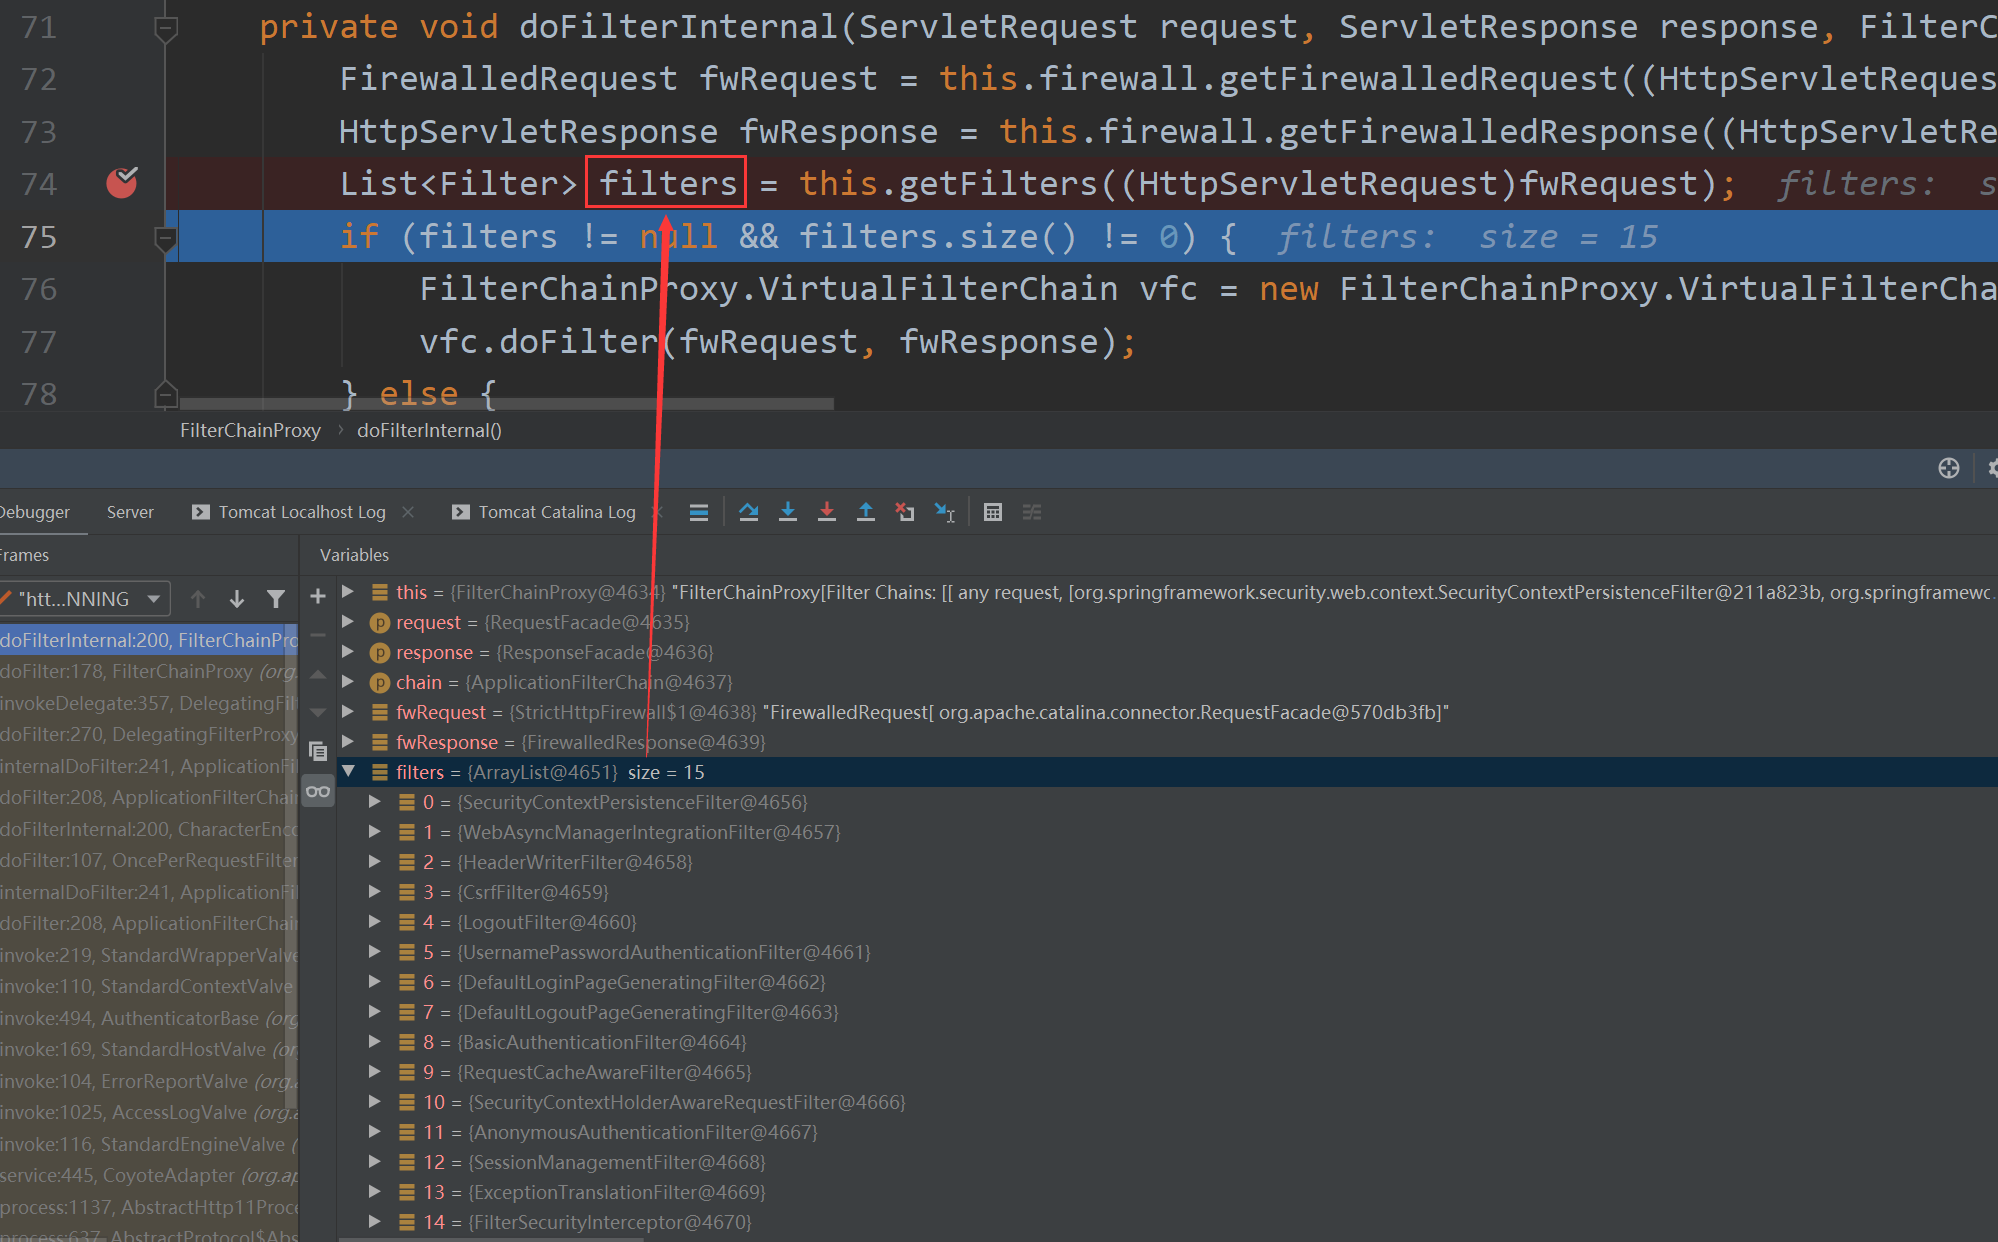
In step 3, these filters are encapsulated in the SecurityFilterChain.
3.2.3.FilterChainProxy
Finally, look at SecurityFilterChain. This is an interface and there is only one implementation class. This is the filter chain object configured in web.xml!
//Interface
public interface SecurityFilterChain {
	boolean matches(HttpServletRequest var1);
	List<Filter> getFilters();
}

//Implementation class
public final class DefaultSecurityFilterChain implements SecurityFilterChain {
	private static final Log logger = LogFactory.getLog(DefaultSecurityFilterChain.class);
	private final RequestMatcher requestMatcher;
	private final List<Filter> filters;

	public DefaultSecurityFilterChain(RequestMatcher requestMatcher, Filter... filters) {
		this(requestMatcher, Arrays.asList(filters));
	}

	public DefaultSecurityFilterChain(RequestMatcher requestMatcher, List<Filter> filters) {
		logger.info("Creating filter chain: " + requestMatcher + ", " + filters);
		this.requestMatcher = requestMatcher;
		this.filters = new ArrayList(filters);
	}

	public RequestMatcher getRequestMatcher() {
		return this.requestMatcher;
	}
	public List<Filter> getFilters() {
	return this.filters;
	}

	public boolean matches(HttpServletRequest request) {
		return this.requestMatcher.matches(request);
	}

	public String toString() {
		return "[ " + this.requestMatcher + ", " + this.filters + "]";
	}
}
4. Spring security -- using a custom authentication page
4.1. Specify authentication page configuration information
(1) Specify the authentication page configuration information in the spring security main configuration file spring-security.xml
<?xml version="1.0" encoding="UTF-8"?>
<beans xmlns="http://www.springframework.org/schema/beans"
       xmlns:xsi="http://www.w3.org/2001/XMLSchema-instance"
       xmlns:context="http://www.springframework.org/schema/context"
       xmlns:aop="http://www.springframework.org/schema/aop"
       xmlns:tx="http://www.springframework.org/schema/tx"
       xmlns:security="http://www.springframework.org/schema/security"
       xsi:schemaLocation="http://www.springframework.org/schema/beans
        http://www.springframework.org/schema/beans/spring-beans.xsd
        http://www.springframework.org/schema/context
        http://www.springframework.org/schema/context/spring-context.xsd
        http://www.springframework.org/schema/aop
        http://www.springframework.org/schema/aop/spring-aop.xsd
        http://www.springframework.org/schema/tx
        http://www.springframework.org/schema/tx/spring-tx.xsd
        http://www.springframework.org/schema/security
        http://www.springframework.org/schema/security/spring-security.xsd">

    <!--Release static resources without SpringSecurity intercept-->
    <security:http pattern="/css/**" security="none"/>
    <security:http pattern="/img/**" security="none"/>
    <security:http pattern="/plugins/**" security="none"/>
    <security:http pattern="/failer.jsp" security="none"/>
    <security:http pattern="/favicon.ico" security="none"/>

    <!--Settings can be used spring of el Expression configuration Spring Security And automatically generate corresponding configuration components (filters)-->
    <!--
        auto-config="true"  Indicates automatic loading springsecurity Configuration file for
        use-expressions="true" Indicates use spring of el Expression to configure springsecurity
    -->
    <security:http auto-config="true" use-expressions="true">
        <!--Make the authentication page accessible anonymously-->
        <security:intercept-url pattern="/login.jsp" access="permitAll()"/>
        <!--use spring of el Expression to specify that all resource accesses to the project must have ROLE_USER or ROLE_ADMIN role-->
        <security:intercept-url pattern="/**" access="hasAnyRole('ROLE_USER','ROLE_ADMIN')"/>
        <!--Configure authentication information-->
        <security:form-login login-page="/login.jsp"
                             login-processing-url="/login"
                             default-target-url="/index.jsp"
                             authentication-failure-url="/failer.jsp"/>
        <!--Configure exit login information-->
        <security:logout logout-url="/logout"
                         logout-success-url="/login.jsp"/>
    </security:http>

    <!--set up Spring Security Source of authentication user information-->
    <!-- springsecurity The default authentication must be encrypted, plus{noop}Indicates that authentication is not encrypted.-->
    <security:authentication-manager>
        <security:authentication-provider>
            <security:user-service>
                <security:user name="user" password="{noop}user"
                               authorities="ROLE_USER" />
                <security:user name="admin" password="{noop}admin"
                               authorities="ROLE_ADMIN" />
            </security:user-service>
        </security:authentication-provider>
    </security:authentication-manager>
</beans>
(2) To modify the request address of the login authentication page, here are the following two main points:
① The controller that handles the login request (i.e. / login) is provided by spring security.
② The login request method must be POST.

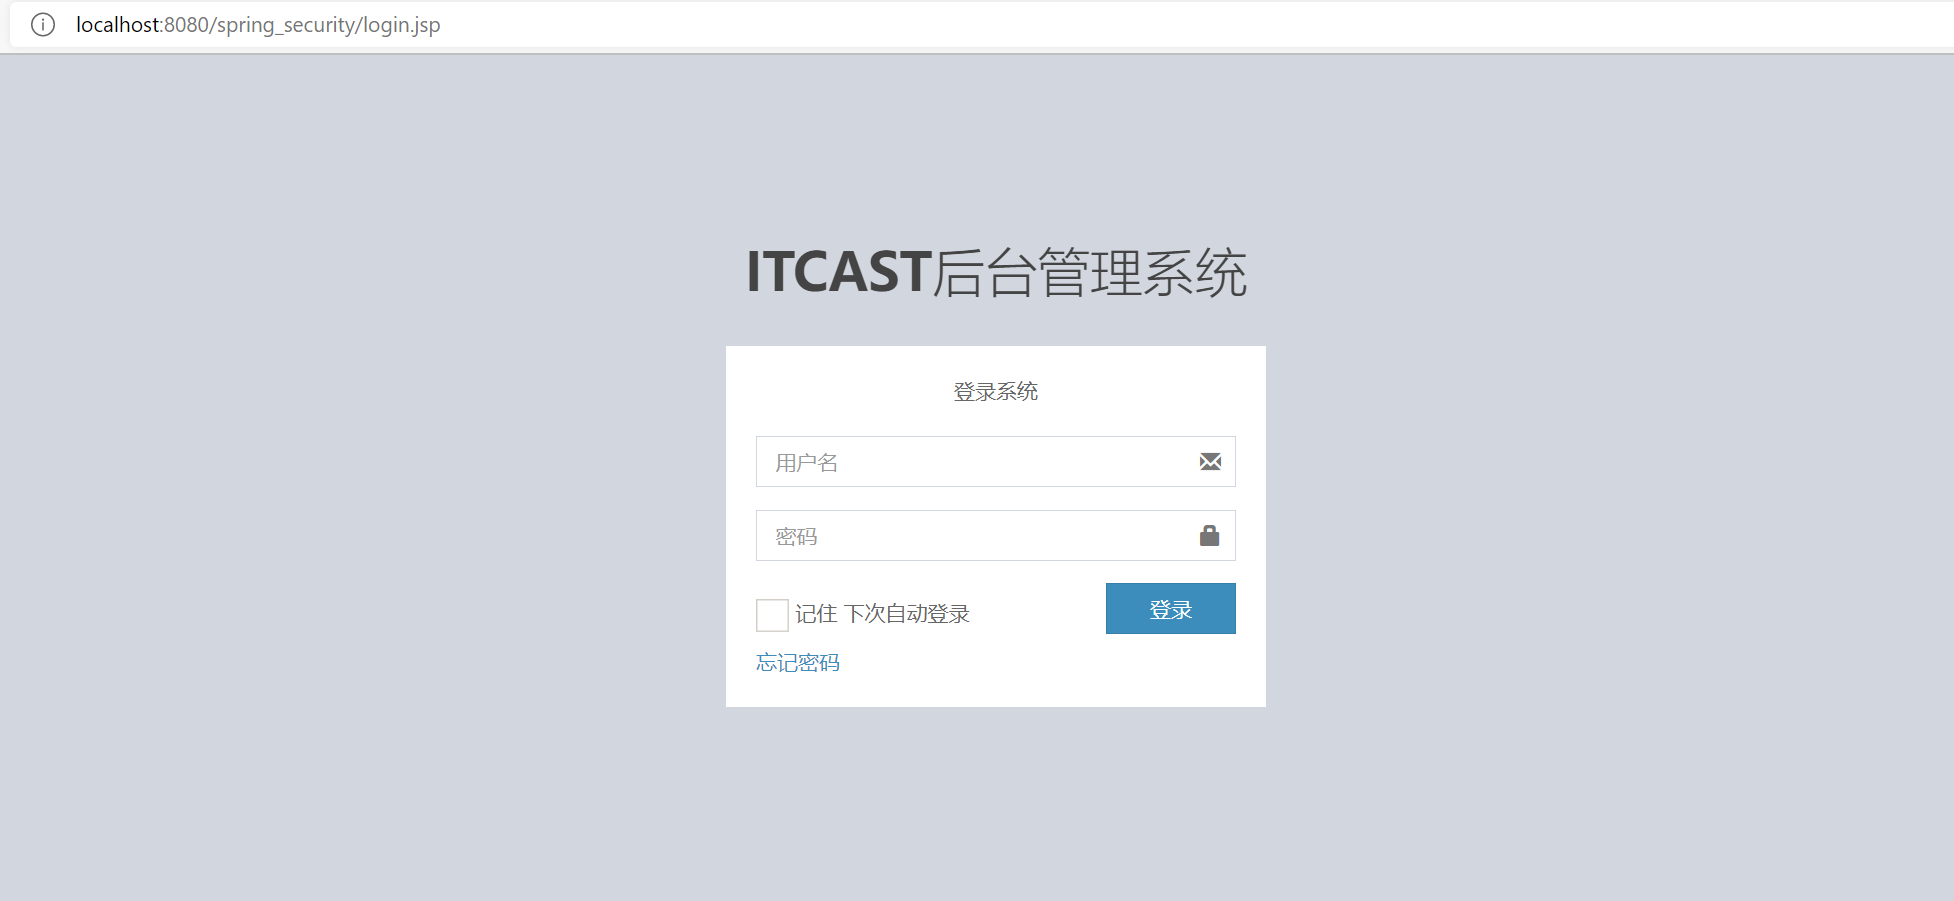
(3) Start the project and you can go to the user-defined login authentication page
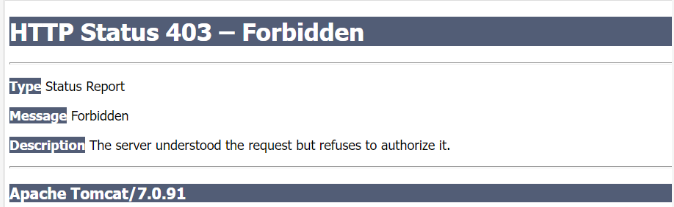
(4) However, when you enter the authentication user information configured in spring-security.xml (i.e. enter the user name user/admin and password user/admin), the following interface appears:
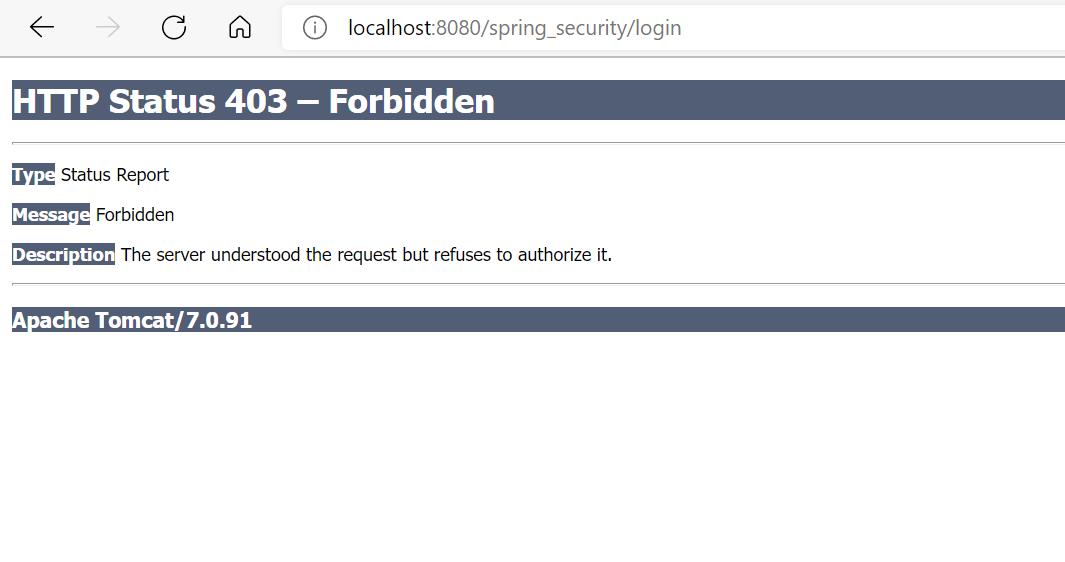
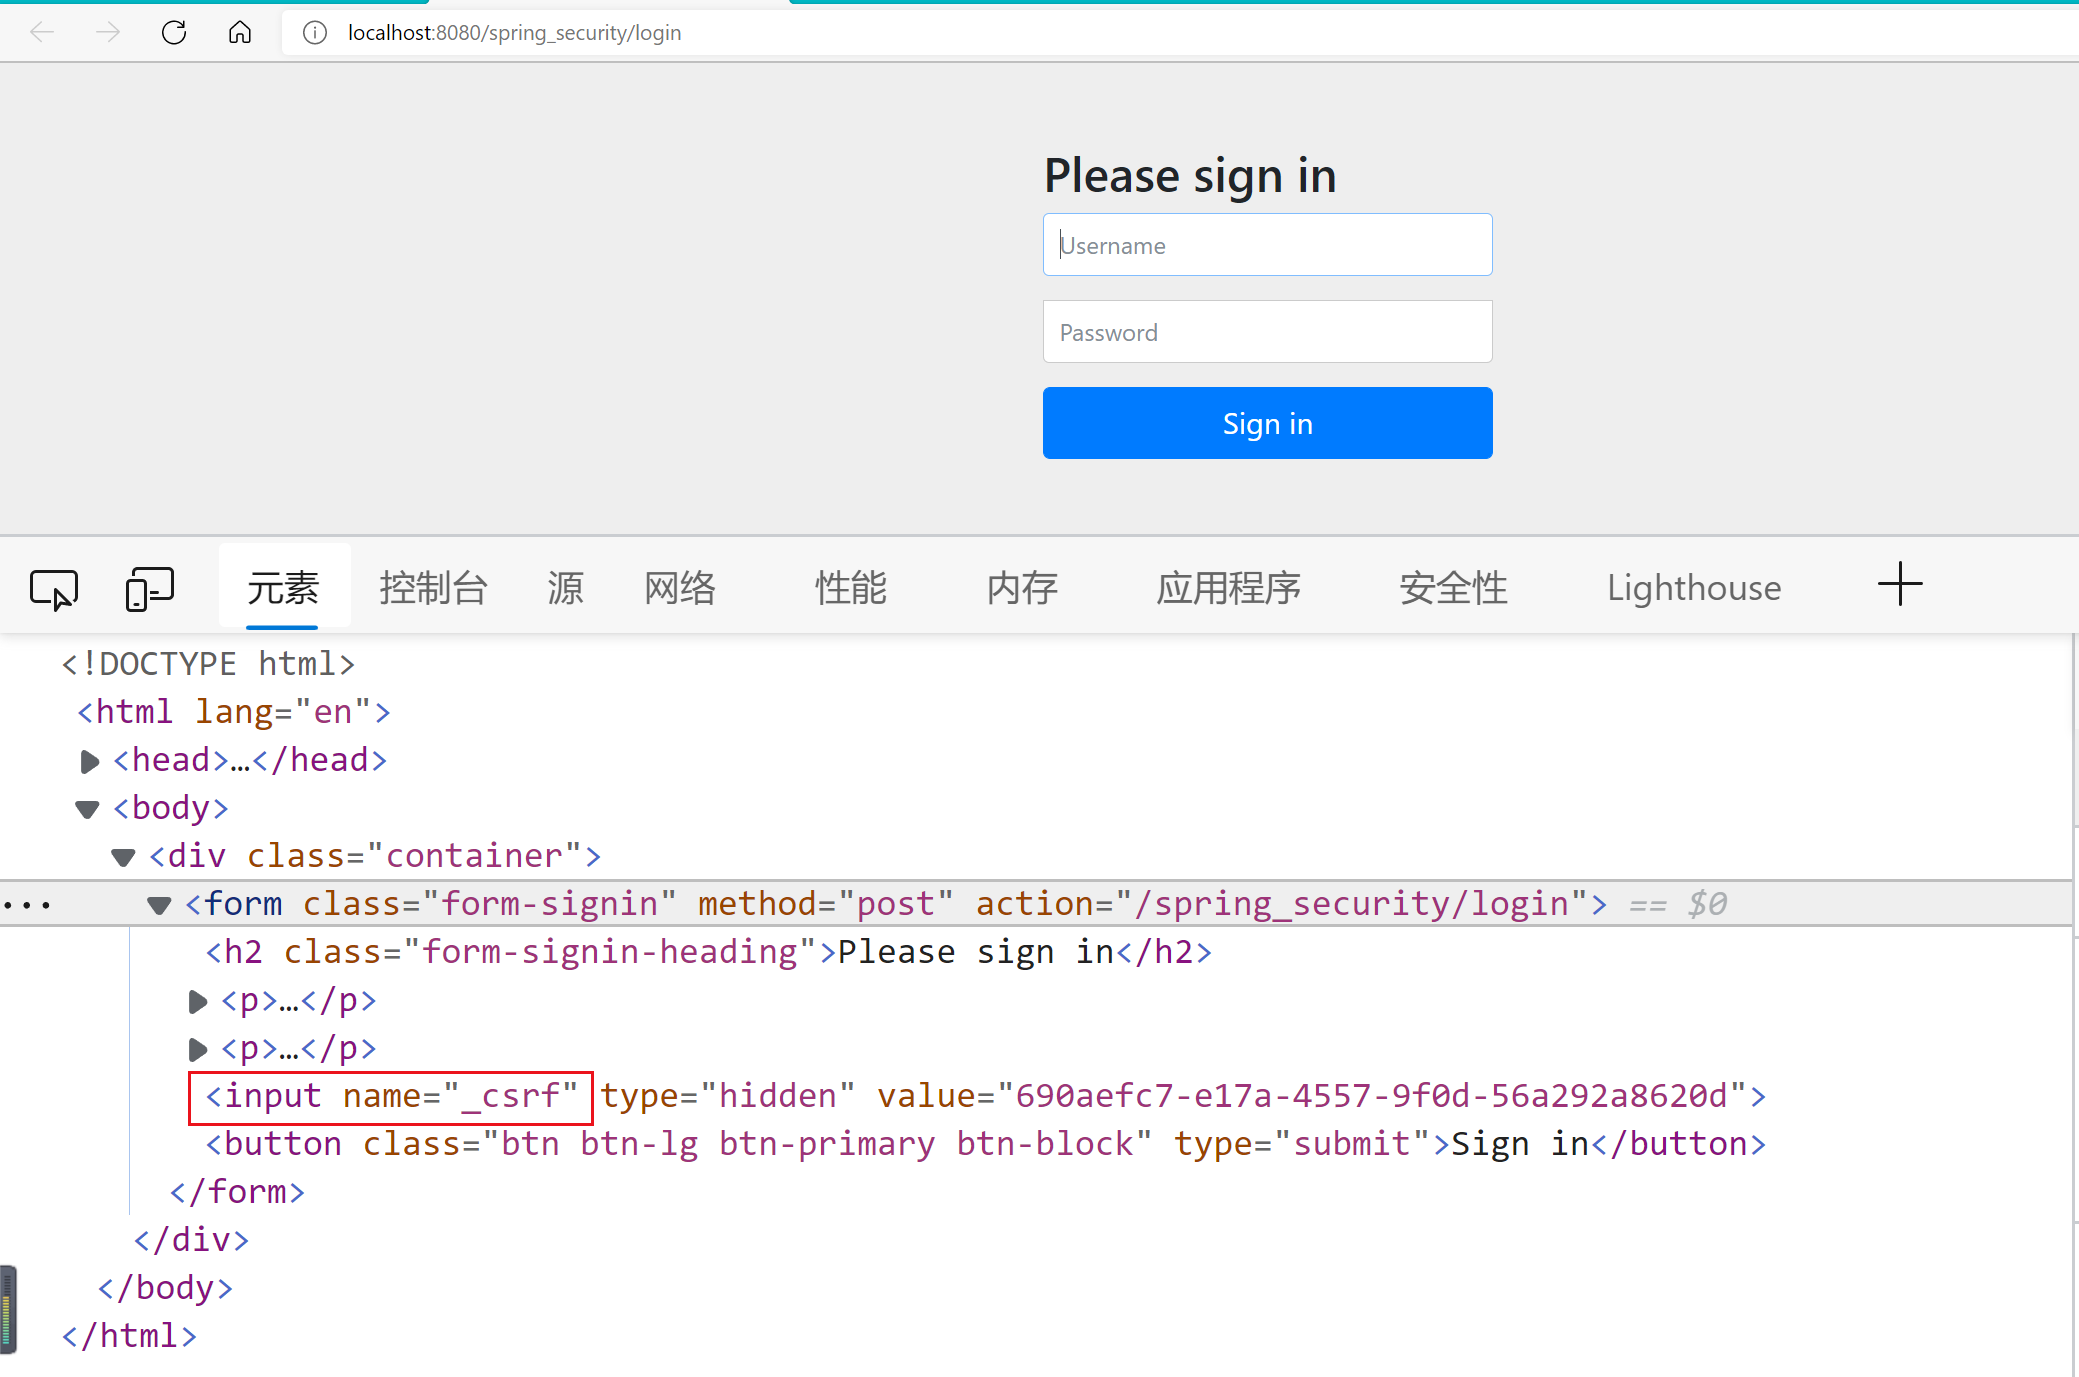
403 the exception is insufficient permission in spring security! In fact, there is a hidden input in the source code of the built-in authentication page of spring security above, and the attribute value of its name is_ csrf, that's the problem! It is the csrf protection mechanism of spring security that will be discussed in the next section.
4.2. csrf protection mechanism of spring security
CSRF (Cross Site Request Forgery), that is, cross site request forgery, is a network attack that is difficult to prevent.
4.2.1. CsrfFilter description in spring security
//
// Source code recreated from a .class file by IntelliJ IDEA
// (powered by Fernflower decompiler)
//

package org.springframework.security.web.csrf;

import java.io.IOException;
import java.util.Arrays;
import java.util.HashSet;
import javax.servlet.FilterChain;
import javax.servlet.ServletException;
import javax.servlet.http.HttpServletRequest;
import javax.servlet.http.HttpServletResponse;
import org.apache.commons.logging.Log;
import org.apache.commons.logging.LogFactory;
import org.springframework.security.web.access.AccessDeniedHandler;
import org.springframework.security.web.access.AccessDeniedHandlerImpl;
import org.springframework.security.web.util.UrlUtils;
import org.springframework.security.web.util.matcher.RequestMatcher;
import org.springframework.util.Assert;
import org.springframework.web.filter.OncePerRequestFilter;

public final class CsrfFilter extends OncePerRequestFilter {
    public static final RequestMatcher DEFAULT_CSRF_MATCHER = new CsrfFilter.DefaultRequiresCsrfMatcher();
    private final Log logger = LogFactory.getLog(this.getClass());
    private final CsrfTokenRepository tokenRepository;
    private RequestMatcher requireCsrfProtectionMatcher;
    private AccessDeniedHandler accessDeniedHandler;

    public CsrfFilter(CsrfTokenRepository csrfTokenRepository) {
        this.requireCsrfProtectionMatcher = DEFAULT_CSRF_MATCHER;
        this.accessDeniedHandler = new AccessDeniedHandlerImpl();
        Assert.notNull(csrfTokenRepository, "csrfTokenRepository cannot be null");
        this.tokenRepository = csrfTokenRepository;
    }

	//From here, we can see that the csrf mechanism of spring security divides the request mode into two categories to process
    protected void doFilterInternal(HttpServletRequest request, HttpServletResponse response, FilterChain filterChain) throws ServletException, IOException {
        request.setAttribute(HttpServletResponse.class.getName(), response);
        CsrfToken csrfToken = this.tokenRepository.loadToken(request);
        boolean missingToken = csrfToken == null;
        if (missingToken) {
            csrfToken = this.tokenRepository.generateToken(request);
            this.tokenRepository.saveToken(csrfToken, request, response);
        }

        request.setAttribute(CsrfToken.class.getName(), csrfToken);
        request.setAttribute(csrfToken.getParameterName(), csrfToken);
        //The first category: "get", "head", "trace" and "options" can be directly passed
        if (!this.requireCsrfProtectionMatcher.matches(request)) {
            filterChain.doFilter(request, response);
        } else {
        	//The second category: except for the above four categories, including POST, it must be verified to carry a token before it can pass
            String actualToken = request.getHeader(csrfToken.getHeaderName());
            if (actualToken == null) {
                actualToken = request.getParameter(csrfToken.getParameterName());
            }

            if (!csrfToken.getToken().equals(actualToken)) {
                if (this.logger.isDebugEnabled()) {
                    this.logger.debug("Invalid CSRF token found for " + UrlUtils.buildFullRequestUrl(request));
                }

                if (missingToken) {
                    this.accessDeniedHandler.handle(request, response, new MissingCsrfTokenException(actualToken));
                } else {
                    this.accessDeniedHandler.handle(request, response, new InvalidCsrfTokenException(csrfToken, actualToken));
                }

            } else {
                filterChain.doFilter(request, response);
            }
        }
    }

    public void setRequireCsrfProtectionMatcher(RequestMatcher requireCsrfProtectionMatcher) {
        Assert.notNull(requireCsrfProtectionMatcher, "requireCsrfProtectionMatcher cannot be null");
        this.requireCsrfProtectionMatcher = requireCsrfProtectionMatcher;
    }

    public void setAccessDeniedHandler(AccessDeniedHandler accessDeniedHandler) {
        Assert.notNull(accessDeniedHandler, "accessDeniedHandler cannot be null");
        this.accessDeniedHandler = accessDeniedHandler;
    }

    private static final class DefaultRequiresCsrfMatcher implements RequestMatcher {
        private final HashSet<String> allowedMethods;

        private DefaultRequiresCsrfMatcher() {
            this.allowedMethods = new HashSet(Arrays.asList("GET", "HEAD", "TRACE", "OPTIONS"));
        }

        public boolean matches(HttpServletRequest request) {
            return !this.allowedMethods.contains(request.getMethod());
        }
    }
}
Through source code analysis, we can know our own authentication page. The request method is POST, but it does not carry a token. Therefore, there is an exception of insufficient 403 permission. There are generally two ways to deal with this problem (the next section will expand in detail):
Method 1: disable csrf directly (not recommended, because enabling csrf helps the security of the system).
Method 2: carry the token request on the authentication page.
4.2.2. Handling 403 exceptions with insufficient permissions
(1) Disable csrf directly (not recommended), that is, add a configuration to disable crsf protection in the spring-security.xml file.
<!--Disable csrf Protection mechanism (written in security:http (in label)-->
<security:csrf disabled="true"/>
(2) Carry the token request on the authentication page
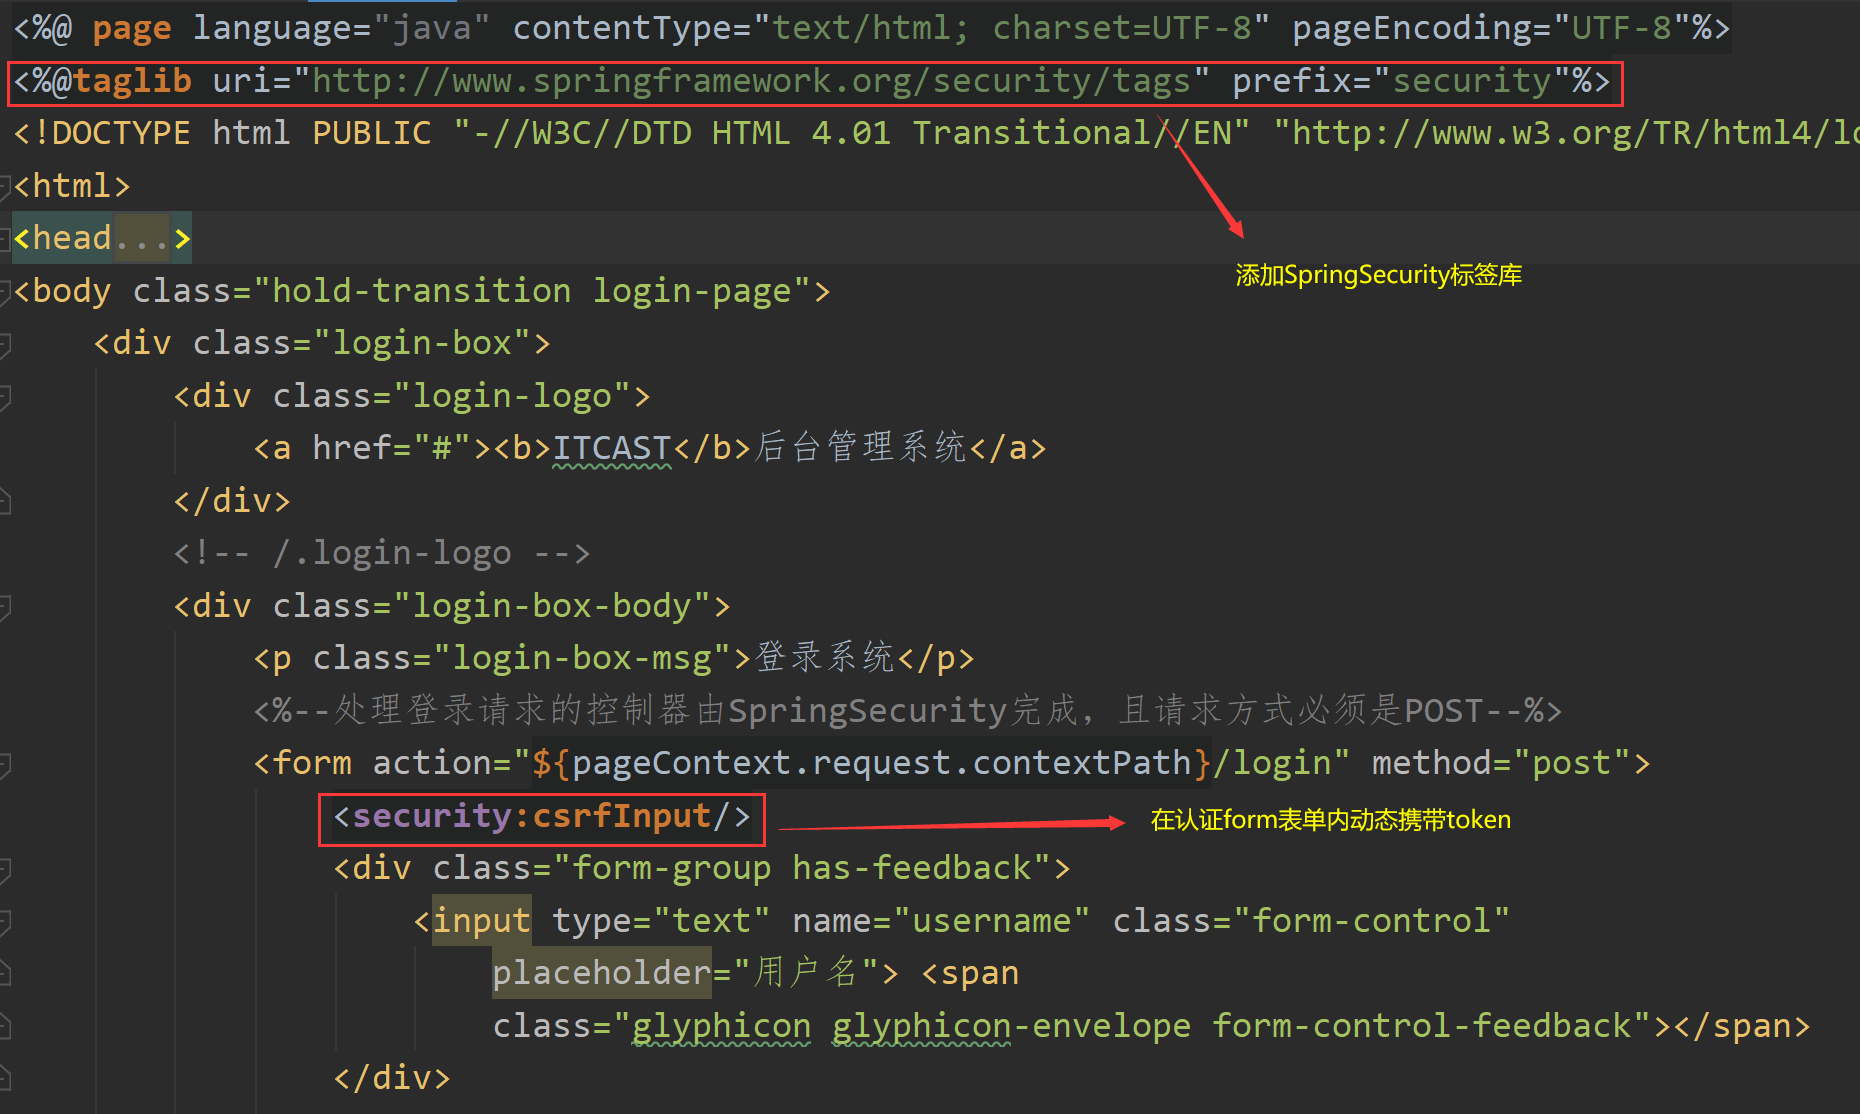
4.3. Spring security logoff function
(1) Configure the exit login information in spring-security.xml (this has been configured before)
<!--Configure exit login information-->
<security:logout logout-url="/logout"
                 logout-success-url="/login.jsp"/>
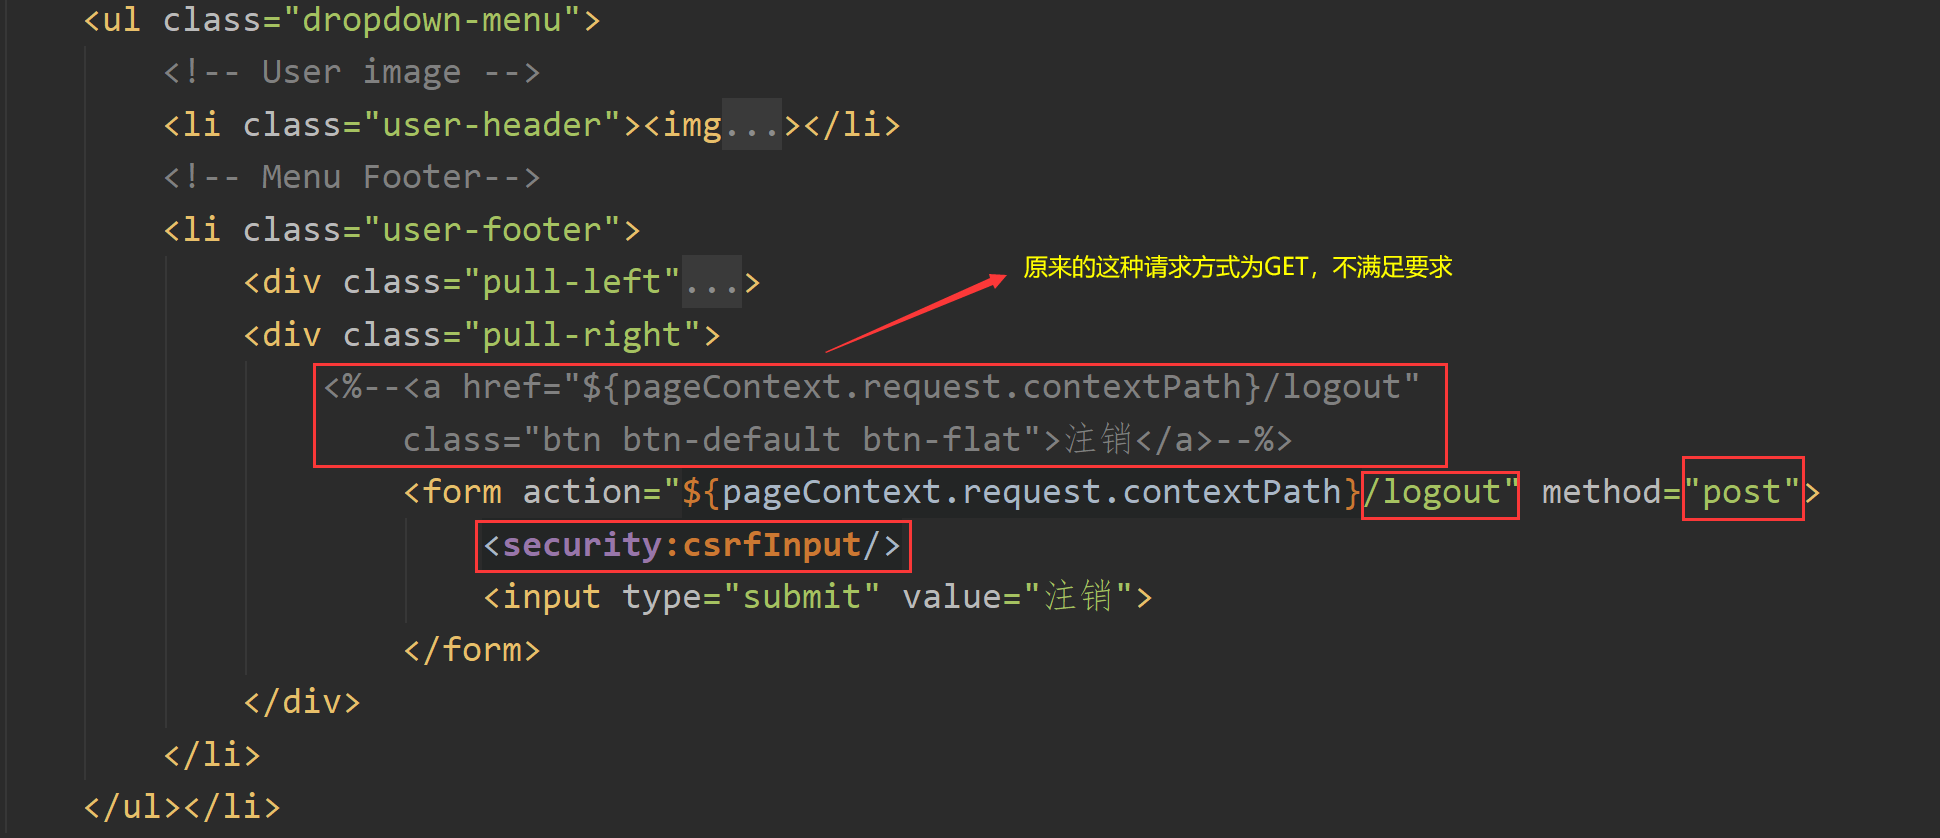
(2) Modify the front-end page related to logout, that is, add spring security tag library, use POST request and dynamically carry token (once csrf protection function is enabled, logout processor only supports POST request mode!).
5. Spring security -- using database data to complete authentication
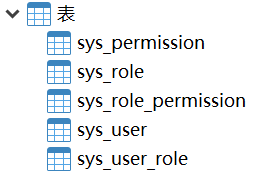
The relevant tables in the current database are shown in the following figure:
5.1. Certification process analysis
To analyze the specific authentication process of spring security, you can start with the UsernamePasswordAuthenticationFilter, which is mainly responsible for authentication (it is inconvenient to expand in detail here).
5.2. Preliminary realization of authentication function
5.2.1. User defined UserService interface inherits UserDetailsService
UserDetailsService is internal to spring security. If you want spring security to know a custom UserService, you just need to let the UserService interface inherit UserDetailsService and rewrite the corresponding method.
package com.itheima.service;

import com.itheima.domain.SysUser;
import org.springframework.security.core.userdetails.UserDetailsService;

import java.util.List;
import java.util.Map;

//The custom UserService inherits the UserDetailsService inside spring security
public interface UserService extends UserDetailsService {

    public void save(SysUser user);

    public List<SysUser> findAll();

    public Map<String, Object> toAddRolePage(Integer id);

    public void addRoleToUser(Integer userId, Integer[] ids);
}
5.2.2. Write loadUserByUsername business
After the UserService interface inherits UserDetailsService, override the loadUserByUsername method in UserServiceImpl.
/**
 * Certification service
 * @param username The user name entered by the user in the browser
 * @return UserDetails Is the user object of springsecurity itself
 * @throws UsernameNotFoundException
 */
@Override
public UserDetails loadUserByUsername(String username) throws UsernameNotFoundException {
    try {
        //Query according to user name
        SysUser sysUser = userDao.findByName(username);
        if(sysUser==null){
            return null;
        }
        //authorities: the permissions of the current user
        List<SimpleGrantedAuthority> authorities = new ArrayList<>();
        //Get currently owned roles
        List<SysRole> roles = sysUser.getRoles();
        for (SysRole role : roles) {
            authorities.add(new SimpleGrantedAuthority(role.getRoleName()));
        }
        /*
            1.{noop}Spring security will consider the following password as the original text.
            2.The browser now has the password entered by the user, and then compare it with "{noop}"+sysUser.getPassword()
         */
        UserDetails userDetails = new User(sysUser.getUsername(), "{noop}"+sysUser.getPassword(), authorities);
        return userDetails;
    }catch (Exception e){
        e.printStackTrace();
        //When null is returned, spring security will consider the authentication failed!
        return null;
    }
}
5.2.3. Specify the business object used for authentication in spring-security.xml
<!--
	1.set up Spring Security Source of authentication user information
	2.because UserServiceImpl Has been registered to Spring Container, when referencing its object name, it defaults to the first lowercase letter of the class name
-->
<security:authentication-manager>
    <security:authentication-provider user-service-ref="userServiceImpl">
    </security:authentication-provider>
</security:authentication-manager>
Finally, test:
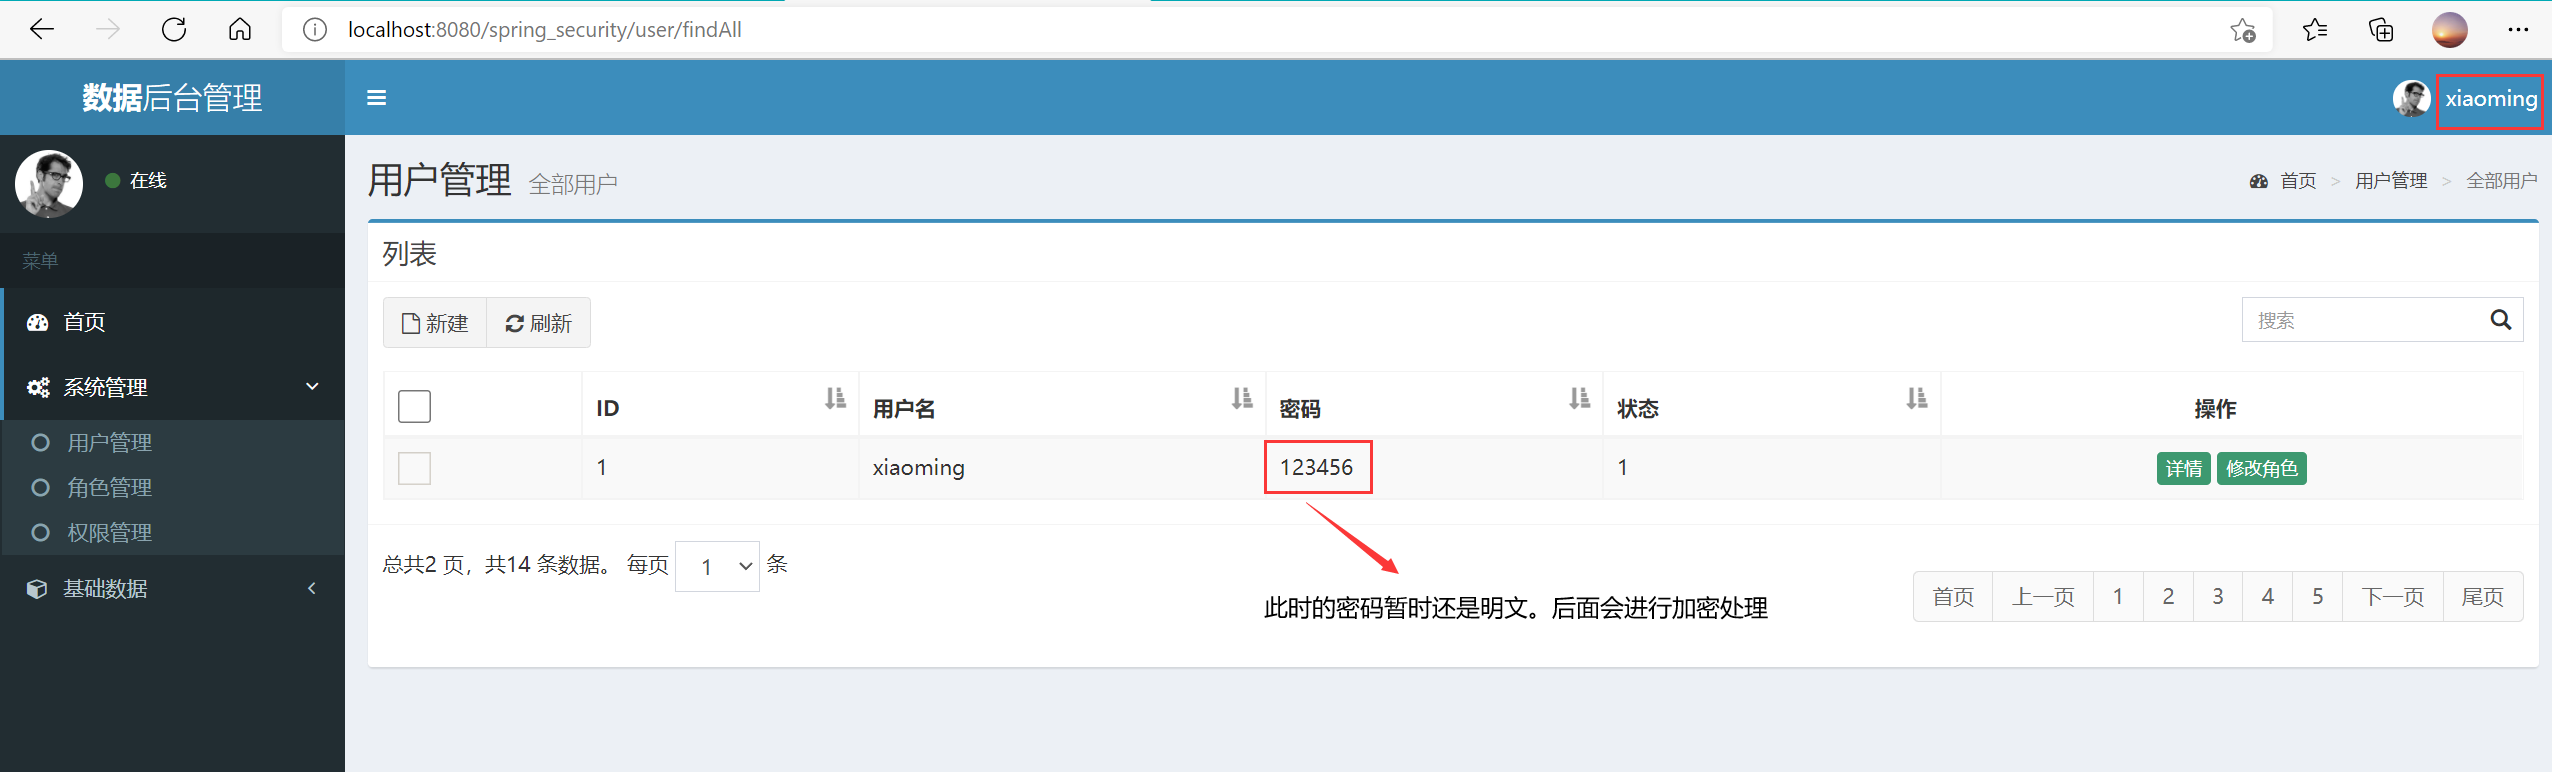
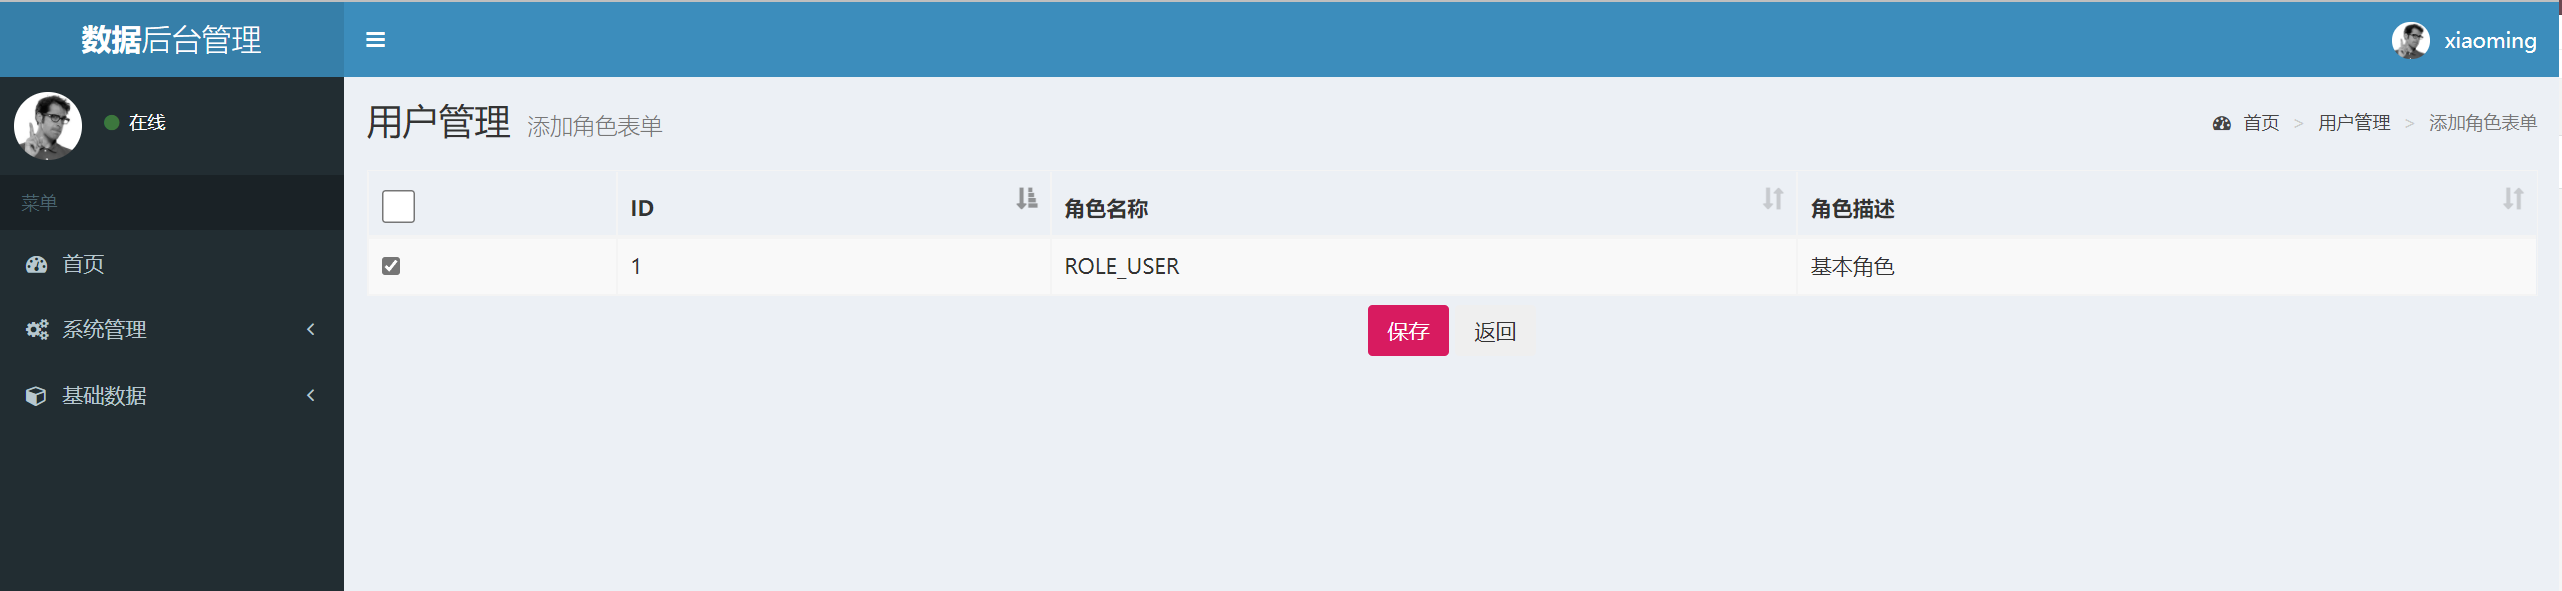
It should be noted that if you want to modify the user's role information, you also need to add spring security tag library, use POST request and dynamically carry token on the corresponding page.
5.3. Encryption authentication
5.3.1. Provide encrypted objects in spring-security.xml
<!--Put the encrypted object into IoC In container-->
<bean id="passwordEncoder" class="org.springframework.security.crypto.bcrypt.BCryptPasswordEncoder"></bean>
<!--set up Spring Security Source of authentication user information-->
<security:authentication-manager>
    <security:authentication-provider user-service-ref="userServiceImpl">
        <security:password-encoder ref="passwordEncoder"/>
    </security:authentication-provider>
</security:authentication-manager>
5.3.2. Modification of certification method
That is, remove {noop} from loadUserByUsername()
@Override
public UserDetails loadUserByUsername(String username) throws UsernameNotFoundException {
    try {
        //Query according to user name
        SysUser sysUser = userDao.findByName(username);
        if(sysUser==null){
            return null;
        }
        //authorities: the permissions of the current user
        List<SimpleGrantedAuthority> authorities = new ArrayList<>();
        //Get currently owned roles
        List<SysRole> roles = sysUser.getRoles();
        for (SysRole role : roles) {
            authorities.add(new SimpleGrantedAuthority(role.getRoleName()));
        }
        /*
            1.{noop}Spring security will consider the following password as the original text.
            2.The browser now has the password entered by the user, and then compare it with "{noop}"+sysUser.getPassword()
         */
        UserDetails userDetails = new User(sysUser.getUsername(), sysUser.getPassword(), authorities);
        return userDetails;
    }catch (Exception e){
        e.printStackTrace();
        //Authentication failed!
        return null;
    }
}
5.3.3. Modifying and adding users
That is, the user password is encrypted and then stored in the database
//Inject encrypted object
@Autowired
private BCryptPasswordEncoder passwordEncoder;

@Override
public void save(SysUser user) {
    //Encrypt user password
    user.setPassword(passwordEncoder.encode(user.getPassword()));
    userDao.save(user);
}
5.3.4. Manually change the user password in the database to the encrypted ciphertext
You can write a test case to obtain the ciphertext encrypted by the plaintext password, and finally write it to the database.

6. Set user status
6.1. Source code analysis
In the User authentication service, when encapsulating the User object, spring security selects the construction method of three construction parameters. In fact, there is another construction method:
public User(String username, String password, boolean enabled, boolean accountNonExpired,
			boolean credentialsNonExpired, boolean accountNonLocked, Collection<?  extends GrantedAuthority>
authorities) {
	if (username != null && !"".equals(username) && password != null) {
		this.username = username;
		this.password = password;
		this.enabled = enabled;
		this.accountNonExpired = accountNonExpired;
		this.credentialsNonExpired = credentialsNonExpired;
		this.accountNonLocked = accountNonLocked;
		this.authorities = Collections.unmodifiableSet(sortAuthorities(authorities));
	} else {
		throw new IllegalArgumentException("Cannot pass null or empty values to constructor");
	}
}
It can be seen that there are four Boolean construction parameters in this construction method. In fact, in the construction method of the three construction parameters we use, these four Boolean values are assigned to true by default. The specific meanings of these four Boolean values are as follows:
| boolean enabled | Available |
|---|---|
| boolean accountNonExpired | Is the account invalid |
| boolean credentialsNonExpired | Is the secret invalid |
| boolean accountNonLocked | Is the account locked |
6.2. Judge the status of the authenticated user
The above four parameters must be true at the same time to pass the authentication. In order to save time, only the first Boolean value is tested here. The modified authentication business code is as follows:
/**
* Certification service
 * @param username The user name entered by the user in the browser
 * @return UserDetails Is the user object of springsecurity itself
 * @throws UsernameNotFoundException
 */
@Override
public UserDetails loadUserByUsername(String username) throws UsernameNotFoundException {
    try {
        //Query according to user name
        SysUser sysUser = userDao.findByName(username);
        if(sysUser==null){
            return null;
        }
        //authorities: the permissions of the current user
        List<SimpleGrantedAuthority> authorities = new ArrayList<>();
        //Get currently owned roles
        List<SysRole> roles = sysUser.getRoles();
        for (SysRole role : roles) {
            authorities.add(new SimpleGrantedAuthority(role.getRoleName()));
        }
        /*
            1.{noop}Spring security will consider the following password as the original text.
            2.The browser now has the password entered by the user, and then compare it with "{noop}"+sysUser.getPassword()
         */
        UserDetails userDetails = new User(sysUser.getUsername(),
                sysUser.getPassword(),
                sysUser.getStatus()==1,
                true,
                true,
                true,
                authorities);
        return userDetails;
    }catch (Exception e){
        e.printStackTrace();
        //Authentication failed!
        return null;
    }
}
At this moment, only users with user status of 1 can successfully pass the authentication! (the user table structure is shown in the figure below)

7.remember me
7.1. Remember my functional principle analysis
public abstract class AbstractRememberMeServices implements RememberMeServices, InitializingBean, LogoutHandler {
	public final void loginSuccess(HttpServletRequest request, HttpServletResponse response, Authentication successfulAuthentication) {
		// Judge whether to check remember me
		// Note: Click this.parameter to enter the private string parameter = "remember me" above;
		if (!this.rememberMeRequested(request, this.parameter)) {
			this.logger.debug("Remember-me login not requested."); }
		else {
			//If checked, the onLoginSuccess method is called
			this.onLoginSuccess(request, response, successfulAuthentication);
		}
	}
}
Click the rememberMeRequested method in the above if judgment, which is still in the current class:
protected boolean rememberMeRequested(HttpServletRequest request, String parameter) {
	if (this.alwaysRemember) {
		return true;
	} else {
		// From the above word, the value of parameter is "remember me"
		// That is, the attribute name submitted by this function must be "remember me"
		String paramValue = request.getParameter(parameter);
		// Here we can see that the attribute values can be: true, on, yes, 1.
		if (paramValue != null && (paramValue.equalsIgnoreCase("true") || paramValue.equalsIgnoreCase("on") || paramValue.equalsIgnoreCase("yes") || paramValue.equals("1"))) {
		//true can be returned only when the above conditions are met
		return true;
		} else {
		if (this.logger.isDebugEnabled()) {
			this.logger.debug("Did not send remember-me cookie (principal did not set parameter '" + parameter + "')"); }
			return false;
		}
	}
}
If the above method returns true, it means that the remember me option is checked on the page. Continue to find the onLoginSuccess method of PersistentTokenBasedRememberMeServices along the called method:
public class PersistentTokenBasedRememberMeServices extends AbstractRememberMeServices {
	protected void onLoginSuccess(HttpServletRequest request, HttpServletResponse response, Authentication successfulAuthentication) {
		// Get user name
        String username = successfulAuthentication.getName();
        this.logger.debug("Creating new persistent login for user " + username);
        //Create and remember my token
        PersistentRememberMeToken persistentToken = new PersistentRememberMeToken(username, this.generateSeriesData(), this.generateTokenData(), new Date());

        try {
        	//Persist token to database
            this.tokenRepository.createNewToken(persistentToken);
            //Write the token to the browser's Cookie
            this.addCookie(persistentToken, request, response);
        } catch (Exception var7) {
            this.logger.error("Failed to save persistent token ", var7);
        }
    }
}
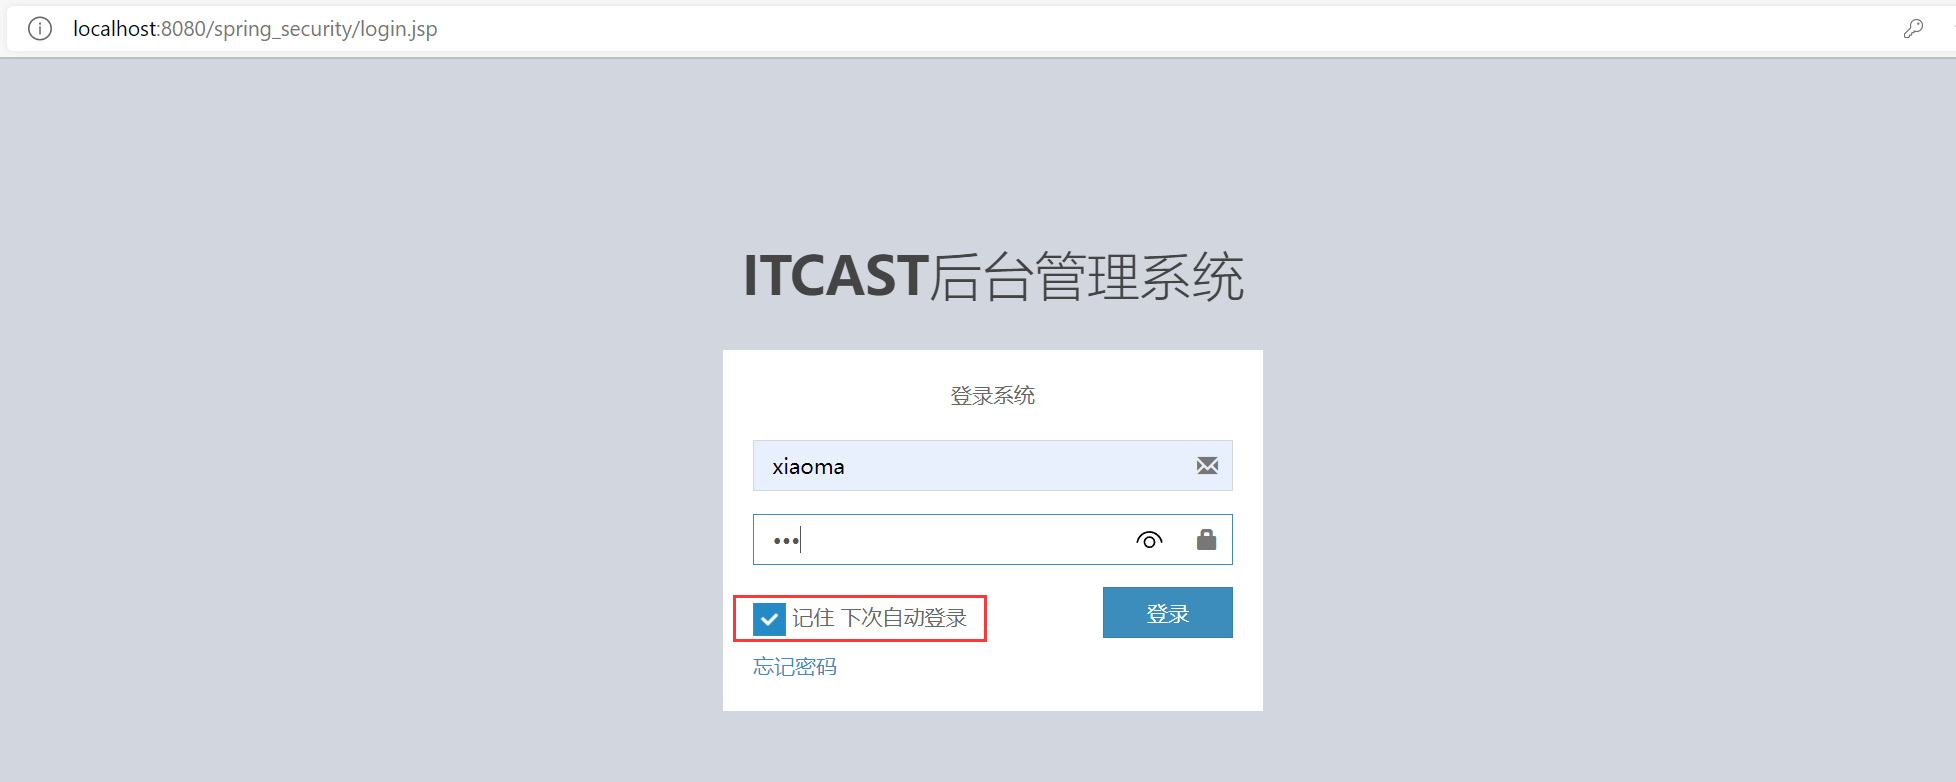
7.2. Remember my function page code
<form action="${pageContext.request.contextPath}/login" method="post">
	<security:csrfInput/>
	<div class="form-group has-feedback">
		<input type="text" name="username" class="form-control"
			placeholder="user name"> <span
			class="glyphicon glyphicon-envelope form-control-feedback"></span>
	</div>
	<div class="form-group has-feedback">
		<input type="password" name="password" class="form-control"
			placeholder="password"> <span
			class="glyphicon glyphicon-lock form-control-feedback"></span>
	</div>
	<div class="row">
		<div class="col-xs-8">
			<div class="checkbox icheck">
				<!--
					1.name The value of the property must be remember-me
					2.value The value of the property must be true,on,yes Or 1
				-->
				<label><input type="checkbox" name="remember-me" value="true"> Remember to log in automatically next time</label>
			</div>
		</div>
		<!-- /.col -->
		<div class="col-xs-4">
			<button type="submit" class="btn btn-primary btn-block btn-flat">Sign in</button>
		</div>
		<!-- /.col -->
	</div>
</form>
7.3. Turn on the remember me filter
Enable the remember me filter in spring-security.xml:
<!--open remember me Filters, setting token The storage time is 60 seconds (at security:http (in label)-->
<security:remember-me token-validity-seconds="60"/>
Note: the function in RememberMeAuthenticationFilter is very simple. It will automatically judge whether to authenticate when opening the browser. If not, call autoLogin for automatic authentication.
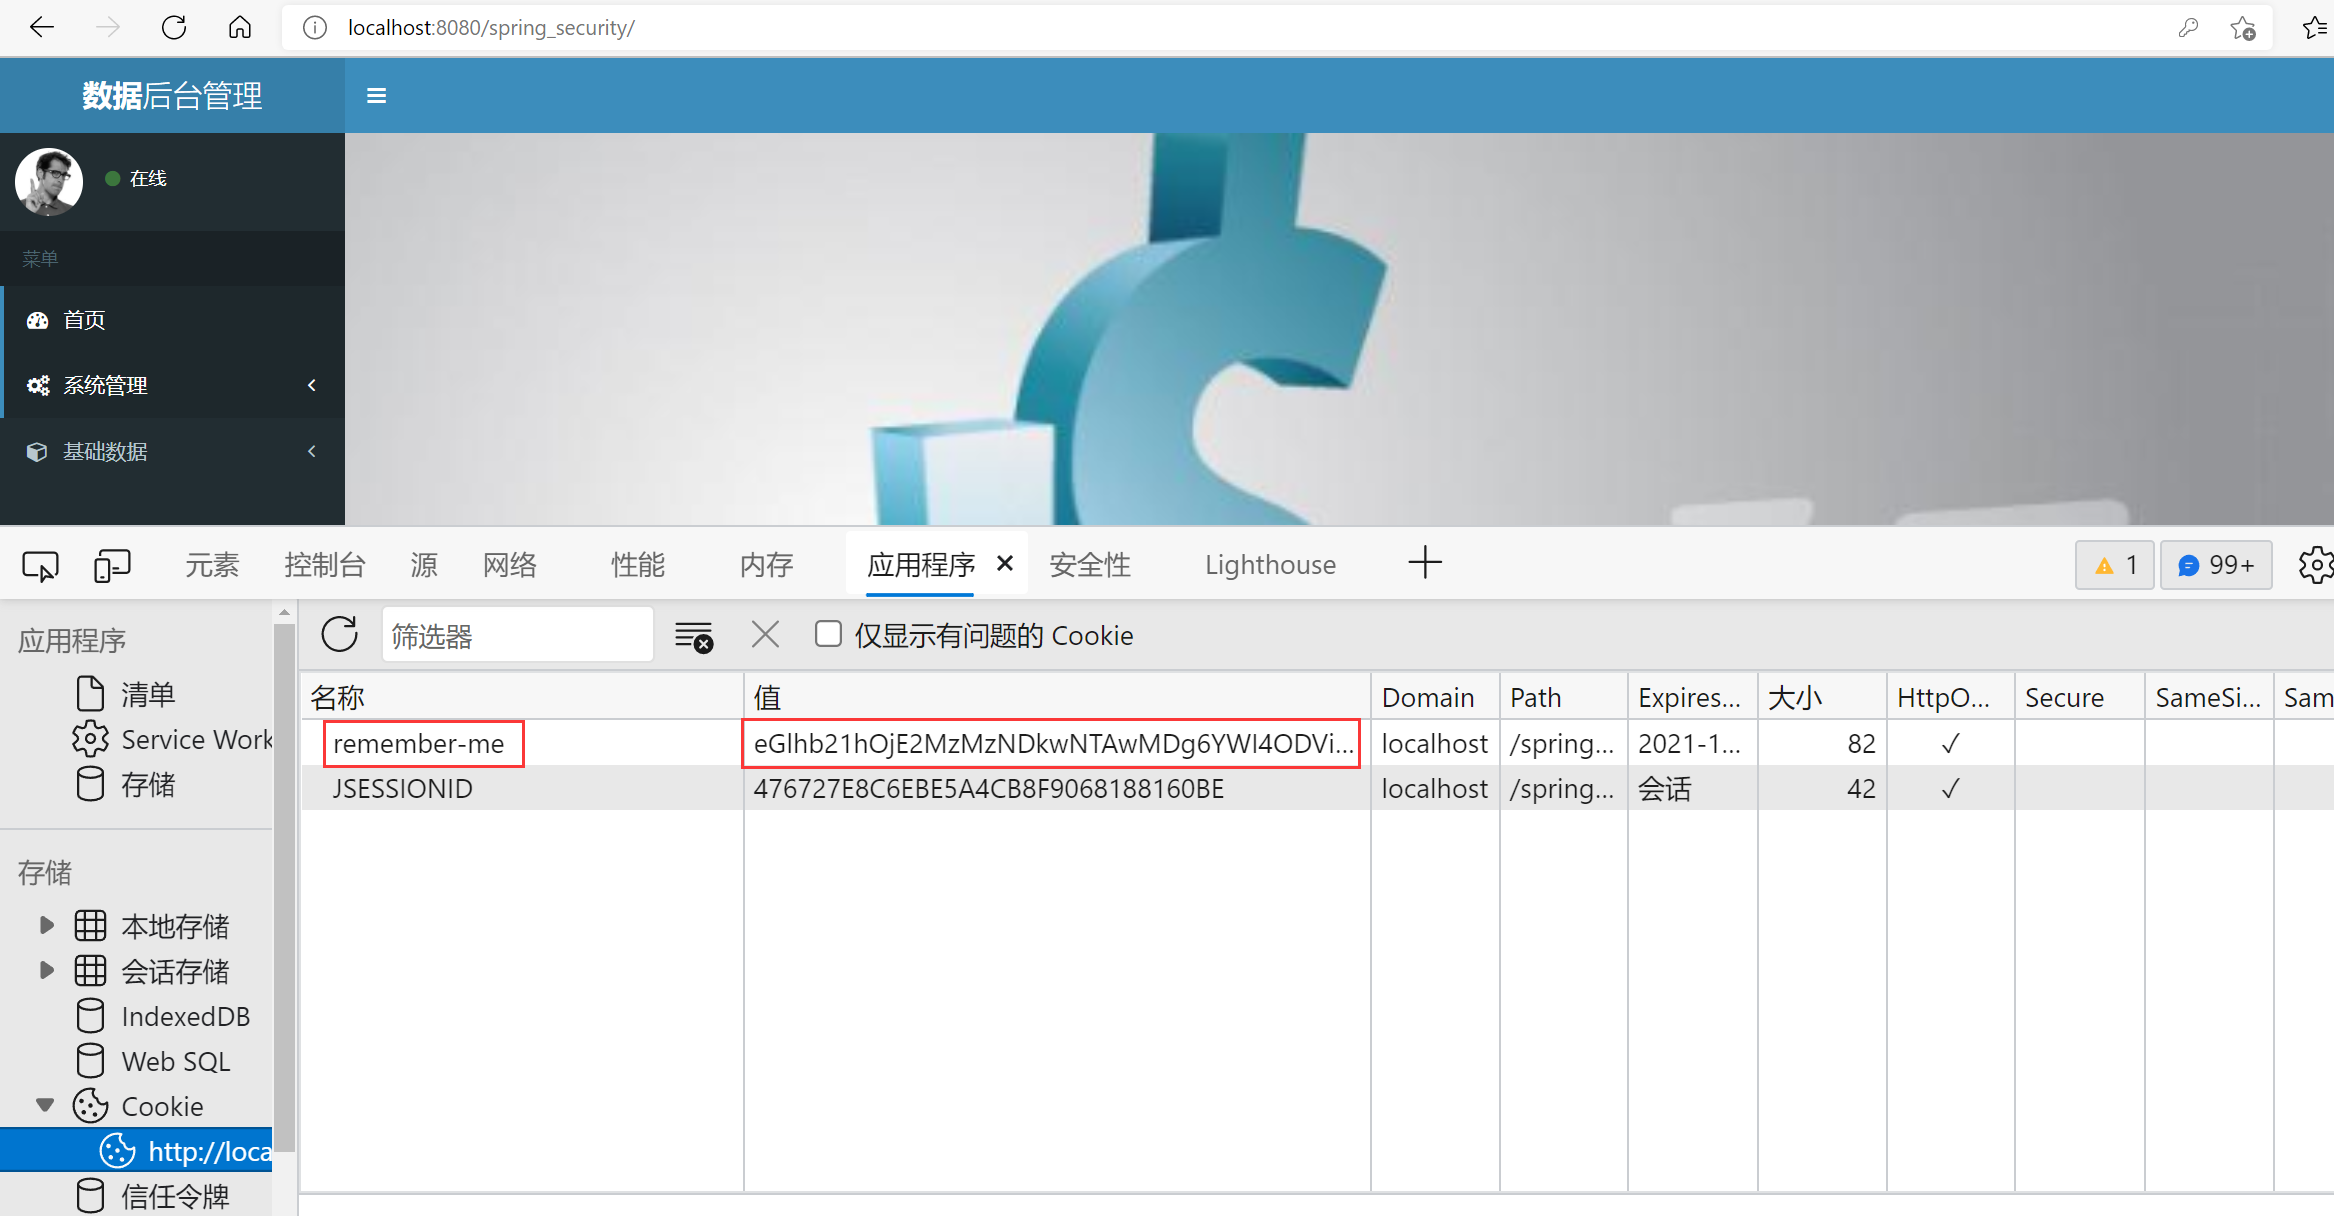
Select the remember check box when logging in. If you close the browser and open it again within the valid storage time of the token, you can directly enter the background homepage address without logging in.
7.4.remember me security analysis
(1) Remember, my function is convenient, but the security is worrying. After all, cookies are stored on the client, which is easy to steal, and the value of cookies is also related to sensitive data such as user names and passwords. Although encrypted, it is not safe to store sensitive information on the client. Then it is necessary to remind those who like to use this function to manually log out of the website and clear the authentication information.
(2) In addition, SpringSecurity also provides another relatively more secure implementation mechanism of remember me, that is, only a meaningless encryption string (independent of sensitive data such as user name and password) is saved in the client's cookie, and then the corresponding relationship between the encryption string and user information is saved in the database. During automatic login, the encryption string in the cookie is used, Verify in the database. If it passes, the automatic login is considered as passed.
7.5. Persistent remember me information
(1) Create a card named persistent_logins table. Note that the name and fields of this table are officially specified. Do not modify them.
CREATE TABLE `persistent_logins` (
	`username` varchar(64) NOT NULL,
	`series` varchar(64) NOT NULL,
	`token` varchar(64) NOT NULL,
	`last_used` timestamp NOT NULL,
	PRIMARY KEY (`series`)
) ENGINE=InnoDB DEFAULT CHARSET=utf8
(2) Modify the previous configuration in spring-security.xml:
<!--
	open remember me filter
	data-source-ref="dataSource" Specify database connection pool
	token-validity-seconds="60" set up token The storage time is 60 seconds and can be omitted
 	remember-me-parameter="remember-me" The specified parameter name can be omitted
-->
<security:remember-me data-source-ref="dataSource"
						token-validity-seconds="60"
						remember-me-parameter="remember-me"/>
(3) After testing again, it is found that there is one more record in the table, that is, the relevant information of remember me is persisted in the database, which is relatively safer.

7.5. Display current authentication user name
In header.jsp (add Spring Security tag library first), find the picture on the far right of the page header and add the following information:
<span class="hidden-xs">
	<security:authentication property="name" />
</span>
<!--
	perhaps
	<span class="hidden-xs">
		<security:authentication property="principal.username" />
	</span>
-->
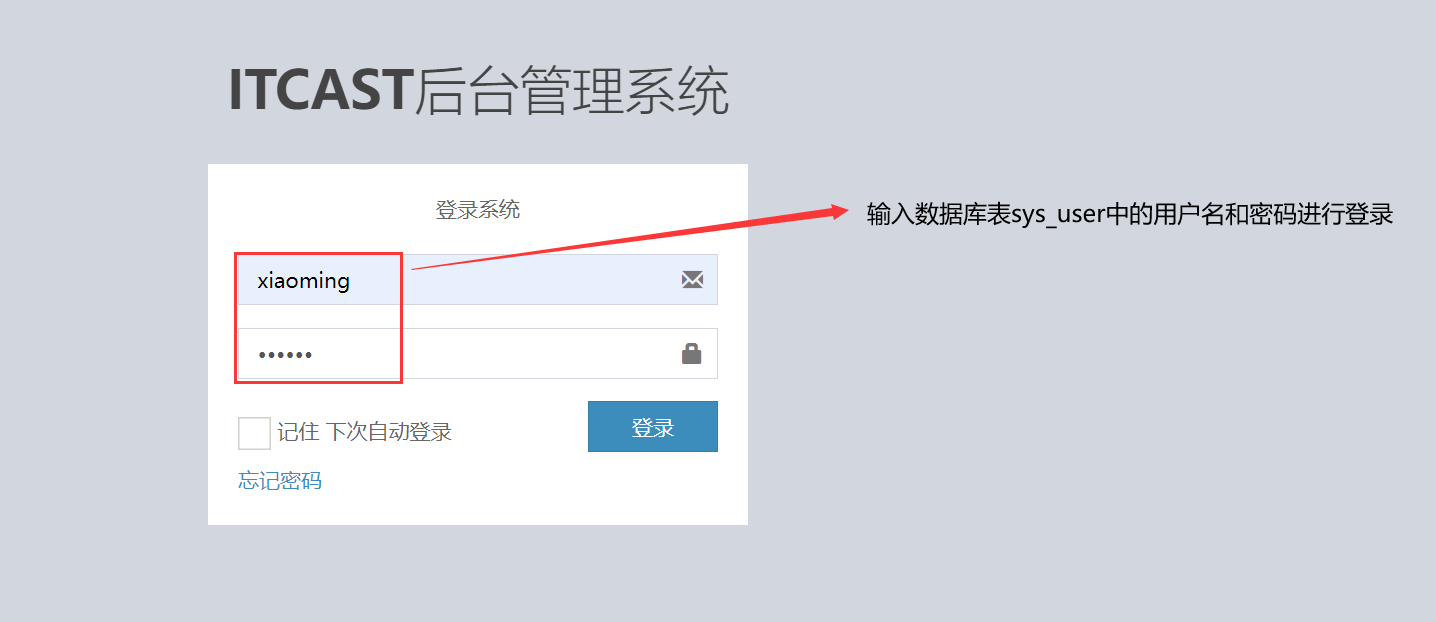
8. Authorized operation
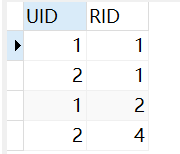
The authorization operation here refers to that for users with different permissions, the operations (or pages) that can be performed by entering the background management system are different. For example, now in the database table sys_ There are two simulated users xiaoming and xiaoma in user. xiaoming can manage products in the background, but can't manage orders. xiaoma is just the opposite. Now it is necessary to realize that different users can see different function menus when entering the background system.
8.1. Preliminary preparations
In order to simulate the authorization operation, two business functions are temporarily written, and the processor code is as follows:
//ProductController
@Controller
@RequestMapping("/product")
public class ProductController {
	@RequestMapping("/findAll")
	public String findAll(){
		return "product-list";
	}
}

//OrderController
@Controller
@RequestMapping("/order")
public class OrderController {
	@RequestMapping("/findAll")
	public String findAll(){
		return "order-list";
	}
}
Corresponding function menu in aside.jsp page:
<ul class="treeview-menu">
    <li id="system-setting"><a
            href="${pageContext.request.contextPath}/product/findAll">
        <i class="fa fa-circle-o"></i> product management
    </a></li>
    <li id="system-setting"><a
            href="${pageContext.request.contextPath}/order/findAll">
        <i class="fa fa-circle-o"></i> Order management
    </a></li>
</ul>
8.2. Dynamic display menu
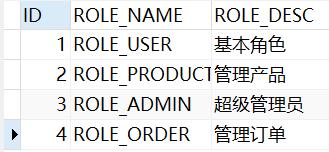
(1) First, prepare relevant roles for users xiaoming and xiaoma in the database

(2) First add the label Library of Spring Security in aside.jsp, and then modify the two function menus of product management and order management as follows:
<ul class="treeview-menu">
    <%--Only have ROLE_PRODUCT or ROLE_ADMIN Role users can see the function menu of product management--%>
    <security:authorize access="hasAnyRole('ROLE_PRODUCT','ROLE_ADMIN')">
        <li id="system-setting"><a
                href="${pageContext.request.contextPath}/product/findAll">
            <i class="fa fa-circle-o"></i> product management
        </a></li>
    </security:authorize>

    <%--Only have ROLE_ORDER or ROLE_ADMIN Role users can see the function menu of order management--%>
    <security:authorize access="hasAnyRole('ROLE_ORDER','ROLE_ADMIN')">
        <li id="system-setting"><a
                href="${pageContext.request.contextPath}/order/findAll">
            <i class="fa fa-circle-o"></i> Order management
        </a></li>
    </security:authorize>
</ul>
(3) Log in with xiaoming and xiaoma as user names respectively

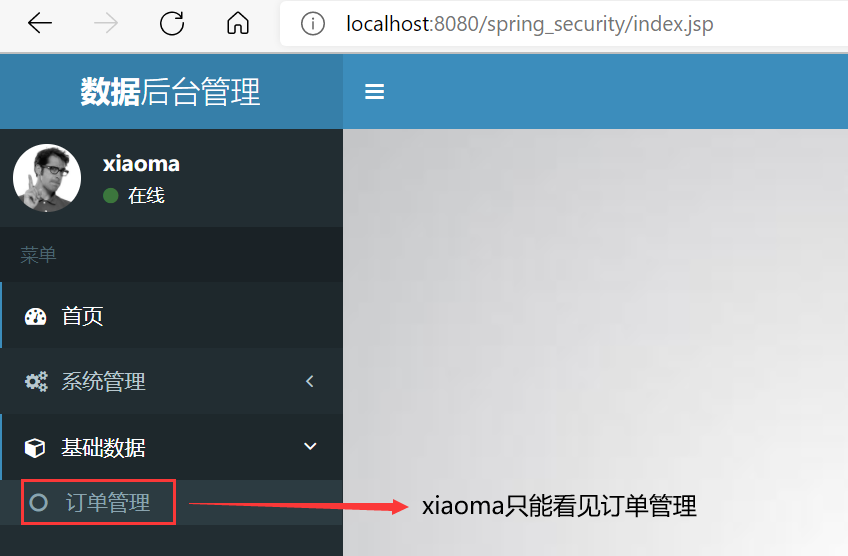
Although it seems that xiaoming and xiaoma have been authorized successfully from the display effect of the function menu, they have not. For example, you can try to directly access the http request address of the product. At this time, you find that xiaoma, which originally could not manage the product, can operate directly!
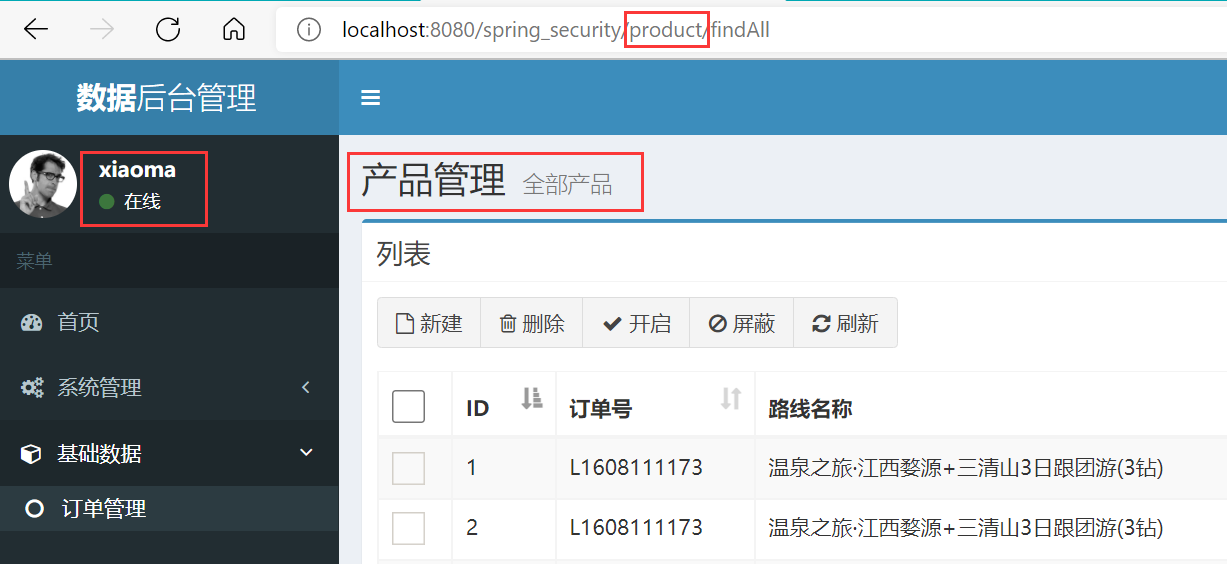
Therefore, xiaoma can actually operate the product module, but the system does not display the product functions to xiaoma, that is, the display of page dynamic menu is only for user experience and does not really control permissions!
8.3. Real authorized operation
Note: Spring security can control the access rights of classes or methods through annotation. Annotations need corresponding annotation support. If the annotation is placed in the controller class, the corresponding annotation support should be placed in the mvc configuration file, because the controller class is scanned and created by the mvc configuration file. Similarly, the annotation is placed in the service class, and the corresponding annotation support should be placed in the spring configuration file. Since we are now simulating business operations and have no service business code, we put the annotation in the controller class.
(1) Enable annotation support for authorization
Enable the annotation support for authorization in the spring MVC configuration file spring-mvc.xml
<!--
    Enable annotation support for permissions:
    secured-annotations="enabled": SpringSecurity Internal permission control annotation switch
    pre-post-annotations="enabled": Spring Annotation switch for specified permission control
    jsr250-annotations="enabled": open java250 Annotation support
-->
<security:global-method-security
        secured-annotations="enabled"
        pre-post-annotations="enabled"
        jsr250-annotations="enabled"/>
(2) Add annotations on corresponding classes or methods supported by annotations
//ProductController
//Indicates that the current user needs ROLE_PRODUCT or ROLE_ADMIN can access this method
//@Secured ({"role_product", "role_admin"}) / / Notes internally developed by springsecurity
//@RolesAllowed({"ROLE_PRODUCT","ROLE_ADMIN"})//jsr250 annotation
@PreAuthorize("hasAnyAuthority('ROLE_PRODUCT','ROLE_ADMIN')")//spring el expression annotation
@RequestMapping("/findAll")
public String findAll(){
    return "product-list";
}

//OrderController
//Indicates that the current user needs ROLE_ORDER or role_ The admin role can access this method
@Secured({"ROLE_ORDER","ROLE_ADMIN"})
@RequestMapping("/findAll")
public String findAll(){
    return "order-list";
}
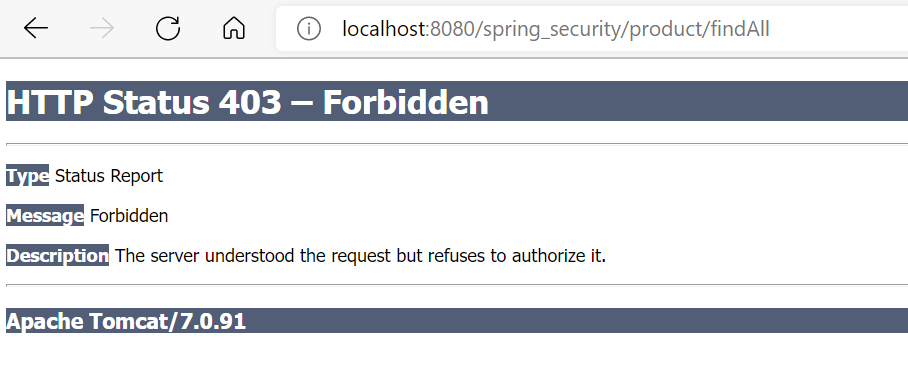
At this time, log in with xiaoma as the user name, and then directly access the http request address of the product. A prompt of insufficient permission will appear! This shows that the authorization has really succeeded.
8.4. Exception handling for insufficient authority
Through the above example, we also found that 403 pages appear every time the permission is insufficient, which is very unfriendly to the user's visual experience, so we should find a way to deal with the exception, that is, jump to a relatively user-friendly and easy to understand page.
(1) Exception handling flow chart:
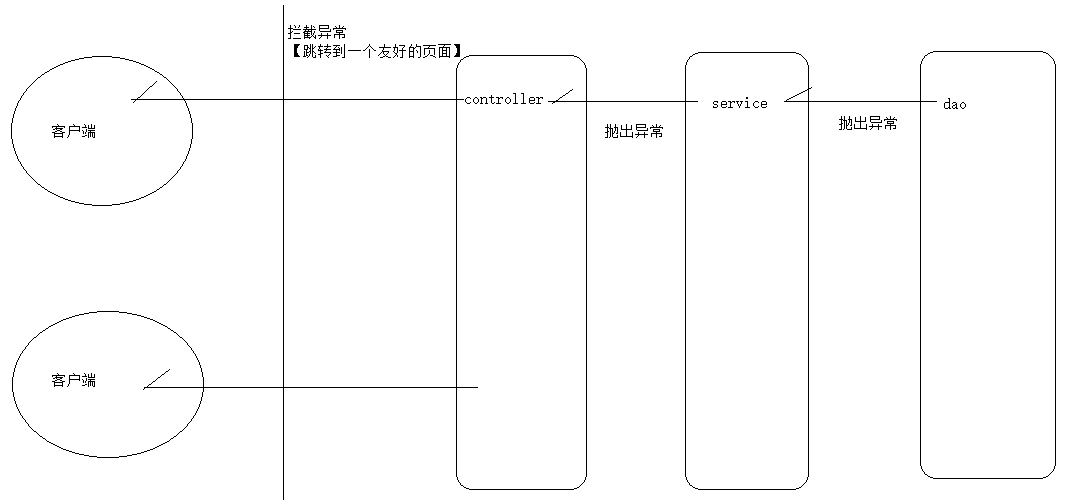
(2) Three common ways to handle exceptions
Method 1: process in the spring-security.xml configuration file
<!--When the exception of insufficient permission occurs, jump to 403.jsp Page (written in security:http (in label)-->
<security:access-denied-handler error-page="/403.jsp"/>
The disadvantage of this method is that it can only handle 403 exceptions with insufficient permissions, but can not handle other types of exceptions! (not recommended)

Method 2: process in web.xml
<!--Handling 403 insufficient permission exception-->
<error-page>
    <error-code>403</error-code>
    <location>/403.jsp</location>
</error-page>

<!--Handling 404 exceptions-->
<error-page>
    <error-code>404</error-code>
    <location>/404.jsp</location>
</error-page>
Method 3: write exception handler (recommended)
package com.itheima.controller.advice;

import org.springframework.security.access.AccessDeniedException;
import org.springframework.security.acls.model.NotFoundException;
import org.springframework.web.bind.annotation.ControllerAdvice;
import org.springframework.web.bind.annotation.ExceptionHandler;

@ControllerAdvice
public class HandlerControllerAdvice{

    //Jump to different pages for different exception types
    @ExceptionHandler(AccessDeniedException.class)
    public String handlerException(){
        return "redirect:/403.jsp";
    }

    @ExceptionHandler(NotFoundException.class)
    public String notFoundException(){
        return "redirect:/404.jsp";
    }

    @ExceptionHandler(RuntimeException.class)
    public String runtimeHandlerException(){
        return "redirect:/500.jsp";
    }
}