The article is long and comprehensive. Please read it patiently. It will be updated continuously in the future. Please pay attention to it.
I. What is Spring
- Spring is an open source, lightweight Java development framework
- Spring came into being to simplify enterprise application development. Using Spring, you can make simple JavaBean s implement functions that only Ejb could do before.
- Spring is a one-stop framework for JavaSE/EE
2. Advantages of Spring
-
Facilitate decoupling and simplify development
Spring is a big factory that can create and maintain all objects and dependencies, and it can be handed over to Spring management. -
AOP programming support
Spring provides aspect-oriented programming, which can easily realize the functions of privilege interception, operation monitoring and so on. -
Declarative transaction support
- Transaction management can be accomplished with configuration without manual programming -
Convenient program testing
Spring supports Junit4 and can easily test Spring programs through annotations -
Convenient integration of excellent frameworks
Spring does not exclude excellent open source frameworks, but provides direct support for excellent frameworks such as Struts, Hibernate, MyBatis, etc. -
Reduce the difficulty of using Java EE API
Spring provides encapsulation of some API s (JDBC, JavaMail, remote calls, etc.) that are very difficult to use in Java EE development, which greatly reduces the difficulty of their application.
3. Spring Modules
Refer to the following figure: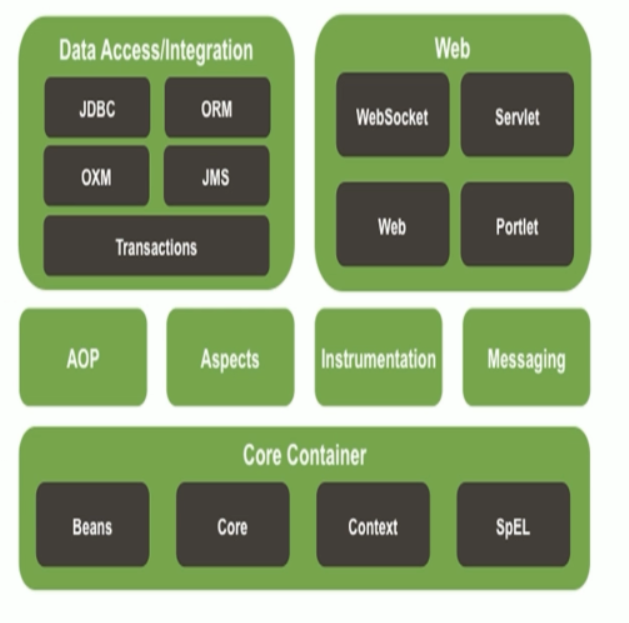
- Core Container is Spring's core container, and it's also the focus of what we'll talk about later.
In the next blog, I will say slowly (Spring version has reached 5.x on the market now, I currently use 4.24 version)
4. Implementation of the underlying principle of Spring IOC
- What is Spring IOC?
Inversion of Control, or "Inversion of Control", IOC is not a technology, but an idea, an important rule of object-oriented programming. It can guide us how to design loosely coupled and better programs.
Traditionally, we actively create dependent objects within classes, which results in high coupling between classes and is difficult to test. With IoC containers, the control of creating and searching dependent objects is given to the containers, and the containers inject composite objects, so the objects and objects are loosely coupled, which is also convenient. Testing is conducive to functional reuse and, more importantly, makes the whole architecture of the program very flexible. For more details about IOC, you can refer to it. Daniel's article (more than 20 million visitors). - Here we take the interface UserService and the implementation class UserService Impl as examples. In traditional development methods, we can use "UserService us = new UserService Impl ()" to create instance objects, and factory can be used for advanced points.
/*
**Establishing Factory Class to Complete Object Creation
*/

class FactoryBean{
    public static UserService getUs(){
       return new UserServiceImpl();
    }
}

UserService us = FactoryBean.getUs();
From the above we can see that UserService and its implementation classes are coupled before. After using factory classes, UserService and implementation classes are not directly coupled, but they are coupled with factory classes. That is to say, when we want to change the underlying implementation, we will not change **"UserService = FactoryBean". GetUs ();"** This line, but we need to change the factory code, or a bit of trouble, is there a way to do nothing?
At this point we can use factory + reflection + configuration file
/*To configure*/
<bean id="us" class="com.MtLi.UserServiceImpl"/>

/*factory*/
class FacrotyBean{
    public static Object getBean(String id){
    ...
    //It can parse the configuration file, get the corresponding implementation class according to id, and then reflect (generate an instance of this class)
    }
}
//This is Spring's idea of decoupling and an underlying principle of IOC.
To get a quick start on Spring, let's talk about a simple case
Quick Start Case of Spring IOC (Development Tool: IntelliJ IDEA 2018.2.4)
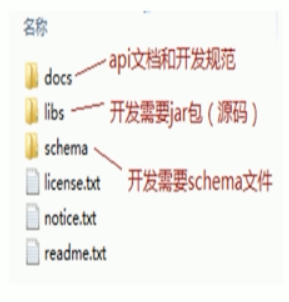
- First, we need to download Spring's development kit, which can be used in Download here After downloading, decompress it, put it in whatever disc character you like, and how to import it into our back. After decompression, it is shown as follows:
- Now let's create a Maven project (Maven is simply a project management tool that can easily manage the dependencies between projects). First, select a new project, select Maven, select Create from archetype (for the first time, the following content may be loaded a little longer), and then select the diagram. That one, and then the next step
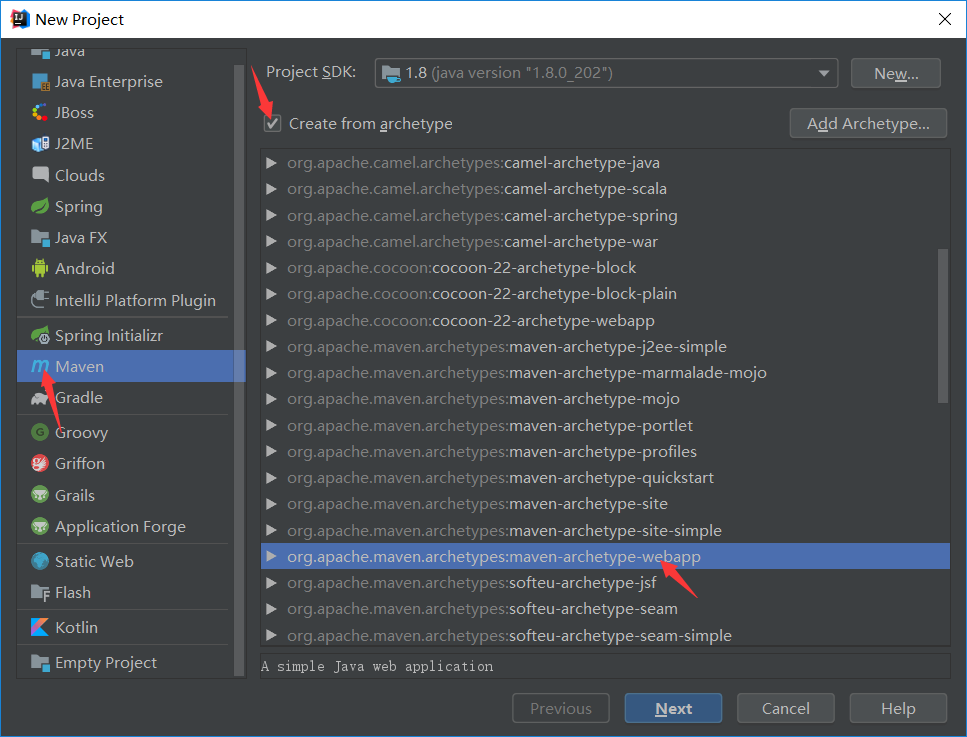
And then two of the items on this page are believed to be understandable by all of you.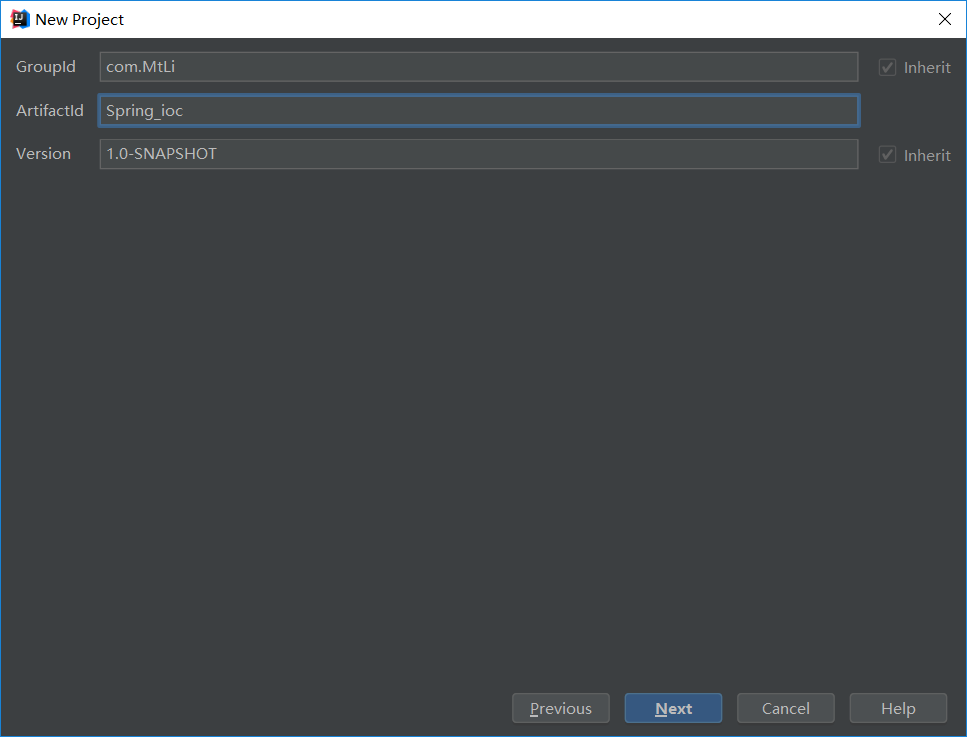
Next, the address of the configuration file and the address of the local warehouse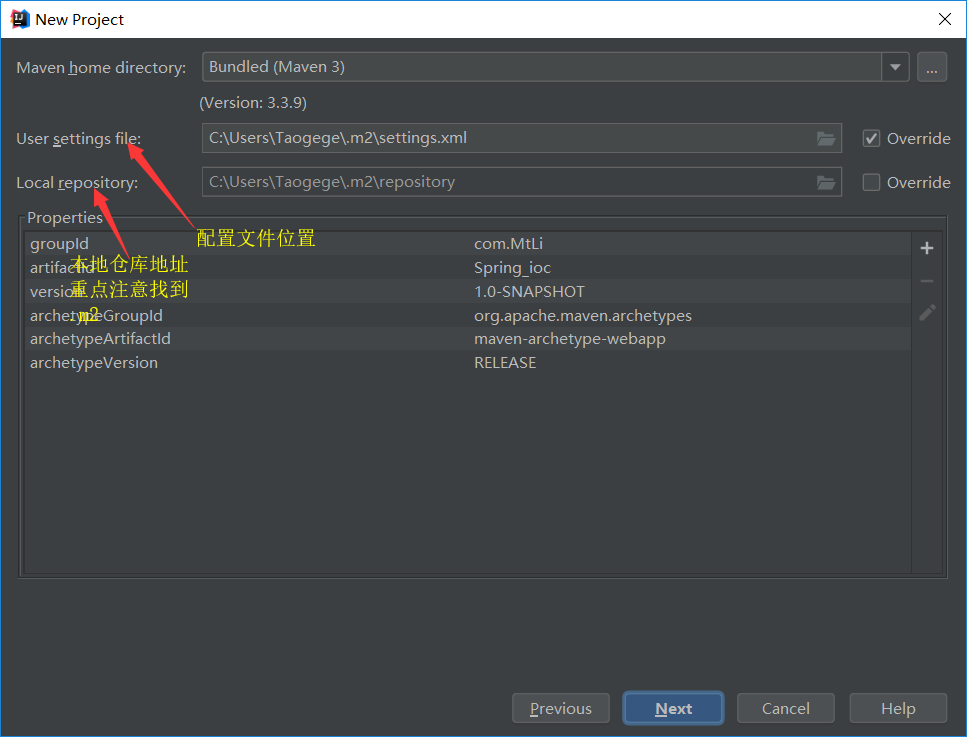
I'm using the Maven version of ide. If there is no configuration file in. m2, you can go to the location shown below and copy it to. m2, and then go on to the next step.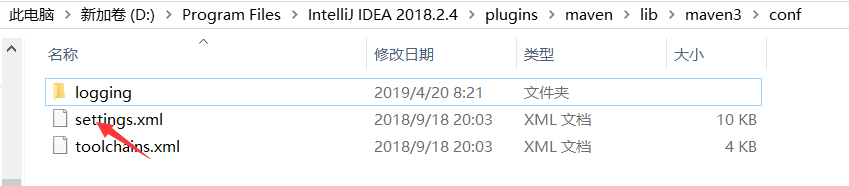
Project name, location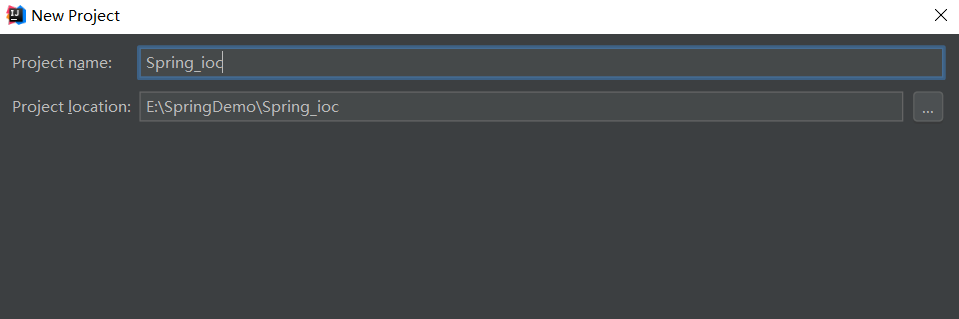
Click Finish, and then the ide starts to create. Maybe it will take some time. If it's still slow when it's created later, Baidu will solve it by itself. When it's finished, the following is true: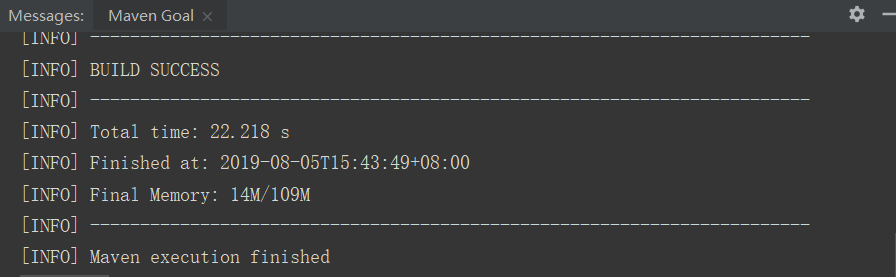
The project structure is shown as follows:
Some students may not have resource folders, and I didn't have them at first. Then they went to Moduls in the project structure and created a (right-click main, new folder, property change to resource folder):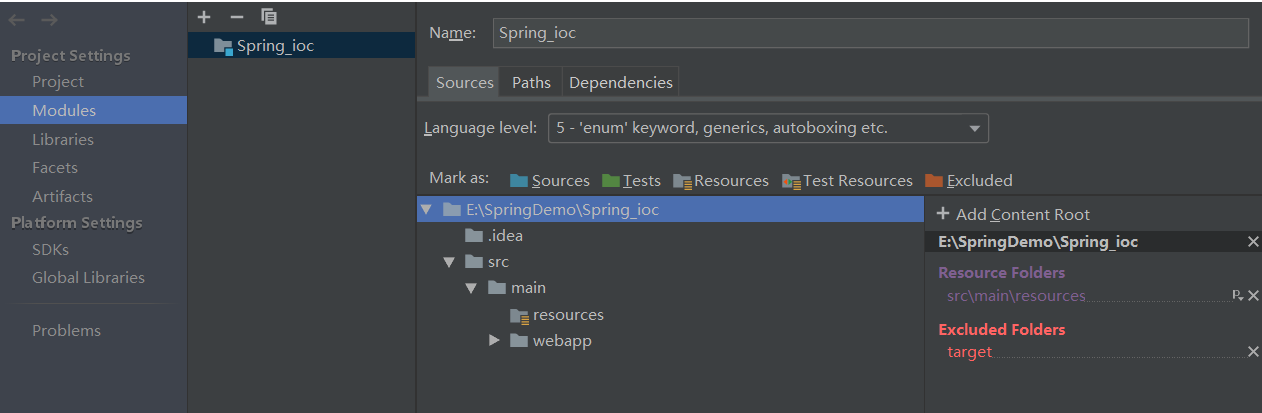
- Then we're going to import the jar package, open pom.xml, and if the "junit version number" on this page is red, see How to Solve the Remarking of junit Version Number I used version 4.12 to introduce the jar package, which is similar to the way junit introduced. Now I post the dependencies code in xml:
  <dependencies>
    <dependency>
      <groupId>junit</groupId>
      <artifactId>junit</artifactId>
      <version>4.12</version>
    </dependency>

    <dependency>
      <groupId>org.springframework</groupId>
      <artifactId>spring-core</artifactId>
      <version>4.2.4.RELEASE</version>
    </dependency>

    <dependency>
      <groupId>org.springframework</groupId>
      <artifactId>spring-context</artifactId>
      <version>4.2.4.RELEASE</version>
    </dependency>

    <dependency>
      <groupId>org.springframework</groupId>
      <artifactId>spring-beans</artifactId>
      <version>4.2.4.RELEASE</version>
    </dependency>

    <dependency>
      <groupId>org.springframework</groupId>
      <artifactId>spring-expression</artifactId>
      <version>4.2.4.RELEASE</version>
    </dependency>

    <dependency>
      <groupId>commons-logging</groupId>
      <artifactId>commons-logging</artifactId>
      <version>1.2</version>
    </dependency>

    <dependency>
      <groupId>log4j</groupId>
      <artifactId>log4j</artifactId>
      <version>1.2.17</version>
    </dependency>
  </dependencies>
Most of the jar packages introduced in it are in Spring development packages downloaded from the front. They need to be introduced into the local warehouse before introducing the project. Maven imports jar packages After the import is completed, click on the following image to refresh. At this point, the project is created.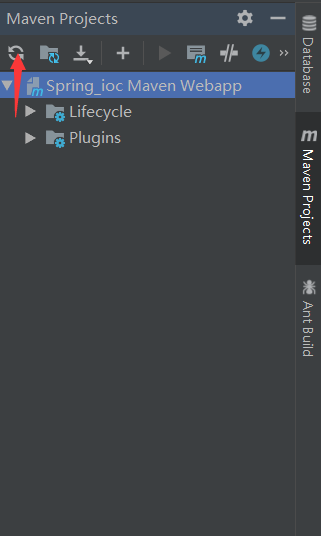
- Next, let's move on to the Code Writing section.
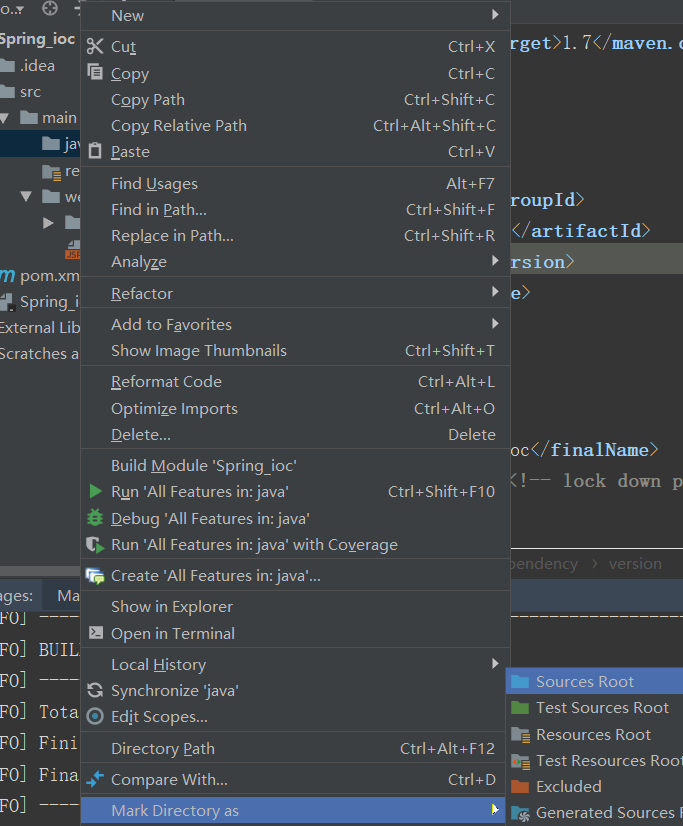
- Under main, we create a new folder named "java" and change its properties to "root resource folder". After success, the folder becomes blue. Change as follows:
Then we can put packages and classes in this folder. - First we create the UserService interface, the UserService Impl implementation class, and the Spring Demo1 test class. First we test the traditional way.
UserService interface
package com.MtLi.demo1;

public interface UserService {
  public void sayHello();
}
UserService Impl Implementation Class
package com.MtLi.demo1;

public class UserServiceImpl implements UserService {

    public void sayHello(){
        System.out.println("Hello Spring");
    }
}
SpringDemo1 implementation class
package com.MtLi.demo1;

import org.junit.Test;
import org.springframework.context.ApplicationContext;
import org.springframework.context.support.FileSystemXmlApplicationContext;

public class SpringDemo1 {

    @Test
    /**
     * Traditional way
     */
    public void demo1(){
        UserService userService = new UserServiceImpl();
        userService.sayHello();
    }
}
Running demo1 yields the following results: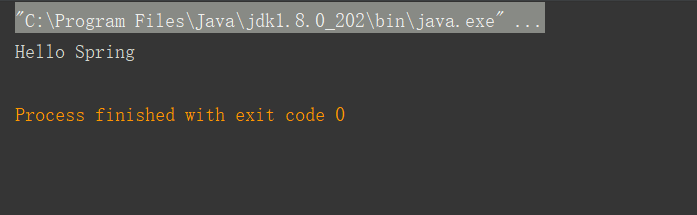
- Next, test with Spring
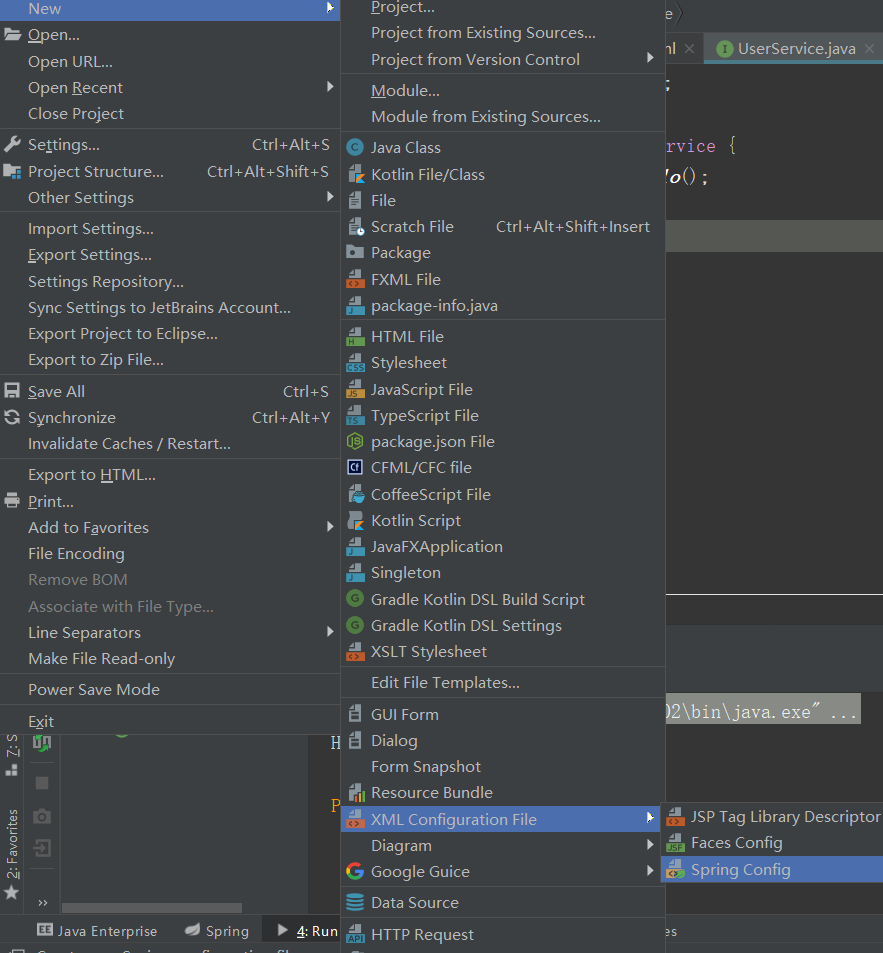
- First, we introduce a configuration file. We create a new XML file named "applicationContext.xml" under resources.
- Once created, we configure it
<?xml version="1.0" encoding="UTF-8"?>
<beans xmlns="http://www.springframework.org/schema/beans"
       xmlns:p="http://www.springframework.org/schema/p"
       xmlns:xsi="http://www.w3.org/2001/XMLSchema-instance"
       xsi:schemaLocation="http://www.springframework.org/schema/beans http://www.springframework.org/schema/beans/spring-beans.xsd">
       <!--These are generated by default-->

    <!-- UserService The right to create was handed over. Spring -->
    <bean id="userService" class="com.MtLi.demo1.UserServiceImpl"/>
</beans>
The SpringDemo1 test class is changed as follows:
package com.MtLi.demo1;

import org.junit.Test;
import org.springframework.context.ApplicationContext;
import org.springframework.context.support.ClassPathXmlApplicationContext;
import org.springframework.context.support.FileSystemXmlApplicationContext;

public class SpringDemo1 {

//    @Test
//    /**
//     * Traditional way
//     */
//    public void demo1(){
//        UserService userService = new UserServiceImpl();
//        userService.sayHello();
//    }

    @Test
    /**
     * Spring Ways to achieve
     */
    public void demo2(){
        //Creating Spring's Factory
        ApplicationContext applicationContext = new ClassPathXmlApplicationContext("applicationContext.xml");
        //Obtain classes from factories:
        UserService userService =(UserService)applicationContext.getBean("userService");
        userService.sayHello();
    }
  }
The effect is the same as before.
- @ Test is indispensable
- Application Context is Spring's factory class
ApplicationContext applicationContext = new ClassPathXmlApplicationContext("applicationContext.xml");
UserService userService =(UserService)applicationContext.getBean("userService");
userService.sayHello();
These three lines of code use ApplicationContext to get the Bean instance (object) defined in Spring, find the corresponding class according to id "userService", and generate the object (reflection) by Spring, corresponding to what was said earlier: factory, reflection. Configuration file.
- We give the class to Spring for management. We just need to get it through the factory. The factory will create the object well. This is Spring IOC, which is the inversion of control. The initiative to create the object is transferred from the original class creation to container management.
DI (Dependency Injection) Dependency Injection
DI is the process of creating this object in Spring by injecting the attributes that the object depends on.
- Now let's explain attribute injection on the basis of a previous case.
The UserService interface remains unchanged
UserService Impl Implementation Class
package com.MtLi.demo1;

public class UserServiceImpl implements UserService {
    //Adding attributes
    private String name;

    public void sayHello(){
        System.out.println("Hello Spring"+name);
    }

    public String getName() {
        return name;
    }

    public void setName(String name) {
        this.name = name;
    }
}
Note: In Spring Demo1, we need to modify its source code in the traditional way, such as adding "userService.setName("Zhang San"); just simple examples to modify, if it is a big project is not a bother to die, we can use Spring's attribute injection.
applicationContext.xml Modification
<?xml version="1.0" encoding="UTF-8"?>
<beans xmlns="http://www.springframework.org/schema/beans"
       xmlns:p="http://www.springframework.org/schema/p"
       xmlns:xsi="http://www.w3.org/2001/XMLSchema-instance"
       xsi:schemaLocation="http://www.springframework.org/schema/beans http://www.springframework.org/schema/beans/spring-beans.xsd">
<!-- UserService The right to create was handed over. Spring -->
<bean id="userService" class="com.MtLi.demo1.UserServiceImpl">
    <property name="name" value="Li Si"/>
</bean>
</beans>
Note: Here we use attribute injection of set method, that is:
<property name="name" value="Li Si"/>
The SpringDemo1 implementation class does not need to be modified
- Run demo2 and get the following results:
Hello Spring Li Si
So far, this QuickStart case is over. I believe that readers have a preliminary understanding of Spring and IOC. This is just the beginning. I am just learning Spring. I am willing to discuss learning with you. Later, I will keep updating.