Spring IOC Annotation Development
@ (Spring)[Spring, ioc, annotations]
Annotation usage steps of Spring's IOC
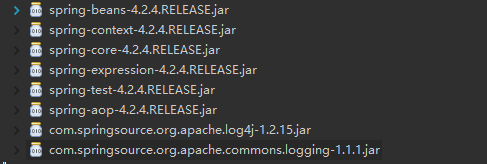
Create projects and introduce jar packages

Introducing configuration files
- log4j.properties
- applicationContext.xml
- Introduce a context constraint
<beans xmlns="http://www.springframework.org/schema/beans"
    xmlns:xsi="http://www.w3.org/2001/XMLSchema-instance"
    xmlns:context="http://www.springframework.org/schema/context" xsi:schemaLocation="
        http://www.springframework.org/schema/beans http://www.springframework.org/schema/beans/spring-beans.xsd
        http://www.springframework.org/schema/context http://www.springframework.org/schema/context/spring-context.xsd">

</beans>
Create related packages and classes
- Create interface
package com.pc.service;

/**
 * User Service Class Interface
 *
 * @author Switch
 * @data 2016 November 23, 2001
 * @version V1.0
 */
public interface UserService {
    /**
     * Save user
     */
    public void save();
}- Create implementation classes
package com.pc.service.impl;

/**
 * User Service Implementation Class
 *
 * @author Switch
 * @data 2016 November 23, 2001
 * @version V1.0
 */
public class UserServiceImpl implements UserService {
    @Override
    public void save() {
        System.out.println("Save user");
    }
}
Give control of the class to the Spring container
- Open IOC annotations in Spring
<! - Configuration Component Scanning - > Configuration Component Scanning
<context:component-scan base-package="com.pc.service"/>
- Add annotations to classes
package com.pc.service.impl;

import org.springframework.stereotype.Service;

import com.pc.service.UserService;

/**
 * User Service Implementation Class
 *
 * @author Switch
 * @data 2016 November 23, 2001
 * @version V1.0
 */
@Service("userService")
public class UserServiceImpl implements UserService {
    @Override
    public void save() {
        System.out.println("Save user");
    }
}
Compiling test
package com.pc.test;

import org.junit.Test;
import org.junit.runner.RunWith;
import org.springframework.test.context.ContextConfiguration;
import org.springframework.test.context.junit4.SpringJUnit4ClassRunner;

/**
 * SpringIOC Annotation test
 *
 * @author Switch
 * @data 2016 November 23, 2001
 * @version V1.0
 */
@RunWith(SpringJUnit4ClassRunner.class)
@ContextConfiguration("classpath:applicationContext.xml")
public class SpringIOCAnnotationTest {
    @Test
    public void test1() {
    }
}
Dependency injection
package com.pc.test;

import javax.annotation.Resource;

import org.junit.Test;
import org.junit.runner.RunWith;
import org.springframework.test.context.ContextConfiguration;
import org.springframework.test.context.junit4.SpringJUnit4ClassRunner;

import com.pc.service.UserService;

/**
 * SpringIOC Annotation test
 *
 * @author Switch
 * @data 2016 November 23, 2001
 * @version V1.0
 */
@RunWith(SpringJUnit4ClassRunner.class)
@ContextConfiguration("classpath:applicationContext.xml")
public class SpringIOCAnnotationTest {
    @Resource(name = "userService")
    private UserService userService;

    @Test
    public void test1() {
        userService.save();
    }
}
If the attribute has a set method, annotations need to be added to the set method, and if there is no set method, annotations need to be added directly to the attribute.
PS: If you don't know how to configure Spring and junit unit test integration, you can refer to the previous blog Spring Integrated Unit Test.
Detailed Interpretation of Spring's IOC Annotations
Bean Definition Annotation
Originally, we need to bind id and class in the way of XML configuration. Now we don't need to do this, just add annotations on the class.
-
@ Component: Component
- @ Controller: Modifying web Layer Classes
- @ Service: Decorating Business Layer Classes
- @ Repository: Modifying persistent layer classes
@ Component is a generic component annotation provided by Spring. By using this annotation on a class, the corresponding class can be marked as Spring Bean. To use this function, you need to open component scanning in the Spring configuration file, <context: component-scan base-package= "package name"/>.
@ The difference between Component and @Component("name") is that the former can only inject dependencies by type through Spring, while the latter can also inject dependencies by name.
@ Controller, @Service and @Repository all have the same functionality as @Component in the current 4.x.x version, just indicating that it is a component. However, by using corresponding annotations at different levels, annotations can be more meaningful. In future versions, Spring may provide different enhancements to these three annotations.
// Only by type injection
// @Component
// Can be injected by name
@Service("userService")
public class UserServiceImpl implements UserService {
    @Override
    public void save() {
        System.out.println("Save user");
    }
}
Bean Dependency Injection Annotation
If the attribute has a set method, annotations need to be added to the set method, and if there is no set method, annotations need to be added directly to the attribute.
@RunWith(SpringJUnit4ClassRunner.class)
@ContextConfiguration("classpath:applicationContext.xml")
public class SpringIOCAnnotationTest {
    // @Value("Switch")
    private String name;
    @Value("Switch")
    public void setName(String name) {
        this.name = name;
    }
    @Test
    public void test2() {
        System.out.println(name);
    }
}
PS: If annotations are added to both the attribute and the set method, then the annotations on the set method will override the attribute.
- Attributes of common types
- @ Value: Injecting common type attributes
@RunWith(SpringJUnit4ClassRunner.class)
@ContextConfiguration("classpath:applicationContext.xml")
public class SpringIOCAnnotationTest {
    @Value("Switch")
    private String name;

    @Test
    public void test2() {
        System.out.println(name);
    }
}- Object type attributes
- @ Resource: Injection object type
-
@ Autowired: Inject object types by default. Complete the injection by name with the @Qualifier annotation.
- @Qualifier
@RunWith(SpringJUnit4ClassRunner.class)
@ContextConfiguration("classpath:applicationContext.xml")
public class SpringIOCAnnotationTest {
    // Injection by bean type
    // @Resource
    // Injection by name requires component name setting
    // @Resource(name = "userService")
    // Like the above functions, inject by name
    @Qualifier("userService")
    @Autowired
    private UserService userService;

    @Test
    public void test1() {
        userService.save();
    }
}
Annotation of Bean's Scope of Action
- Annotation of Bean Scope: The default is singleton
-
@ Scope: Added to the class, control class generation using singletons or multiple instances.
- Value:
- Singleton: singleton
- prototype: multiple cases
- Request: request domain, which requires a web environment
- Session: session domain, which requires a web environment
- application: context domain, which requires a web environment
- Session domain of global session cluster environment needs web Environment
- Value:
-
@ Scope: Added to the class, control class generation using singletons or multiple instances.
PS: You can find the value of @Scope in the Web Application Context interface and the Configurable BeanFactory class.
Annotation of Bean's Life Cycle
- Annotation of Bean's Life Cycle
- @ PostConstruct: equivalent to init-method
- @ PreDestroy: equivalent to destroy-method
@Service("userService")
public class UserServiceImpl implements UserService {
    @Override
    public void save() {
        System.out.println("Save user");
    }

    @PostConstruct
    public void init() {
        System.out.println("User initialization");
    }

    @PreDestroy
    public void destory() {
        System.out.println("logoff");
    }
}
Comparison of Spring's IOC's XML and Annotation
Comparisons between XML and annotations

The difference between context:componet-scan and context:annotation-config
From the annotation of <context: annotation-config>, we can see that its function is activation.
@ Notes such as Required, @Autowired, @PostConstruct, @PreDestroy, @Resource, etc.
The annotation of <context:component-scan base-package="xx"/> shows that it activates not only all annotations in <context:annotation-config>, but also @Component,@Repository,@Service,@Controller,
@ RestController, @Controller Advice, @Configuration annotations.
Attached is a good blog post about the use of <context:component-scan>.
context:component-scan usage instructions