SpringBoot e-commerce project mall (20k+star) address: https://github.com/macrozheng/mall
abstract
Spring Cloud Security provides a series of solutions for building secure SpringBoot applications, which can be implemented with Oauth2. The usage of single sign-on is described in detail in this article.
Introduction to Single Sign-on
Single Sign On refers to the fact that when multiple systems need to be logged on, a user only needs to log on to one system to access other systems without having to log on.
Create oauth2-client module
Here we create an oauth2-client service as a client service that requires login, using the oauth2-jwt-server service as the authentication service in the previous section. Once we have logged in on the oauth2-jwt-server service, we can directly access the interface that oauth2-client needs to log in to demonstrate the single sign-on function.
- Add dependencies to pom.xml:
<dependency>
    <groupId>org.springframework.cloud</groupId>
    <artifactId>spring-cloud-starter-oauth2</artifactId>
</dependency>
<dependency>
    <groupId>org.springframework.cloud</groupId>
    <artifactId>spring-cloud-starter-security</artifactId>
</dependency>
<dependency>
    <groupId>org.springframework.boot</groupId>
    <artifactId>spring-boot-starter-web</artifactId>
</dependency>
<dependency>
    <groupId>io.jsonwebtoken</groupId>
    <artifactId>jjwt</artifactId>
    <version>0.9.0</version>
</dependency>
- Configure in application.yml:
server:
  port: 9501
  servlet:
    session:
      cookie:
        name: OAUTH2-CLIENT-SESSIONID #Prevent Cookie conflicts, which can cause login validation to fail
oauth2-server-url: http://localhost:9401
spring:
  application:
    name: oauth2-client
security:
  oauth2: #Configuration corresponding to oauth2-server
    client:
      client-id: admin
      client-secret: admin123456
      user-authorization-uri: ${oauth2-server-url}/oauth/authorize
      access-token-uri: ${oauth2-server-url}/oauth/token
    resource:
      jwt:
        key-uri: ${oauth2-server-url}/oauth/token_key
- Add the @EnableOAuth2Sso annotation on the startup class to enable single sign-on:
@EnableOAuth2Sso
@SpringBootApplication
public class Oauth2ClientApplication {

    public static void main(String[] args) {
        SpringApplication.run(Oauth2ClientApplication.class, args);
    }

}
- Add an interface to get the current logged-in user information:
/**
 * Created by macro on 2019/9/30.
 */
@RestController
@RequestMapping("/user")
public class UserController {

    @GetMapping("/getCurrentUser")
    public Object getCurrentUser(Authentication authentication) {
        return authentication;
    }

}
Modify Authentication Server Configuration
Modify the AuthorizationServerConfig class in the oauth2-jwt-server module to jump the binding to http://localhost:9501/login And add the authentication to get the secret key.
/**
 * Authentication Server Configuration
 * Created by macro on 2019/9/30.
 */
@Configuration
@EnableAuthorizationServer
public class AuthorizationServerConfig extends AuthorizationServerConfigurerAdapter {
    //Above omits a bunch of code...
    @Override
    public void configure(ClientDetailsServiceConfigurer clients) throws Exception {
        clients.inMemory()
                .withClient("admin")
                .secret(passwordEncoder.encode("admin123456"))
                .accessTokenValiditySeconds(3600)
                .refreshTokenValiditySeconds(864000)
//                .redirectUris("http://www.baidu.com")
                .redirectUris("http://localhost:9501/login ") //Single sign-on configuration
                .scopes("all")
                .authorizedGrantTypes("authorization_code","password","refresh_token");
    }

    @Override
    public void configure(AuthorizationServerSecurityConfigurer security) {
        security.tokenKeyAccess("isAuthenticated()"); // Acquiring keys requires authentication and must be configured when using single sign-on
    }
}
Web Single Sign-on Demo
- Start the oauth2-client service and the oauth2-jwt-server service;
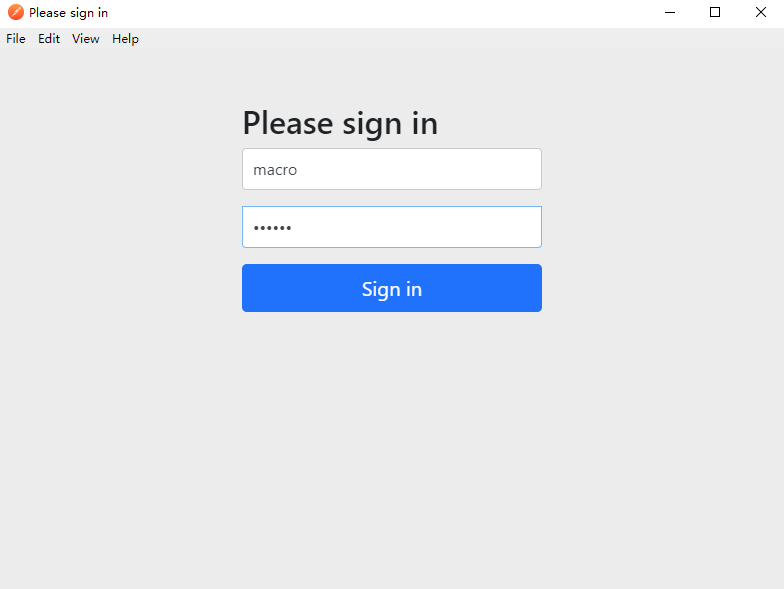
- Accessing an interface that clients need to authorize http://localhost:9501/user/getCurrentUser Will jump to the login interface of the authorization service;

- Jump to authorization page after login operation;

- After authorization, it will jump to the interface address where the privilege was originally needed to display the logged-in user information.

- Add autoApprove(true) configuration if you need to skip authorization for automatic authorization:
/**
 * Authentication Server Configuration
 * Created by macro on 2019/9/30.
 */
@Configuration
@EnableAuthorizationServer
public class AuthorizationServerConfig extends AuthorizationServerConfigurerAdapter {
    //Above omits a bunch of code...
    @Override
    public void configure(ClientDetailsServiceConfigurer clients) throws Exception {
        clients.inMemory()
                .withClient("admin")
                .secret(passwordEncoder.encode("admin123456"))
                .accessTokenValiditySeconds(3600)
                .refreshTokenValiditySeconds(864000)
//                .redirectUris("http://www.baidu.com")
                .redirectUris("http://localhost:9501/login ") //Single sign-on configuration
                .autoApprove(true) //Automatic Authorization Configuration
                .scopes("all")
                .authorizedGrantTypes("authorization_code","password","refresh_token");
    }
}
Call Interface Single Sign-on Demo
Here we use Postman to demonstrate how to call the client interface that requires login in the right way.
- Accessing the client requires a login interface: http://localhost:9501/user/getCurrentUser
- Use Oauth2 authentication to obtain access tokens:

- Enter information about obtaining access tokens and click Request Token:

- This will jump to the authentication server for login operation:

- Use the acquired token after successful login:

- The last request interface can get the following information:
{
    "authorities": [
        {
            "authority": "admin"
        }
    ],
    "details": {
        "remoteAddress": "0:0:0:0:0:0:0:1",
        "sessionId": "63BB793E35383B2FFC608333B3BF4988",
        "tokenValue": "eyJhbGciOiJIUzI1NiIsInR5cCI6IkpXVCJ9.eyJ1c2VyX25hbWUiOiJtYWNybyIsInNjb3BlIjpbImFsbCJdLCJleHAiOjE1NzI2OTAxNzUsImF1dGhvcml0aWVzIjpbImFkbWluIl0sImp0aSI6IjIwN2U5MTQzLTVjNTUtNDhkMS1iZmU3LTgwMzUyZTQ3Y2QyZCIsImNsaWVudF9pZCI6ImFkbWluIiwiZW5oYW5jZSI6ImVuaGFuY2UgaW5mbyJ9.xf3cBu9yCm0sME0j3UcP53FwF4tJVJC5aJbEj_Y2XcU",
        "tokenType": "bearer",
        "decodedDetails": null
    },
    "authenticated": true,
    "userAuthentication": {
        "authorities": [
            {
                "authority": "admin"
            }
        ],
        "details": null,
        "authenticated": true,
        "principal": "macro",
        "credentials": "N/A",
        "name": "macro"
    },
    "clientOnly": false,
    "oauth2Request": {
        "clientId": "admin",
        "scope": [
            "all"
        ],
        "requestParameters": {
            "client_id": "admin"
        },
        "resourceIds": [],
        "authorities": [],
        "approved": true,
        "refresh": false,
        "redirectUri": null,
        "responseTypes": [],
        "extensions": {},
        "grantType": null,
        "refreshTokenRequest": null
    },
    "principal": "macro",
    "credentials": "",
    "name": "macro"
}
oauth2-client Add Permission Check
- Add Configuration to turn on method-based privilege checking:
/**
 * Use when configuring permissions on interfaces
 * Created by macro on 2019/10/11.
 */
@Configuration
@EnableGlobalMethodSecurity(prePostEnabled = true)
@Order(101)
public class SecurityConfig extends WebSecurityConfigurerAdapter {
}
- Add an interface in UserController that requires admin privileges:
/**
 * Created by macro on 2019/9/30.
 */
@RestController
@RequestMapping("/user")
public class UserController {

    @PreAuthorize("hasAuthority('admin')")
    @GetMapping("/auth/admin")
    public Object adminAuth() {
        return "Has admin auth!";
    }

}
- Access interfaces that require admin privileges: http://localhost:9501/user/auth/admin

- If you use an account without admin privileges, such as andy:123456, to access the interface after acquiring a token, you will find that you do not have permission to access it.

Modules used
springcloud-learning
├── oauth2-jwt-server -- Use jwt Of oauth2 Certification Test Service
└── oauth2-client -- Single sign-on oauth2 Client Services
Project Source Address
https://github.com/macrozheng/springcloud-learning
Public Number
mall project In the full series of learning tutorials, focus on the first time public number is available.
