Spring Cloud Bus connects distributed nodes with lightweight message brokers. It can be used for broadcast profile changes or communication between services, or for monitoring. This article is about the implementation of Spring Cloud Bus to notify the change of configuration file of microservice architecture.
1, Preparations
This article is based on the previous article. According to the official documents, we only need to configure spring cloud starter bus AMQP in the configuration file; that is to say, we need to install rabbitMq, click rabbitmq Download.
Detailed steps of installing Rabbit MQ under Windows
2, Transform config client
The pom file plus the start-up depends on spring cloud starter bus AMQP. The complete configuration file is as follows:
<?xml version="1.0" encoding="UTF-8"?>
<project xmlns="http://maven.apache.org/POM/4.0.0" xmlns:xsi="http://www.w3.org/2001/XMLSchema-instance"
	xsi:schemaLocation="http://maven.apache.org/POM/4.0.0 http://maven.apache.org/xsd/maven-4.0.0.xsd">
	<modelVersion>4.0.0</modelVersion>

	<groupId>com.example</groupId>
	<artifactId>da-config-client</artifactId>
	<version>0.0.1-SNAPSHOT</version>
	<packaging>jar</packaging>

	<name>da-config-client</name>
	<description>Demo project for Spring Boot</description>

	<parent>
		<groupId>org.springframework.boot</groupId>
		<artifactId>spring-boot-starter-parent</artifactId>
		<version>2.0.0.RELEASE</version>
		<relativePath/> <!-- lookup parent from repository -->
	</parent>

	<properties>
		<project.build.sourceEncoding>UTF-8</project.build.sourceEncoding>
		<project.reporting.outputEncoding>UTF-8</project.reporting.outputEncoding>
		<java.version>1.8</java.version>
		<spring-cloud.version>Finchley.M8</spring-cloud.version>
	</properties>

	<dependencies>
		<dependency>
			<groupId>org.springframework.cloud</groupId>
			<artifactId>spring-cloud-starter-netflix-eureka-client</artifactId>
		</dependency>
		<dependency>
			<groupId>org.springframework.cloud</groupId>
			<artifactId>spring-cloud-starter-config</artifactId>
		</dependency>
		<dependency>
			<groupId>org.springframework.boot</groupId>
			<artifactId>spring-boot-starter-web</artifactId>
		</dependency>
		<dependency>
			<groupId>org.springframework.boot</groupId>
			<artifactId>spring-boot-starter-actuator</artifactId>
		</dependency>
		<dependency>
			<groupId>org.springframework.cloud</groupId>
			<artifactId>spring-cloud-starter-bus-amqp</artifactId>
		</dependency>
		<dependency>
			<groupId>org.springframework.boot</groupId>
			<artifactId>spring-boot-starter-test</artifactId>
			<scope>test</scope>
		</dependency>
	</dependencies>

	<dependencyManagement>
		<dependencies>
			<dependency>
				<groupId>org.springframework.cloud</groupId>
				<artifactId>spring-cloud-dependencies</artifactId>
				<version>${spring-cloud.version}</version>
				<type>pom</type>
				<scope>import</scope>
			</dependency>
		</dependencies>
	</dependencyManagement>

	<build>
		<plugins>
			<plugin>
				<groupId>org.springframework.boot</groupId>
				<artifactId>spring-boot-maven-plugin</artifactId>
			</plugin>
		</plugins>
	</build>

	<repositories>
		<repository>
			<id>spring-milestones</id>
			<name>Spring Milestones</name>
			<url>https://repo.spring.io/milestone</url>
			<snapshots>
				<enabled>false</enabled>
			</snapshots>
		</repository>
	</repositories>


</project>
Add the configuration of RabbitMq in the configuration file application.yml, including the address, port, user name and password of RabbitMq. The code is as follows:
eureka:
  client:
    serviceUrl:
      defaultZone: http://localhost:1001/eureka/

spring:
  application:
    name: config-client
  cloud:
    bus:
      trace:
        enabled: true
    config:
      name: didispace                   #Only file names
      label: master                     #Indicates the branch of the remote warehouse
      profile: dev                      #dev development environment configuration file test test test environment pro formal environment
      uri: http://localhost:5001 / ා indicates the web address of the configuration service center
      discovery:
        enabled: true                   #Read files from configuration center
        serviceId: config-server        #Service name of configuration center
  rabbitmq:
    host: 127.0.0.1
    port: 5672
    username: guest
    password: guest
server:
  port: 5002
Start Eureka server, config server and config client successively.
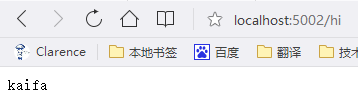
Visit localhost:5002/hi Browser display:
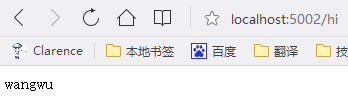
Then we go Code repository Change the value of from to "wangwu", that is, change the value of the configuration file from. If it is a traditional approach, you need to restart the service to update the configuration file. At this point, we just need to send the post request: http://localhost:5002/bus/refresh , where the request data changes.
In addition, the / bus/refresh interface can specify services, i.e. use the "destination" parameter, such as "/ bus/refresh?destination=customers: * *", i.e. refresh all services named customers, regardless of ip.