Spring Cloud Alibaba Sentinel
1, Sentinel introduction

With the popularity of microservices, the stability between services and services becomes more and more important. Sentinel takes traffic as the starting point to protect the stability of services from multiple dimensions such as traffic control, fuse degradation and system load protection.
Sentinel has the following characteristics:
- Rich application scenarios: Sentinel has undertaken the core scenarios of Alibaba's double 11 traffic promotion in recent 10 years, such as second kill (i.e. sudden traffic control within the range of system capacity), message peak cutting and valley filling, real-time fusing downstream unavailable applications, etc.
- Complete real-time monitoring: Sentinel also provides real-time monitoring function. You can see the second level data of a single machine connected to the application in the console, and even the summary operation of clusters with a scale of less than 500.
- Extensive open source Ecology: Sentinel provides out of the box integration modules with other open source frameworks / libraries, such as Spring Cloud, Dubbo and gRPC. You can quickly access Sentinel by introducing corresponding dependencies and simple configuration.
- Perfect SPI extension points: Sentinel provides simple, easy-to-use and perfect SPI extension points. You can quickly customize logic by implementing extension points. For example, custom rule management, adapting data sources, etc.
2, Sentinel console installation
Sentinel provides a lightweight open source console, which provides machine discovery, health management, monitoring (single machine and cluster), rule management and push functions. This section details how to control the various behaviors of sentinel client through sentinel console. Sentinel console functions mainly include: flow control, degradation control, hotspot configuration, system rules and authorization rules.
2.1 download Sentinel
visit: https://github.com/alibaba/Sentinel/releases
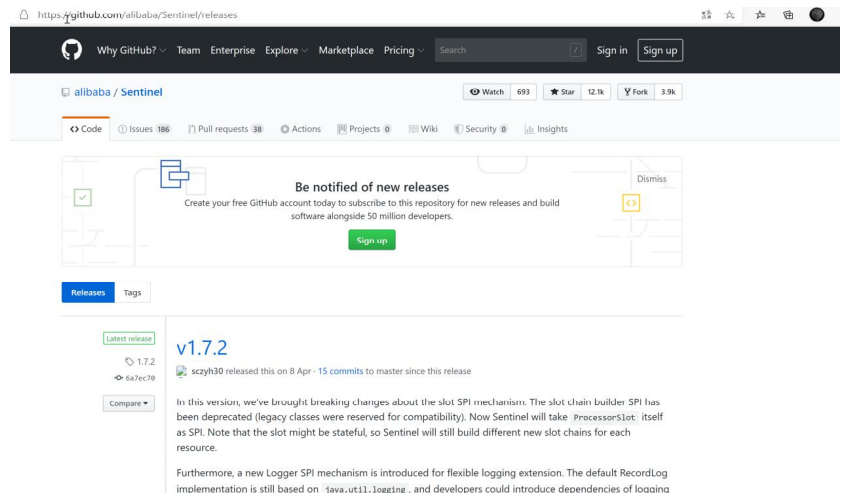
Found: version 1.7.1:

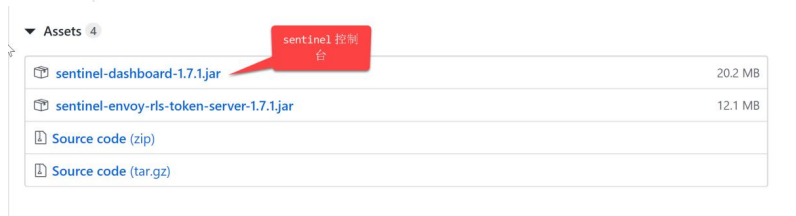
Click sentinel-dashboard-1.7.1.jar to complete the download:
2.2 start sentinel dashboard
Copy the downloaded sentinel-dashboard-1.7.1.jar to the directory where the software is installed.
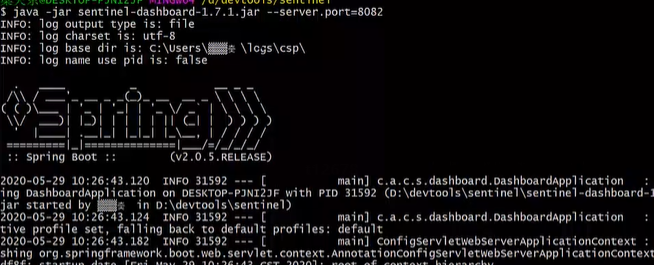
use:
java -jar sentinel-dashboard-1.7.1.jar
To start an instance of sentinel dashboard.
After successful startup:

We can access through the browser:
http://localhost:8080/
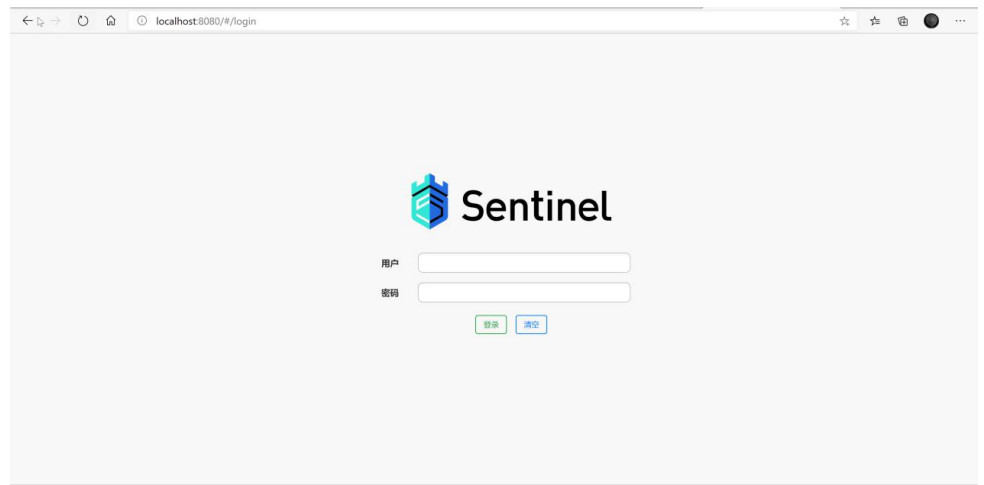
Where, user name: sentinel
Password: sentinel
More available startup parameter configurations:
java -D Parameter name=Parameter value -jar xx.jar

java -jar xx.jar --Parameter name=Parameter value

-Dsentinel.dashboard.auth.username=sentinel The login user name used to specify the console is sentinel;

-Dsentinel.dashboard.auth.password=123456 The login password used to specify the console is 123456. If these two parameters are omitted, the default user and password are both 123456 sentinel;

-Dserver.servlet.session.timeout=7200 Used to specify Spring Boot Server session The expiration time of, for example, 7200 indicates 7200 seconds; sixty m Indicates 60 minutes, and the default is 30 minutes;

-Dcsp.sentinel.dashboard.server=consoleIp:port Specify the console address and port
3, Build client
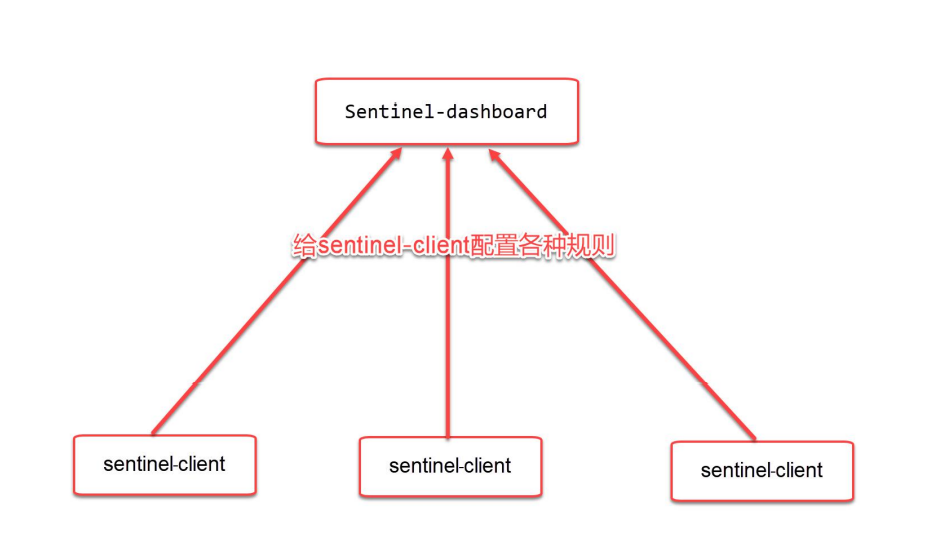
Just now we built sentinel dashboard. We also need to build a client to test various functions of sentinel.
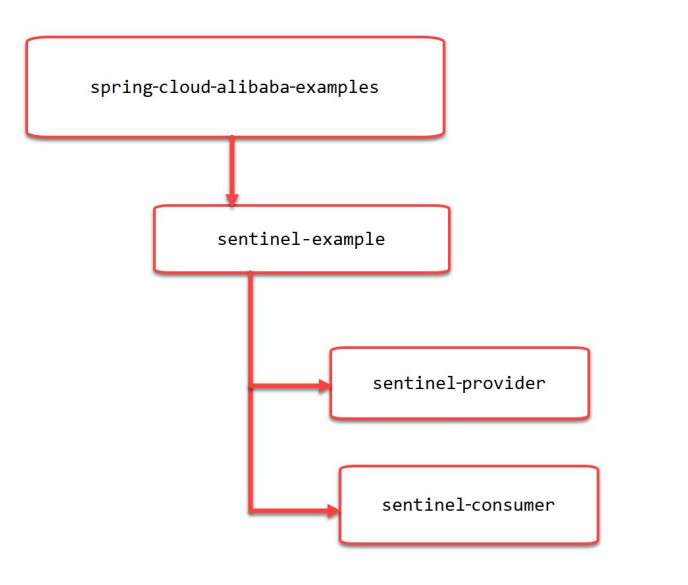
We will build the Maven project structure as shown in the figure:
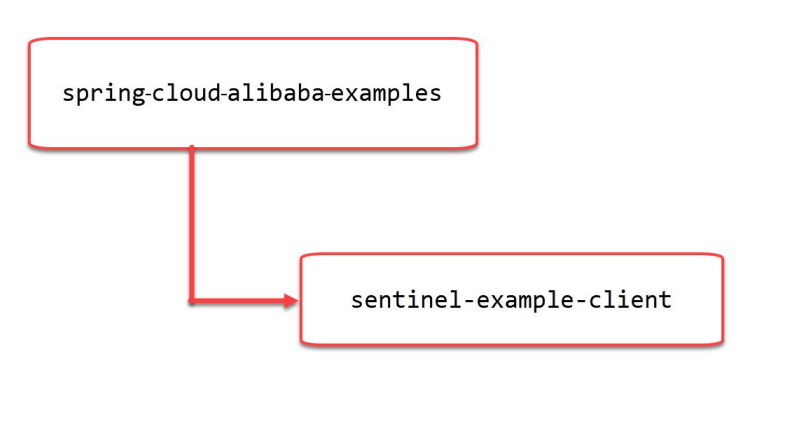
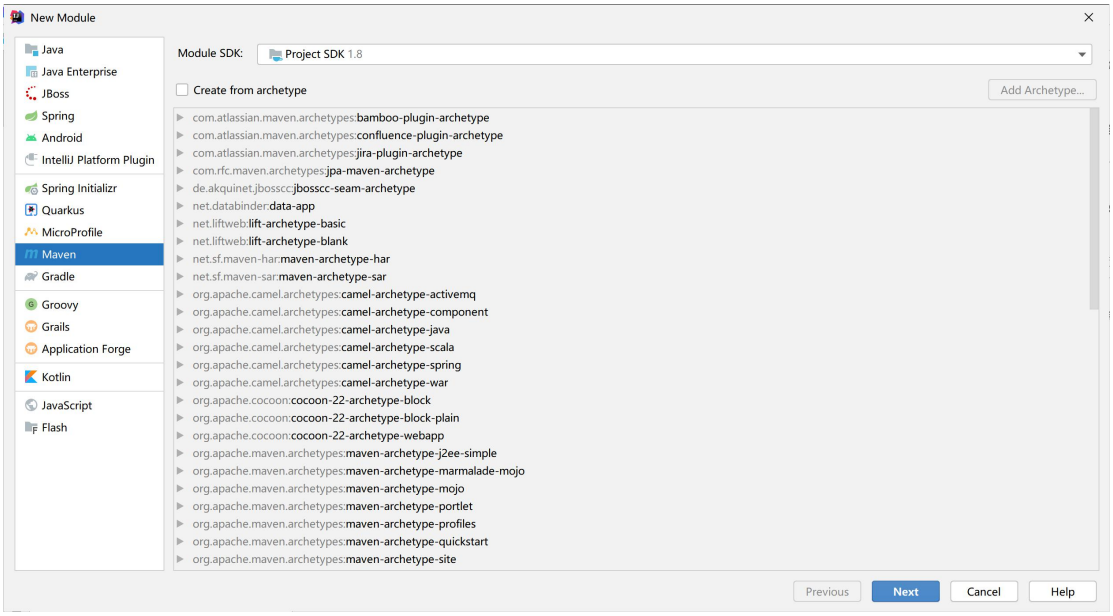
3.1 creating sub modules using IDEA
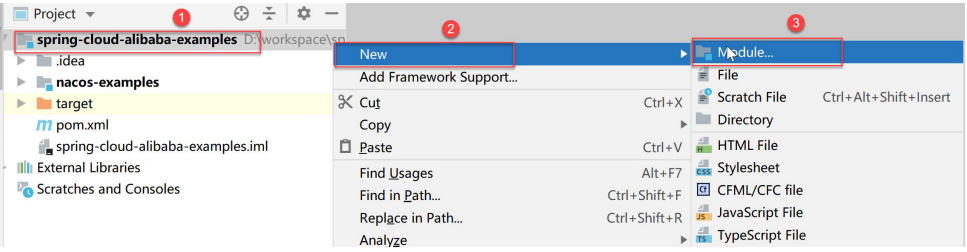
Select Maven project:
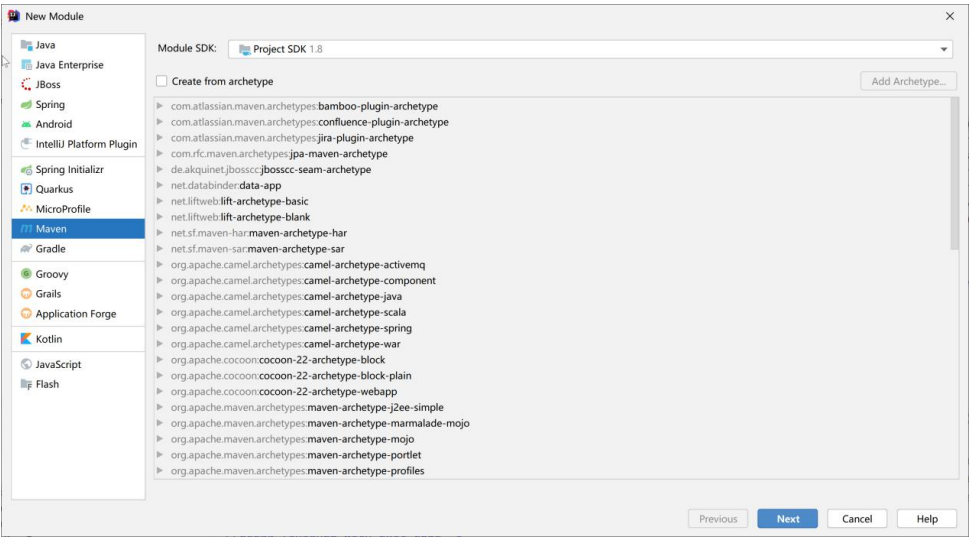
Click Next:
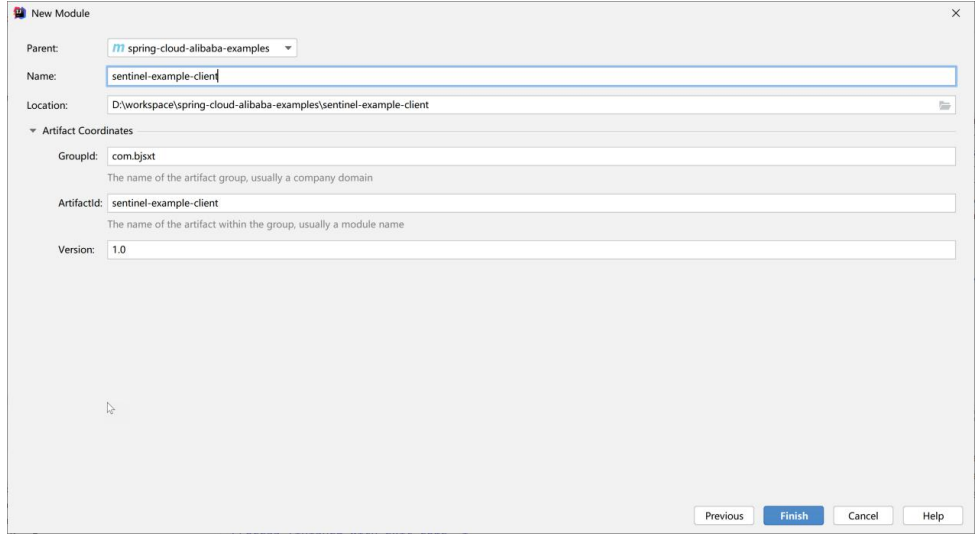
Parent: select spring cloud Alibaba examples
Name: named sentinel example client
Other items can keep the default value.
Click Finish to complete the creation.

3.2 adding dependencies
Modify the pom.xml file in sentinel example client:
Add the following:
<dependencies>
	<dependency>
		<groupId>org.springframework.boot</groupId>
		<artifactId>spring-boot-starter-web</artifactId>
	</dependency>
	<dependency>
		<groupId>com.alibaba.cloud</groupId>
		<artifactId>spring-cloud-starter-alibaba-sentinel</artifactId>
	</dependency>
</dependencies>
There are 2 dependencies:
- Spring cloud starter Alibaba sentinel this is an integration project of spring cloud and sentinel
- Spring boot starter web is the most basic dependency for opening the web. Add the packaging plug of spring boot
<build>
	<plugins>
		<plugin>
			<groupId>org.springframework.boot</groupId>
			<artifactId>spring-boot-maven-plugin</artifactId>
		</plugin>
	</plugins>
</build>
In this way, after our project is packaged, we can use Java jar to run it directly.
3.3 complete pom.xml
<?xml version="1.0" encoding="UTF-8"?>
<project xmlns="http://maven.apache.org/POM/4.0.0"
	xmlns:xsi="http://www.w3.org/2001/XMLSchema-instance"
	xsi:schemaLocation="http://maven.apache.org/POM/4.0.0
http://maven.apache.org/xsd/maven-4.0.0.xsd">
	<parent>
		<artifactId>spring-cloud-alibaba-examples</artifactId>
		<groupId>com.bjsxt</groupId>
		<version>1.0</version>
	</parent>
	<modelVersion>4.0.0</modelVersion>
	<artifactId>sentinel-example-client</artifactId>
	<dependencies>
		<dependency>
			<groupId>org.springframework.boot</groupId>
			<artifactId>spring-boot-starter-web</artifactId>
		</dependency>
		<dependency>
			<groupId>com.alibaba.cloud</groupId>
			<artifactId>spring-cloud-starter-alibaba-sentinel</artifactId>
		</dependency>
	</dependencies>
	<build>
		<plugins>
			<plugin>
				<groupId>org.springframework.boot</groupId>
				<artifactId>spring-boot-maven-plugin</artifactId>
			</plugin>
		</plugins>
	</build>
</project>
3.4 add a profile
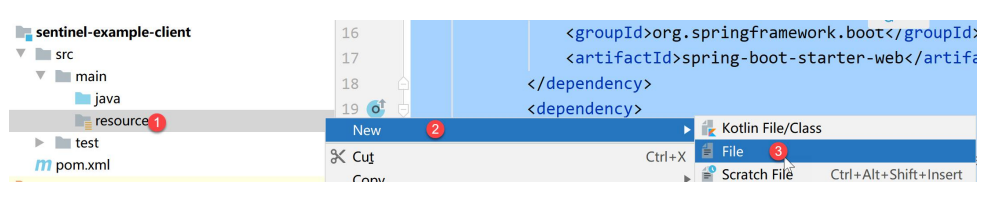
Named:

Modify the configuration file and add the following configuration:
server:
	port: 8085
spring:
	application:
		name: sentinel-client
	cloud:
		sentinel:
			transport:
				dashboard: localhost:8080
				port: 8719 #Sentinel client listens because sentinel dashboard will collect data from this port. If the port is occupied, + 1
Of which:
- spring.cloud.sentinel.transport.dashboard specifies the ip and port address of sentinel console;
- spring.cloud.sentinel.transport.port represents the communication port between sentinel client and console. The default is 8719. If this port has been occupied, sentinel will automatically scan + 1 from 8719 until an unoccupied port is found.
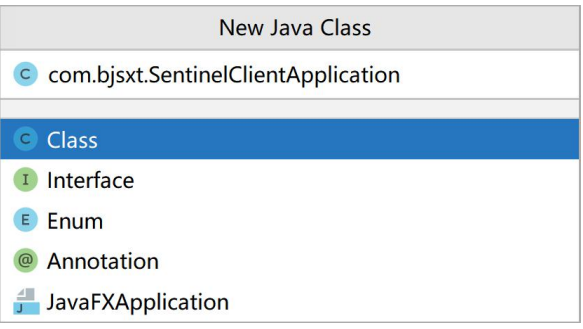
3.5 add a startup class
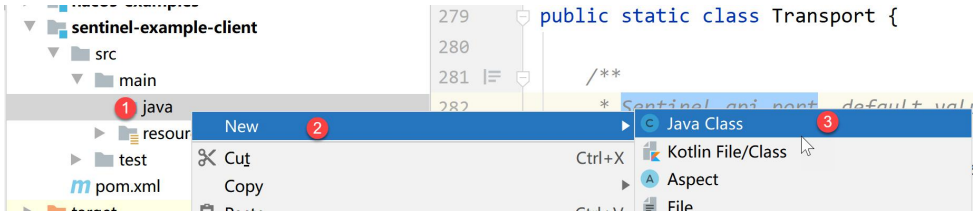
Name: com.bjsxt.SentinelClientApplication
Add the following code:
@SpringBootApplication
public class SentinelClientApplication {
	public static void main(String[] args) {
		SpringApplication.run(SentinelClientApplication.class ,args) ;
	}
}
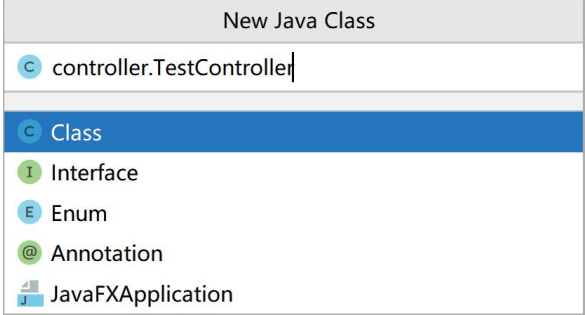
3.6 adding a Controller

Name: controller.TestController
Add the following interfaces to TestContrller:
@RestController
public class TestController {
	@GetMapping("/hello")
	public ResponseEntity<String> hello(){
		return ResponseEntity.ok("hello,sentinel") ;
	}
}
3.7 start up project

Access in browser:
http://localhost:8080/#/dashboard/home
appear:
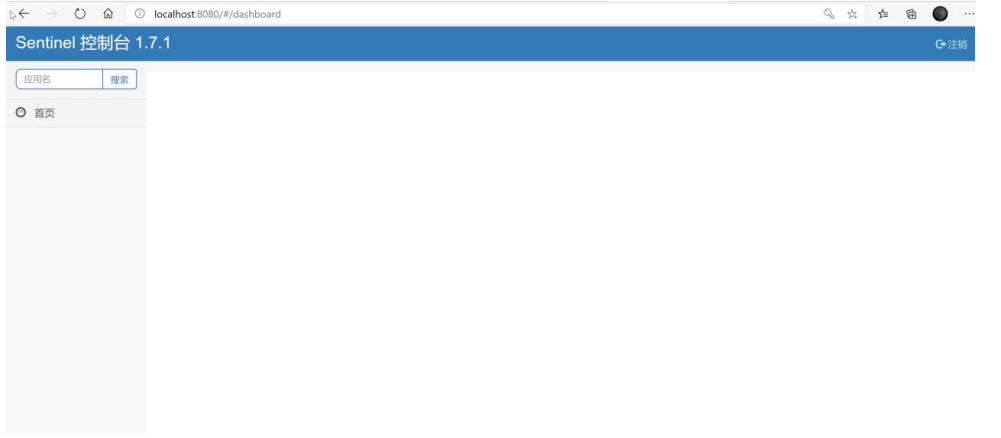
Found no function.
At this point, let's access the hello interface we wrote:
http://localhost:8085/hello
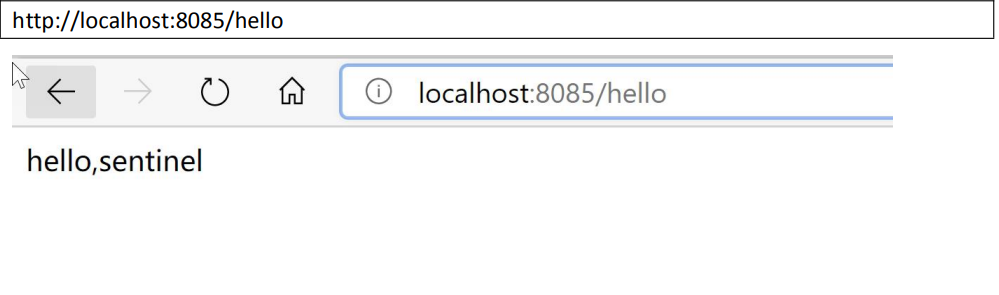
Visit more times.
Visit again:
http://localhost:8080/#/dashboard/home
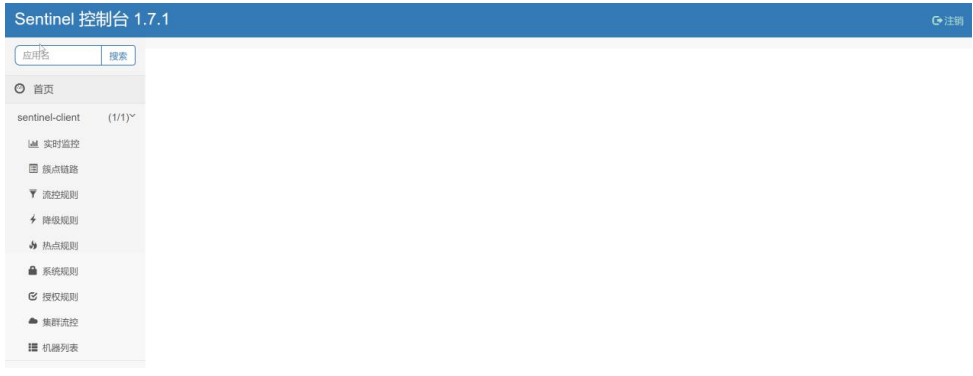
The console has been displayed normally.
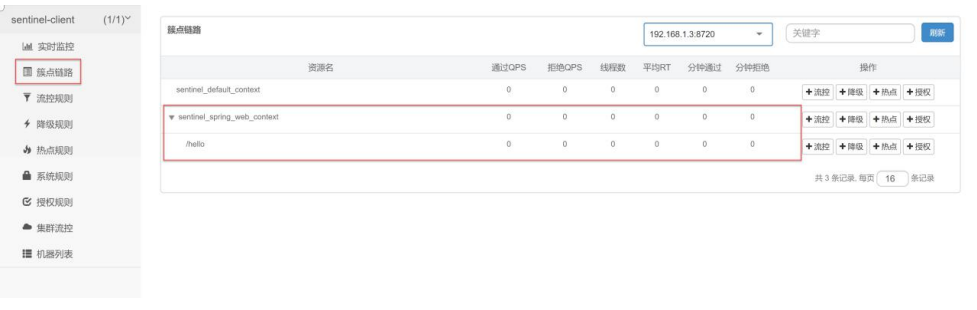
In addition, we can see the request in the cluster link. We can flow control, downgrade, authorize and hotspot it
Configuration (the console is lazily loaded, and if there are no requests, the console will not have anything).
4, Flow control rules
Flow control rules.
In the cluster point link list, click the flow control button after / hello:

appear:
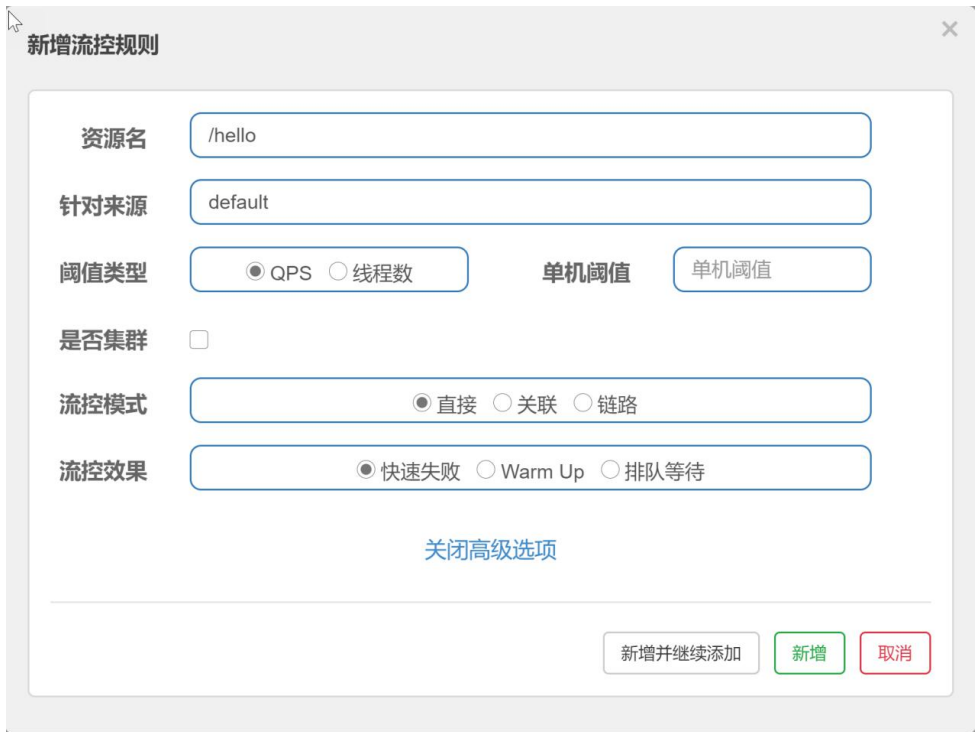
- Resource Name: the unique name that identifies the resource. The default is the request path. You can also use @ SentinelResource configuration in the client;
- For source: Sentinel can limit the flow for service callers, and fill in the micro service name, spring.application.name, which is default by default and does not distinguish between sources;
- Threshold type, single machine threshold:
- QPS (queries per second): limit the current when the QPS calling the api reaches the threshold;
- Number of threads: limit the flow when the number of threads calling the api reaches the threshold.
- Cluster: cluster is not selected by default;
- Flow control mode:
- Direct: when the api call reaches the current limit condition, the current is directly limited;
- Association: limit the flow when the associated resource request reaches the threshold;
- Link: only record the traffic on the specified link (the traffic of the specified resource coming in from the entrance resource. If the threshold is reached, limit the flow).
- Flow control effect:
- Quick failure: direct failure;
- Warm Up: according to the value of codeFactor (cold loading factor, the default value is 3), the set QPS threshold can be reached only after preheating time from threshold / codeFactor;
- Queuing: queue at a constant speed to let the request pass at a constant speed. The threshold type must be set to QPS, otherwise it is invalid.
4.1 QPS direct failure
Demonstrate the setting and effect of QPS direct failure. Click the flow control button behind the / hello request in the cluster point link list:
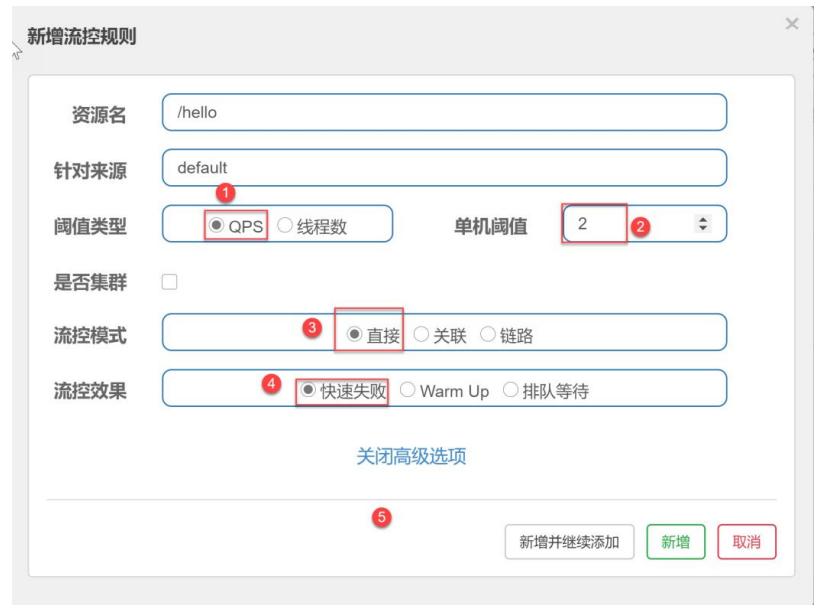
The effect of the above settings is to limit the current when the number of requests for / hello resources reaches more than 2 times in one second.
Click Add to finish setting the rule.
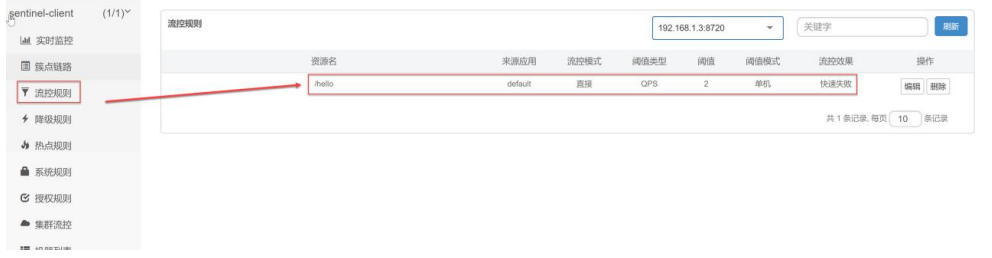
Now, in the browser, access:
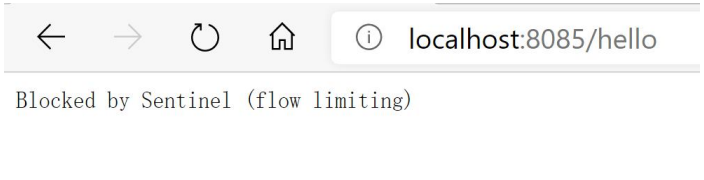
http://localhost:8085/hello
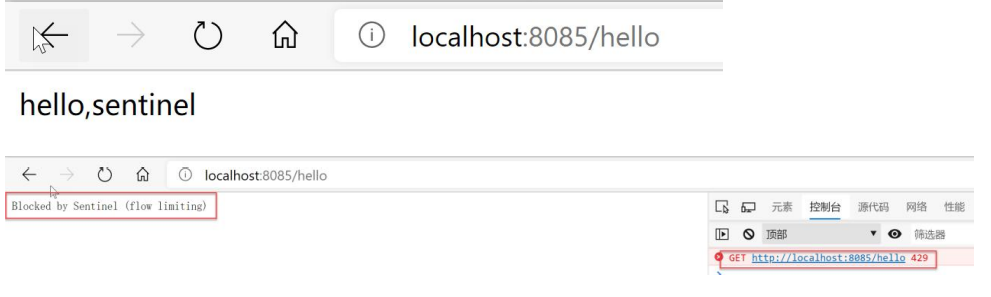
When the hand speed is faster (more than twice a second), the page returns Blocked by Sentinel (flow limiting). And the response code is 429.
4.2 number of threads: direct failure
4.2.1 adding interfaces
Create a new interface in TestController.
/**
* Direct thread failure
* @return
* @throws InterruptedException
*/
@GetMapping("/thread")
public ResponseEntity<String> threadMode() throws InterruptedException {
	TimeUnit.SECONDS.sleep(1);
	return ResponseEntity.ok("hello,sentinel!") ;
}
Among them, we added:
TimeUnit.SECONDS.sleep(1);
Let the thread sleep for 1s, which makes it easier to trigger the rule.
Restart the project.
To access the thread interface we added:
http://localhost:8085/thread
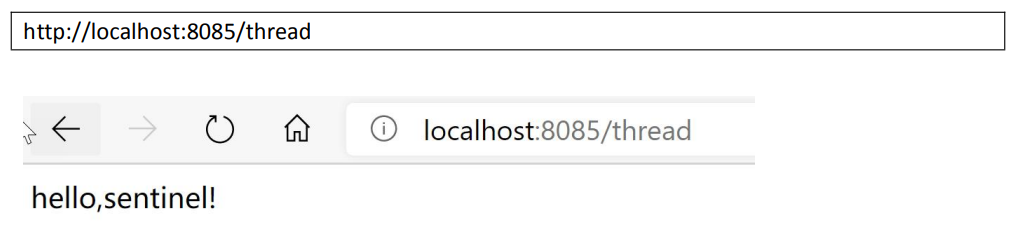
It is found that the page needs to wait about 1s before responding, which is the effect of thread sleep.
4.2.2 add flow control rules
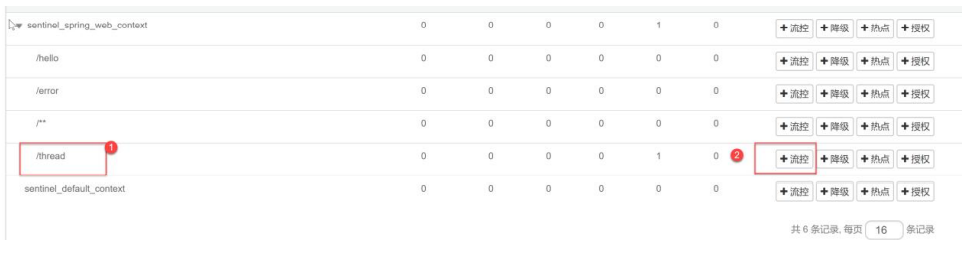
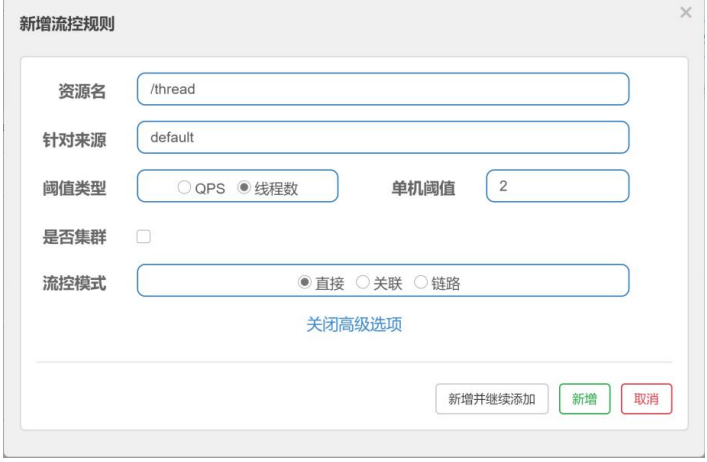
Click Add to complete the creation.

4.2.3 test the rule
Quick browser access:
http://localhost:8085/thread


4.3 Association
After accessing an interface and reaching certain flow control rules, start to restrict this interface.
4.3.1 add api interface in TestController
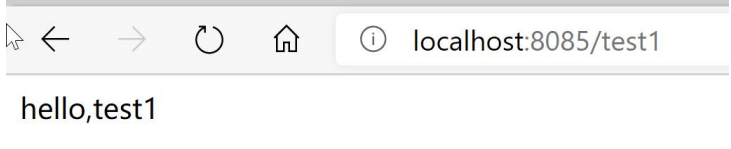
@GetMapping("/test1")
public ResponseEntity<String> test1(){
	return ResponseEntity.ok("hello,test1") ;
}
@GetMapping("/test2")
public ResponseEntity<String> test2(){
	return ResponseEntity.ok("hello,test2") ;
}
Restart the project and normally access test1 and test2 tests:

4.3.2 adding rules
We want test1 to be associated with test2, that is, after accessing the test2 interface to meet certain rules, start current limiting test1.
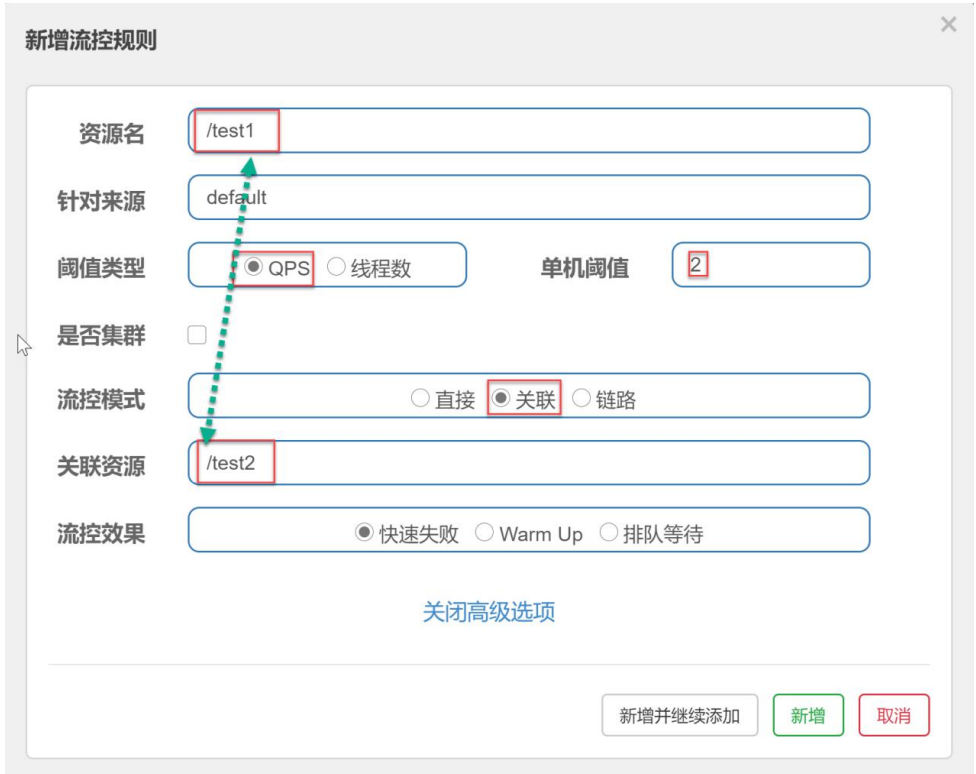
The above flow control rule indicates that when the number of accesses to / test2 within 1 second is greater than 2, the current limit is / test1.

4.3.3 test rules
We use to open two web pages and visit / test2 intensively, and then we manually request / test1 from the browser to see the effect.
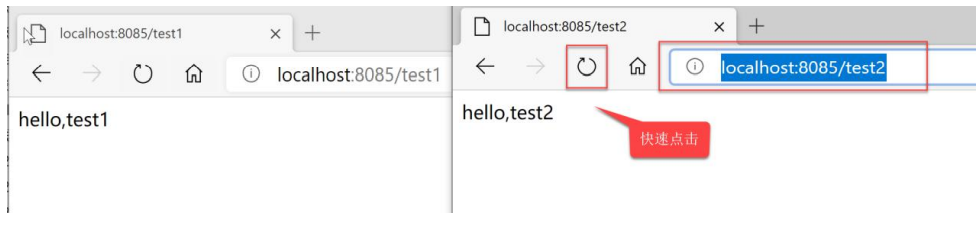
Access test1:

It is found that current limiting has begun.
4.4 link
The call of the program can be regarded as a link. When a rule of a link is triggered, the link is current limited.
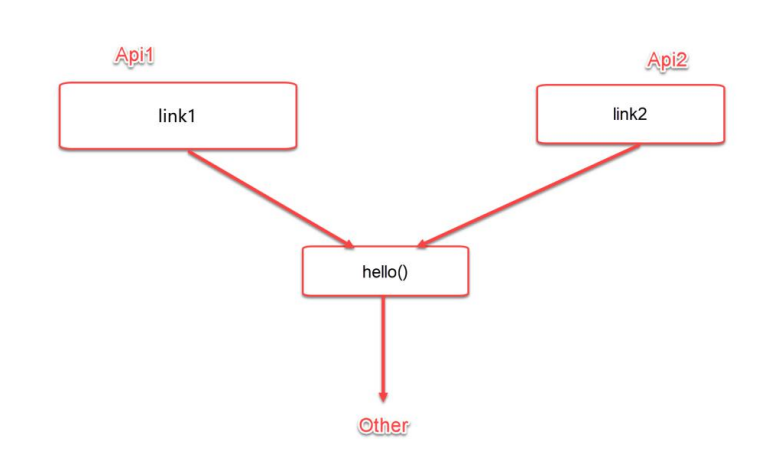
Starting from the API in the figure above, two links can be found, namely:
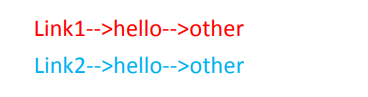
On the call of the two links, the current limiting rules complement each other.
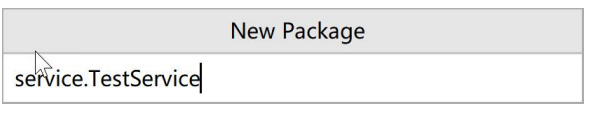
4.4.1 add a Service
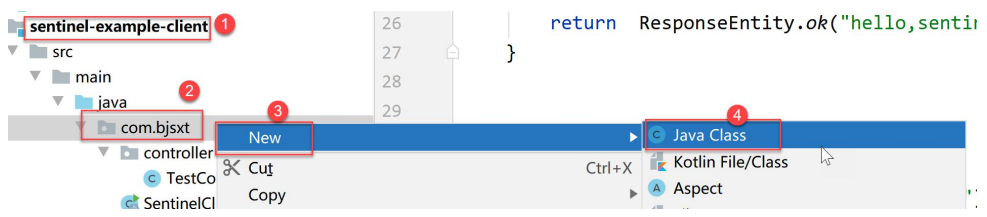
Name: (service.TestService)
The code is:
@Service
public class TestService {
	public String hello(){
		return "hello" ;
	}
}
4.4.2 adding interfaces
@Autowired
private TestService testService ;
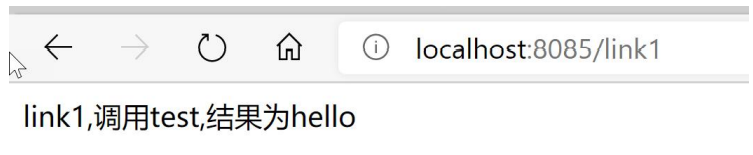
@GetMapping("/link1")
public ResponseEntity<String> link1(){
return ResponseEntity.ok(String.format("link1,call test,The result is%s",testService.hello())) ;
}
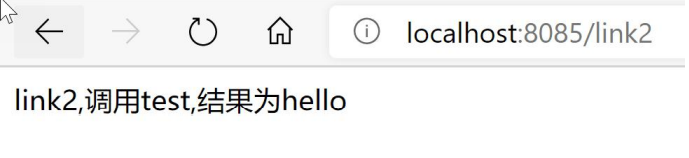
@GetMapping("/link2")
public ResponseEntity<String> lin2(){
return ResponseEntity.ok(String.format("link2,call test,The result is%s",testService.hello())) ;
}
4.4.3 claim resources
We now turn the hello method in TestService into a resource:
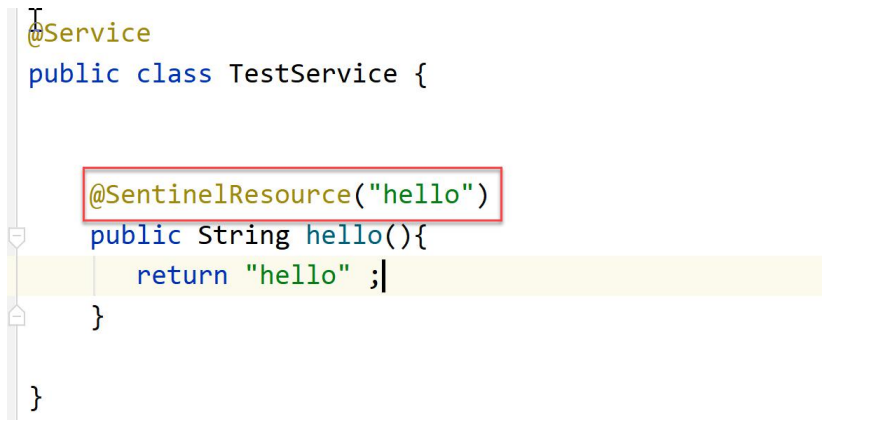
be careful:
@Sentinel resource ("hello") identifies the method as a sentinel resource named hello.
Then restart the test:
4.4.4 adding link rules
Click cluster link:
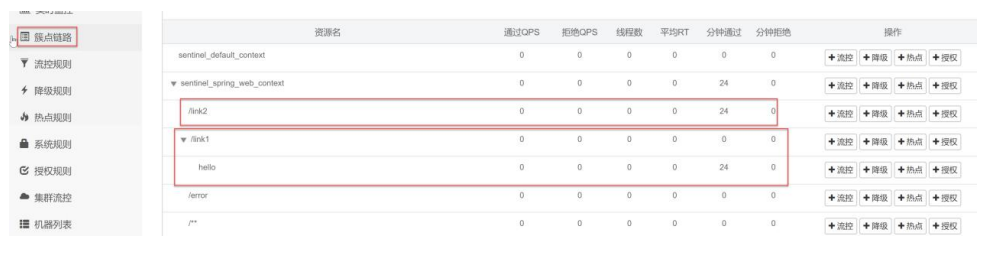
At this point, we limit the resource flow to hello:

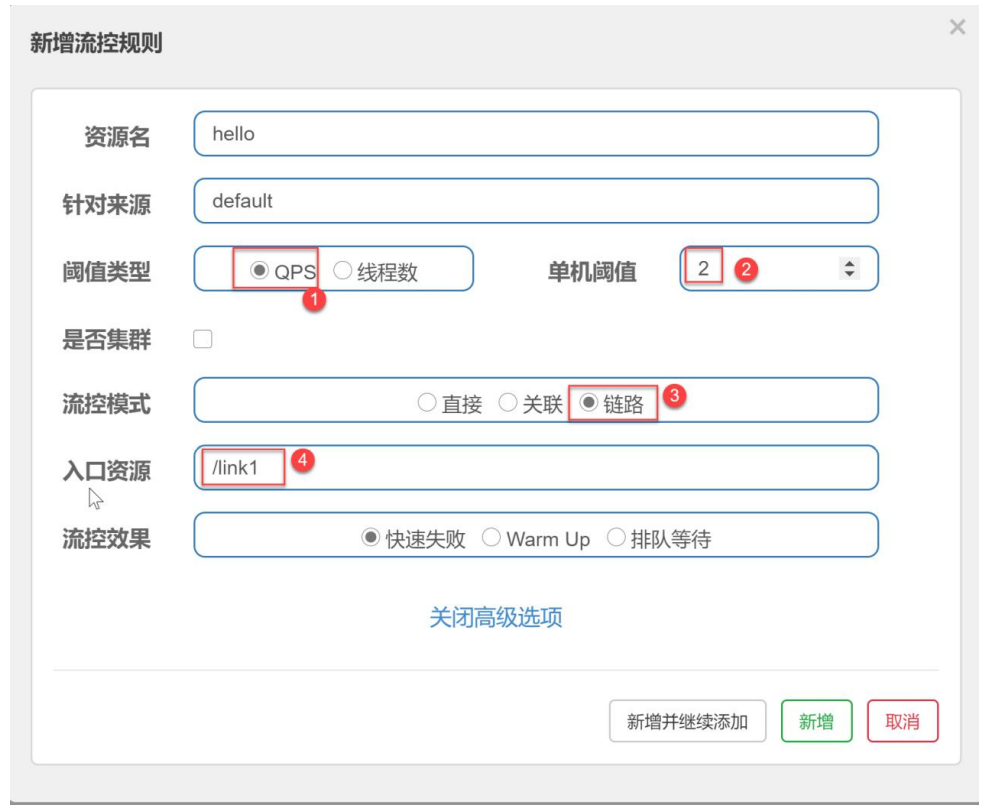
In the portal resource, we use link1. Click Add to complete the addition of rules.
The above configuration means that when accessing hello through / link1, if the QPS is greater than 2, the current is limited; The implication is that / link access to hello requests is not affected.

4.4.5 test the rule
Open link1 and link2 interfaces.
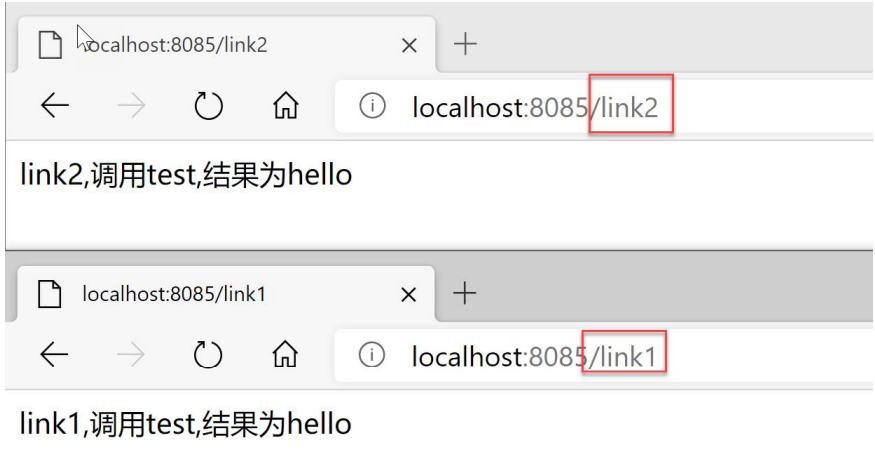
Quickly access link1 and then link2:
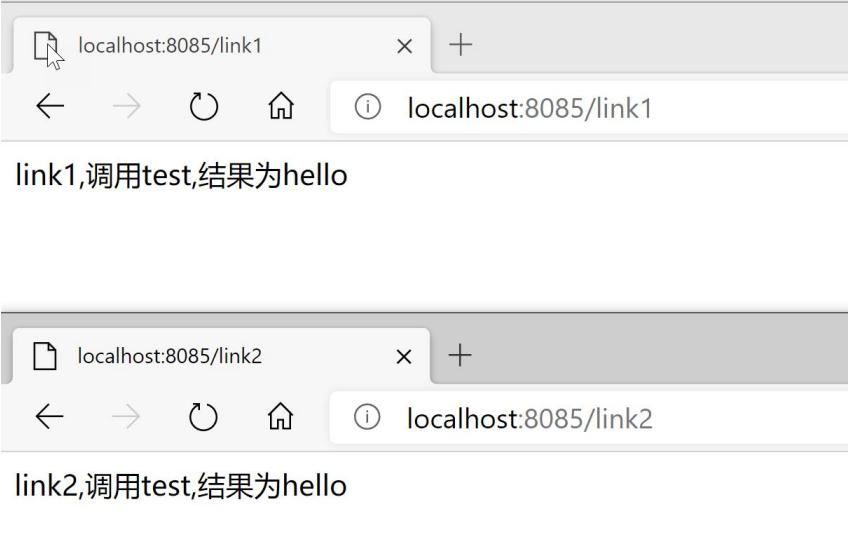
The test was accessed n times, and it was found that it was still unsuccessful. Uncomfortable!
Specific error:
https://github.com/alibaba/Sentinel/issues/1213
4.5 Warm Up
In addition to the direct failure of flow control effect, we can also choose to preheat Warm Up.
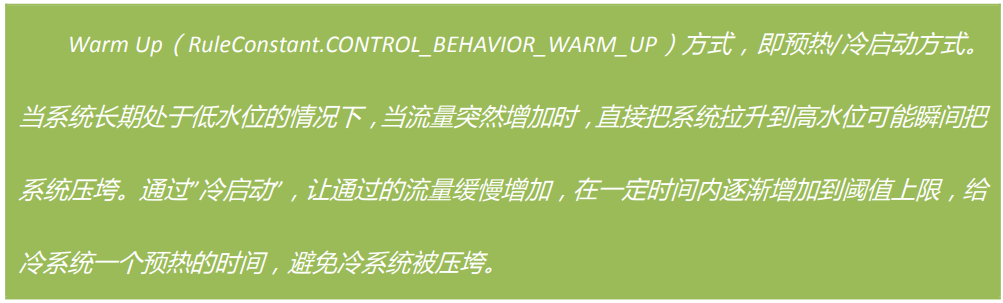
The default cold load factor coldFactor of sentinel client is 3, that is, the requested QPS starts from threshold / 3 and gradually rises to the set QPS threshold after preheating.
For example:
We set this rule for the hello resource.

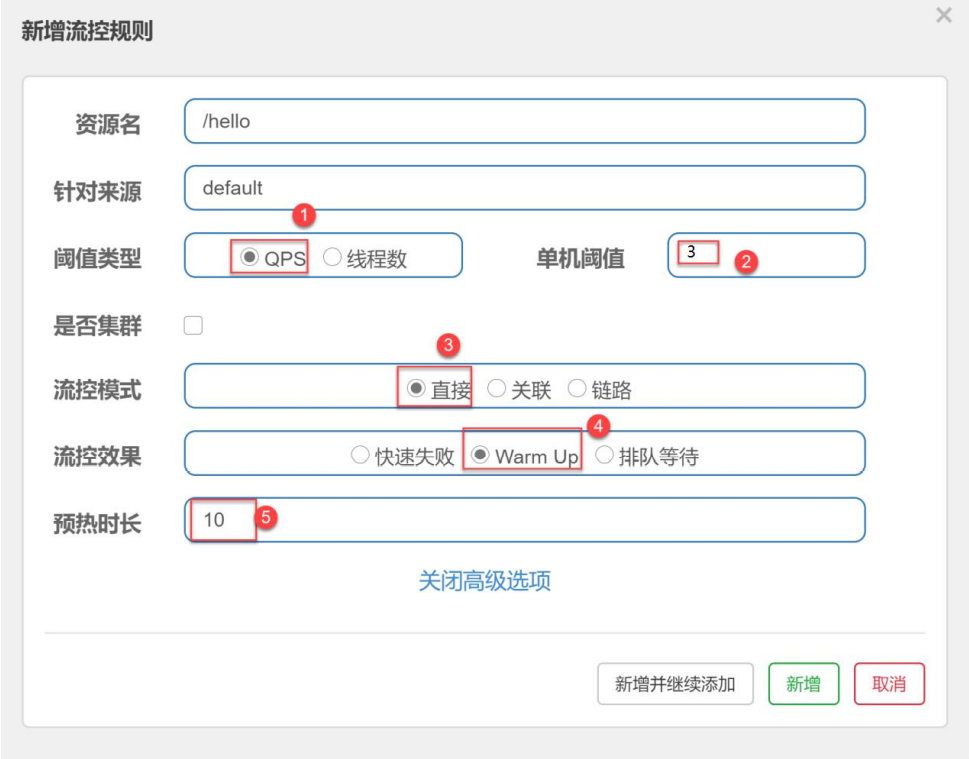
The above configuration means that for / hello resources, the initial QPS threshold is 3. After 10 seconds, the QPS threshold reaches 10.
After adding:

Quick access / hello
http://localhost:8085/hello
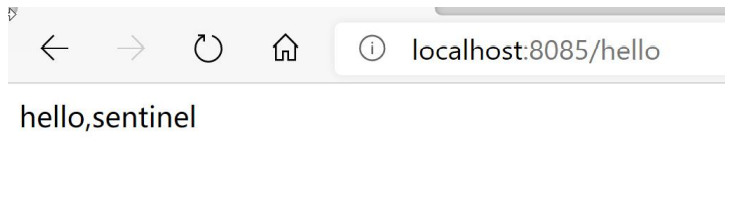
see:
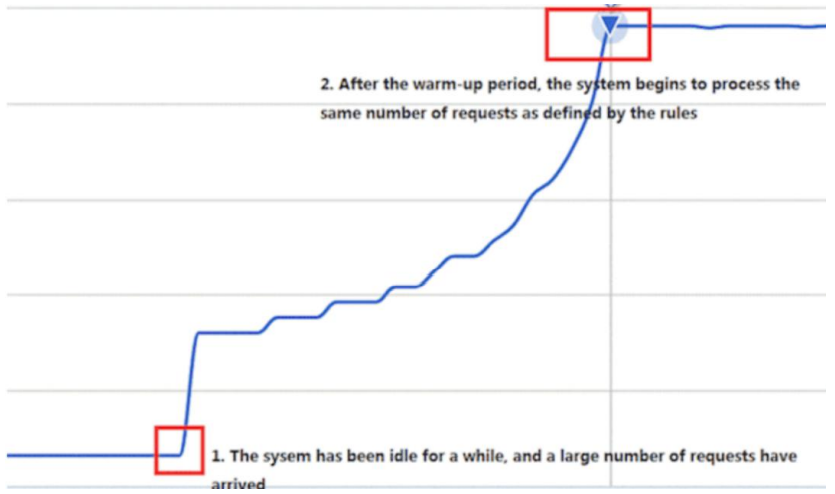
The process is similar to the following figure:
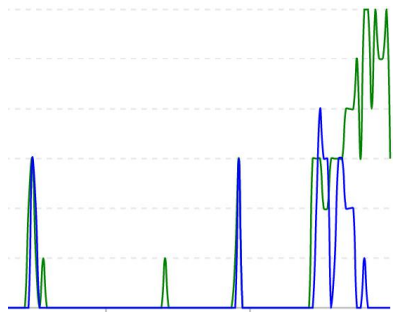
In the early stage, in the warm-up environment, the sudden high QPS will cause the system to directly refuse access. Slowly, a large number of new requests are introduced.
The fastest hand speed point is refreshed. You will often see the prompt of Blocked by Sentinel (flow limiting) at the beginning, and it will hardly appear after 10 seconds (because your hand speed is difficult to reach 10 times in 1 second).
4.6 queuing
Queuing does not reject requests, but strictly controls the interval between requests, that is, to let requests pass at a uniform speed.
Add interface in TestController:
private static Logger logger = LoggerFactory.getLogger(TestController.class) ;

@GetMapping("/queue")
public ResponseEntity<String> queue(){
	logger.info("Start processing request");
	return ResponseEntity.ok("ok") ;
}
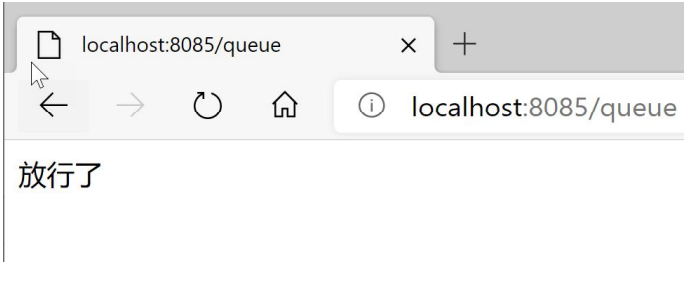
Restart the project and access the queue interface:
Add a flow restriction rule to the queue:
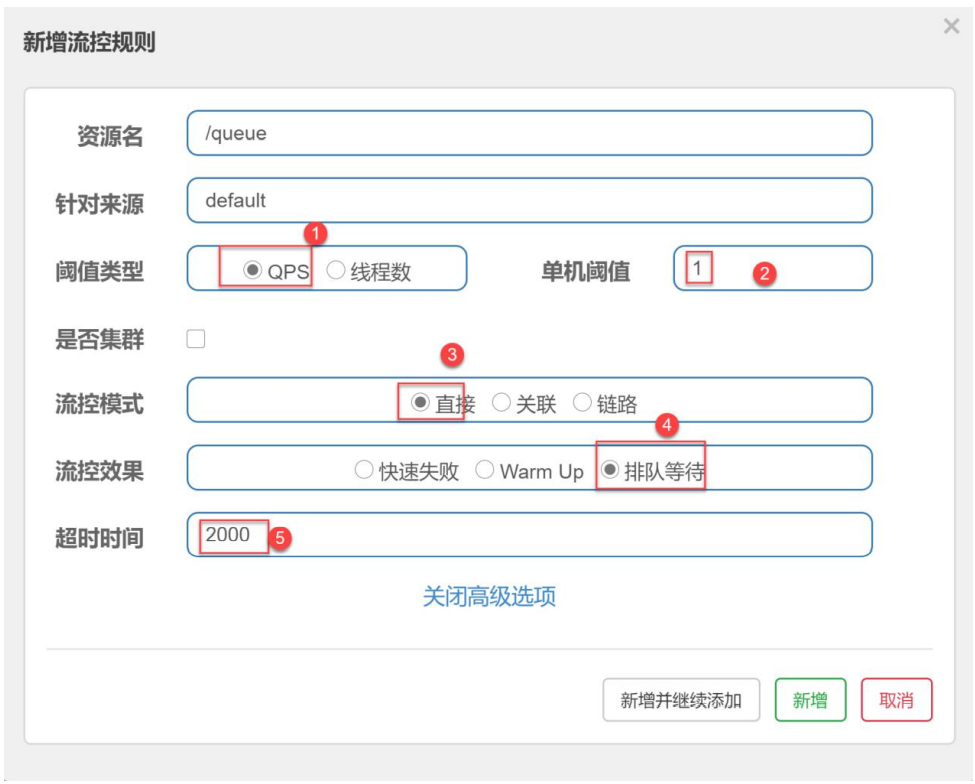
Click Add to complete the creation.

Quickly access the queue interface and observe the background printing:
The meaning of the above configuration is that access / queue requests can only be accessed once per second at most. Requests exceeding can be queued and wait. If the waiting exceeds 2000 milliseconds, it will timeout. After adding this rule, you can quickly access localhost:8081/test1 for many times and sentinel client control
The bench log is printed as follows:

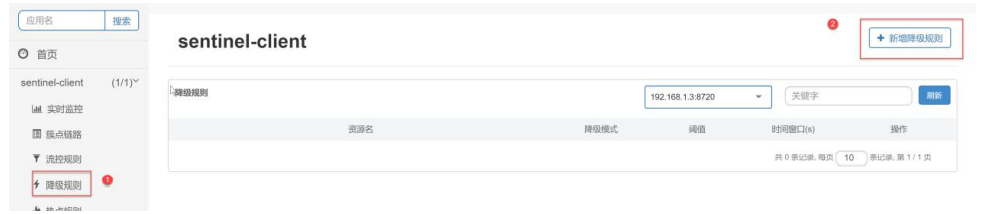
5, Degradation rule
In addition to flow control, fusing and degrading unstable resources in the call link is also one of the important measures to ensure high availability. Due to the complexity of the call relationship, if a resource in the call link is unstable, it will eventually lead to the accumulation of requests. Sentinel will restrict the call of a resource when it is in an unstable state in the call link (for example, the call timeout or the abnormal proportion increases), so as to make the request fail quickly and avoid affecting other resources and causing cascading errors. When a resource is downgraded, calls to the resource will be automatically fused within the next downgrade time window (the default behavior is to throw DegradeException).
When the access to the system fails for more than a certain number of times, fuse the interface.
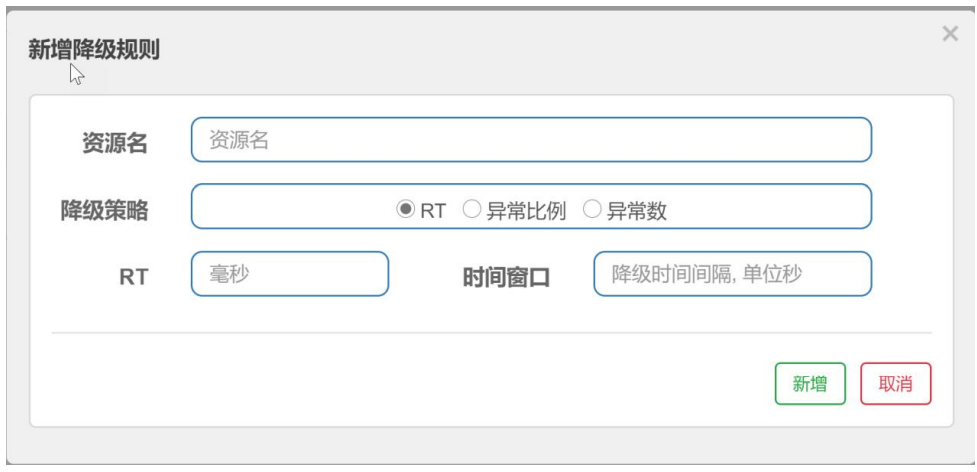
We can find that there are three degradation strategies:
- RT, average response time (grade_grade_rt): when five requests are continuously entered within 1s, and the average response time (in seconds) at the corresponding time exceeds the threshold (count, in ms), the call to this method will automatically fuse (throw DegradeException) within the next time window (timeWindow in DegradeRule, in s). Note that the RT upper limit of Sentinel's default statistics is 4900 ms, and those exceeding this threshold will be counted as 4900 ms. if you need to change this upper limit, you can configure it by starting the configuration item - DCSP. Sentinel. Statistical. Max.rt = XXX.
- Grade_grade_exception_ratio: when the number of requests per second of the resource is > = 5 and the ratio of the total number of exceptions per second to the throughput exceeds the threshold (count in DegradeRule), the resource enters the degraded state, that is, within the next time window (timeWindow in DegradeRule, in s), calls to this method will be returned automatically. The threshold range of abnormal ratio is [0.0, 1.0], representing 0% - 100%.
- Grade_grade_exception_count: when the number of exceptions of the resource in recent 1 minute exceeds the threshold, it will fuse. Note that since the statistical time window is of minute level, if the timeWindow is less than 60s, it may still enter the fusing state after the fusing state is ended.
5.1 RT
When five requests are continuously entered within 1s, and the average response time (in seconds) at the corresponding time exceeds the threshold (count, in ms), the call to this method will automatically melt (throw DegradeException) within the next time window (timeWindow in DegradeRule, in s).
5.1.1 add test interface
@GetMapping("/rt")
public ResponseEntity<String> rt() throws InterruptedException {
	TimeUnit.SECONDS.sleep(1);
	return ResponseEntity.ok("ok") ;
}
5.1.2 add downgrade rule

Five requests are entered within 1s. If the corresponding time exceeds 500ms, the fuse mechanism is executed in the next 3s.
5.1.3 testing
Open Apache jmeter.
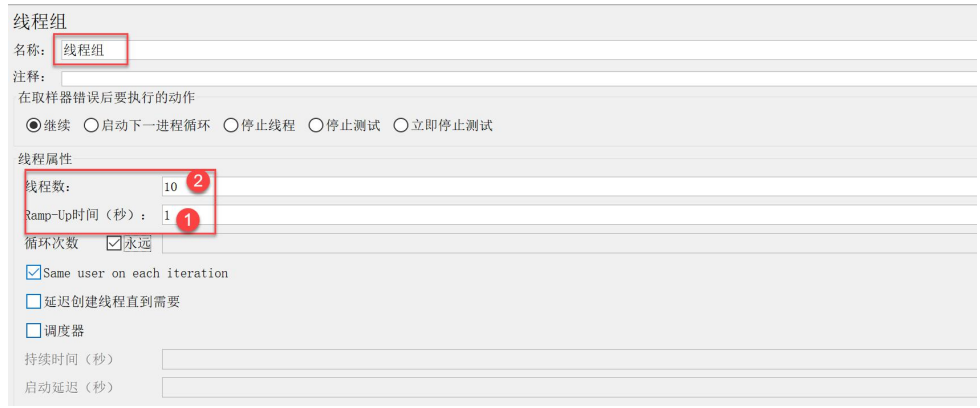
Add a thread group:
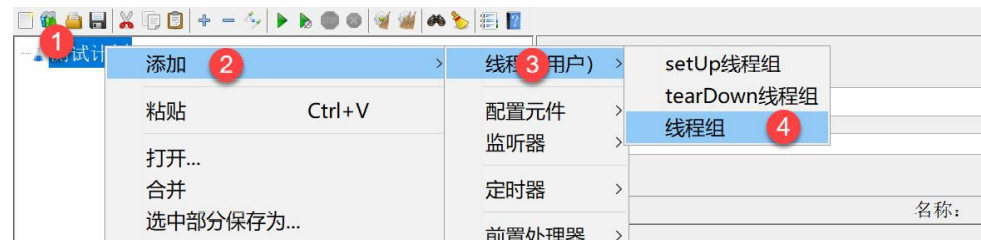
1 s 10 threads send requests at the same time.
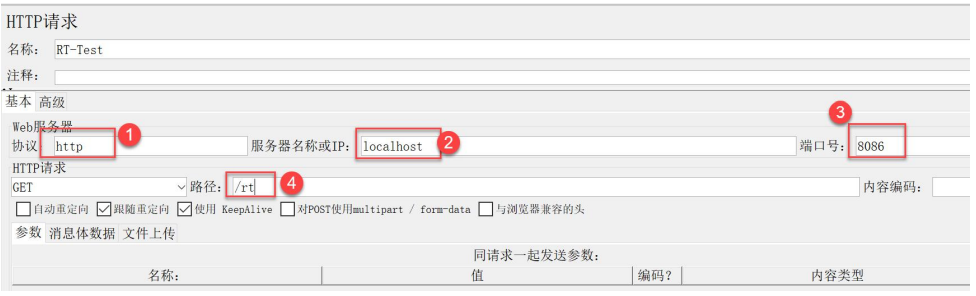
Add a sampler:

Add the interface we want to test:
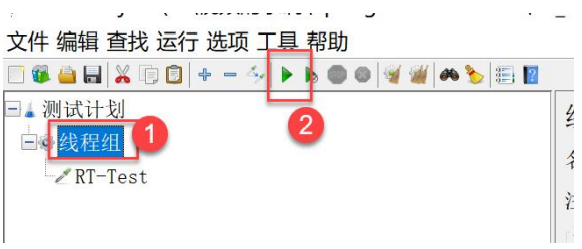
Start test:
View results:


5.2 abnormal proportion
When the requests per second of resources are > = 5, and the ratio of the total number of exceptions per second to the throughput exceeds the threshold, the resources enter the degraded state, and the program will fail quickly in the next time window.
5.2.1 adding interfaces
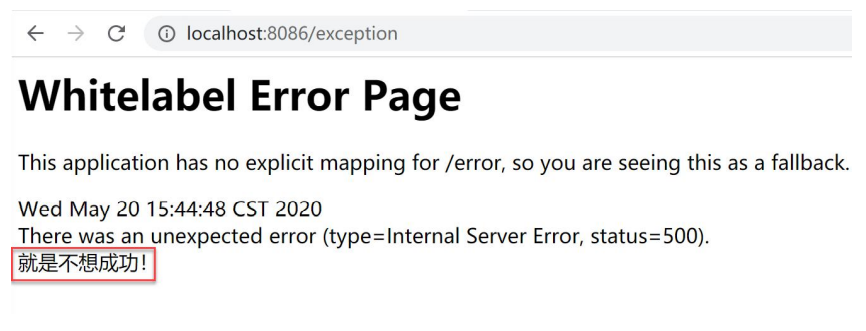
@GetMapping("/exception")
public ResponseEntity<String> exception() throws InterruptedException {
	throw new RuntimeException("Just don't want to succeed!") ;
}
5.2.2 add degradation rule

The above configuration means that if the QPS of / exception is greater than 5 and the request exception ratio per second is greater than 0.5, the sentinel circuit breaker will open and the api interface will not be available in the next 3 seconds (time window).
In other words, if 10 requests come in within one second and more than 5 are wrong, the fuse will be triggered and the interface will not be available within one second.
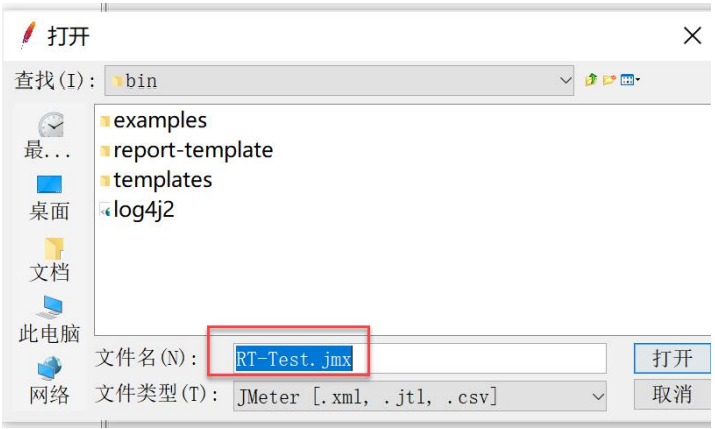
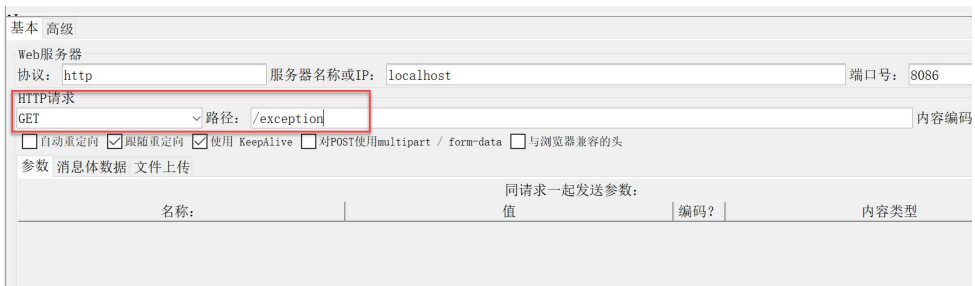
5.2.3 testing
Open Jmeter and modify the requested address:
Start the test.
Open in browser:
http://localhost:8086/exception
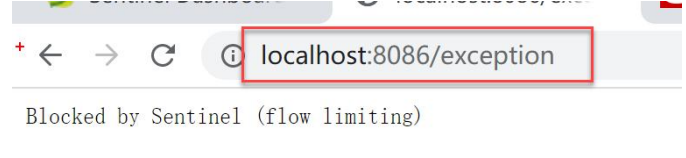
Directly fused, stop jemter, wait for 3s, visit here:
5.3 number of exceptions
When the policy is the number of exceptions, it means that degradation will be triggered when the number of exceptions requested is greater than or equal to a certain value within the specified time window. Continue to use the interface test above.
5.3.1 adding rules
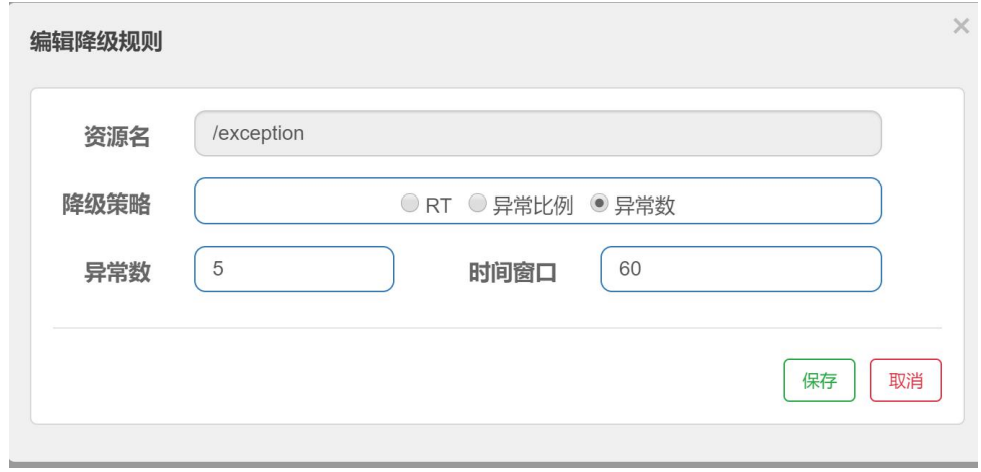
The above rule indicates that if the number of access / exception request exceptions is greater than or equal to 5 within 60 seconds, degradation will be triggered.
5.3.2 testing the rule
It can be seen that the downgrade was successfully triggered on the fifth visit.
6, Hotspot rule
Hot spots are frequently accessed data. Many times, we want to count the data with the highest access frequency in a hot data and restrict its access.
6.1 add an interface
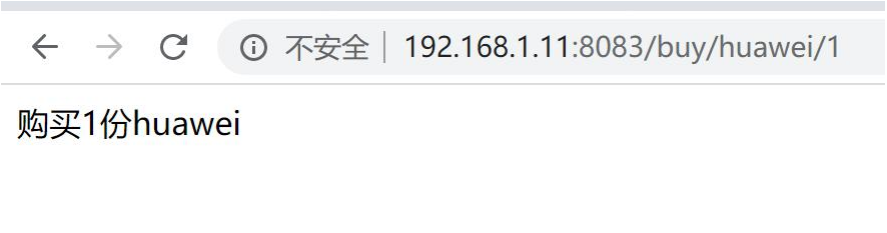
@GetMapping("/buy")
@SentinelResource("buy")
public ResponseEntity<String> buy(String prodName,Integer prodCount){
	return ResponseEntity.ok("buy" + prodCount + "share" + prodName );
}
6.2 rules for adding hotspots
Add a hotspot rule to this resource:
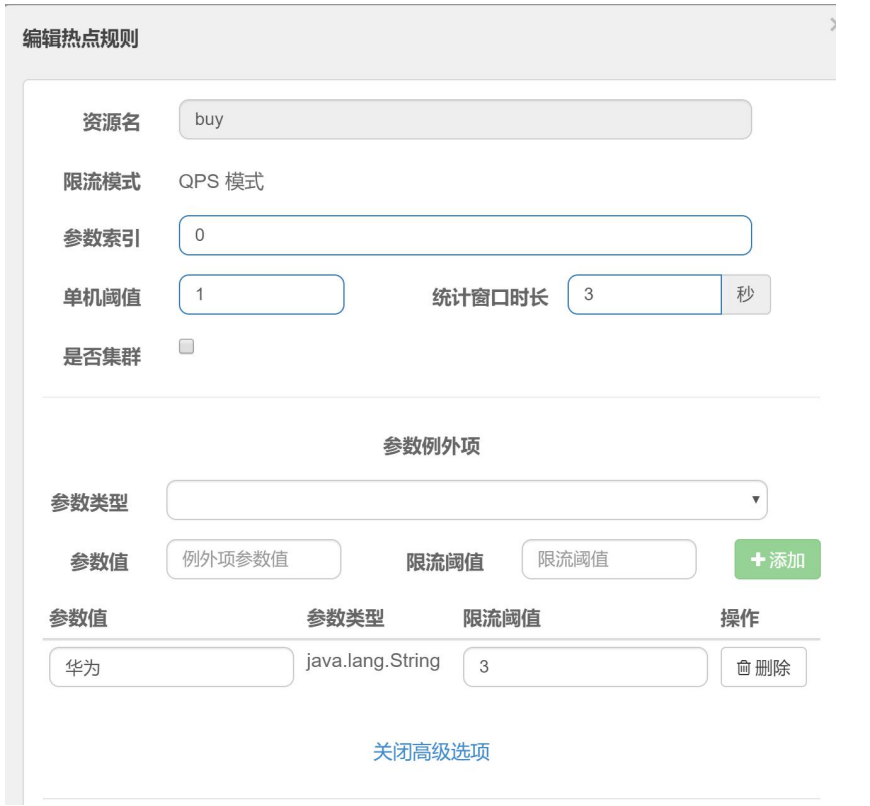
The above configuration means: add a hotspot rule to the buy resource. When the value of the 0th parameter is Huawei, the QPS threshold is 3, otherwise it is 1. In addition, if the 0th parameter is not passed, the request is not limited by the hotspot rule.
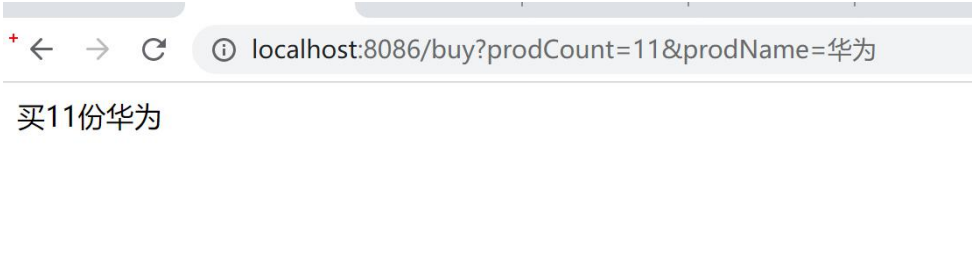
6.3 test effect
Not Huawei:
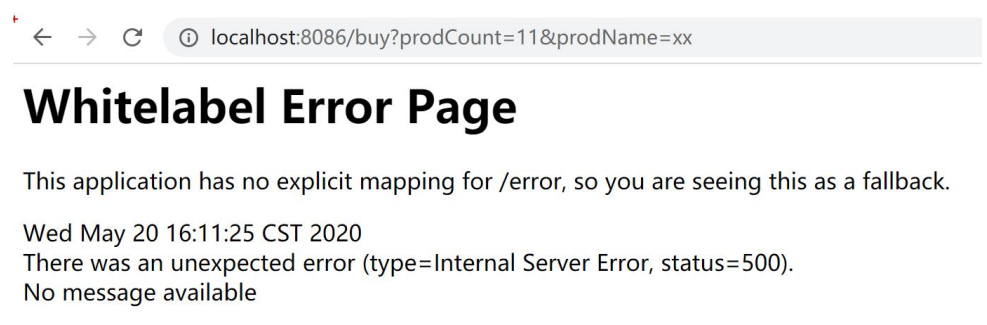
After buying once, the current is limited inside.
Huawei: buy it three times at the same time to limit the current
7, System rules
System rules set flow restriction rules for the whole system, not for a resource. The setting page is as follows:
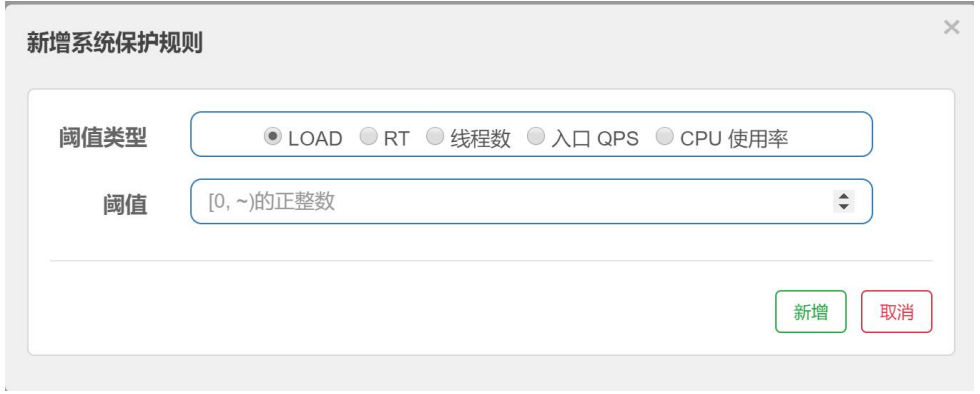
Threshold types include the following five types:
- Load adaptation (only valid for Linux / Unix like machines): load1 of the system is used as the heuristic index for adaptive system protection. When system load1 exceeds the set heuristic value and the current number of concurrent threads exceeds the estimated system capacity, system protection will be triggered (BBR stage). The system capacity is estimated from the maxQps minRt of the system. The setting reference value is generally CPU cores 2.5.
- CPU usage (version 1.5.0 +): when the system CPU utilization exceeds the threshold, the system protection is triggered (value range 0.0-1.0), which is sensitive.
- Average RT: when the average RT of all inlet flows on a single machine reaches the threshold, the system protection is triggered, and the unit is milliseconds.
- Number of concurrent threads: system protection is triggered when the number of concurrent threads of all inlet traffic on a single machine reaches the threshold.
- Inlet QPS: when the QPS of all inlet flows on a single machine reaches the threshold, the system protection is triggered
8, Authorization rules
Authorization rules are used to configure the black and white list of resources:

The configuration indicates that only appA and appB can access test1 resources.
SentinelResource remote call test case construction
1, Introduction to @ SentinelResource
Sentinel provides @ SentinelResource annotation to define resources, and provides optional exception fallback and Block fallback.
Exception fallback refers to the fallback processing when Java exceptions occur in the method marked with @ SentinelResource annotation;
Block fallback refers to the fallback when the @ SentinelResource resource access does not comply with the rules defined by the Sentinel console (the default return is Blocked by Sentinel (flow limiting)). The usage of this annotation is briefly recorded here.
2, Construction of framework
We will build the test framework as shown in the figure:
2.1 setting up sentinel example
We will demonstrate all the functions of @ SentinelResource in sentinel example.
2.1.4 complete pom.xml file
<?xml version="1.0" encoding="UTF-8"?>
<project xmlns="http://maven.apache.org/POM/4.0.0"
	xmlns:xsi="http://www.w3.org/2001/XMLSchema-instance"
	xsi:schemaLocation="http://maven.apache.org/POM/4.0.0
http://maven.apache.org/xsd/maven-4.0.0.xsd">
	<parent>
		<artifactId>spring-cloud-alibaba-examples</artifactId>
		<groupId>com.bjsxt</groupId>
		<version>1.0</version>
	</parent>
	<modelVersion>4.0.0</modelVersion>
	<packaging>pom</packaging>
	<artifactId>sentinel-examples</artifactId>
	<dependencies>
		<dependency>
			<groupId>org.springframework.boot</groupId>
			<artifactId>spring-boot-starter-web</artifactId>
		</dependency>
		<dependency>
			<groupId>com.alibaba.cloud</groupId>
			<artifactId>spring-cloud-alibaba-nacos-discovery</artifactId>
		</dependency>
	</dependencies>
</project>
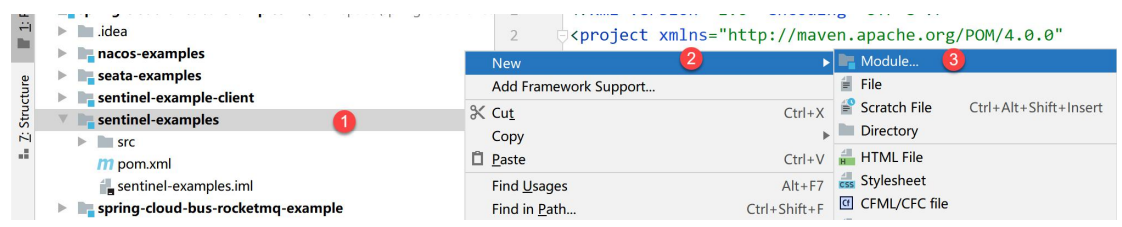
2.1.1 create a Maven project using IDEA

Select Maven project:
Click Next and fill in the following contents:

Parent: select spring cloud Alibaba example
Name: sentinel-example
Click Finish to complete the creation
2.1.2 add dependency
<dependencies>
	<dependency>
		<groupId>org.springframework.boot</groupId>
		<artifactId>spring-boot-starter-web</artifactId>
	</dependency>
	<dependency>
		<groupId>com.alibaba.cloud</groupId>
		<artifactId>spring-cloud-alibaba-nacos-discovery</artifactId>
	</dependency>
</dependencies>
- Spring boot stat web is the most basic dependency for web development;
- Spring cloud Alibaba Nacos discovery is the discovery component of services
2.1.3 modify the packaging method of the project
<packaging>pom</packaging>
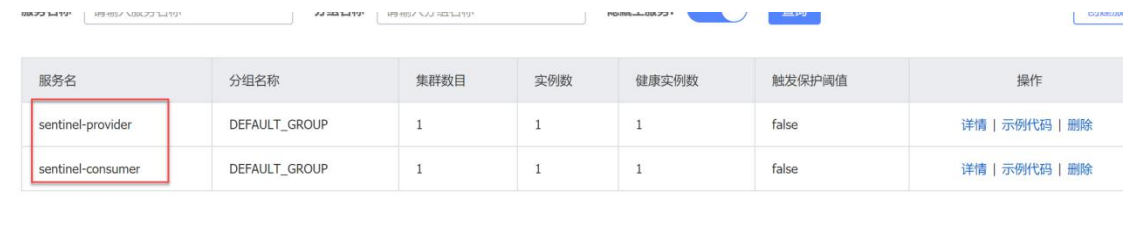
2.2 setting up sentinel provider
Provide is an ordinary service provider.
2.2.1 create a Maven project using IDEA

Select Maven project:

Click Next and fill in the following contents:
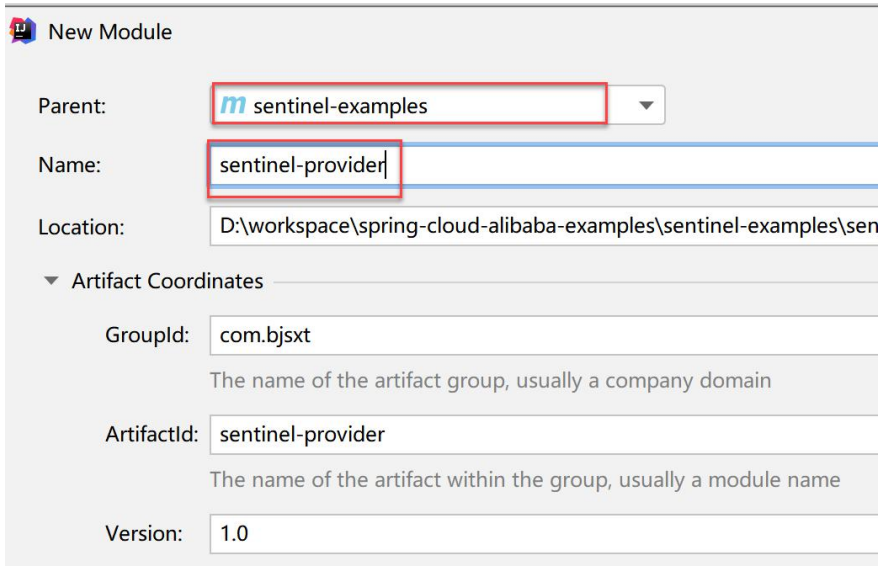
Parent: select sentinel example
Name: sentinel-provider
Click Finish to complete the creation.
2.2.2 modify the packaging method of the project
We modify the packaging method of the project, and later we can use jar to publish the project.
<build>
	<plugins>
		<plugin>
			<groupId>org.springframework.boot</groupId>
			<artifactId>spring-boot-maven-plugin</artifactId>
		</plugin>
	</plugins>
</build>
2.2.3 complete pom.xml file
<?xml version="1.0" encoding="UTF-8"?>
<project xmlns="http://maven.apache.org/POM/4.0.0"
	xmlns:xsi="http://www.w3.org/2001/XMLSchema-instance"
	xsi:schemaLocation="http://maven.apache.org/POM/4.0.0
http://maven.apache.org/xsd/maven-4.0.0.xsd">
	<parent>
		<artifactId>sentinel-examples</artifactId>
		<groupId>com.bjsxt</groupId>
		<version>1.0</version>
	</parent>
	<modelVersion>4.0.0</modelVersion>
	<artifactId>sentinel-provider</artifactId>
	<build>
		<plugins>
			<plugin>
				<groupId>org.springframework.boot</groupId>
				<artifactId>spring-boot-maven-plugin</artifactId>
			</plugin>
		</plugins>
	</build>
</project>
2.3 setting up sentinel consumer
Provide is an ordinary service consumer.
2.3.1 create a Maven project using IDEA
Select Maven project:

Click Next and fill in the following contents:
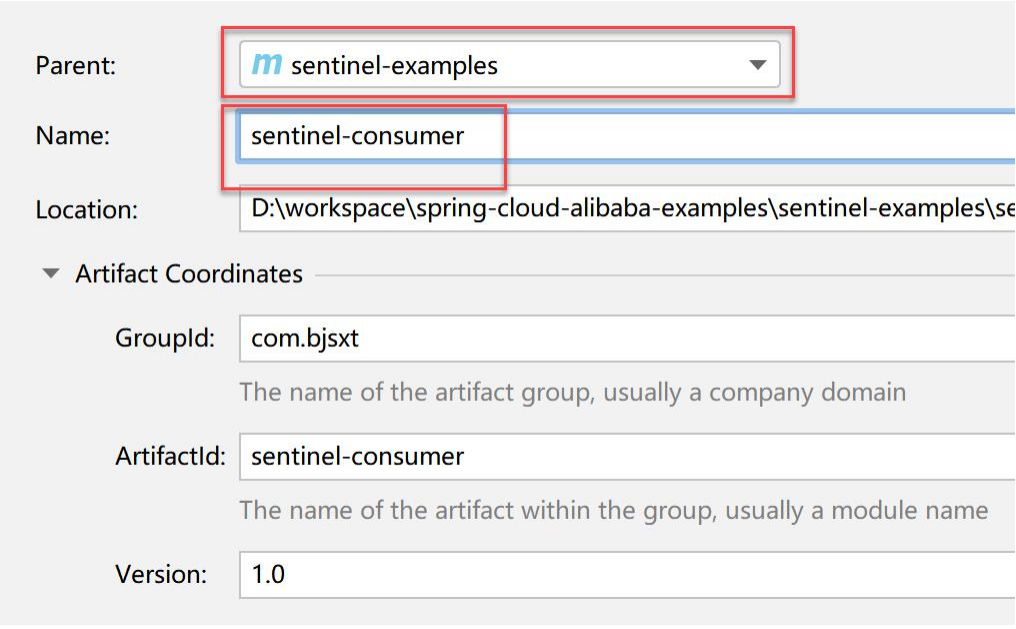
Parent: select sentinel example
Name: sentinel-consumer
Click Finish to complete the creation.
2.3.2 modify pom.xml file
We will demonstrate the function of @ SentinelResource in this project.
	<dependencies>
	<dependency>
		<groupId>com.alibaba.cloud</groupId>
		<artifactId>spring-cloud-starter-alibaba-sentinel</artifactId>
	</dependency>
</dependencies>
We modify the packaging method of the project, and later we can use jar to publish the project.
<build>
	<plugins>
		<plugin>
			<groupId>org.springframework.boot</groupId>
			<artifactId>spring-boot-maven-plugin</artifactId>
		</plugin>
	</plugins>
</build>
2.3.3 complete pom.xml file
<?xml version="1.0" encoding="UTF-8"?>
<project xmlns="http://maven.apache.org/POM/4.0.0"
	xmlns:xsi="http://www.w3.org/2001/XMLSchema-instance"
	xsi:schemaLocation="http://maven.apache.org/POM/4.0.0
http://maven.apache.org/xsd/maven-4.0.0.xsd">
	<parent>
		<artifactId>sentinel-examples</artifactId>
		<groupId>com.bjsxt</groupId>
		<version>1.0</version>
	</parent>
	<modelVersion>4.0.0</modelVersion>
	<artifactId>sentinel-consumer</artifactId>
	<dependencies>
		<dependency>
			<groupId>com.alibaba.cloud</groupId>
			<artifactId>spring-cloud-starter-alibaba-sentinel</artifactId>
		</dependency>
	</dependencies>
	<build>
		<plugins>
			<plugin>
				<groupId>org.springframework.boot</groupId>
				<artifactId>spring-boot-maven-plugin</artifactId>
			</plugin>
		</plugins>
	</build>
</project>
3, Improve sentinel provider
We add an analog data interface to the provider.
3.1 add a data interface
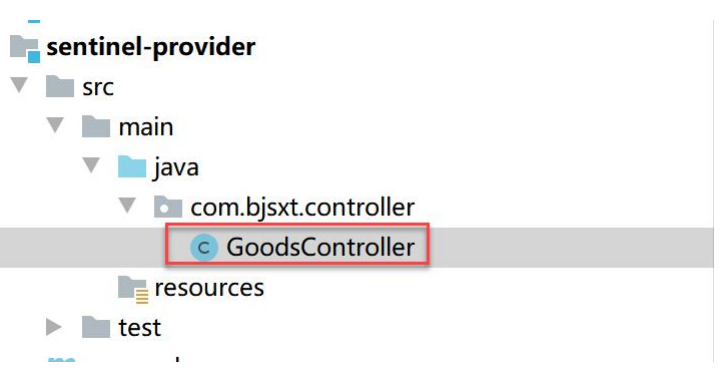
The code is as follows:
@RestController
public class GoodsController {
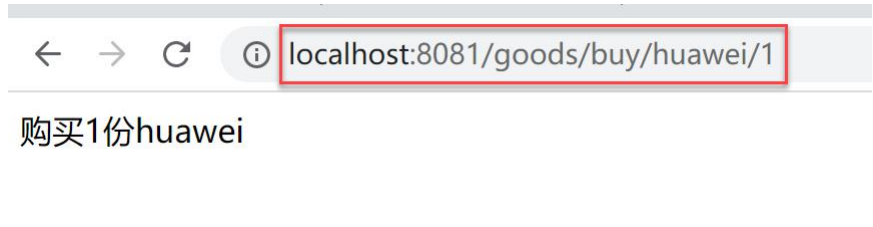
@GetMapping("/goods/buy/{name}/{count}")
public ResponseEntity<String> buy(
@PathVariable("name") String name,
@PathVariable("count") Integer count) {
return ResponseEntity.ok(String.format("purchase%d share%s", count, name));
}
}
3.2 add profile
server:
	port: 8081
spring:
	application:
		name: sentinel-provider
	cloud:
		nacos:
			discovery:
				server-addr: localhost:8848
Just so that the service can register with the registry.
3.3 add a startup class
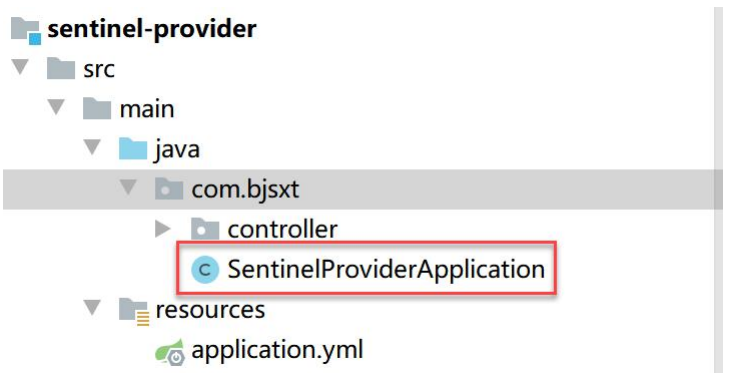
The code is as follows:
@SpringBootApplication
@EnableDiscoveryClient
public class SentinelProviderApplication {
	public static void main(String[] args) {
		SpringApplication.run(SentinelProviderApplication.class ,args) ;
	}
}
3.4 start up test
Before starting, we must ensure that Nacos has been started successfully.

Test interface:
http://localhost:8081/goods/buy/huawei/1
4, Perfect sentinel consumer
4.1 calling service providers
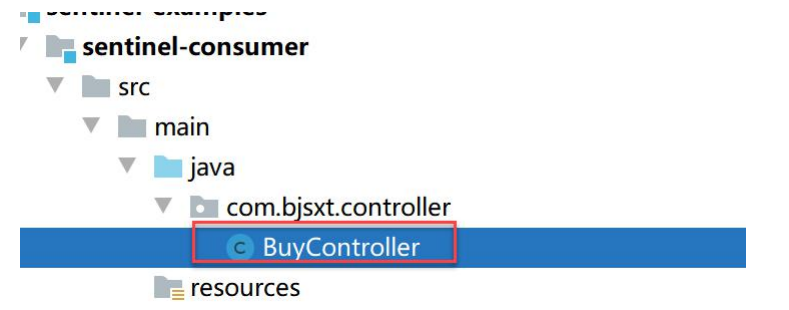
The code is as follows:
@RestController
public class BuyController {
@Autowired
private RestTemplate restTemplate;
@GetMapping("buy/{name}/{count}")
@SentinelResource(value = "buy", fallback = "buyFallback", blockHandler =
"buyBlock")
public ResponseEntity<String> buy(@PathVariable String name, @PathVariable
Integer count) {
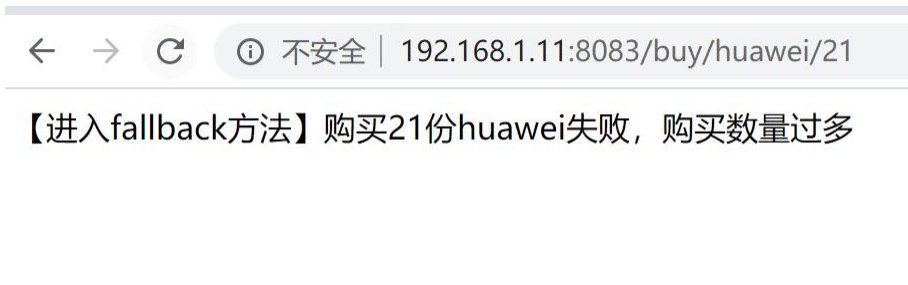
if (count >= 20) {
throw new IllegalArgumentException("Too many purchases");
}
if ("miband".equalsIgnoreCase(name)) {
throw new NullPointerException("Sold out");
}
Map<String, Object> params = new HashMap<>(2);
params.put("name", name);
params.put("count", count);
return ResponseEntity.ok(
this.restTemplate.getForEntity("http://sentinel-provider/goods/buy/{name}/{count}", String.class, params).getBody());
}
// Abnormal fallback
public ResponseEntity<String> buyFallback(@PathVariable String name,
@PathVariable Integer count, Throwable throwable) {
return ResponseEntity.ok(
String.format("[get into fallback [method] purchase%d share%s Failure,%s", count,name, throwable.getMessage()));
}
// sentinel fallback
public ResponseEntity<String> buyBlock(@PathVariable String name,
@PathVariable Integer count, BlockException e) {
return ResponseEntity.ok(String.format("[get into blockHandler [method] purchase%d share%s Failed. There are too many buyers at present. Please try again later", count, name));
}
}
4.2 add profile
New profile:
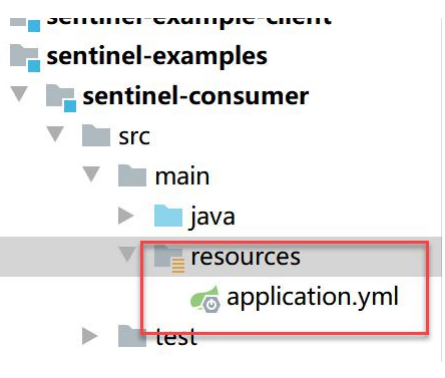
The contents are as follows:
server:
	port: 8083
spring:
	application:
		name: sentinel-consumer
	cloud:
		nacos:
			discovery:
				server-addr: localhost:8848
		sentinel:
			transport:
				dashboard: localhost:8080
				port: 8719
4.3 add startup class
@SpringBootApplication
@EnableDiscoveryClient
public class SentinelConsumerApplication {
	public static void main(String[] args) {
		SpringApplication.run(SentinelConsumerApplication.class ,args) ;
	}

	@LoadBalanced
	@Bean
	public RestTemplate restTemplate(){
		return new RestTemplate() ;
	}
}
4.4 start up test
4.4.1 startup software
Before starting, you must ensure that these software have been started:
- Nacos-Server
- Sentinel-Dashboard
- Sentinel-provider
When ready, start sentine consumer:
Access interface test:
http://192.168.1.11:8083/buy/huawei/1
4.4.2 adding flow control rules


When the QPS exceeds 2 when accessing the resource, an exception is thrown.
Test:
http://192.168.1.11:8083/buy/huawei/1

5, Other usage
5.1 description
Writing a fallback method in the current class will make the code redundant and highly coupled. We can extract the fallback method into a specified class.
5.2 add BuyBlockHandler
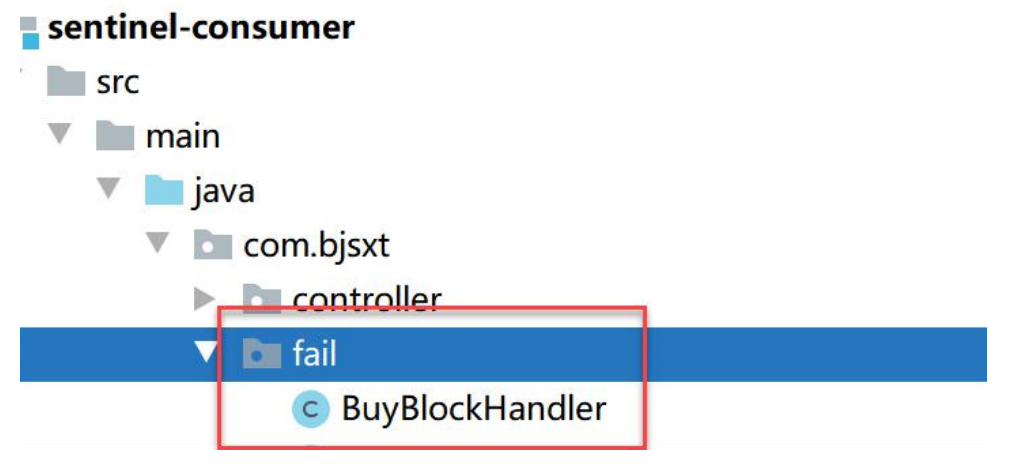
The code is as follows:
public class BuyBlockHandler {
	// sentinel fallback
	public static String buyBlock(@PathVariable String name, @PathVariable
	Integer count, BlockException e) {
		return String.format("[get into blockHandler [method] purchase%d share%s Failed. There are too many buyers at present. Please try again later", count, name);
	}
}
5.3 add BuyFallBack
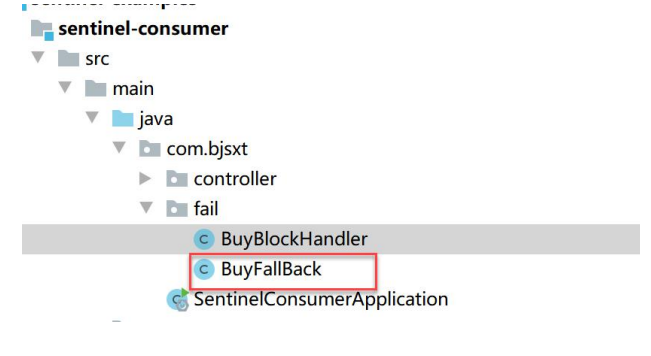
The code is as follows:
public class BuyBlockHandler {
	// sentinel fallback
	public static ResponseEntity<String> buyBlock(@PathVariable String name,
	@PathVariable Integer count, BlockException e) {
		return ResponseEntity.ok(String.format("[get into blockHandler [method] purchase%d share%s Failed. There are too many buyers at present. Please try again later", count, name));
	}
}
5.4 transformation of BuyController
@RestController
public class BuyController {

	@Autowired
	private RestTemplate restTemplate;

	@GetMapping("buy/{name}/{count}")
	@SentinelResource(
					value = "buy",
					fallback = "buyFallback",
					fallbackClass = BuyFallBack.class ,
					blockHandler = "buyBlock",
					blockHandlerClass = BuyBlockHandler.class ,
	)
	public ResponseEntity<String> buy(@PathVariable String name, @PathVariable
	Integer count) {
		if (count >= 20) {
		throw new IllegalArgumentException("Too many purchases");
		}
		if ("miband".equalsIgnoreCase(name)) {
		throw new NullPointerException("Sold out");
		}
		Map<String, Object> params = new HashMap<>(2);
		params.put("name", name);
		params.put("count", count);
		return ResponseEntity.ok(
	this.restTemplate.getForEntity("http://sentinel-provider/goods/buy/{name}/{
	count}", String.class, params).getBody());
	}
}
Spring Cloud Alibaba Seata
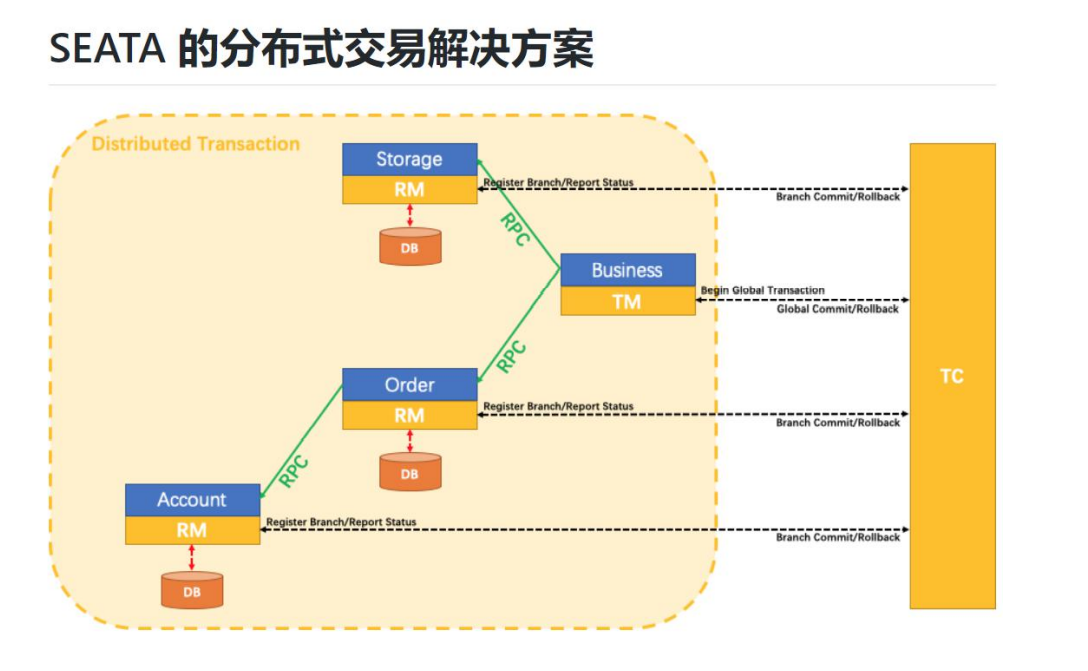
1, Introduction to Seata

Seata is an open source distributed transaction solution, which is committed to providing high-performance and easy-to-use distributed transaction services under the microservice architecture. Before the opening of Seata, the corresponding internal version of Seata has been playing the role of distributed consistency Middleware in Alibaba economy, helping the economy survive the double 11 over the years and providing strong support for BU businesses. After years of precipitation and accumulation, commercial products have been sold in Alibaba cloud and financial cloud. On January 2019, in order to create a more perfect technological ecology and inclusive technological achievements, Seata officially announced open source. In the future, Seata will help its technology more reliable and complete in the form of community co construction.
2, Installation of Seata server
Before using Seata, we first need to install the Seata server server.
2.1 download Seata
Since the version of spring cloud alibaba We use is 2.2.0.RELEASE, which controls the version of seata to 1.0.0, we download the version of seata of 1.0.0 here.
visit:
https://github.com/seata/seata/releases/tag/v1.0.0
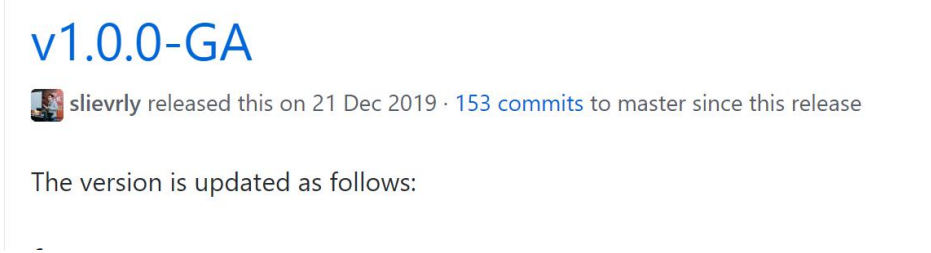
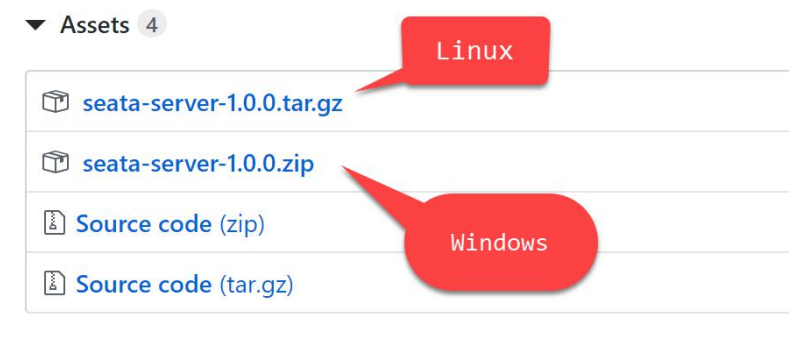
Because I am using a windows computer, I choose the version of seata-server-1.0.0.zip.
Click this file to download.
2.2 Seata server directory analysis
Copy the Seata server to the directory of the software, and use the decompression tool to extract the file.
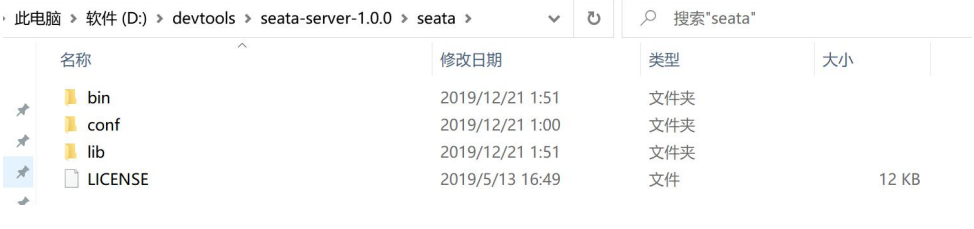
Bin: executable directory
Conf: profile directory
lib: dependent jar
LICENSE: authorization file
2.3 Seata startup
Enter the {seata}/bin directory and double-click:
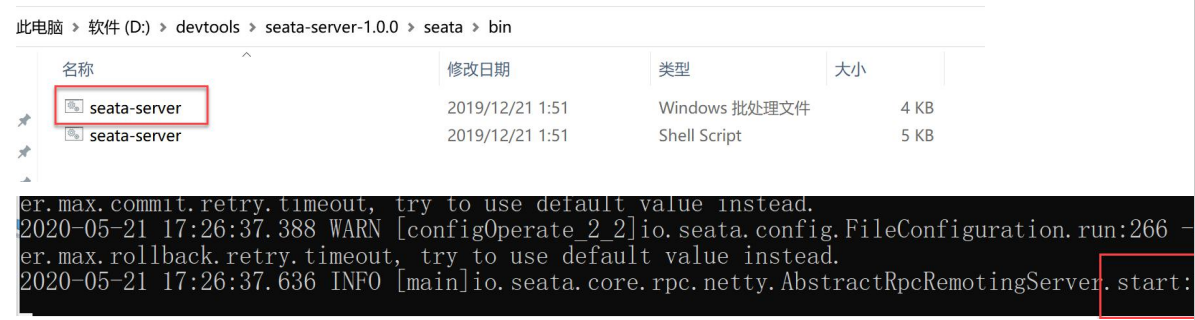
Indicates that the Seata server has been started successfully.
3, Construction of framework
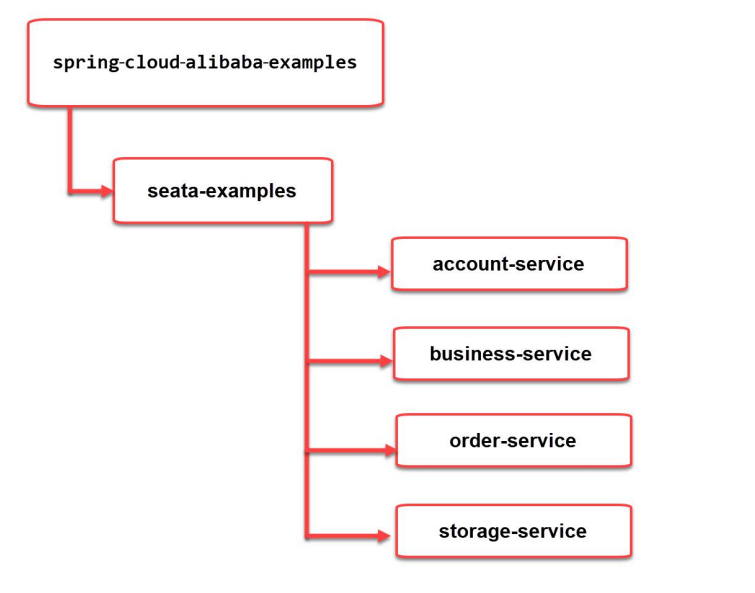
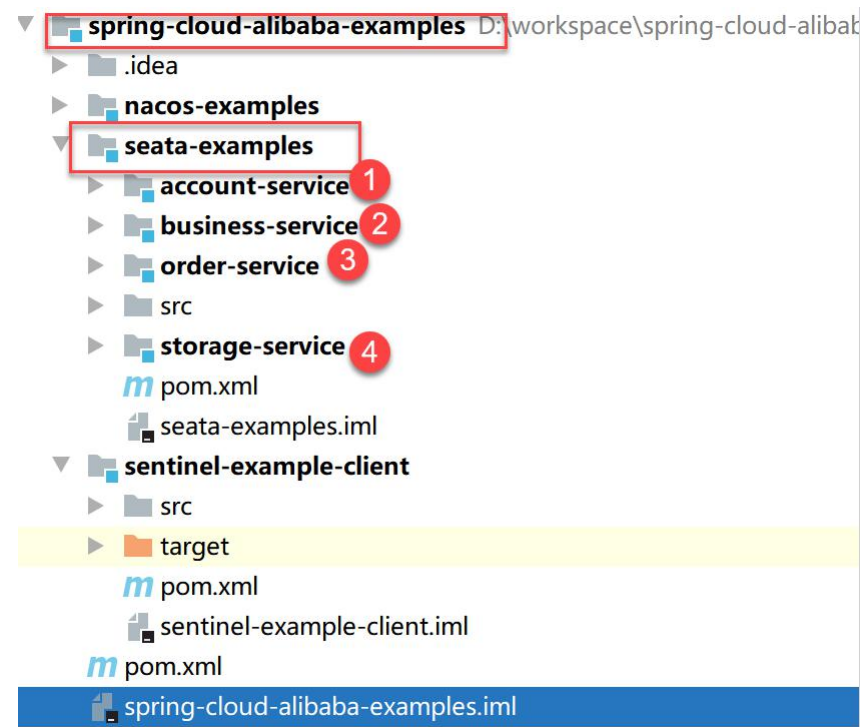
In this example, we simulate a scenario where a user purchases goods:
- StorageService is responsible for deducting inventory quantity;
- OrderService is responsible for saving orders;
- AccountService is responsible for deducting user account balance;
- Business is responsible for the whole process of placing orders by users;
3.1 construction of Seata examples project
seata examples is used to control the dependent version numbers of all projects and remove the public dependent seata.
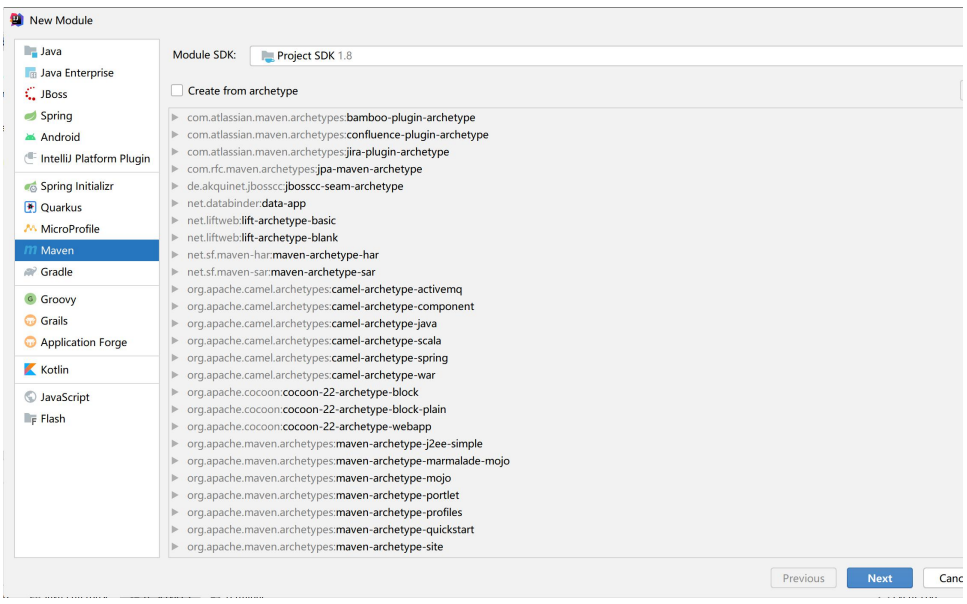
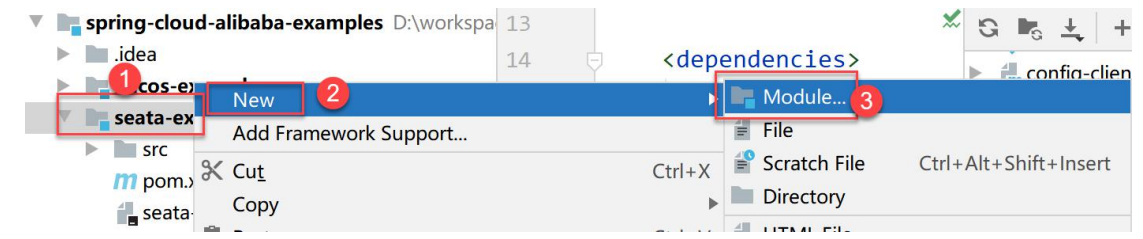
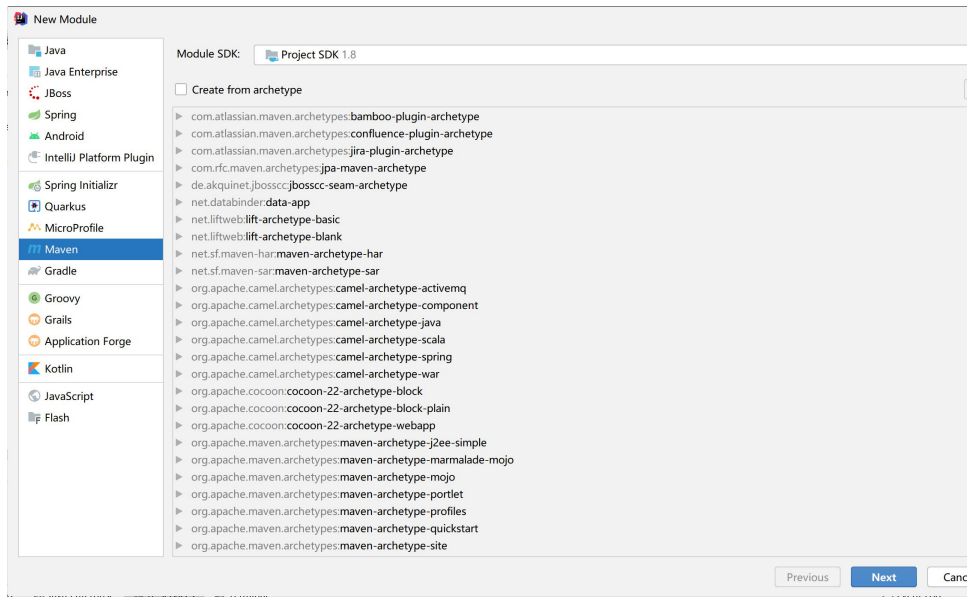
3.1.1 create Maven project using IDEA
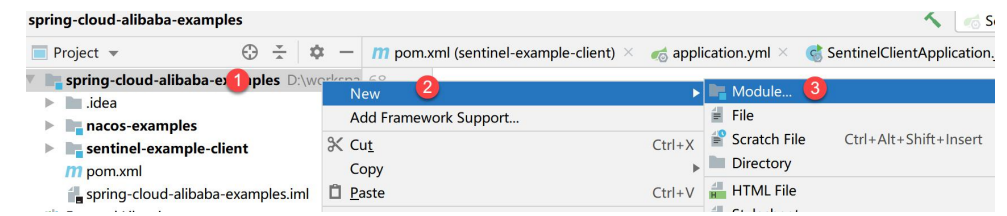
Select Maven project:
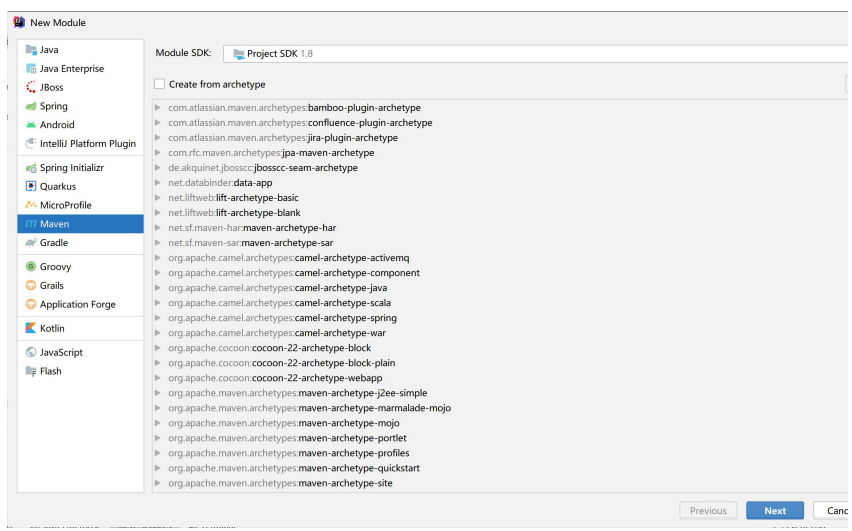
Click Next to add the following information:
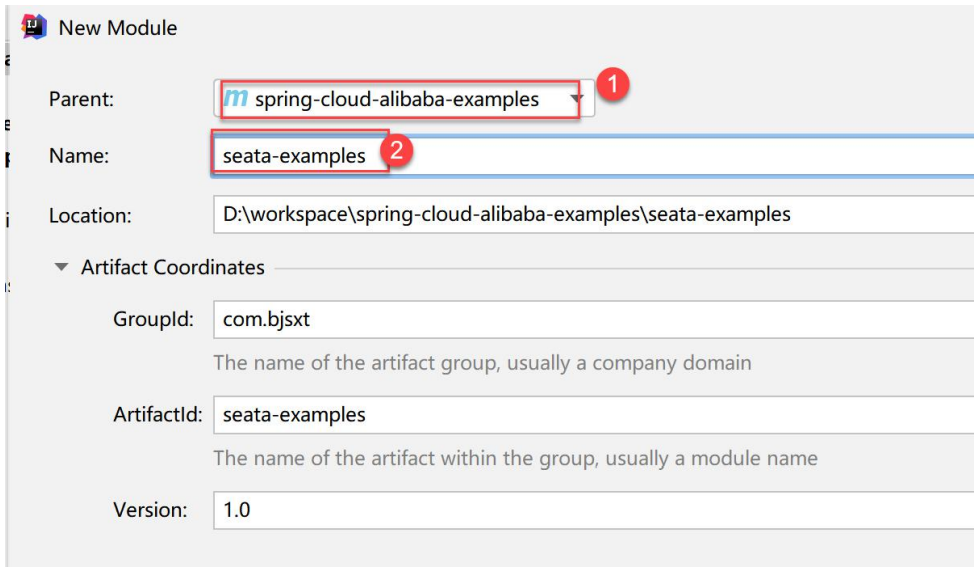
Parent: select spring cloud Alibaba examples
Name: seata-examples
Other information can be left as default. Then click Finish to complete the creation.
3.1.2 add dependency
Open the pom.xml file of the project and add the following dependencies.
<dependencies>
	<!-- Service registration-->
	<dependency>
		<groupId>com.alibaba.cloud</groupId>
		<artifactId>spring-cloud-alibaba-nacos-discovery</artifactId>
	</dependency>
	<!-- seata-->
	<dependency>
		<groupId>com.alibaba.cloud</groupId>
		<artifactId>spring-cloud-starter-alibaba-seata</artifactId>
	</dependency>
	<!-- web Basic dependencies of the project-->
	<dependency>
		<groupId>org.springframework.boot</groupId>
		<artifactId>spring-boot-starter-web</artifactId>
	</dependency>
</dependencies>
3.1.3 complete pom.xml
<?xml version="1.0" encoding="UTF-8"?>
<project xmlns="http://maven.apache.org/POM/4.0.0"
	xmlns:xsi="http://www.w3.org/2001/XMLSchema-instance"
	xsi:schemaLocation="http://maven.apache.org/POM/4.0.0
http://maven.apache.org/xsd/maven-4.0.0.xsd">
	<parent>
		<artifactId>spring-cloud-alibaba-examples</artifactId>
		<groupId>com.bjsxt</groupId>
		<version>1.0</version>
	</parent>
	<modelVersion>4.0.0</modelVersion>
	<artifactId>seata-examples</artifactId>
	<dependencies>
		<!-- Service registration-->
		<dependency>
			<groupId>com.alibaba.cloud</groupId>
			<artifactId>spring-cloud-alibaba-nacos-discovery</artifactId>
		</dependency>
		<!-- seata-->
		<dependency>
			<groupId>com.alibaba.cloud</groupId>
			<artifactId>spring-cloud-starter-alibaba-seata</artifactId>
		</dependency>
		<!-- web Basic dependencies of the project-->
		<dependency>
			<groupId>org.springframework.boot</groupId>
			<artifactId>spring-boot-starter-web</artifactId>
		</dependency>
	</dependencies>
</project>
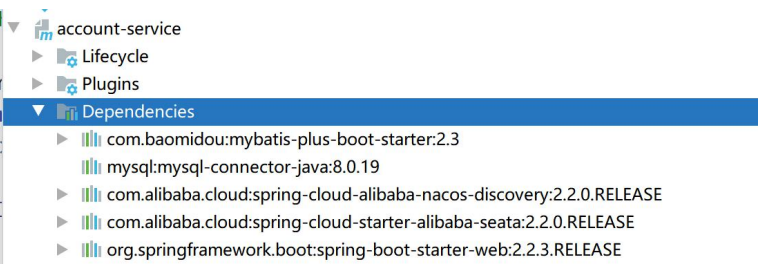
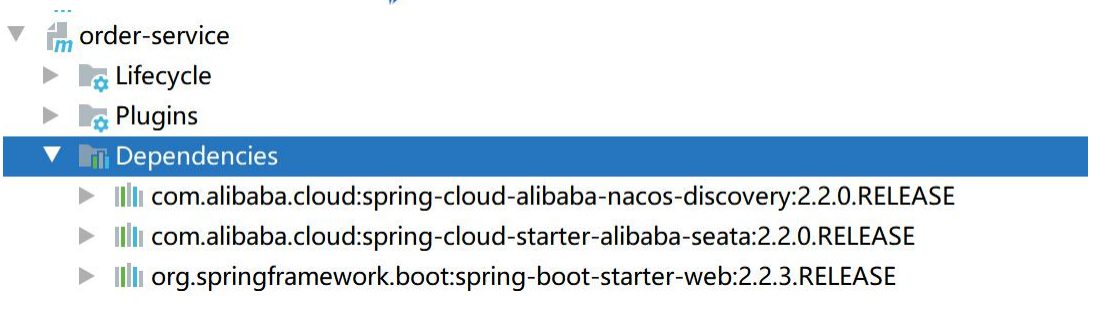
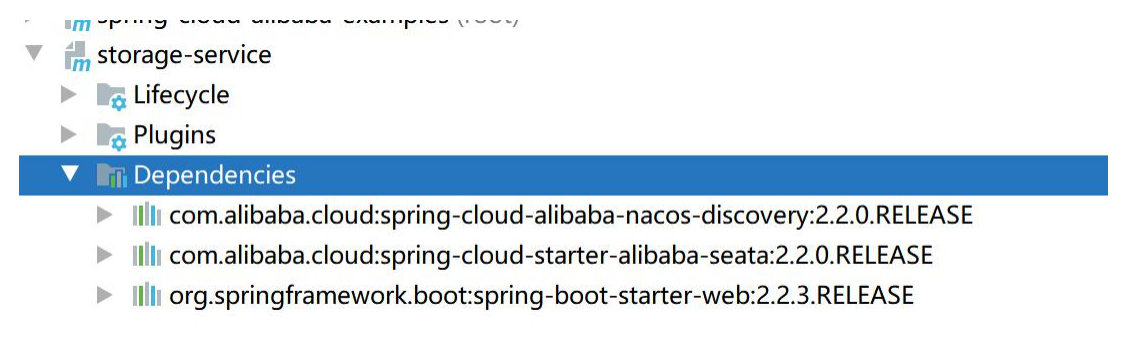
Finally, the dependencies of our project are as follows:
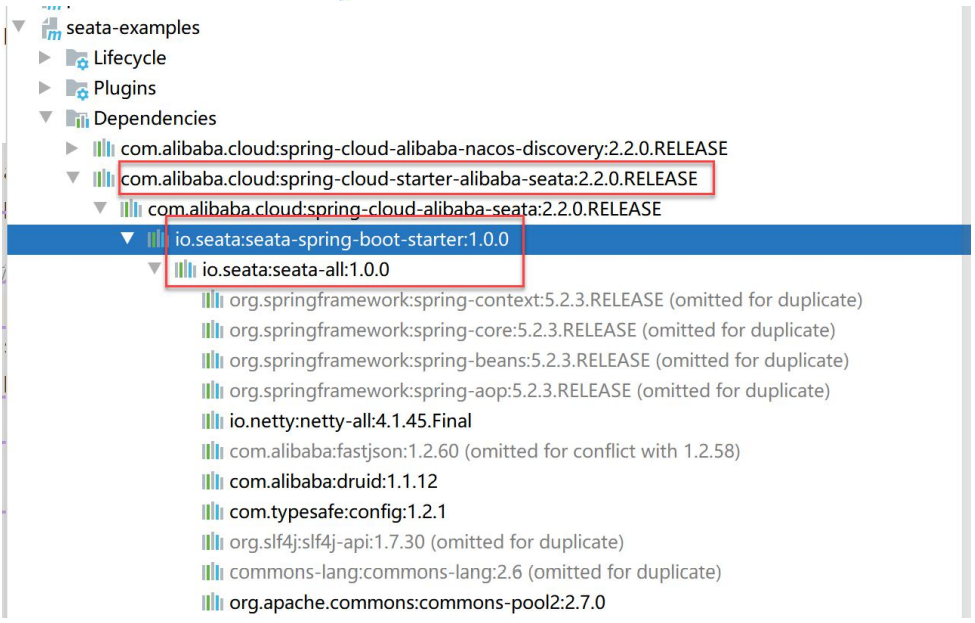
As you can see, our seata version is 1.0.0.
3.2 build account service project
The account service project will be responsible for deducting the user account balance
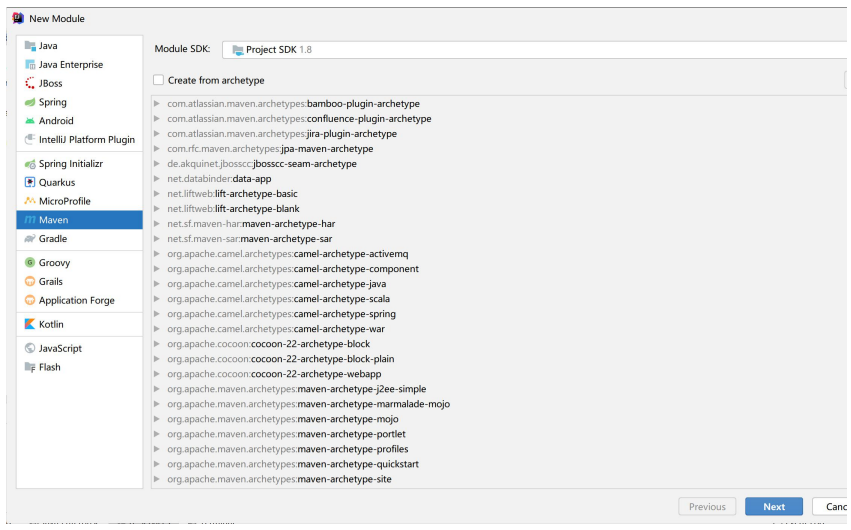
3.2.1 create a Maven project using IDEA
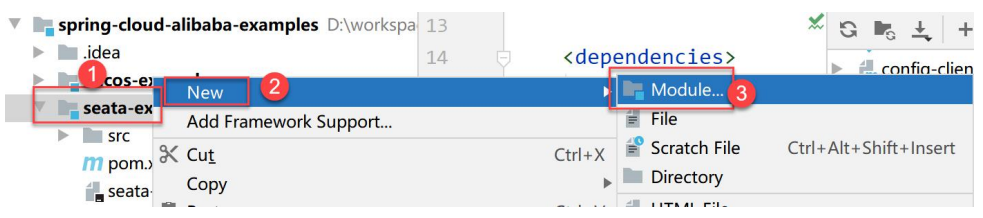
Select Maven project:
Click Next and fill in the following information:
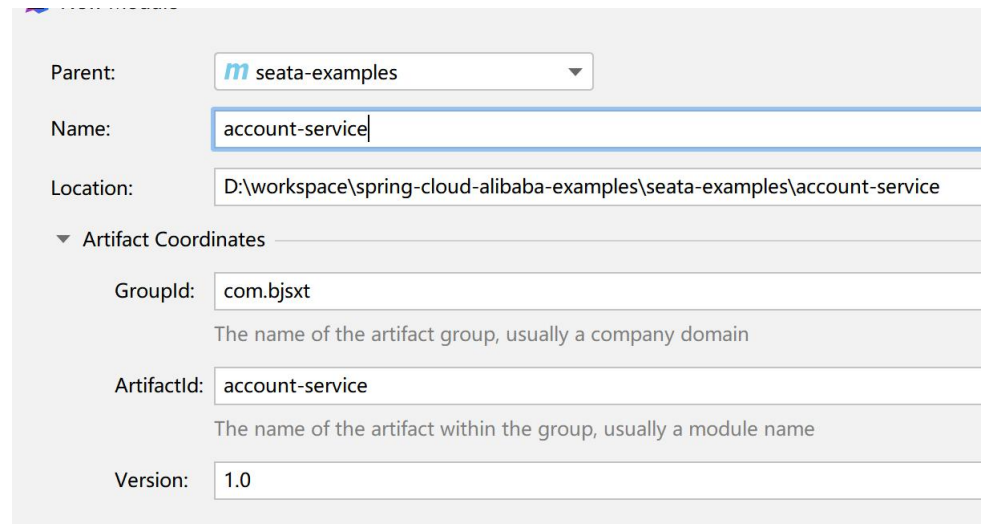
Parent: seata-examples
Name: account-service
Other values can remain the default.
3.2.2 add dependency
We need to use the ORM framework to complete the operation on the database. In this case, we need to use mybatis plus to operate the database.
Open pom.xml and add the following contents:
<dependencies>
	<dependency>
		<groupId>com.baomidou</groupId>
		<artifactId>mybatis-plus-boot-starter</artifactId>
		<version>3.3.0</version>
	</dependency>
	<!--MySQL rely on -->
	<dependency>
		<groupId>mysql</groupId>
		<artifactId>mysql-connector-java</artifactId>
	</dependency>
</dependencies>
In order to package and publish our project in the future, we add the package plug-in of boot Maven:
<build>
	<plugins>
		<plugin>
			<groupId>org.springframework.boot</groupId>
			<artifactId>spring-boot-maven-plugin</artifactId>
		</plugin>
	</plugins>
</build>
In order to package and publish our project in the future, we add the package plug-in of boot Maven:
<build>
	<plugins>
		<plugin>
			<groupId>org.springframework.boot</groupId>
			<artifactId>spring-boot-maven-plugin</artifactId>
		</plugin>
	</plugins>
</build>
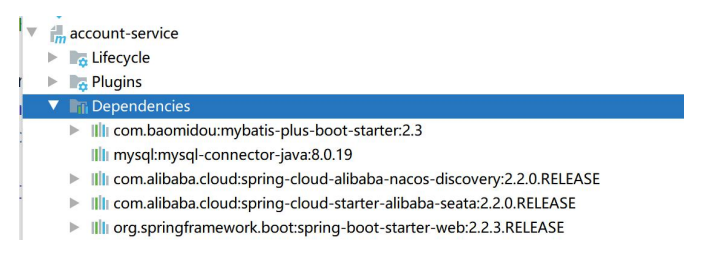
3.2.3 the complete pom.xml file is as follows
<?xml version="1.0" encoding="UTF-8"?>
<project xmlns="http://maven.apache.org/POM/4.0.0"
	xmlns:xsi="http://www.w3.org/2001/XMLSchema-instance"
	xsi:schemaLocation="http://maven.apache.org/POM/4.0.0
http://maven.apache.org/xsd/maven-4.0.0.xsd">
	<parent>
		<artifactId>seata-examples</artifactId>
		<groupId>com.bjsxt</groupId>
		<version>1.0</version>
	</parent>
	<modelVersion>4.0.0</modelVersion>
	<artifactId>account-service</artifactId>
	<dependencies>
		<dependency>
			<groupId>com.baomidou</groupId>
			<artifactId>mybatis-plus-boot-starter</artifactId>
			<version>2.3</version>
		</dependency>
		<!--MySQL rely on -->
		<dependency>
			<groupId>mysql</groupId>
			<artifactId>mysql-connector-java</artifactId>
		</dependency>
	</dependencies>
	<build>
		<plugins>
			<plugin>
				<groupId>org.springframework.boot</groupId>
				<artifactId>spring-boot-maven-plugin</artifactId>
			</plugin>
		</plugins>
	</build>
</project>
The dependencies of the project are as follows:
3.3 build business service project
business will mainly complete the order logic, including inventory deduction and order creation.
3.3.1 create a Maven project using IDEA
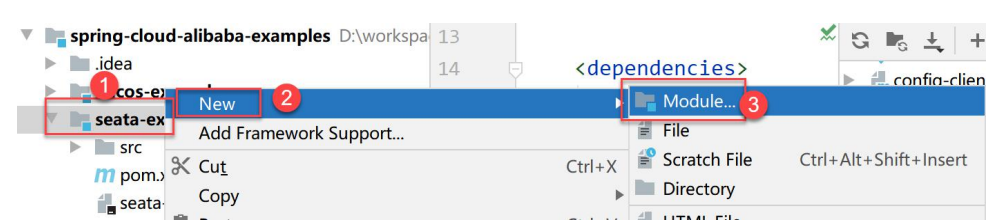
Select Maven project:
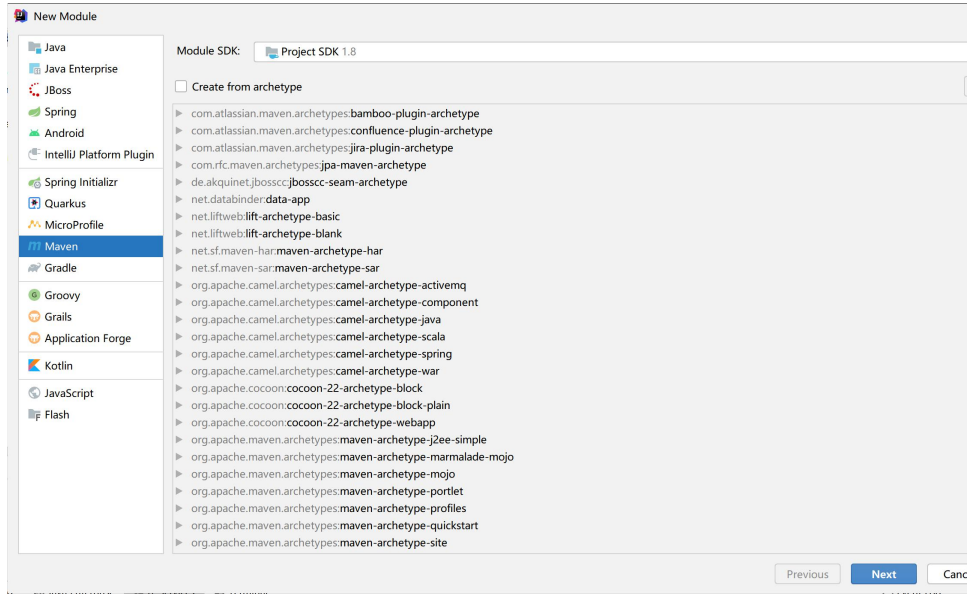
Click Next and fill in the following information:
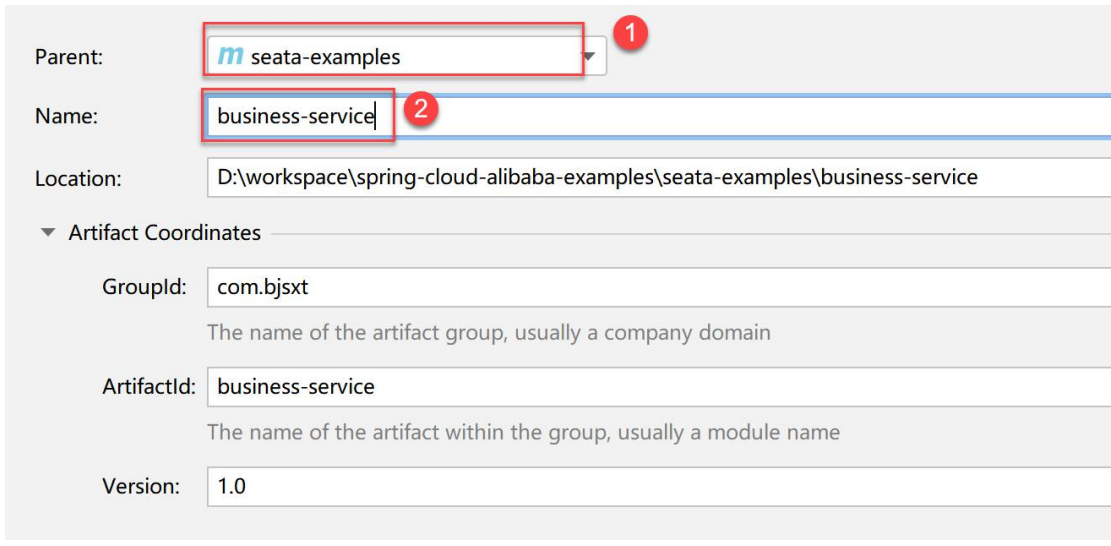
Parent: seata-examples
Name: business-service
Other values can remain the default.
3.3.2 add dependency
In order to package and publish our project in the future, we add the package plug-in of boot Maven:
<build>
	<plugins>
		<plugin>
			<groupId>org.springframework.boot</groupId>
			<artifactId>spring-boot-maven-plugin</artifactId>
		</plugin>
	</plugins>
</build>
3.2.3 the complete pom.xml file is as follows
<?xml version="1.0" encoding="UTF-8"?>
<project xmlns="http://maven.apache.org/POM/4.0.0"
	xmlns:xsi="http://www.w3.org/2001/XMLSchema-instance"
	xsi:schemaLocation="http://maven.apache.org/POM/4.0.0
http://maven.apache.org/xsd/maven-4.0.0.xsd">
	<parent>
		<artifactId>seata-examples</artifactId>
		<groupId>com.bjsxt</groupId>
		<version>1.0</version>
	</parent>
	<modelVersion>4.0.0</modelVersion>
	<artifactId>account-service</artifactId>
	<dependencies>
		<dependency>
			<groupId>com.baomidou</groupId>
			<artifactId>mybatis-plus-boot-starter</artifactId>
			<version>2.3</version>
		</dependency>
		<!--MySQL rely on -->
		<dependency>
			<groupId>mysql</groupId>
			<artifactId>mysql-connector-java</artifactId>
		</dependency>
	</dependencies>
	<build>
		<plugins>
			<plugin>
				<groupId>org.springframework.boot</groupId>
				<artifactId>spring-boot-maven-plugin</artifactId>
			</plugin>
		</plugins>
	</build>
</project>
The dependencies of the project are as follows:
3.4 build order service project
The order service project will be responsible for saving user orders.
3.4.1 create a Maven project using IDEA
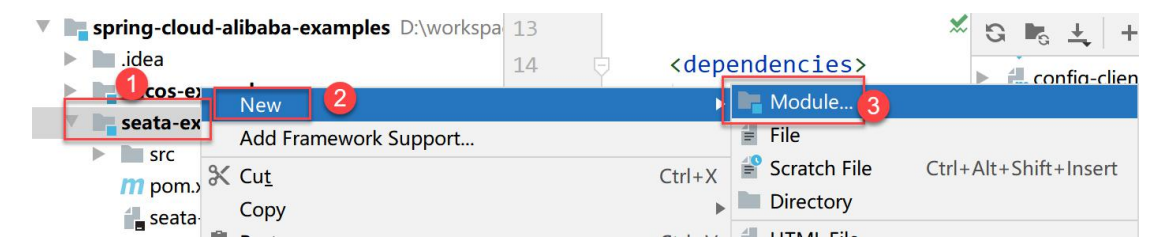
Select Maven project:
Click Next and fill in the following information:
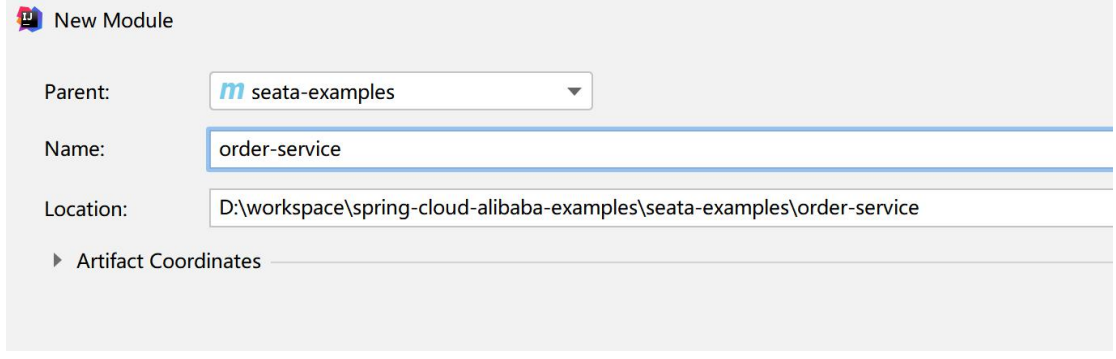
Parent: seata-examples
Name: order-service
Other values can remain the default.
3.4.2 add dependency
We need to use the ORM framework to complete the operation on the database. In this case, we need to use mybatis plus to operate the database.
Open pom.xml and add the following contents:
<dependencies>
	<dependency>
		<groupId>com.baomidou</groupId>
		<artifactId>mybatis-plus-boot-starter</artifactId>
		<version>3.3.0</version>
	</dependency>
	<!--MySQL rely on -->
	<dependency>
		<groupId>mysql</groupId>
		<artifactId>mysql-connector-java</artifactId>
	</dependency>
</dependencies>
In order to package and publish our project in the future, we add the package plug-in of boot Maven:
<build>
	<plugins>
		<plugin>
			<groupId>org.springframework.boot</groupId>
			<artifactId>spring-boot-maven-plugin</artifactId>
		</plugin>
	</plugins>
</build>
3.4.3 the complete pom.xml file is as follows
<?xml version="1.0" encoding="UTF-8"?>
<project xmlns="http://maven.apache.org/POM/4.0.0"
	xmlns:xsi="http://www.w3.org/2001/XMLSchema-instance"
	xsi:schemaLocation="http://maven.apache.org/POM/4.0.0
http://maven.apache.org/xsd/maven-4.0.0.xsd">
	<parent>
		<artifactId>seata-examples</artifactId>
		<groupId>com.bjsxt</groupId>
		<version>1.0</version>
	</parent>
	<modelVersion>4.0.0</modelVersion>
	<artifactId>order-service</artifactId>
	<dependencies>
		<dependency>
			<groupId>com.baomidou</groupId>
			<artifactId>mybatis-plus-boot-starter</artifactId>
			<version>2.3</version>
		</dependency>
		<!--MySQL rely on -->
		<dependency>
			<groupId>mysql</groupId>
			<artifactId>mysql-connector-java</artifactId>
		</dependency>
	</dependencies>
	<build>
		<plugins>
			<plugin>
				<groupId>org.springframework.boot</groupId>
				<artifactId>spring-boot-maven-plugin</artifactId>
			</plugin>
		</plugins>
	</build>
</project>
The dependencies of the project are as follows:
3.5 building storage service project
Storage service will be responsible for deducting the inventory of goods.
3.5.1 create a Maven project using IDEA
Select Maven project:
Click Next and fill in the following information:
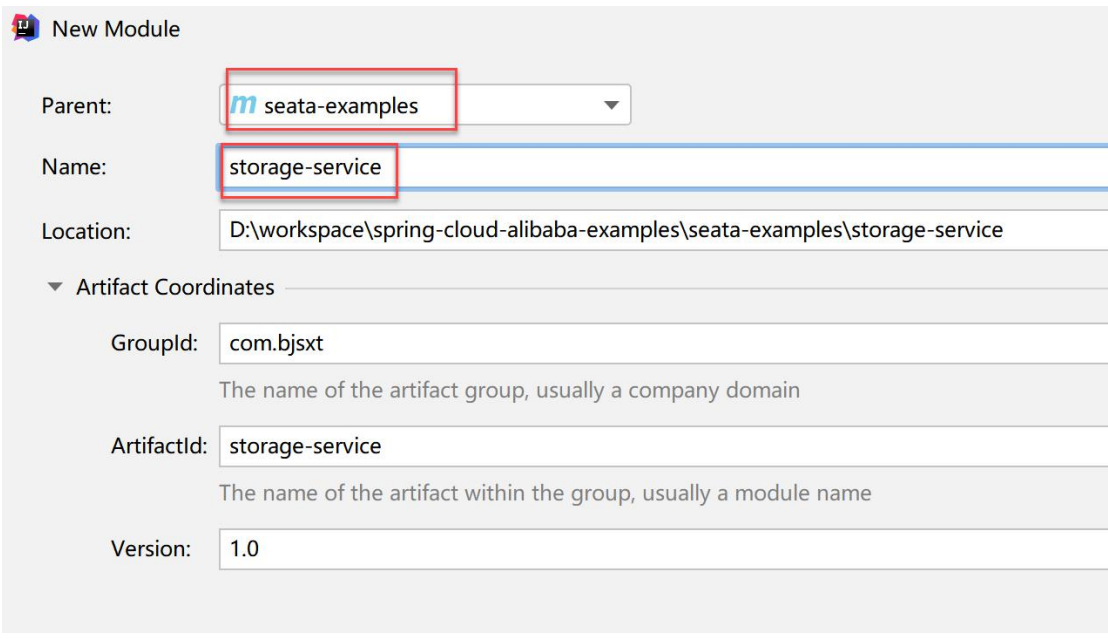
Parent: seata-examples
Name: storage-service
Other values can remain the default.
3.5.2 adding dependencies
We need to use the ORM framework to complete the operation on the database. In this case, we need to use mybatis plus to operate the database.
Open pom.xml and add the following contents:
<dependencies>
	<dependency>
		<groupId>com.baomidou</groupId>
		<artifactId>mybatis-plus-boot-starter</artifactId>
		<version>3.3.0</version>
	</dependency>
	<!--MySQL rely on -->
	<dependency>
		<groupId>mysql</groupId>
		<artifactId>mysql-connector-java</artifactId>
	</dependency>
</dependencies>
In order to package and publish our project in the future, we add the package plug-in of boot Maven:
<build>
	<plugins>
		<plugin>
			<groupId>org.springframework.boot</groupId>
			<artifactId>spring-boot-maven-plugin</artifactId>
		</plugin>
	</plugins>
</build>
3.5.3 the complete pom.xml file is as follows
<?xml version="1.0" encoding="UTF-8"?>
<project xmlns="http://maven.apache.org/POM/4.0.0"
	xmlns:xsi="http://www.w3.org/2001/XMLSchema-instance"
	xsi:schemaLocation="http://maven.apache.org/POM/4.0.0
http://maven.apache.org/xsd/maven-4.0.0.xsd">
	<parent>
		<artifactId>seata-examples</artifactId>
		<groupId>com.bjsxt</groupId>
		<version>1.0</version>
	</parent>
	<modelVersion>4.0.0</modelVersion>
	<artifactId>order-service</artifactId>
	<dependencies>
		<dependency>
			<groupId>com.baomidou</groupId>
			<artifactId>mybatis-plus-boot-starter</artifactId>
			<version>2.3</version>
		</dependency>
		<!--MySQL rely on -->
		<dependency>
			<groupId>mysql</groupId>
			<artifactId>mysql-connector-java</artifactId>
		</dependency>
	</dependencies>
	<build>
		<plugins>
			<plugin>
				<groupId>org.springframework.boot</groupId>
				<artifactId>spring-boot-maven-plugin</artifactId>
			</plugin>
		</plugins>
	</build>
</project>
The dependencies of the project are as follows:
3.6 the case of a complete project is
4, Code perfection
4.1 database table import
Before testing distributed transactions, we need to design the database and prepare the test data.
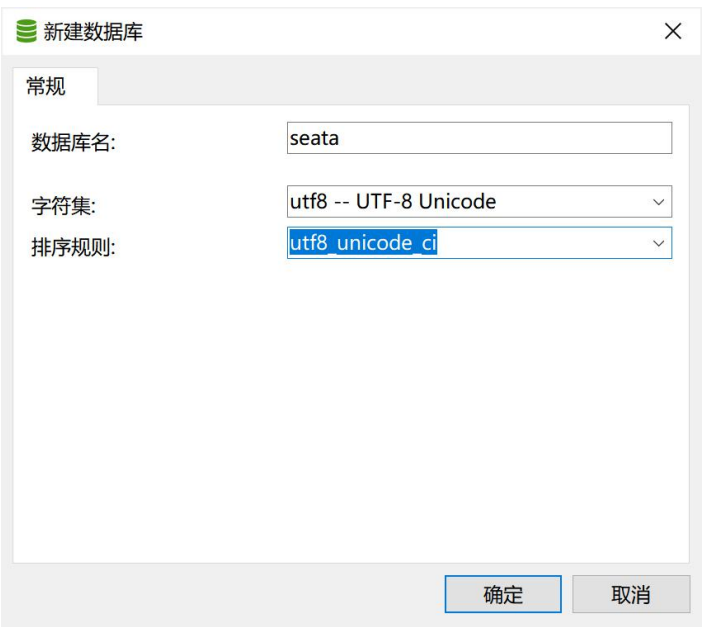
Create a new database named seata
Import Sql:
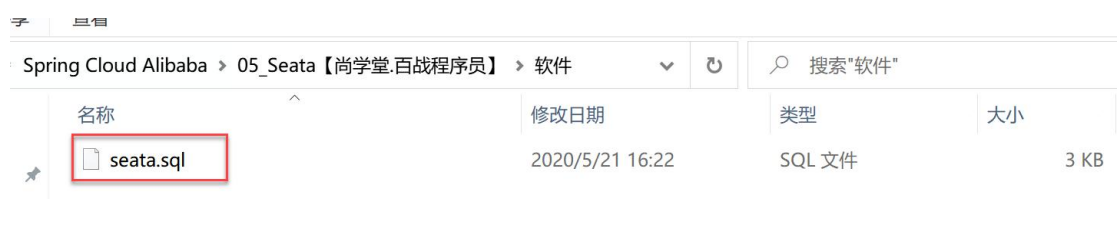
Import the sql:
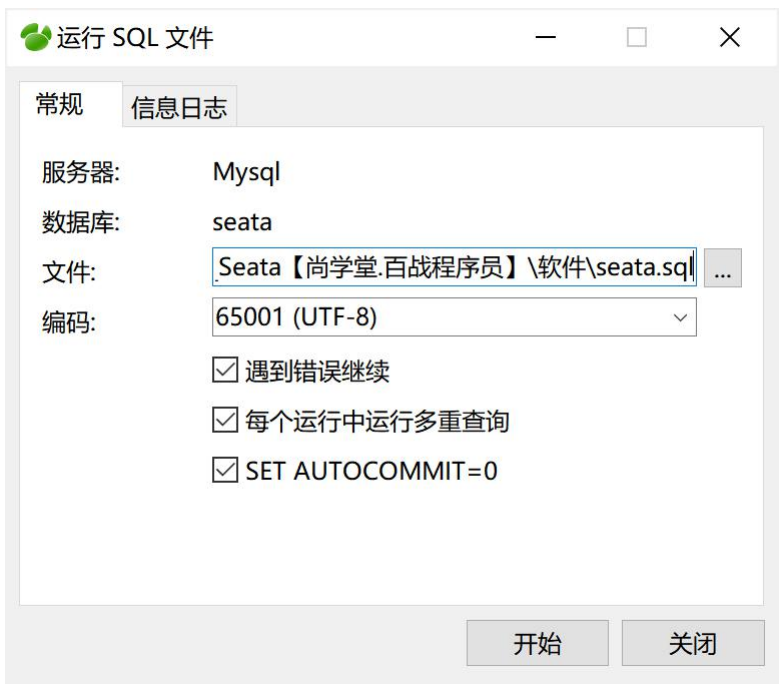
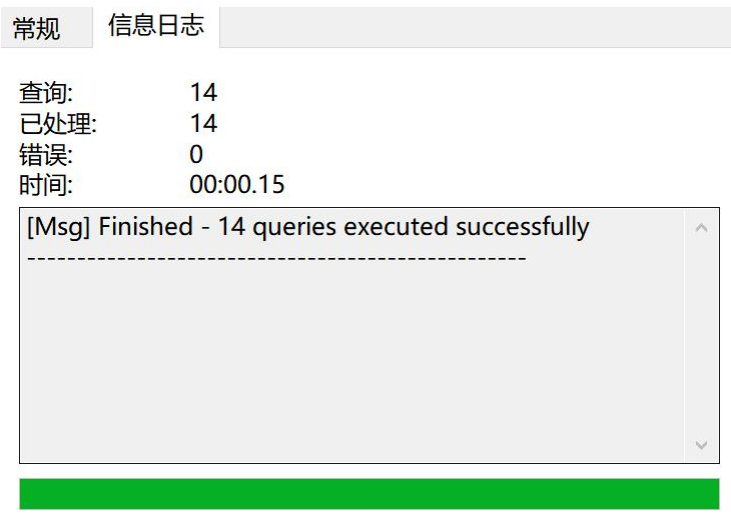
Click start to import.
After success, the number of successful items found is:
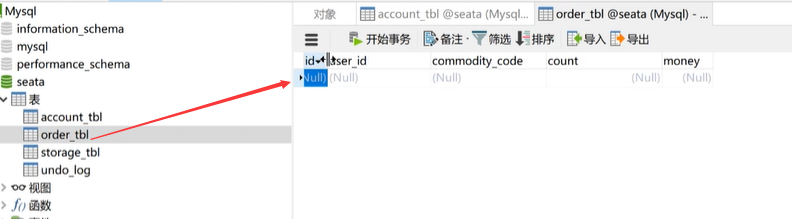
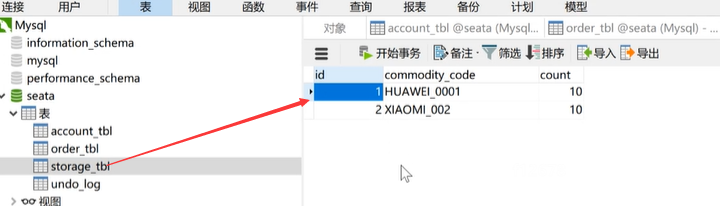
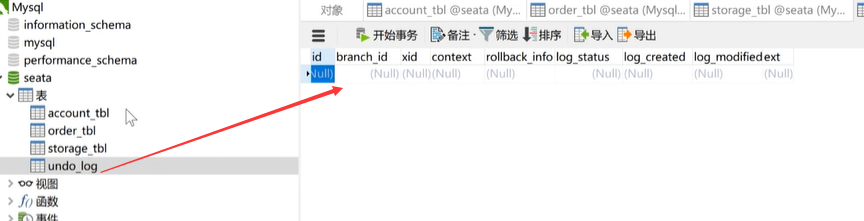
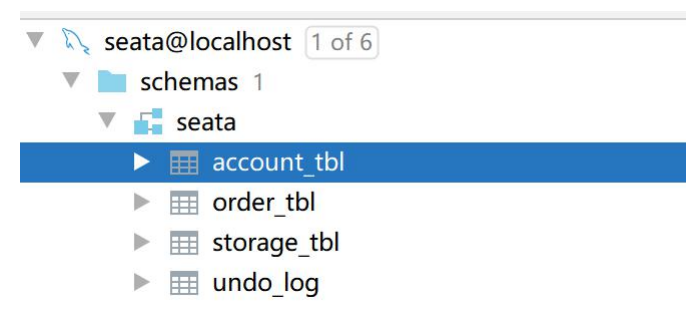
The table is as follows:
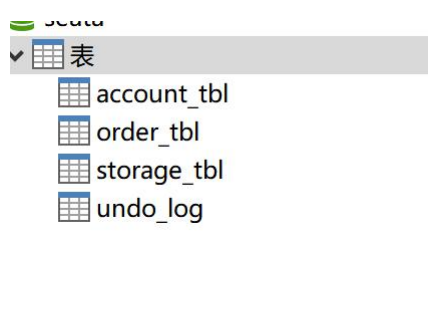
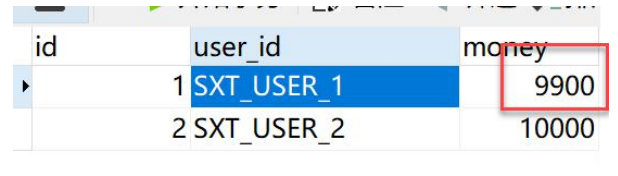
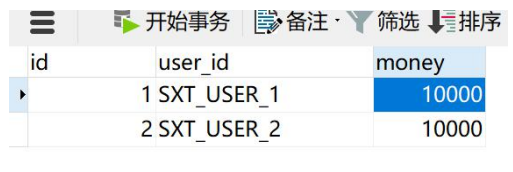
Account: user's account table
Order: order table;
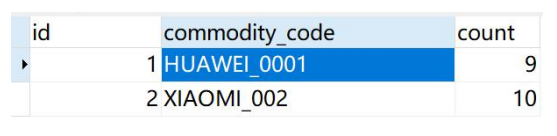
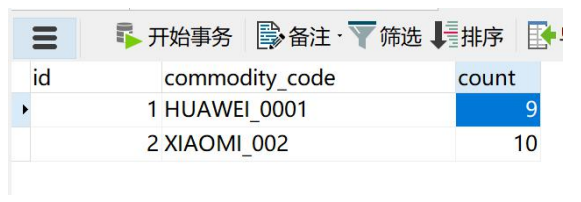
Stowage: inventory table of goods;
UNDO_LOG: rollback the transaction table. Undo is required for the SEATA AT mode_ Log table.
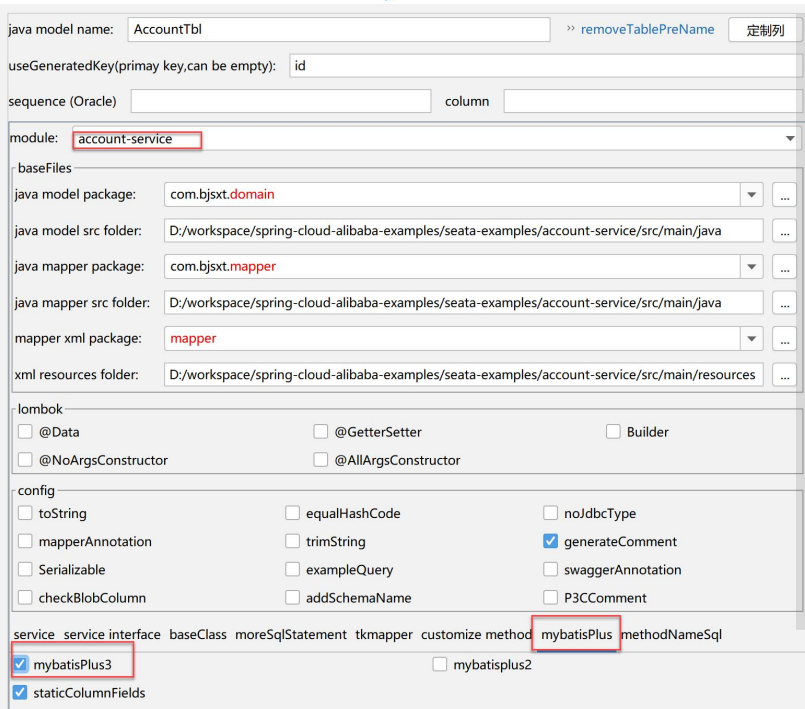
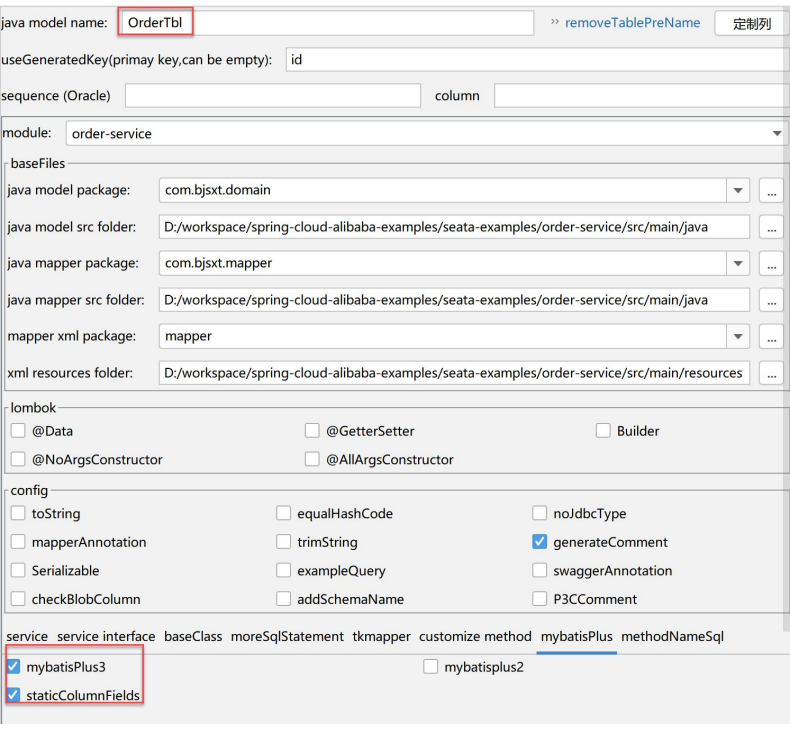
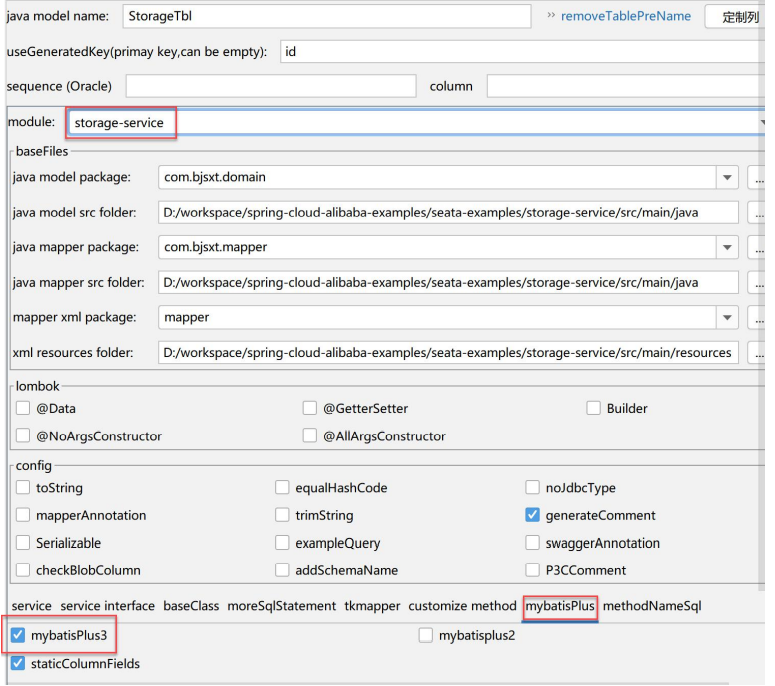
4.2 model object and Mapper object generation
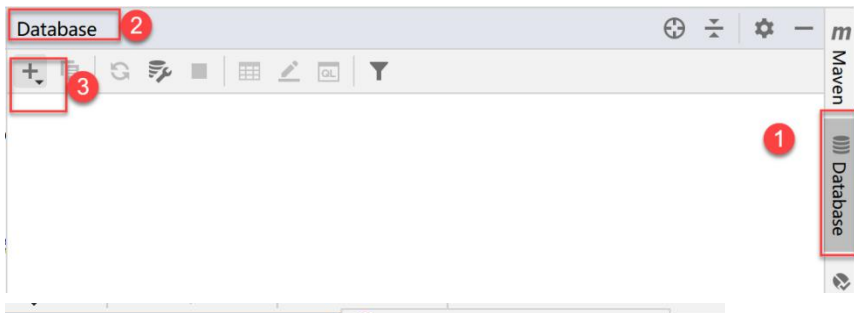
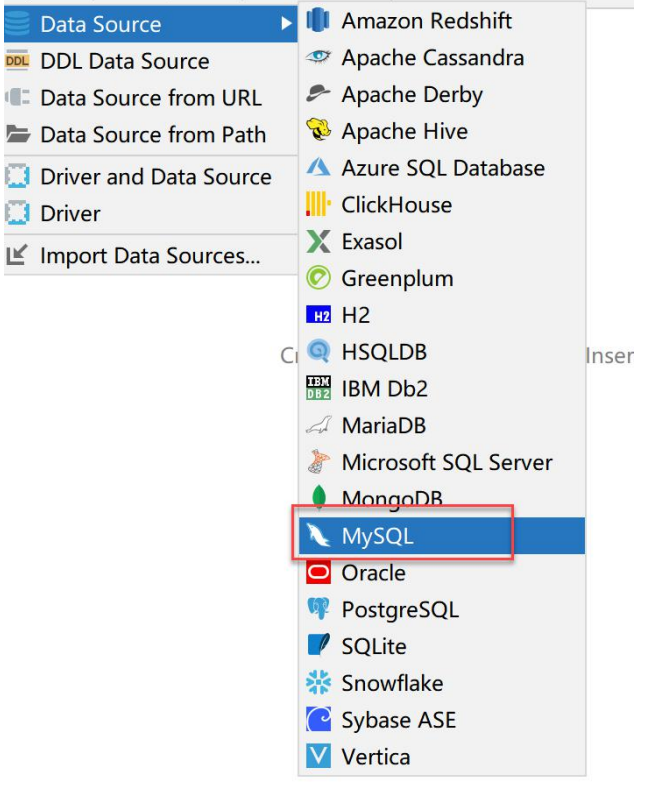
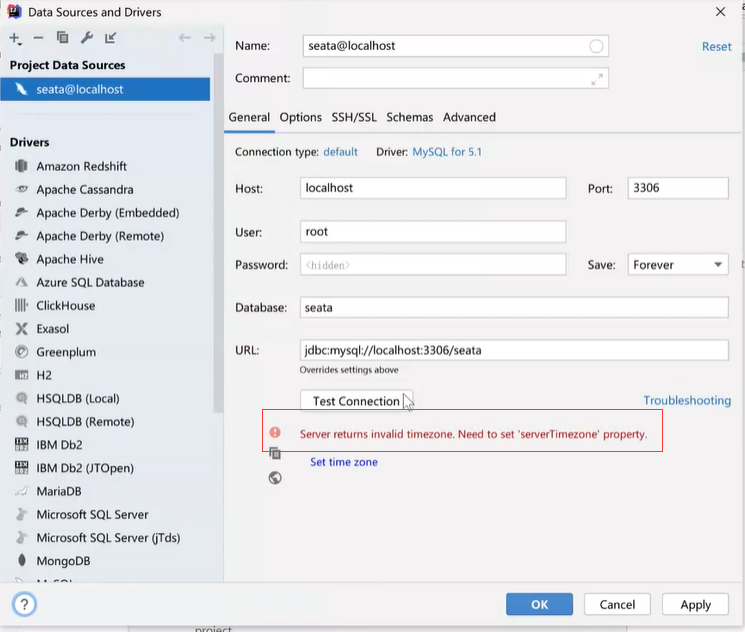
Connect to the database using IDEA:
Set time zone:
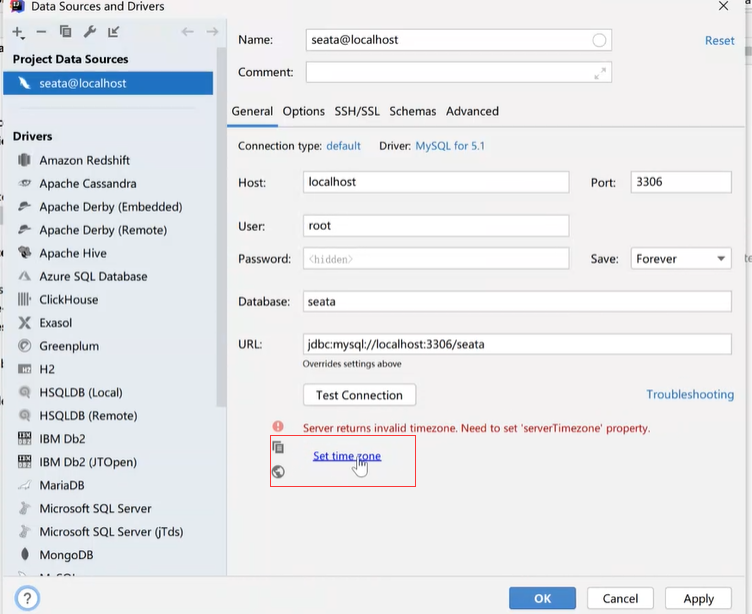
Select the default and click ok

After success, as shown in the figure:
Execute code generation:
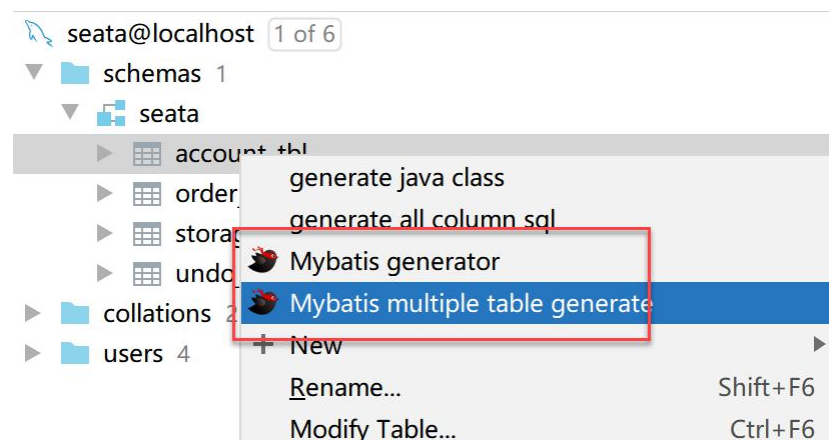
-
Account_tbl:
-
Order_tbl:
-
Storage_tbl:
After code generation:
4.3 improvement of storage service code
4.3.1 interface design
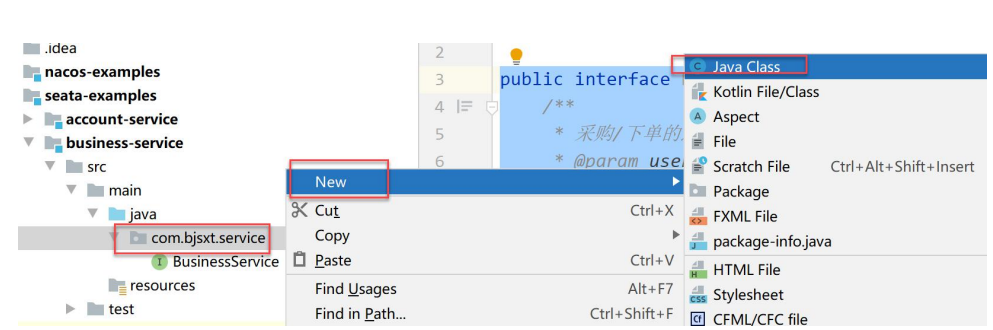
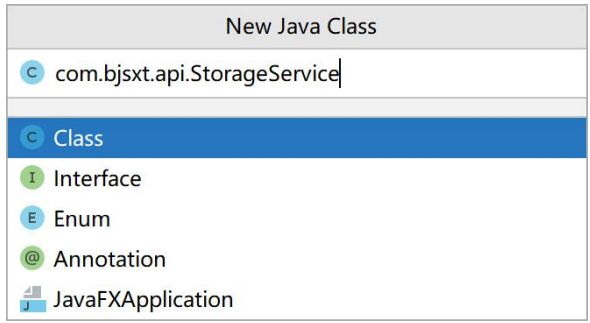
The storage service is mainly used to deduct inventory.
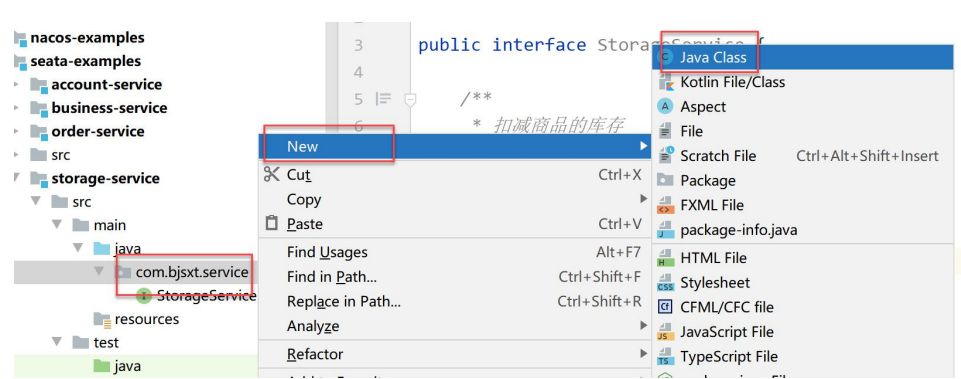
Create a new interface:
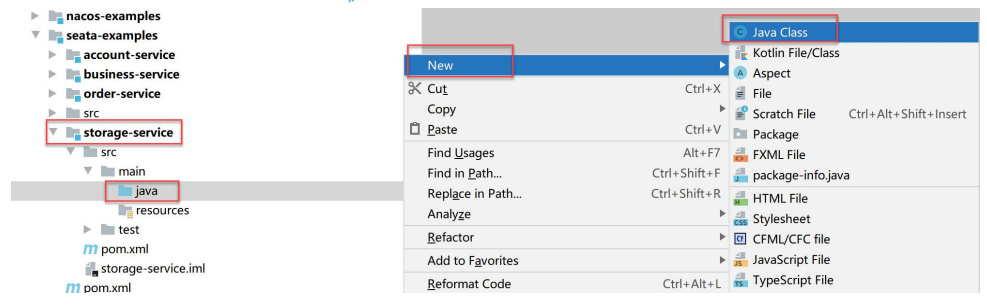
It is named StorageService and the code is as follows:
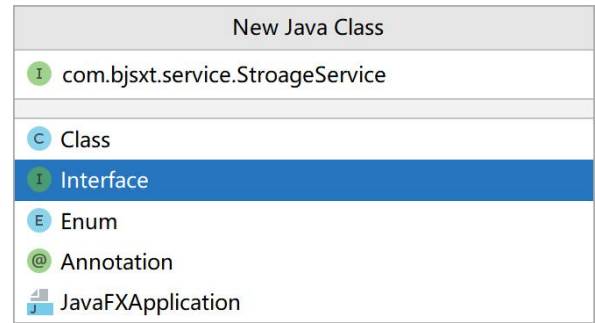
The code is as follows:
public interface StorageService {
	/**
	* Deduct inventory of goods
	* @param commodityCode
	* Commodity code
	* @param count
	* Quantity of goods deducted
	*/
	void deduct(String commodityCode, int count);
}
4.3.2 implementation of the interface
The name is impl.StorageService, and the code implementation is as follows:
@Service
public class StorageServiceImpl implements StorageService {

	private static Logger logger = LoggerFactory.getLogger(StorageServiceImpl.class);

@Autowired
private StorageTblMapper storageTblMapper;
@Override
public void deduct(String commodityCode, int count) {
	logger.info("Start to deduct inventory, item code:{},number:{}", commodityCode, count);
	StorageTbl storageTbl = storageTblMapper.selectOne(
		new LambdaQueryWrapper<StorageTbl>()
			.eq(StorageTbl::getCommodityCode, commodityCode));
	int idleCount = storageTbl.getCount() - count;
	if (idleCount < 0) {
		throw new RuntimeException("Insufficient inventory");
	}
	storageTbl.setCount(idleCount);
	storageTblMapper.updateById(storageTbl);
	logger.info("Inventory deduction succeeded, item code:{},Remaining quantity:{}", commodityCode, idleCount);
	}
}
4.3.3 use Restful to expose this interface
Add a Controller
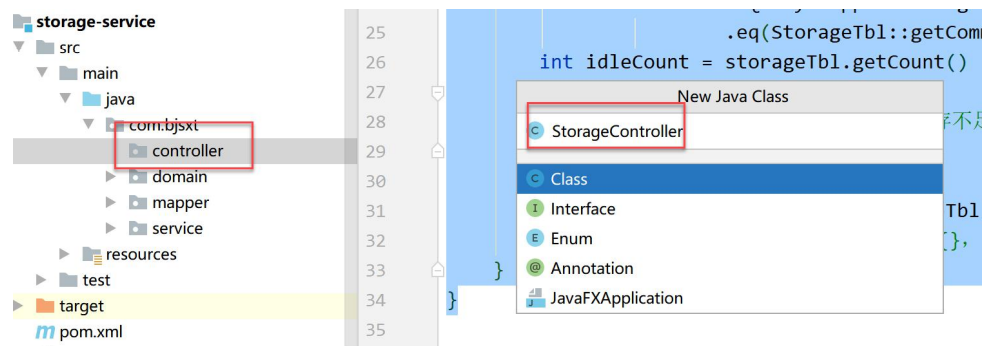
The code is as follows:
@RestController
public class StorageController {

	private static Logger logger = LoggerFactory.getLogger(StorageController.class) ;

	@Autowired
	private StorageService storageService ;

	/**
	* Deduct inventory of goods
	* @param commodityCode Commodity code
	* @param count Quantity of goods
	* @return
	*/
	@GetMapping("/deduct/{commodityCode}/{count}")
	public ResponseEntity<Void> deduct(
		@PathVariable("commodityCode") String commodityCode,
		@PathVariable("count") Integer count){
	logger.info("Account Service ... xid: " + RootContext.getXID());
	// Start deducting inventory
	storageService.deduct(commodityCode , count);
	return ResponseEntity.ok().build() ;
	}
}
4.3.4 add profile
Create a new configuration file in the resource directory:
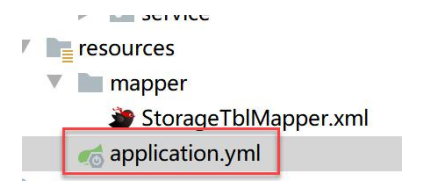
The contents are as follows:
server:
	port: 18084
spring:
	application:
		name: storage-service
	cloud:
		alibaba:
			seata:
				tx-service-group: storage-service
		nacos:
			discovery:
				server-addr: localhost:8848
		datasource:
			name: storageDataSource
			type: com.alibaba.druid.pool.DruidDataSource
			username: root
			password: 123456
			driver-class-name: com.mysql.cj.jdbc.Driver
			url:
			jdbc:mysql://localhost:3306/seata?useSSL=false&serverTimezone=UTC
			druid:
				max-active: 20
				min-idle: 2
				initial-size: 2
seata:
	service:
		vgroup-mapping:
			account-service: default
		grouplist:
			default: 127.0.0.1:8091
		disable-global-transaction: false
		enabled: true
	mybatis-plus:
		mapper-locations: classpath:/mapper/*.xml
4.3.5 add startup class
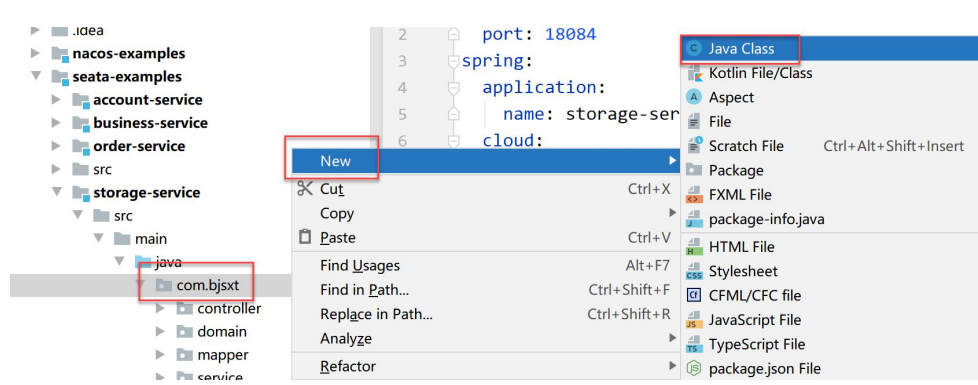
@SpringBootApplication
@EnableDiscoveryClient
@MapperScan("com.bjsxt.mapper")
public class StorageServiceApplication {
	public static void main(String[] args) {
		SpringApplication.run(StorageServiceApplication.class ,args) ;
	}
}
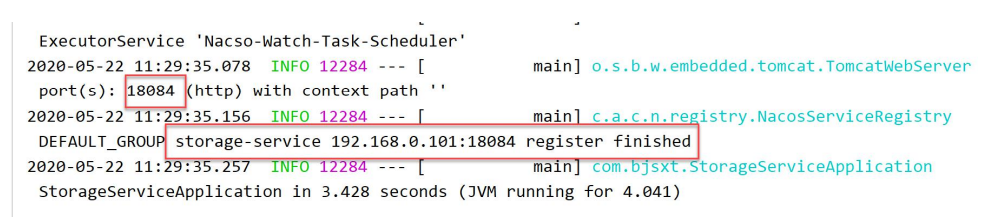
4.3.6 start project test
After starting the project, print the log, indicating that the connection to Seata server is successful.
4.4 improvement of account service code
4.4.1 interface design
Account service is mainly used to deduct the user's balance.
Create a new interface:
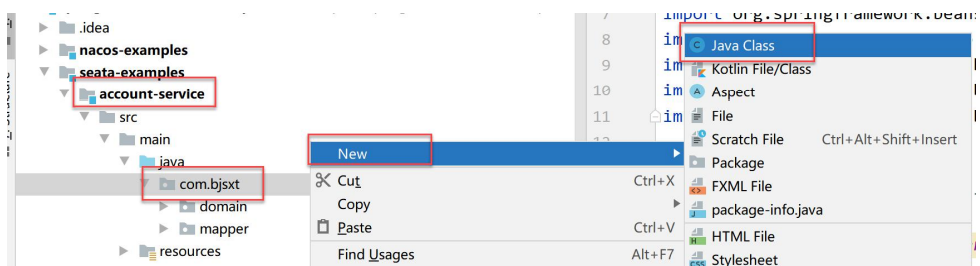
It is named AccountService and the code is as follows:

The code is as follows:
public interface AccountService {
	/**
	* Deduct amount from user's account
	* @param userId
	* User Id
	* @param money
	* amount of money
	*/
	void debit(String userId, int money);
}
4.4.2 implementation of the interface

The name is impl.StorageService, and the code implementation is as follows:
@Service
public class AccountServiceImpl implements AccountService {

	@Autowired
	private AccountTblMapper accountTblMapper;

	private static Logger logger = LoggerFactory.getLogger(AccountServiceImpl.class);

	@Override
	public void debit(String userId, int money) {
		logger.info("User ready to deduct:{} Balance, the amount deducted is:{}", userId, money);
		AccountTbl accountTbl = accountTblMapper.selectOne(
			new LambdaQueryWrapper<AccountTbl>()
				.eq(AccountTbl::getUserId, userId));
	int idleMoney = accountTbl.getMoney() - money;
	if (idleMoney < 0) {
	throw new RuntimeException("Insufficient user balance");
	}
	accountTbl.setMoney(idleMoney);
	accountTblMapper.updateById(accountTbl);
	logger.info("Deduction user{}Amount succeeded, remaining amount is{}", userId, money);
	}
}
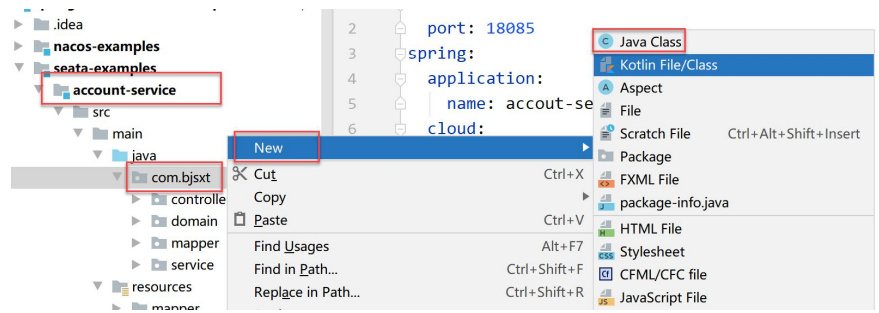
4.4.3 use Restful to expose this interface
Add a Controller
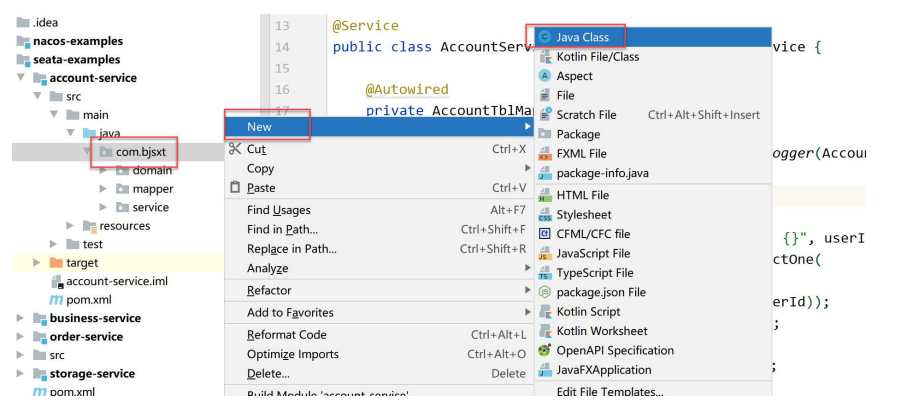
The name is:
The code is as follows:
@RestController
public class AccountController {

	@Autowired
	private AccountService accountService ;

	private static Logger logger =
	LoggerFactory.getLogger(AccountController.class) ;

	@GetMapping("/debit/{userId}/{money}")
	public ResponseEntity<Void> debit(
		@PathVariable("userId") String userId,
		@PathVariable("money") Integer money){
	logger.info("Account Service ... xid: " + RootContext.getXID());
	// Start deducting balance
	accountService.debit(userId , money);
	return ResponseEntity.ok().build() ;
	}
}
4.4.4 add profile
Create a new configuration file in the resource directory:
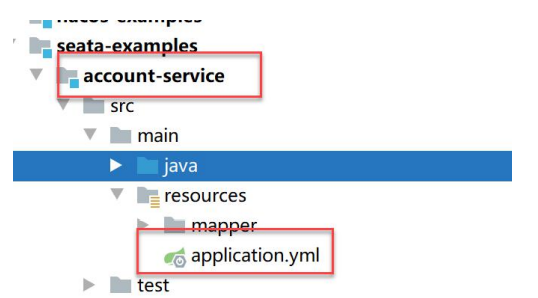
The contents are as follows:
server:
	port: 18085
spring:
	application:
		name: account-service
	cloud:
		alibaba:
			seata:
				tx-service-group: account-service
		nacos:
			discovery:
				server-addr: localhost:8848
	datasource:
		type: com.alibaba.druid.pool.DruidDataSource
		username: root
		password: 123456
		driver-class-name: com.mysql.cj.jdbc.Driver
		url: jdbc:mysql://localhost:3306/seata?useSSL=false&serverTimezone=UTC
		druid:
			max-active: 20
			min-idle: 2
			initial-size: 2
seata:
	service:
		vgroup-mapping:
			account-service: default
		grouplist:
			default: 127.0.0.1:8091
		disable-global-transaction: false
	enabled: true
mybatis-plus:
mapper-locations: classpath:/mapper/*.xml
4.4.5 add startup class
It is named AccountServiceApplication and the code is as follows:
@SpringBootApplication
@EnableDiscoveryClient
@MapperScan("com.bjsxt.mapper")
public class AccoutServiceApplication {

	public static void main(String[] args) {
	SpringApplication.run(AccoutServiceApplication.class ,args) ;
	}
}
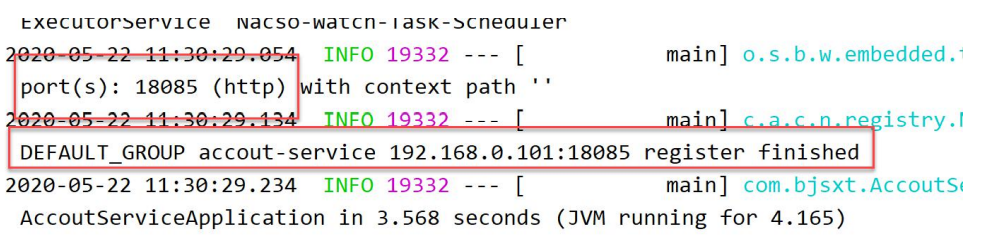
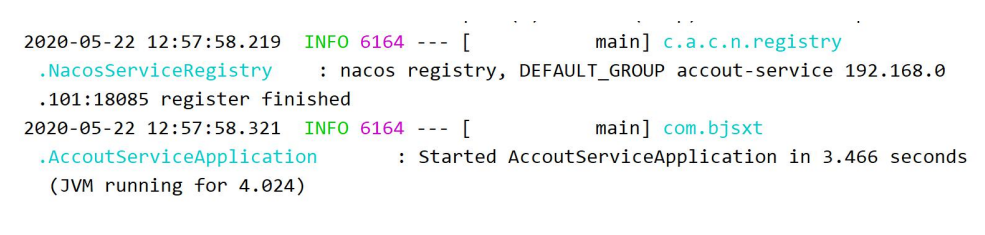
4.4.6 start project test
After starting the project, print the log, indicating that the connection to Seata server is successful.
4.5 improvement of order service code
4.5.1 interface design
The order service is mainly used to save user orders.
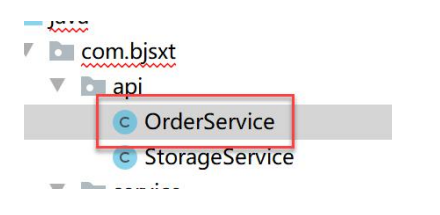
Create a new interface:
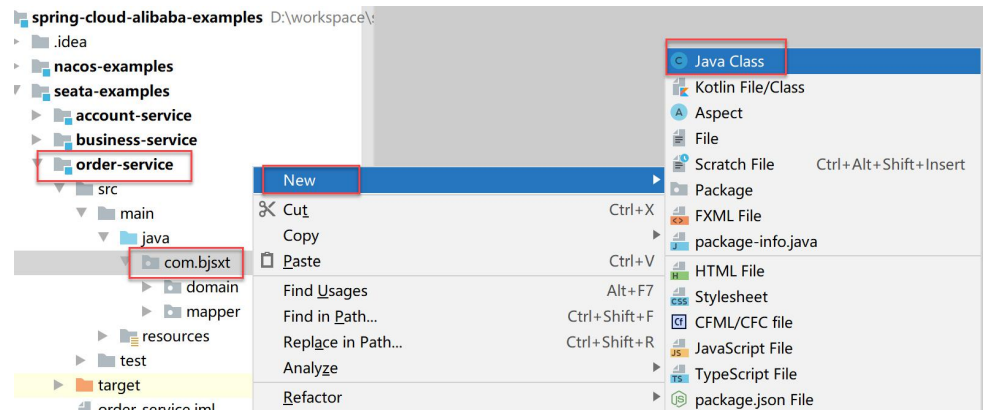
It is named OrderService and the code is as follows:
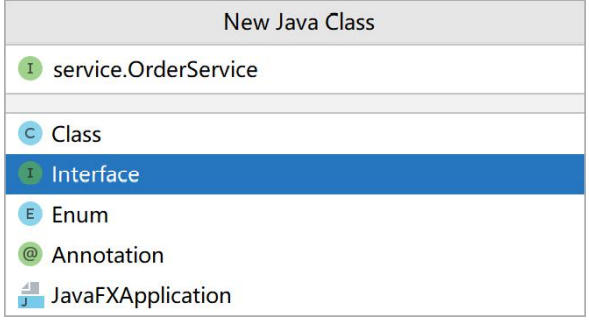
The code is as follows:
public interface OrderService {
	/**
	* Create an order
	* @param userId User id
	* @param commodityCode Item number
	* @param orderCount Quantity of goods
	* @return OrderTbl
	*/
	OrderTbl create(String userId, String commodityCode, int orderCount) ;
}
4.5.4 Ribbon integration
Create a configuration class:
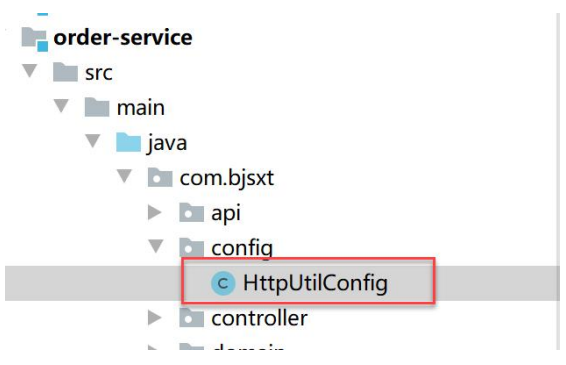
The code is as follows:
@Configuration
public class HttpUtilConfig {

	@LoadBalanced
	@Bean
	public RestTemplate restTemplate(){
		return new RestTemplate() ;
	}
}
4.5.2 implementation of the interface
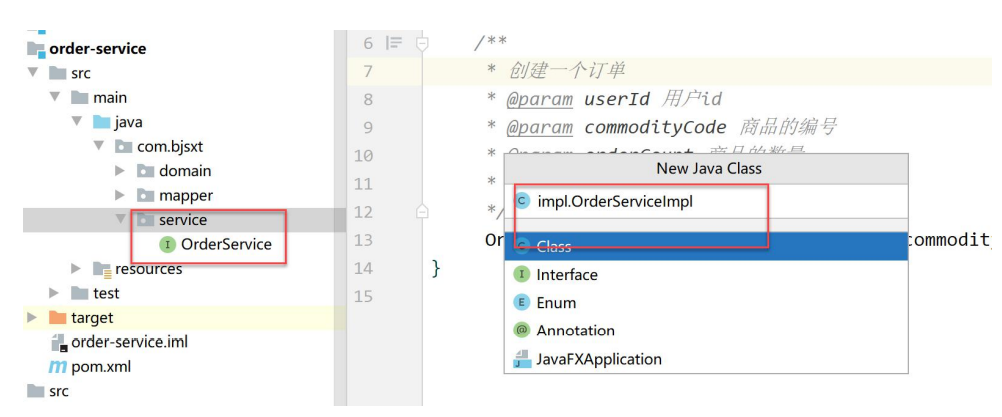
The name is impl.OrderService, and the code implementation is as follows:
@Service
public class OrderServiceImpl implements OrderService {

	@Autowired
	private OrderTblMapper orderTblMapper;

	@Autowired
	private AccountService accountService;
	private static Logger logger =
	LoggerFactory.getLogger(OrderServiceImpl.class);

	@Override
	public OrderTbl create(String userId, String commodityCode, int orderCount)
	{
		logger.info("Ready for{}Create an order,Item number is{},Quantity is{}", userId,
		commodityCode, orderCount);
		// 1. Calculate the total amount
		int orderMoney = calculate(commodityCode, orderCount);
		accountService.debit(userId, orderMoney);
		OrderTbl order = new OrderTbl();
		order.setUserId(userId);
		order.setCommodityCode(commodityCode);
		order.setCount(orderCount);
		order.setMoney(orderMoney);
		orderTblMapper.insert(order);
		// INSERT INTO orders ...
		return order;
	}
	private int calculate(String commodityCode, int orderCount) {
		// We don't have a list of goods now. Here we fix the price of goods
		int prodPrice = 0 ;
		if("HUAWEI_0001".equals(commodityCode)){ // Huawei time 100
			prodPrice = 100;
		}else if ("XIAOMI_002".equals(commodityCode)){ // Millet hour 200
			prodPrice = 200 ;
		}else {
			prodPrice = 1000 ; // 1000 for others
		}
		return orderCount * prodPrice ;
	}
}
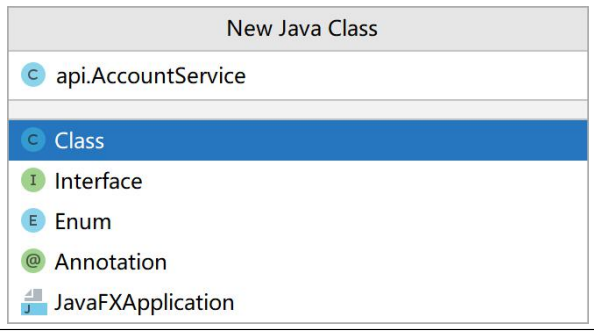
4.5.3 implementation of remote call to account service
Create an AccountService class, which mainly completes the remote call to accout service.
The name is:
/**
* Realize the remote call to the account service
*/
@Service
public class AccountService {

	private static Logger logger = LoggerFactory.getLogger(AccountService.class) ;
	/**
	* 1 ribbon The way
	*/
	@Autowired
	private RestTemplate restTemplate ;

	/**
	* 2 feign The way
	*/
	public void debit(String userId, int orderMoney) {
		ResponseEntity<Void> entity = restTemplate.
			getForEntity(
				"http://accout-service/debit/{userId}/{orderMoney}",
				Void.class,
				userId,
				orderMoney
		);
		if(entity.getStatusCode()== HttpStatus.OK){
		logger.info("Deduction user{}The amount is successful. The amount deducted this time is{}",userId,orderMoney);
		return ;
		}
		logger.info("Deduction user{}Amount failed",userId);
		throw new RuntimeException("Deduction amount failed") ;
	}
}
When we use Ribbon here to make remote calls, we will also test Feign in the following chapters.
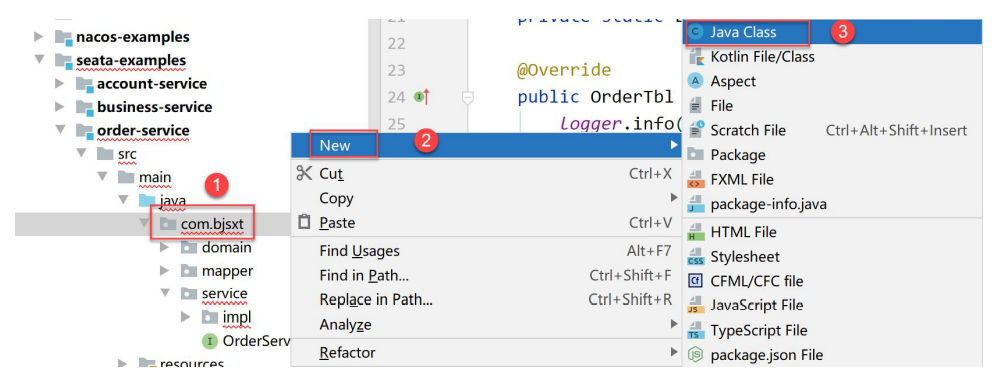
4.5.5 use Restful to expose this interface
Add a Controller

Named:
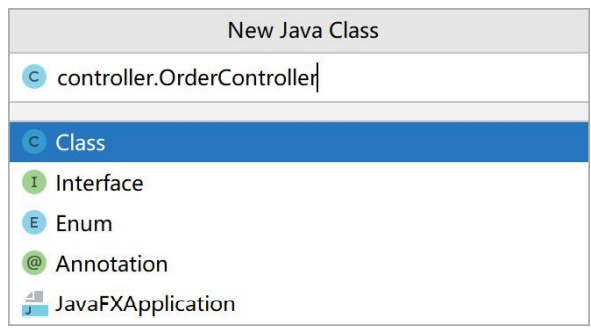
The code is as follows:
@RestController
public class OrderController {

	private static Logger logger = LoggerFactory.getLogger(OrderController.class) ;

	@Autowired
	private OrderService orderService ;

	/**
	* Create order
	* @param userId
	* User Id
	* @param commodityCode
	* Item number
	* @param orderCount
	* Quantity of goods
	* @return
	*/
	@GetMapping("/create/{userId}/{commodityCode}/{orderCount}")
	public ResponseEntity<Void> create(
		@PathVariable("userId") String userId,
		@PathVariable("commodityCode") String commodityCode,
		@PathVariable("orderCount") int orderCount){
	logger.info("Order Service ... xid: " + RootContext.getXID());
	orderService.create(userId, commodityCode, orderCount) ;
	return ResponseEntity.ok().build() ;
	}
}
4.5.6 adding configuration files
Create a new configuration file in the resource directory:
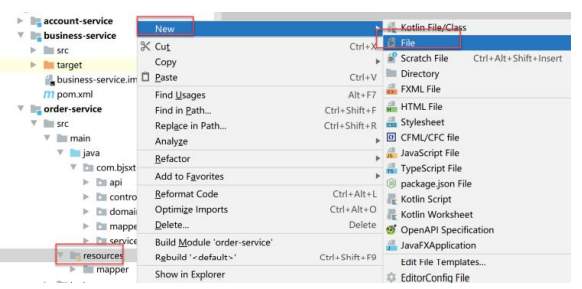
Named: application.yml
The contents are as follows:
server:
	port: 18086
spring:
	application:
		name: order-service
	cloud:
		alibaba:
			seata:
				tx-service-group: order-service
		nacos:
			discovery:
				server-addr: localhost:8848
	datasource:
		name: orderDataSource
		type: com.alibaba.druid.pool.DruidDataSource
		username: root
		password: 123456
		driver-class-name: com.mysql.cj.jdbc.Driver
		url:
		jdbc:mysql://localhost:3306/seata?useSSL=false&serverTimezone=UTC
		druid:
			max-active: 20
			min-idle: 2
			initial-size: 2
seata:
	service:
		vgroup-mapping:
			order-service: default
		grouplist:
			default: 127.0.0.1:8091
		disable-global-transaction: false
	enabled: true
mybatis-plus:
mapper-locations: classpath:/mapper/*.xml
4.5.7 add startup class
Named: OrderServiceApplication
The code is as follows:
@SpringBootApplication
@EnableDiscoveryClient
@MapperScan("com.bjsxt.mapper")
public class OrderServiceApplication {
	public static void main(String[] args) {
		SpringApplication.run(OrderServiceApplication.class ,args) ;
	}
}
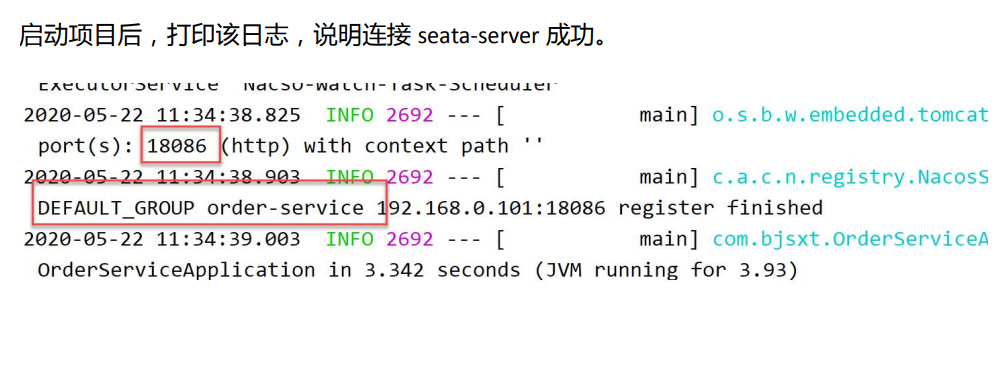
4.58 start project test
After starting the project, print the log, indicating that the connection to Seata server is successful.
4.6 improvement of business service code
4.6.1 interface design
In business service, it mainly completes the logic of placing an order, including two main steps, that is, remote calling of inventory service and order service.
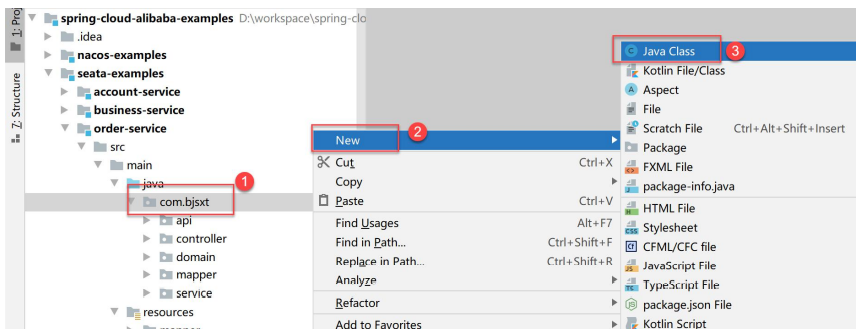
Create a new interface:
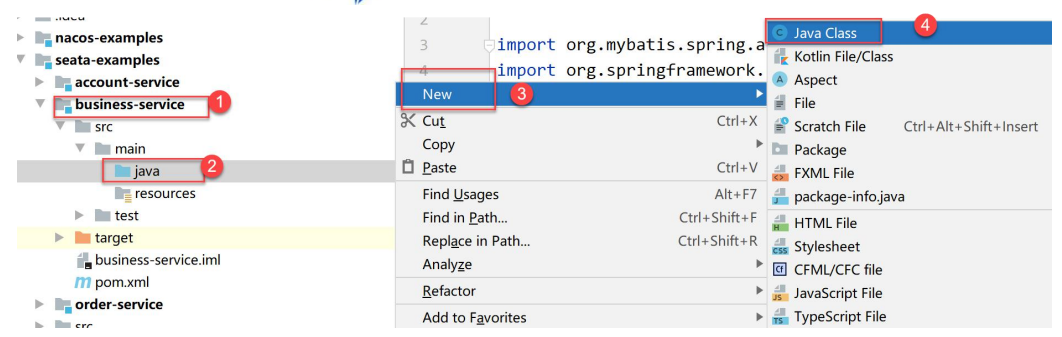
Named: com.bjsxt.service.BusinessService
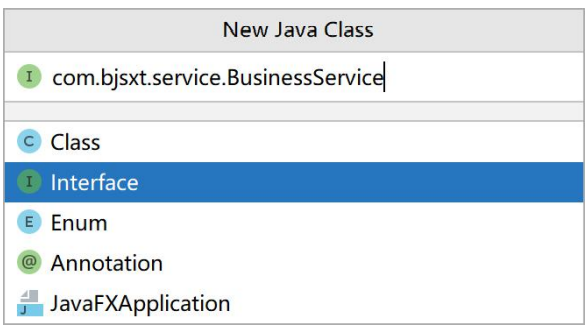
The code is as follows:
public interface BusinessService {
	/**
	* Procurement / order placing process
	* @param userId
	* User Id
	* @param commodityCode
	* Commodity code
	* @param orderCount
	* Quantity of goods
	*/
	void purchase(String userId, String commodityCode, int orderCount) ;
}
4.6.2 implementation of the interface
The name is impl.BusinessServiceImpl, and the code implementation is as follows:
@Service
public class BusinessServiceImpl implements BusinessService {

	private static Logger logger = LoggerFactory.getLogger(BusinessServiceImpl.class) ;

	@Autowired
	private StorageService storageService;

	@Autowired
	private OrderService orderService;

	@Override
	public void purchase(String userId, String commodityCode, int orderCount) {
		logger.info("Ready to place an order, user:{},Commodity:{},number:{}",userId,commodityCode,orderCount);
		storageService.deduct(commodityCode, orderCount);
		orderService.create(userId, commodityCode, orderCount) ;
		logger.info("Order completion");
	}
}
4.6.3 implementation of remote calling storage service
Create a StorageService class, which mainly completes the remote call to storage service.

The name is:
@Service
public class StorageService {

	private static Logger logger = LoggerFactory.getLogger(StorageService.class) ;
	/**
	* 1 In the form of Ribbon
	*/
	@Autowired
	private RestTemplate restTemplate ;
	/**
	* 2 In the form of Feign
	*/
	public void deduct(String commodityCode, int orderCount) {
		ResponseEntity<Void> entity = restTemplate.
			getForEntity(
				"http://storage-service/debut/{commodityCode}/{orderCount}",
				Void.class,
				commodityCode,
				orderCount
			);
		if (entity.getStatusCode()== HttpStatus.OK){
			logger.info("Inventory deduction succeeded, item No{},The amount deducted this time is{}",commodityCode,orderCount);
			return;
		}
		throw new RuntimeException("Inventory deduction failed") ;
	}
}
When we use Ribbon here to make remote calls, we will also test Feign in the following chapters.
4.6.4 implementation of remote calling order service
Create a new class:
The code is as follows:
@Service
public class OrderService {

	private static Logger logger = LoggerFactory.getLogger(StorageService.class) ;
	/**
	* 1 In the form of Ribbon
	*/
	@Autowired
	private RestTemplate restTemplate ;
	/**
	* 2 In the form of Feign
	*/
	public void create(String userId, String commodityCode, int orderCount) {
		ResponseEntity<Void> entity = restTemplate.
			getForEntity(
			"http://order-service/create/{userId}/{commodityCode}/{orderCount}",
			Void.class,
			userId ,
			commodityCode,
			orderCount
		);
		if (entity.getStatusCode()== HttpStatus.OK){
			logger.info("Order created successfully, user is{} ,Item number is{},The amount deducted this time is{}",userId ,
		commodityCode,orderCount);
			return;
		}
		throw new RuntimeException("Order creation failed") ;
	}
}
4.6.5 integrated Ribbon
Add a configuration class of HttpUtilConfig:
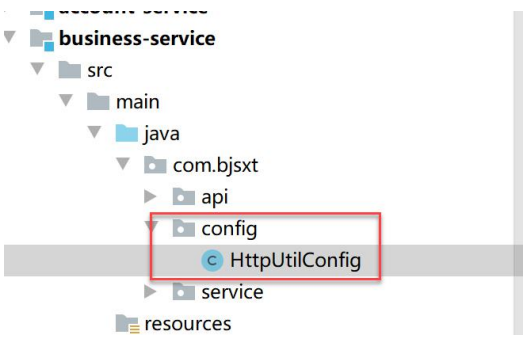
The code is as follows:
@Configuration
public class HttpUtilConfig {

	@LoadBalanced
	@Bean
	public RestTemplate restTemplate(){
		return new RestTemplate() ;
	}
}
4.6.6 adding configuration files
Create a new configuration file in the resource directory:
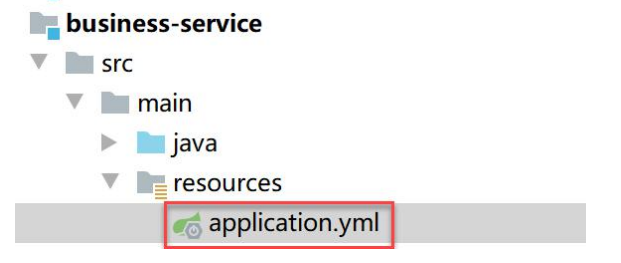
Named: application.yml
The contents are as follows:
server:
	port: 18087
spring:
	application:
		name: business-service
	cloud:
		alibaba:
			seata:
				tx-service-group: business-service
		nacos:
			discovery:
				server-addr: localhost:8848
seata:
	service:
		vgroup-mapping:
			business-service: default
		grouplist:
			default: 127.0.0.1:8091
		disable-global-transaction: false
	enabled: tru
4.6.7 add startup class
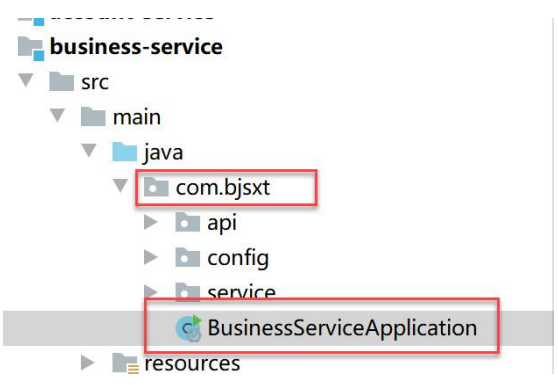
Named: BusinessServiceApplication
The code is as follows:
@SpringBootApplication
@EnableDiscoveryClient
public class BusinessServiceApplication {
	public static void main(String[] args) {
		SpringApplication.run(BusinessServiceApplication.class ,args) ;
	}
}
4.6.8 interface
Continue to transform the startup class:
@SpringBootApplication
@EnableDiscoveryClient
@RestController
public class BusinessServiceApplication {

	@Autowired
	private BusinessService businessService ;

	public static void main(String[] args) {
		SpringApplication.run(BusinessServiceApplication.class ,args) ;
	}
	/**
	* Start placing orders
	* @param userId
	* User Id
	* @param commodityCode
	* Item number
	* @param orderCount
	* Quantity of goods
	* @return
	*/
	@GetMapping("/purchase/{userId}/{commodityCode}/{orderCount}")
	public ResponseEntity<Void> purchase(
		@PathVariable("userId") String userId,
		@PathVariable("commodityCode")String commodityCode,
		@PathVariable("orderCount")Integer orderCount){
	businessService.purchase(userId,commodityCode,orderCount);
	return ResponseEntity.ok().build() ;
	}
}
4.6.9 start project test
After starting the project, print the log, indicating that the connection to Seata server is successful.

4.7 the overall calling process is as follows:
After startup:
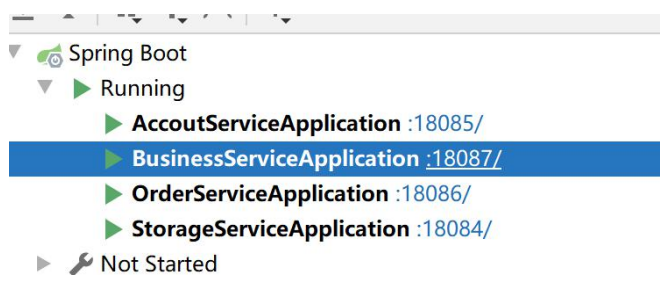
Nacos-Server:

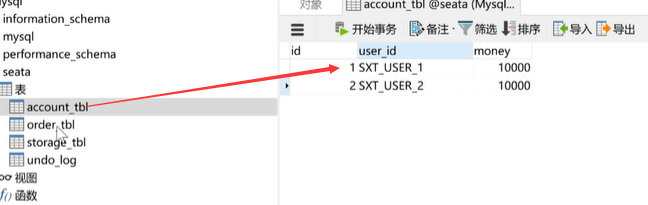
4.8 normal order test
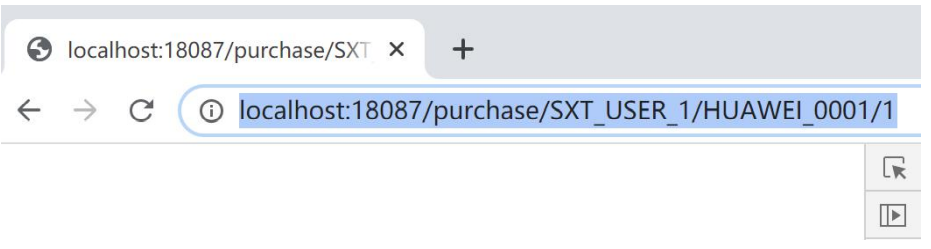
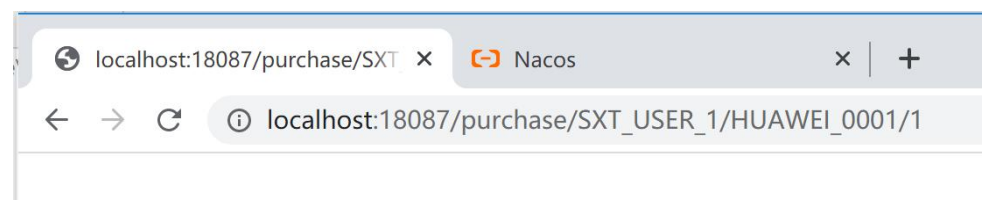
Access in the browser:
http://localhost:18087/purchase/SXT_USER_1/HUAWEI_0001/1
For SXT_USER_1 purchase HUAWEI_0001 one product.
In the database:
- Accout_ Inside TBL, SXT_USER_1. The user's amount is reduced by 100;
- Storage_tbl inside, HUAWEI_0001 inventory decreased by 1;
- Order_ In TBL, an order record is created;

Note: remote call is normal at this time.
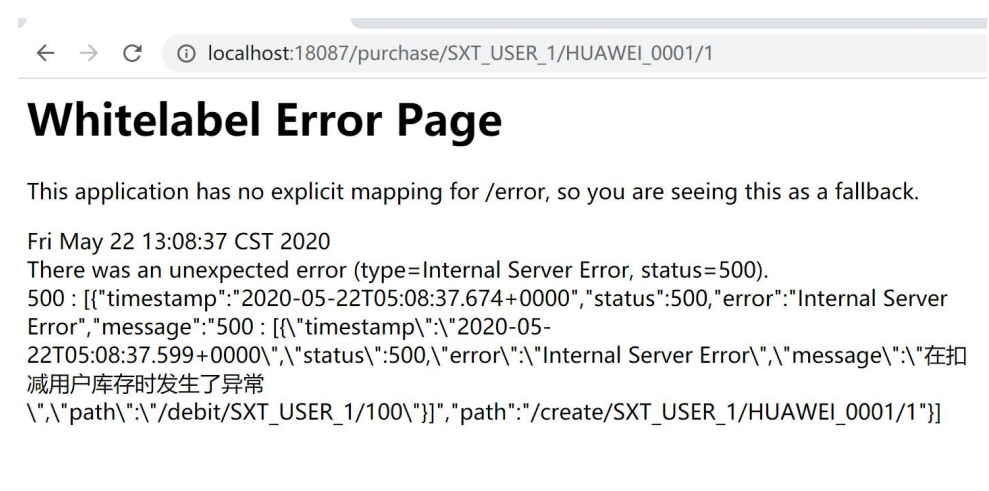
4.9 demonstration of distributed transaction
We demonstrate the exception shown in the figure:
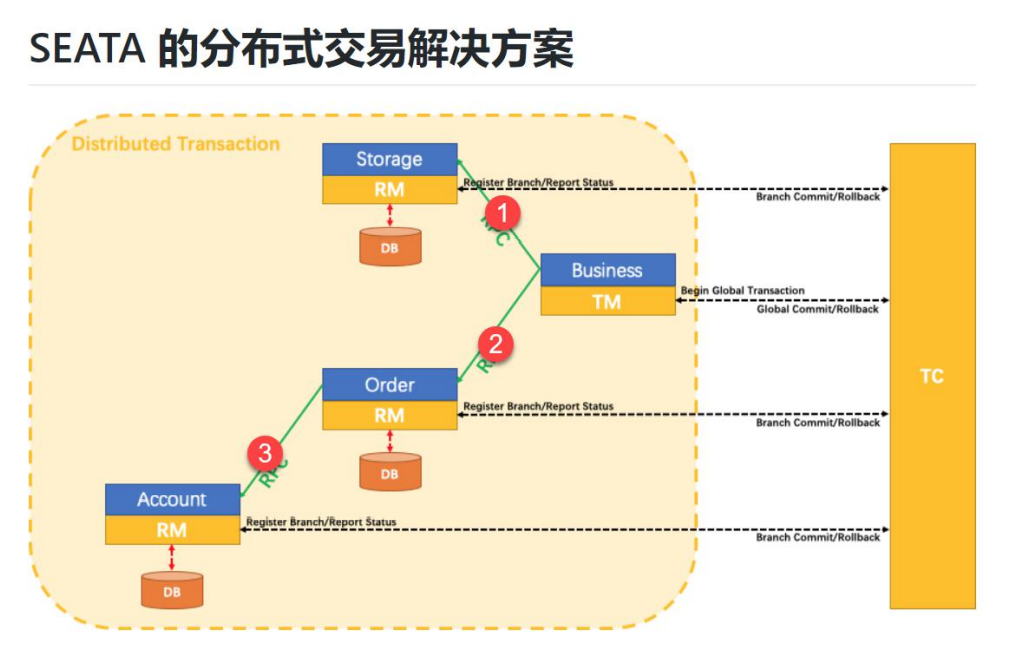
We can find that there are three remote calls.
4.9.1 exception triggered by deduction of balance in accout service
4.9.2 restart the accout service
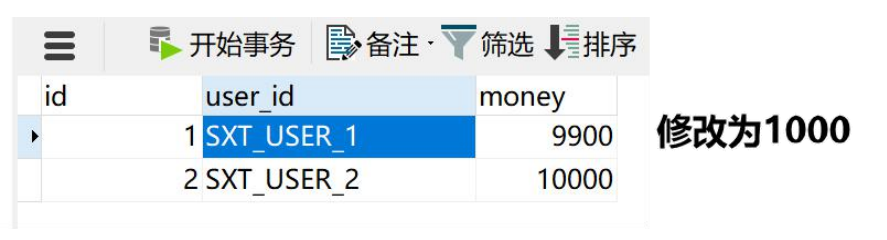
4.9.3 restore data in database
Account_Tbl:
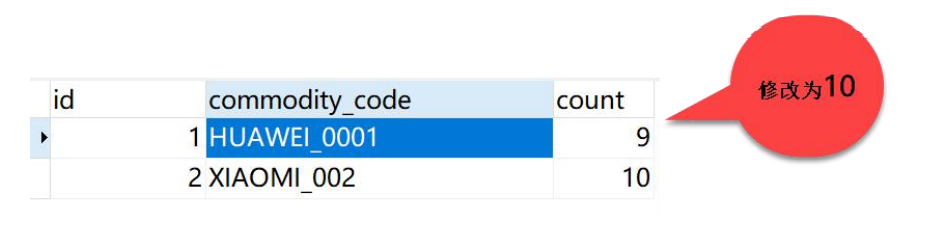
Storage_Tbl:
4.9.4 reorder test
http://localhost:18087/purchase/SXT_USER_1/HUAWEI_0001/1
Database data:
Account_Tbl:
Storage_Tbl:
We found that the distributed transaction generated an exception inside the accout service, resulting in the accout_tbl table data rolled back.
However, in storage_tbl: the transaction at the stowage service is not rolled back.
4.10 solving distributed problems with Seata
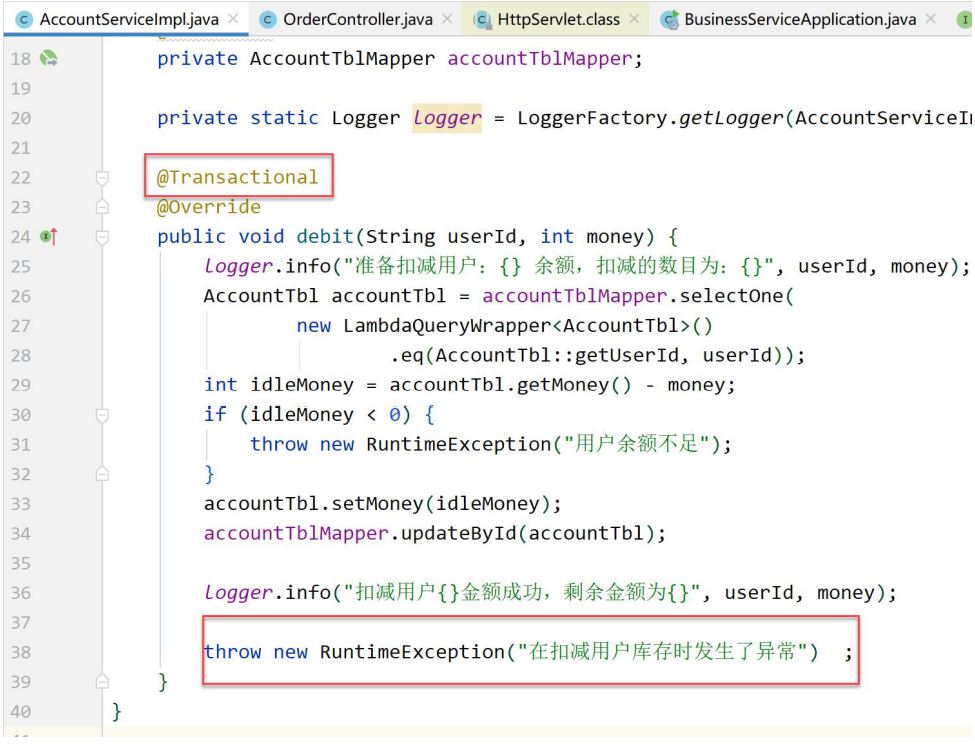
4.10.1 transform AccountServiceImpl in accout service
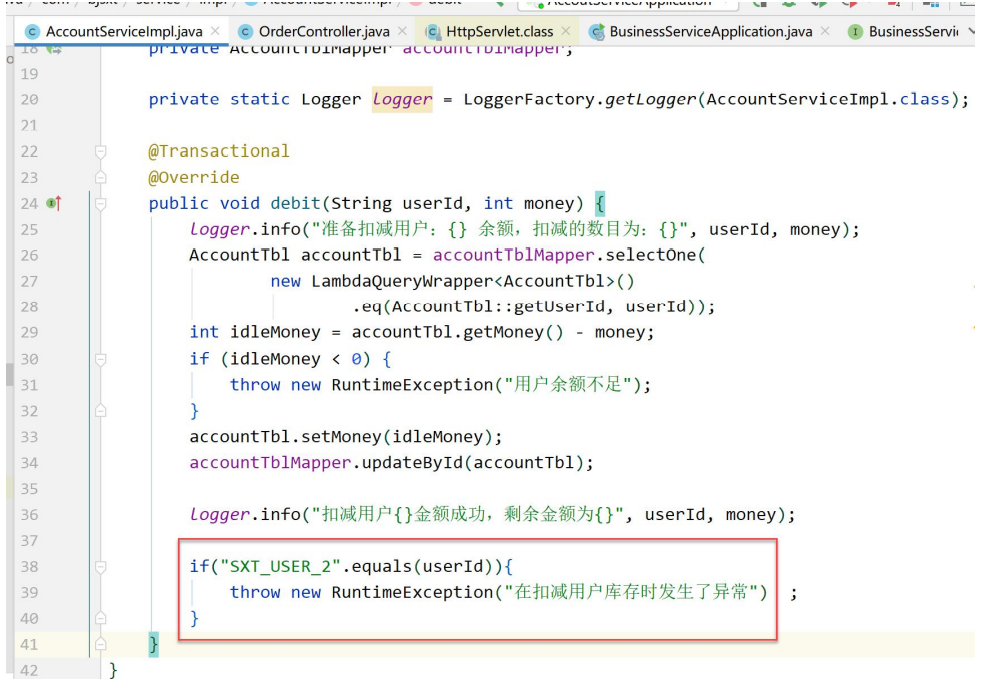
When the user ID is: SXT_ USER_ At 2:00, we throw an exception. When it is for other users, we place orders normally.
4.10.2 transforming BusinessServiceImpl
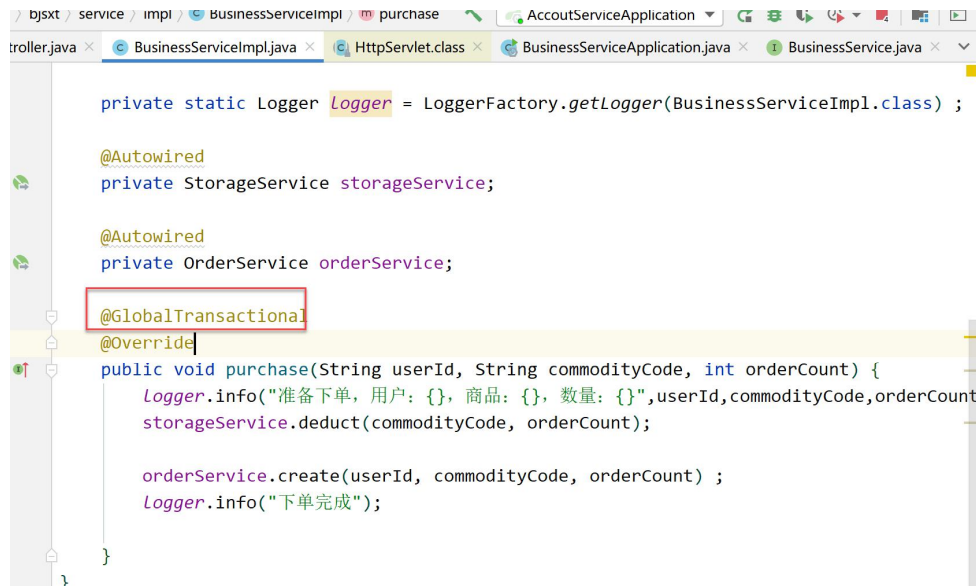
Add an annotation to see if it can solve the problem of distributed transactions
4.10.3 restart test
Restart the accout service and the business service test
Using SXT_USER_1. Normal order test:
Stoage_tbl: normal inventory
Accout_Tbl: normal balance
Using SXT_USER_2 order test:
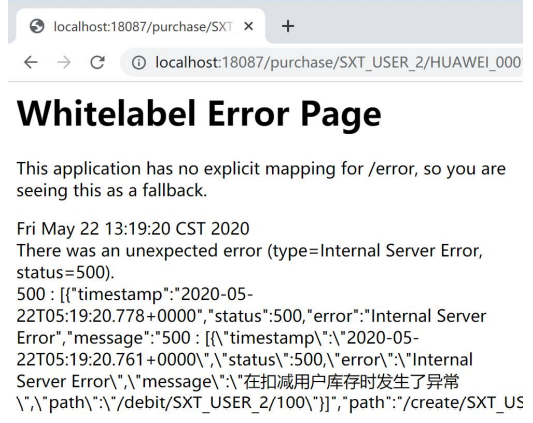
When an exception is found,
stoage_ The data in TBL has not changed, and the data is normal
Accout_ The data in TBL has not changed, and the data is normal
The distributed transaction test succeeded
5, Integration Feign test Seata
In the above chapter, we use the remote call in the form of Ribbon + RestTemplate. Now let's play
Shows how Feign is called.
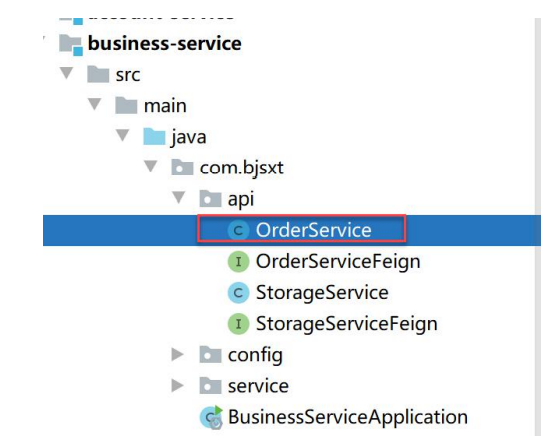
5.1 transformation of business service
5.1.1 add dependency
Modify the pom.xml file in the business service project and add dependencies.
<dependencies>
	<dependency>
		<groupId>org.springframework.cloud</groupId>
		<artifactId>spring-cloud-starter-openfeign</artifactId>
	</dependency>
</dependencies>
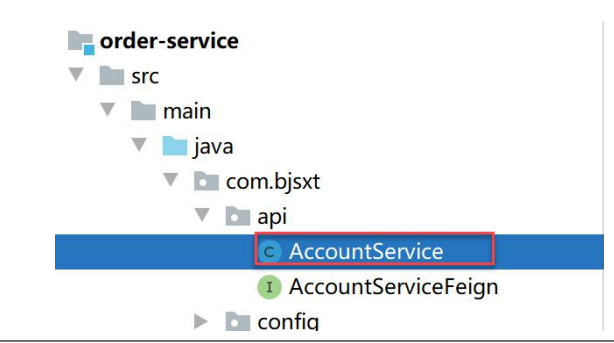
5.1.2 add OrderServiceFeign
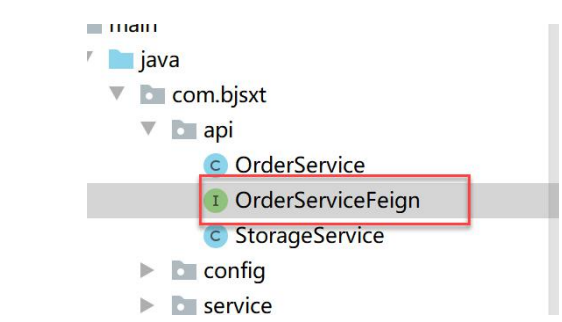
The code inside is as follows:
@FeignClient("order-service")
public interface OrderServiceFeign {

	@GetMapping("/create/{userId}/{commodityCode}/{orderCount}")
	ResponseEntity<Void> create(
		@PathVariable("userId") String userId,
		@PathVariable("commodityCode") String commodityCode,
		@PathVariable("orderCount") Integer orderCount);
}
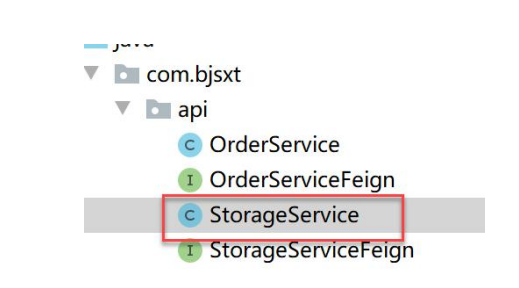
5.1.3 adding StorageServiceFeign
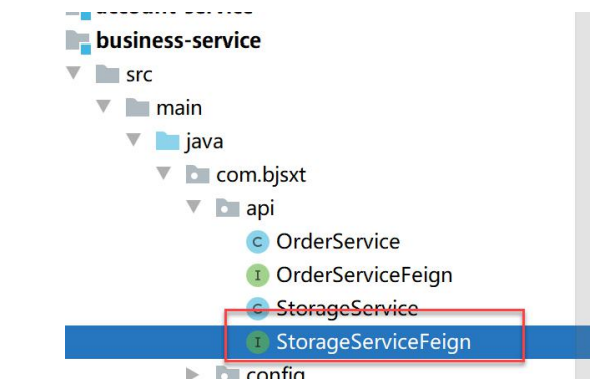
@FeignClient("storage-service")
public interface StorageServiceFeign {

	@GetMapping("/deduct/{commodityCode}/{orderCount}")
	ResponseEntity<Void> deduct(
		@PathVariable("commodityCode") String commodityCode,
		@PathVariable("orderCount") Integer orderCount
	) ;
}
5.1.5 transformation of OrderService
@Service
public class OrderService {
	private static Logger logger = LoggerFactory.getLogger(StorageService.class) ;
	/**
	* 1 In the form of Ribbon
	*/
	@Autowired
	private RestTemplate restTemplate ;

	@Autowired
	private OrderServiceFeign orderServiceFeign ;
	/**
	* 2 In the form of Feign
	*/
	public void create(String userId, String commodityCode,  int orderCount){
	// Ribbon
	// ResponseEntity<Void> entity = restTemplate.
	// 		getForEntity(
	//		"http://order-service/create/{userId}/{commodityCode}/{orderCount}",
	// 		Void.class,
	// 		userId ,
	// 		commodityCode,
	// 		orderCount
	// );

	//Feign
	ResponseEntity<Void> entity = orderServiceFeign.create(userId, commodityCode,
	orderCount);
	if (entity.getStatusCode()== HttpStatus.OK){
		logger.info("Order created successfully, user is{} ,Item number is{},The amount deducted this time is{}",userId ,commodityCode,orderCount);
		return;
	}
	throw new RuntimeException("Order creation failed") ;
	}
}
5.1.7 transforming StorageService
The code is as follows:
@Service
public class StorageService {
	private static Logger logger = LoggerFactory.getLogger(StorageService.class);
	/**
	* 1 In the form of Ribbon
	*/
	@Autowired
	private RestTemplate restTemplate;

	@Autowired
	private StorageServiceFeign storageServiceFeign;

	/**
	* 2 In the form of Feign
	*/
	public void deduct(String commodityCode, int orderCount) {
	// 	Ribbon
	// 	ResponseEntity<Void> entity = restTemplate.
	// 		getForEntity(
	//		"http://storage-service/deduct/{commodityCode}/{orderCount}",
	// 		Void.class,
	// 		commodityCode,
	// 		orderCount
	// 	);

	//Feign
	ResponseEntity<Void> entity = storageServiceFeign.deduct(commodityCode,
	orderCount);
	if (entity.getStatusCode() == HttpStatus.OK) {
		logger.info("Inventory deduction succeeded, item No{},The amount deducted this time is{}", commodityCode,
	orderCount);
		return;
	}
	throw new RuntimeException("Inventory deduction failed");
	}
}
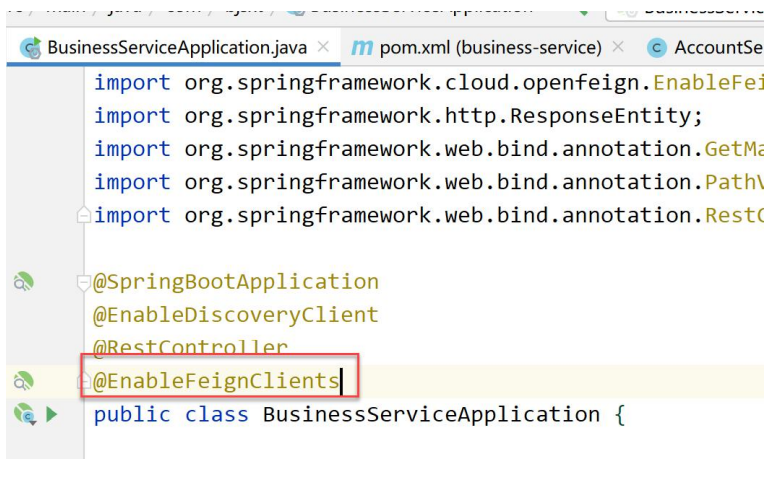
5.1.6 enable Feign support in the startup class
5.2 transformation of order service
5.2.1 add dependency
Add in dependencies:
<dependency>
	<groupId>org.springframework.cloud</groupId>
	<artifactId>spring-cloud-starter-openfeign</artifactId>
</dependency>
5.2.2 adding interfaces
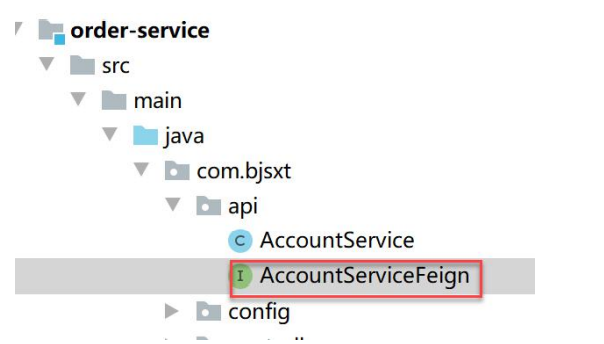
The code inside is as follows:
@FeignClient("account-service")
public interface AccountServiceFeign {

	@GetMapping("/debit/{userId}/{orderMoney}")
	ResponseEntity<Void> debit(
		@PathVariable("userId") String userId,
		@PathVariable("orderMoney") Integer orderMoney
	) ;
}
5.2.3 modifying AccoutService
/**
* Realize the remote call to the account service
*/
@Service
public class AccountService {
	private static Logger logger = LoggerFactory.getLogger(AccountService.class) ;
	/**
	* 1 ribbon The way
	*/
	@Autowired
	private RestTemplate restTemplate ;

	@Autowired
	private AccountServiceFeign accountServiceFeign ;
	/**
	* 2 feign The way
	*/
	public void debit(String userId, int orderMoney) {
	//Ribbon
	// 	ResponseEntity<Void> entity = restTemplate.
	// 		getForEntity(
	// 		"http://accout-service/debit/{userId}/{orderMoney}",
	// 		Void.class,
	// 		userId,
	// 		orderMoney
	// 	);
		ResponseEntity<Void> entity = accountServiceFeign.debit(userId, orderMoney);
		if(entity.getStatusCode()== HttpStatus.OK){
			logger.info("Deduction user{}The amount is successful. The amount deducted this time is{}",userId,orderMoney);
			return ;
		}
		logger.info("Deduction user{}Amount failed",userId);
	throw new RuntimeException("Deduction amount failed") ;
	}
}
5.2.4 add Feign support in the startup class

5.3 restart test
Restart order service and business service
Restore the database data and start the test.
Normal order test:
Using SXT_USER_2. Order:

An error occurred, but all tables in the database are normal.
Seata test succeeded.