Preface
The last Spring blog article mainly explained how to use Spring to implement AOP programming. This blog article mainly explained Spring's support for JDBC.
For JDBC, we are certainly not unfamiliar, we must have written a lot of JDBC template code when we first learned!
Review the process of template code optimization
Let's recall how we optimized the template code!
- First, let's look at our native JDBC: you need to manually drive the database to get the corresponding connection.
        try {
            String sql = "insert into t_dept(deptName) values('test');";
            Connection con = null;
            Statement stmt = null;
            Class.forName("com.mysql.jdbc.Driver");
            // Connection object
            con = DriverManager.getConnection("jdbc:mysql:///hib_demo", "root", "root");
            // Execution command object
            stmt =  con.createStatement();
            // implement
            stmt.execute(sql);

            // Close
            stmt.close();
            con.close();
        } catch (Exception e) {
            e.printStackTrace();
        }
- Because JDBC is oriented to interface programming, so the database driver is done by the database manufacturer. We can get the corresponding database connection only by loading the corresponding database driver. Therefore, we have written a tool class to get the connection with the database. Of course, in order to be more flexible, our tool class is to read the configuration file.
    /*
    * driver, url, username, password connected to the database can be configured through configuration files to increase flexibility
    * When we need to switch the database, we just need to change the above information in the configuration file.
    *
    * */

    private static String  driver = null;
    private static String  url = null;
    private static String  username = null;
    private static String password = null;

    static {
        try {

            //Get the read-in stream of the configuration file
            InputStream inputStream = UtilsDemo.class.getClassLoader().getResourceAsStream("db.properties");

            Properties properties = new Properties();
            properties.load(inputStream);

            //Get information about configuration files
            driver = properties.getProperty("driver");
            url = properties.getProperty("url");
            username = properties.getProperty("username");
            password = properties.getProperty("password");

            //Load driver class
            Class.forName(driver);


        } catch (IOException e) {
            e.printStackTrace();
        } catch (ClassNotFoundException e) {
            e.printStackTrace();
        }

    }

    public static Connection getConnection() throws SQLException {
        return DriverManager.getConnection(url,username,password);
    }
    public static void release(Connection connection, Statement statement, ResultSet resultSet) {

        if (resultSet != null) {
            try {
                resultSet.close();
            } catch (SQLException e) {
                e.printStackTrace();
            }
        }
        if (statement != null) {
            try {
                statement.close();
            } catch (SQLException e) {
                e.printStackTrace();
            }
        }
        if (connection != null) {
            try {
                connection.close();
            } catch (SQLException e) {
                e.printStackTrace();
            }
        }
}- After the encapsulation of the above layer, we can use the tool class directly to get the connection with the database where we use it. So it's much more convenient than before! However, you still need to use Connection to create a Statement object each time. And no matter what method, in fact, the SQL statement and the parameters passed in are different!
- So, we customized a JDBC tool class, you can see the details. http://blog.csdn.net/hon_3y/article/details/53760782#t6
- Our custom tool class is actually written using the DbUtils component as a template, so we have been using the DbUtils component when we develop it.
JDBC using Spring
Now that we have reviewed our previous JDBC development, let's see how Spring optimizes JDBC.
First, to use Spring's JDBC module, two jar files must be introduced:
-
Introducing jar files
- spring-jdbc-3.2.5.RELEASE.jar
- spring-tx-3.2.5.RELEASE.jar
First, let's look at our native JDBC code: Getting Connection is extractable, just use dataSource to get Connection.
    public void save() {
        try {
            String sql = "insert into t_dept(deptName) values('test');";
            Connection con = null;
            Statement stmt = null;
            Class.forName("com.mysql.jdbc.Driver");
            // Connection object
            con = DriverManager.getConnection("jdbc:mysql:///hib_demo", "root", "root");
            // Execution command object
            stmt =  con.createStatement();
            // implement
            stmt.execute(sql);

            // Close
            stmt.close();
            con.close();
        } catch (Exception e) {
            e.printStackTrace();
        }
}- It is noteworthy that JDBC supports the CP30 database connection pool very well. So we can use Spring's dependency injection directly, just configure dataSource in the configuration file!
    <bean id="dataSource" class="com.mchange.v2.c3p0.ComboPooledDataSource">
        <property name="driverClass" value="com.mysql.jdbc.Driver"></property>
        <property name="jdbcUrl" value="jdbc:mysql:///hib_demo"></property>
        <property name="user" value="root"></property>
        <property name="password" value="root"></property>
        <property name="initialPoolSize" value="3"></property>
        <property name="maxPoolSize" value="10"></property>
        <property name="maxStatements" value="100"></property>
        <property name="acquireIncrement" value="2"></property>
    </bean>
    // IOC container injection
    private DataSource dataSource;
    public void setDataSource(DataSource dataSource) {
        this.dataSource = dataSource;
    }


    public void save() {
        try {
            String sql = "insert into t_dept(deptName) values('test');";
            Connection con = null;
            Statement stmt = null;
            // Connection object
            con = dataSource.getConnection();
            // Execution command object
            stmt =  con.createStatement();
            // implement
            stmt.execute(sql);

            // Close
            stmt.close();
            con.close();
        } catch (Exception e) {
            e.printStackTrace();
        }
    }
Spring provides a class like JdbcTemplate for us to use! It encapsulates DataSource, which means that we can use JdbcTemplate in Dao.
Create dataSource, create jdbcTemplate objects
<?xml version="1.0" encoding="UTF-8"?>
<beans xmlns="http://www.springframework.org/schema/beans"
       xmlns:xsi="http://www.w3.org/2001/XMLSchema-instance"
       xmlns:context="http://www.springframework.org/schema/context"
       xmlns:c="http://www.springframework.org/schema/c"
       xsi:schemaLocation="http://www.springframework.org/schema/beans http://www.springframework.org/schema/beans/spring-beans.xsd http://www.springframework.org/schema/context http://www.springframework.org/schema/context/spring-context.xsd">

    <bean id="dataSource" class="com.mchange.v2.c3p0.ComboPooledDataSource">
        <property name="driverClass" value="com.mysql.jdbc.Driver"></property>
        <property name="jdbcUrl" value="jdbc:mysql:///zhongfucheng"></property>
        <property name="user" value="root"></property>
        <property name="password" value="root"></property>
        <property name="initialPoolSize" value="3"></property>
        <property name="maxPoolSize" value="10"></property>
        <property name="maxStatements" value="100"></property>
        <property name="acquireIncrement" value="2"></property>
    </bean>

    <!--Scanning Annotation-->
    <context:component-scan base-package="bb"/>

    <!-- 2. Establish JdbcTemplate object -->
    <bean id="jdbcTemplate" class="org.springframework.jdbc.core.JdbcTemplate">
        <property name="dataSource" ref="dataSource"></property>
    </bean>

</beans>
- userDao
package bb;

import org.springframework.beans.factory.annotation.Autowired;
import org.springframework.jdbc.core.JdbcTemplate;
import org.springframework.stereotype.Component;

/**
 * Created by ozc on 2017/5/10.
 */


@Component
public class UserDao implements IUser {

    //Automated assembly using Spring
    @Autowired
    private JdbcTemplate template;

    @Override
    public void save() {
        String sql = "insert into user(name,password) values('zhoggucheng','123')";
        template.update(sql);
    }

}
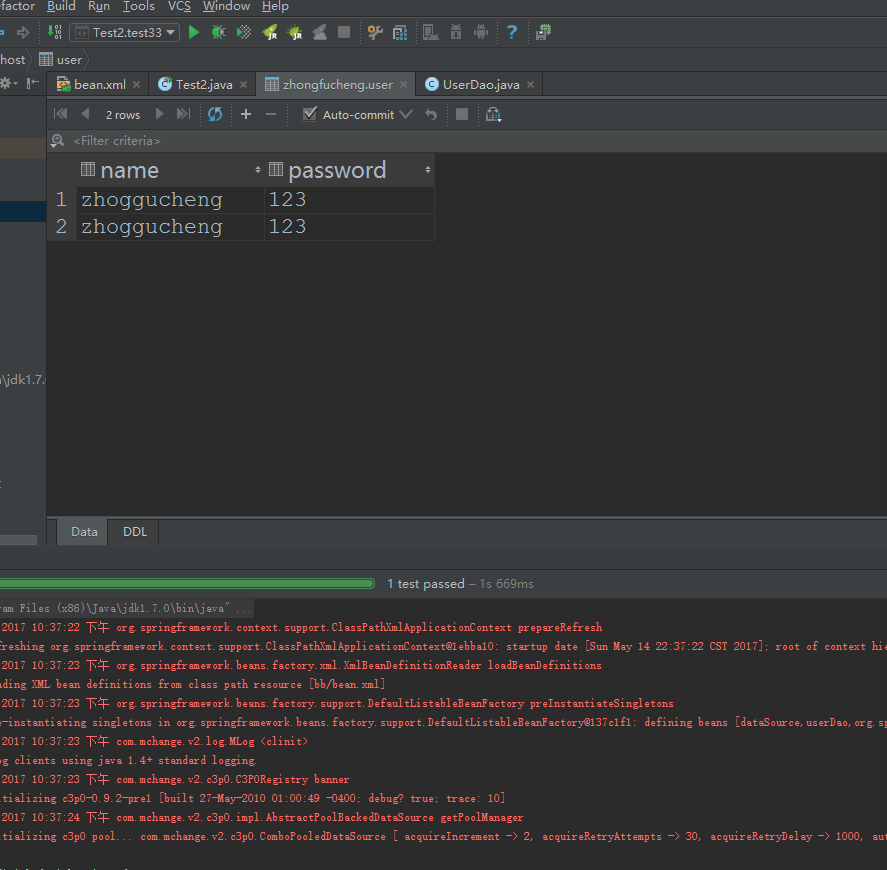
- Test:
    @Test
    public void test33() {
        ApplicationContext ac = new ClassPathXmlApplicationContext("bb/bean.xml");

        UserDao userDao = (UserDao) ac.getBean("userDao");
        userDao.save();
    }
JdbcTemplate query
If we use JdbcTemplate queries, we will find many overloaded query() methods
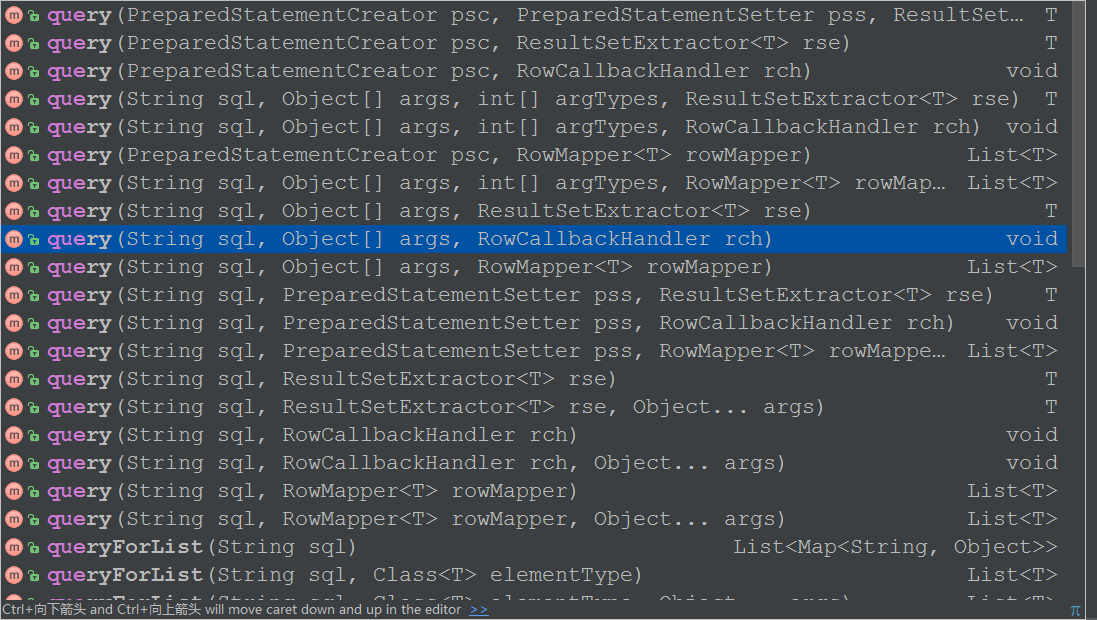
Generally, if we use queryForMap(), we can only encapsulate one row of data, and if we encapsulate multiple rows of data, we will report an error! Also, Spring doesn't know what we want to encapsulate a row of data into, so the return value is a Map set... If we get a set of Maps, we need to convert ourselves into the type we need.
We usually use the following method:
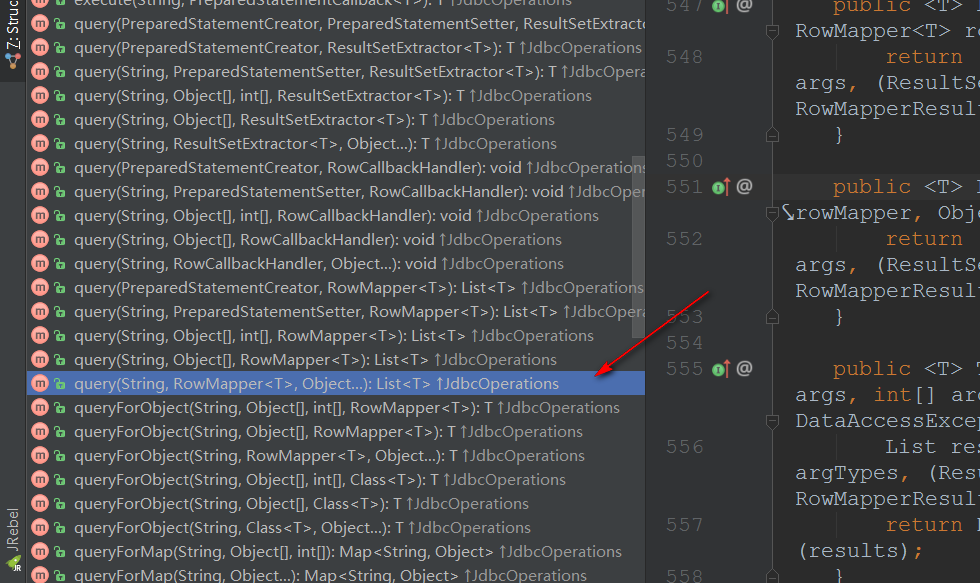
We can implement RowMapper and tell Spring how we encapsulate each row of records.
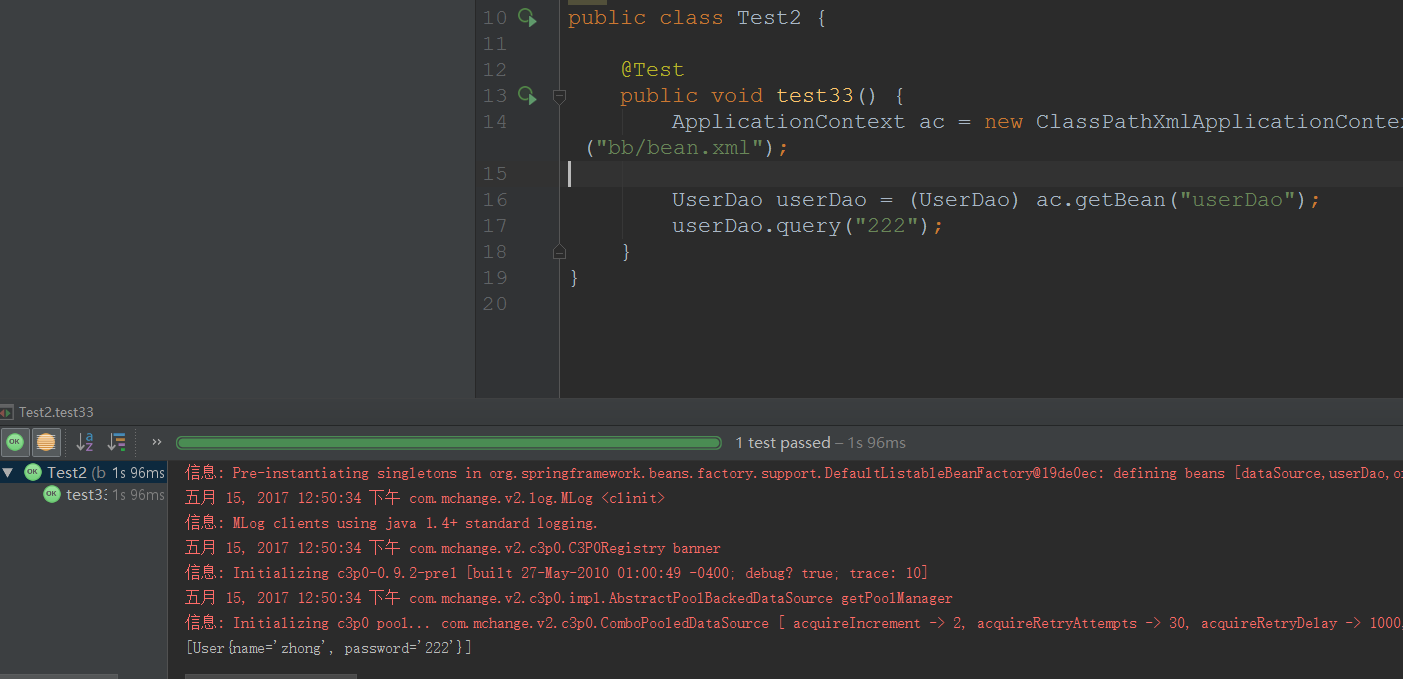
    public void query(String id) {
        String sql = "select * from USER where password=?";

        List<User> query = template.query(sql, new RowMapper<User>() {


            //Encapsulate each row of records as a User object
            @Override
            public User mapRow(ResultSet resultSet, int i) throws SQLException {
                User user = new User();
                user.setName(resultSet.getString("name"));
                user.setPassword(resultSet.getString("password"));

                return user;
            }

        },id);


        System.out.println(query);
    }
Of course, we usually encapsulate each row of records as a JavaBean object, so we can directly implement RowMapper and create it when we use it.
    class MyResult implements RowMapper<Dept>{

        // How to encapsulate a row of records
        @Override
        public Dept mapRow(ResultSet rs, int index) throws SQLException {
            Dept dept = new Dept();
            dept.setDeptId(rs.getInt("deptId"));
            dept.setDeptName(rs.getString("deptName"));
            return dept;
        }

    }