Original address
Summary
Before starting this article, the blogger defaults that you already know Spring Boot, Spring Security, Vue and JWT. The above concepts will not be repeated here. Let's talk about the train of thought.
1. The backend needs to write JWT generation processing and JWT parsing authentication processing.
2. The front end fills in the user name and password to send the login request.
3. After the successful login and authentication of the backend Spring Security, the JWT generator generates the Token and returns it to the front end.
4. The front end gets the Token, which needs to be carried in subsequent requests.
5. JWT filter is written in the back end to parse the Token in the request. If the parsing is successful, the corresponding prompt will be returned in case of failure.
Effect display

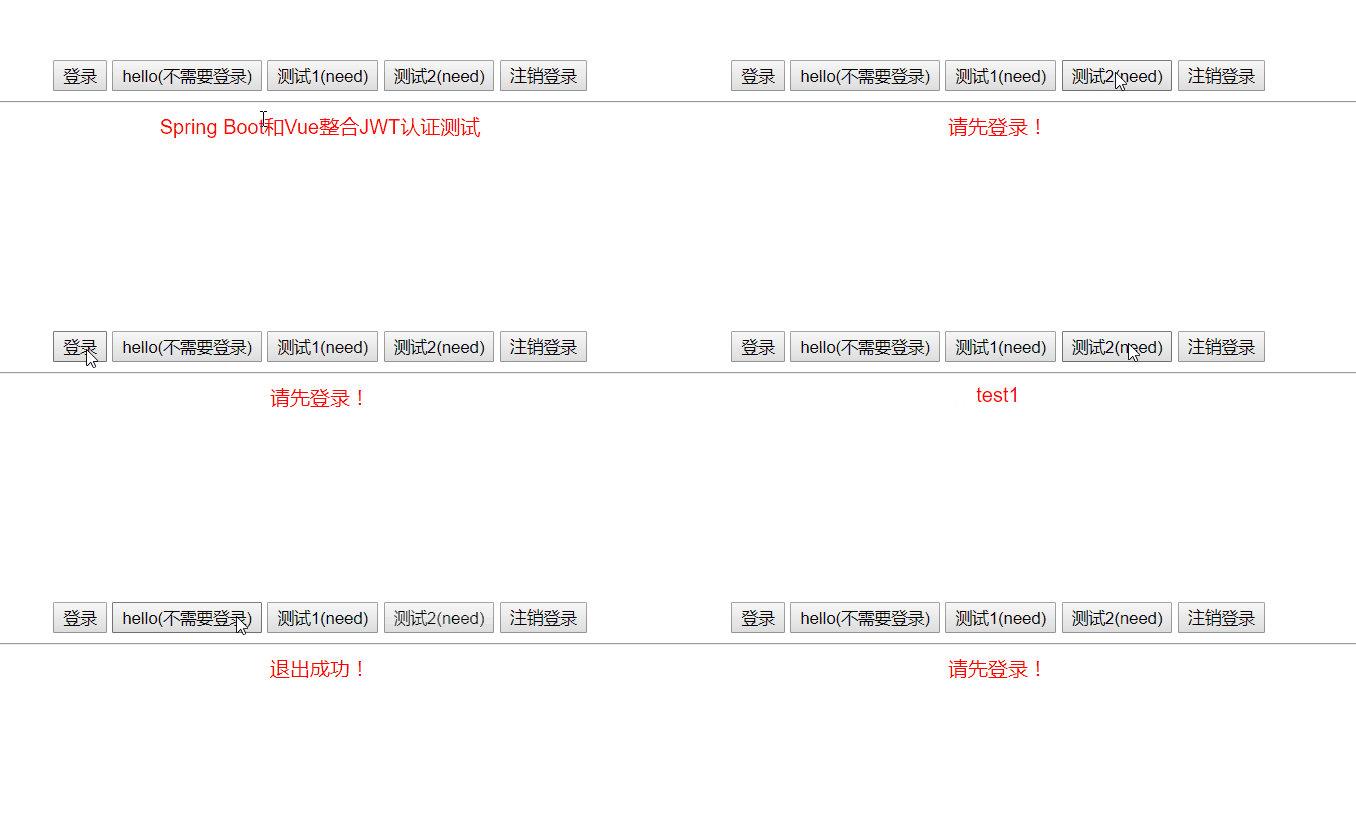
The hello button does not need to be logged in, and the test 1 and test 2 buttons need to be logged in to access it. Click to log in and get the Token. The next time you send a request, carry the Token
code implementation
Backend implementation
-
Introducing dependency
<dependency>
    <groupId>io.jsonwebtoken</groupId>
    <artifactId>jjwt</artifactId>
    <version>0.9.1</version>
</dependency>
-
code implementation
1. Issue Token after the user logs in successfully
Spring Security allows us to add our own login success processor and login failure processor when we do login operations. Here I write my own success processor and failure processor. The operation to generate JWT was added to the success processor. The code is as follows:
//Custom login success processor
@Component("myLoginSuccessHandler")
public class MyLoginSuccessHandler extends SavedRequestAwareAuthenticationSuccessHandler {
    private Logger logger = LoggerFactory.getLogger(getClass());

    @Autowired
    private ObjectMapper objectMapper;

    @Override
    public void onAuthenticationSuccess(HttpServletRequest httpServletRequest,
                                        HttpServletResponse httpServletResponse,
                                        Authentication authentication) throws IOException, ServletException {
        logger.info("Login succeeded!");

//        Set up JWT after successful login
        String Token = Jwts.builder()
                //Set token information
//                .setClaims(claimsMap)
                //Write the authenticated authentication to the token. When verifying, directly verify it
                .claim("authentication",authentication)
                //set up themes
                .setSubject("theme")
                //Expiration date
                .setExpiration(new Date(System.currentTimeMillis() + 60 * 60 * 24 * 1000))
                //Encryption mode
                .signWith(SignatureAlgorithm.HS512, "MyJWTtest")
                .compact();
        httpServletResponse.addHeader("Authorization", "Mrain" + Token);
        //All you have to do is return Authentication to the front end in the form of json. The tool class ObjectMapper is required, and Spring has been automatically injected.
        //Set return type
        httpServletResponse.setContentType("application/json;charset=UTF-8");
        Map<String, Object> tokenInfo = new HashMap<String, Object>();
        tokenInfo.put("Authorization","Mrain" + Token);
        //Write token information
        httpServletResponse.getWriter().write(objectMapper.writeValueAsString(tokenInfo));
    }
}
//Custom login failure processor
@Component("myLoginFailureHandler")
public class MyLoginFailureHandler extends SimpleUrlAuthenticationFailureHandler {
    /**
     * ObjectMapper This class is provided by jackson in java. It is mainly used to convert an object into a json string and return it to the front end,
     */
    @Autowired
    private ObjectMapper objectMapper;

    @Override
    public void onAuthenticationFailure(HttpServletRequest request,
                                        HttpServletResponse response,
                                        AuthenticationException exception) throws IOException, ServletException {
        //json form return
        //Server internal exception
        response.setStatus(500);
        //Set return type
        response.setContentType("application/json;charset=UTF-8");
        //Write error information to
       response.getWriter().write(objectMapper.writeValueAsString(exception.getMessage()));
    }
}
2. JWT interceptor
Define our own JWT interceptor to verify the Token before the request reaches the target.
//JWT interceptor
public class JwtAuthenticationTokenFilter extends OncePerRequestFilter {

    private Logger logger = LoggerFactory.getLogger(getClass());

    @Override
    protected void doFilterInternal(HttpServletRequest request,
                                    HttpServletResponse response,
                                    FilterChain filterChain) throws ServletException, IOException {
        //Get JWT
        String authHeader = request.getHeader("Authorization");
        logger.info("--------->"+authHeader);
        if (authHeader != null) {
            // Parsing token.
            Claims claims = Jwts.parser()
                    .setSigningKey("MyJWTtest")
                    .parseClaimsJws(authHeader.replace("Mrain", ""))
                    .getBody();
            //Get suject
//            String subject = claims.getSubject();
//            User user = (User) claims.get("user");
            //Get expiration time
            Date claimsExpiration = claims.getExpiration();
            logger.info("Expiration date"+claimsExpiration);
            //Judge whether it is overdue
            Date now = new Date();
            if (now.getTime() > claimsExpiration.getTime()) {
                throw new AuthenticationServiceException("The voucher has expired, please login again!");
            }
            //Obtain the successful authentication of the login authentication saved in the token,
            // Using UsernamePasswordAuthenticationToken to generate a new authentication
            // Put it into the SecurityContextHolder to indicate that the authentication is passed
            Object tokenInfo = claims.get("authentication");
            //It is transformed through com.alibaba.fastjson.
            Authentication toknAuthentication = JSONObject.parseObject(JSONObject.toJSONString(tokenInfo), Authentication.class);
            UsernamePasswordAuthenticationToken authentication = new UsernamePasswordAuthenticationToken(toknAuthentication.getPrincipal(),null,toknAuthentication.getAuthorities());
            SecurityContextHolder.getContext().setAuthentication(authentication);
        }
        filterChain.doFilter(request, response);
    }
}
3. Configure the configuration of Spring Security
Add two processors and our Jwt interceptor to the Spring Security configuration
@EnableWebSecurity
public class SecurityConfig extends WebSecurityConfigurerAdapter {
    @Autowired
    private MyLoginSuccessHandler myLoginSuccessHandler;
    @Autowired
    private MyLoginFailureHandler myLoginFailureHandler;

    @Override
    protected void configure(HttpSecurity http) throws Exception {
        /** JWT Interceptor*/
        JwtAuthenticationTokenFilter jwtAuthenticationTokenFilter = new JwtAuthenticationTokenFilter();
        /** Before adding JWT interceptor to UsernamePasswordAuthenticationFilter*/
        http.addFilterBefore(jwtAuthenticationTokenFilter,UsernamePasswordAuthenticationFilter.class);

        http.formLogin()
                .loginPage("/loginInfo")
                .loginProcessingUrl("/login")
                .successHandler(myLoginSuccessHandler)
                .failureHandler(myLoginFailureHandler);
        http.authorizeRequests()
                .antMatchers("/hello","/login","/loginInfo","/logoutSuccess")
                .permitAll()
                .anyRequest()
                .authenticated();
        //Accessing / logout means that the user logs off and clears the session
        http.logout().logoutSuccessUrl("/logoutSuccess");
        // Close csrf
        http.csrf().disable();
        http.cors();
    }

    /**
     * Encryption with salt
     * @return
     */
    @Bean
    public PasswordEncoder passwordEncoder() {
        //Spring's own salt value will be generated randomly every time. Even if the password is the same, it will be different after encryption
        return new BCryptPasswordEncoder();
    }
}
Front end implementation
The front-end implementation is very simple, that is, after successful login, the returned token will be saved, and the token will be carried by each access request header in the future.
login() {
      this.$http
        .post("/login", {
          username: 1,
          password: 1
        })
        .then(res => {
          // Login successfully
          console.log("Login succeeded!");
          console.log(res.data);
           /** Save Token to localStorage*/
          const authorization = res.data.Authorization;
          localStorage.token = authorization;
          this.msg = authorization;
        })
        .catch(error => {
          console.log("Login failed!");
          console.log(error);
          this.msg = error;
        });
    },
//Settings for sending requests using axios
// Do something before sending the request
Axios.interceptors.request.use(config => {
    // Set the parameters to be submitted as form form. If the form is submitted as JSON, it can be ignored
    if(config.method  === 'post'){
        // JSON to FormData
        const formData = new FormData()
        Object.keys(config.data).forEach(key => formData.append(key, config.data[key]))
        config.data = formData
    }

    //In this case, the token is saved to localStorage and added to the request header
    if (localStorage.token) {
        config.headers.Authorization = localStorage.token
    }
    return config
},error =>{
    alert("Wrong parameters", 'fail')
    return Promise.reject(error)
})