1. Overview
The company is currently documenting the project, and documentation is critical to building the REST API.In this article, I will introduce Spring Doc, a tool that simplifies the generation and maintenance of API documents for Spring Boot 1.x and 2.x applications based on the OpenAPI 3 specification.
2. Set up springdoc-openapi
If you want to springdoc-openapi To generate a standard OpenAPI 3 document for our API, simply add [springdoc-openapi-core]( https://search.maven.org/search?q=g:org.springdoc AND a:springdoc-openapi-core&core=gav) depends on pom.xml:
<dependency>
    <groupid>org.springdoc</groupid>
    <artifactid>springdoc-openapi-core</artifactid>
    <version>1.1.45</version>
</dependency>
Once the addition is complete, start the application and access the default path/v3/api-docs to view the documentation as follows:
http://localhost:8080/v3/api-docs/
If you want to customize the path, specify it in the application.properties file:
springdoc.api-docs.path=/api-docs
In this way, the access path to the document becomes:
http://localhost:8080/api-docs/

OpenAPI is defined by default as JSON format.For yaml format, you can access the following path:
http://localhost:8080/api-docs.yaml
3. Integrate springdoc-openapi and wagger UI
In addition to generating our own OpenAPI 3 specification, we can also integrate springdoc-openapi with Swagger UI so that we can interact with our API specification and test endpoints.
3.1. Maven dependency
To integrate springdoc-openapi with the Wagger UI, the only thing you need to do is add a springdoc-openapi-ui dependency to the project pom.xml file.
<dependency>
    <groupid>org.springdoc</groupid>
    <artifactid>springdoc-openapi-ui</artifactid>
    <version>1.1.45</version>
</dependency>
Visit the swagger-ui page:
http://localhost:8080/swagger-ui.html
Of course, you can customize the access path as above:
springdoc.swagger-ui.path=/swagger-ui-custom.html
3.2. Raise a chestnut
Suppose you have a ball (soccer is sad, so you need one!!)controller of.
@RestController
@RequestMapping("/api/ball")
public class BallController {

    @Autowired
    private BallRepository repository;

    @GetMapping("/{id}")
    public Ball findById(@PathVariable long id) {
        return repository.findById(id)
            .orElseThrow(() -> new BallNotFoundException());
    }

    @GetMapping("/")
    public Collection<book> findBooks() {
        return repository.getBooks();
    }

    @PutMapping("/{id}")
    @ResponseStatus(HttpStatus.OK)
    public Book updateBook(@PathVariable("id") final String id, @RequestBody final Book book) {
        return book;
    }
}
Start the project and access the address in the browser:
http://localhost:8080/swagger-ui-custom.html
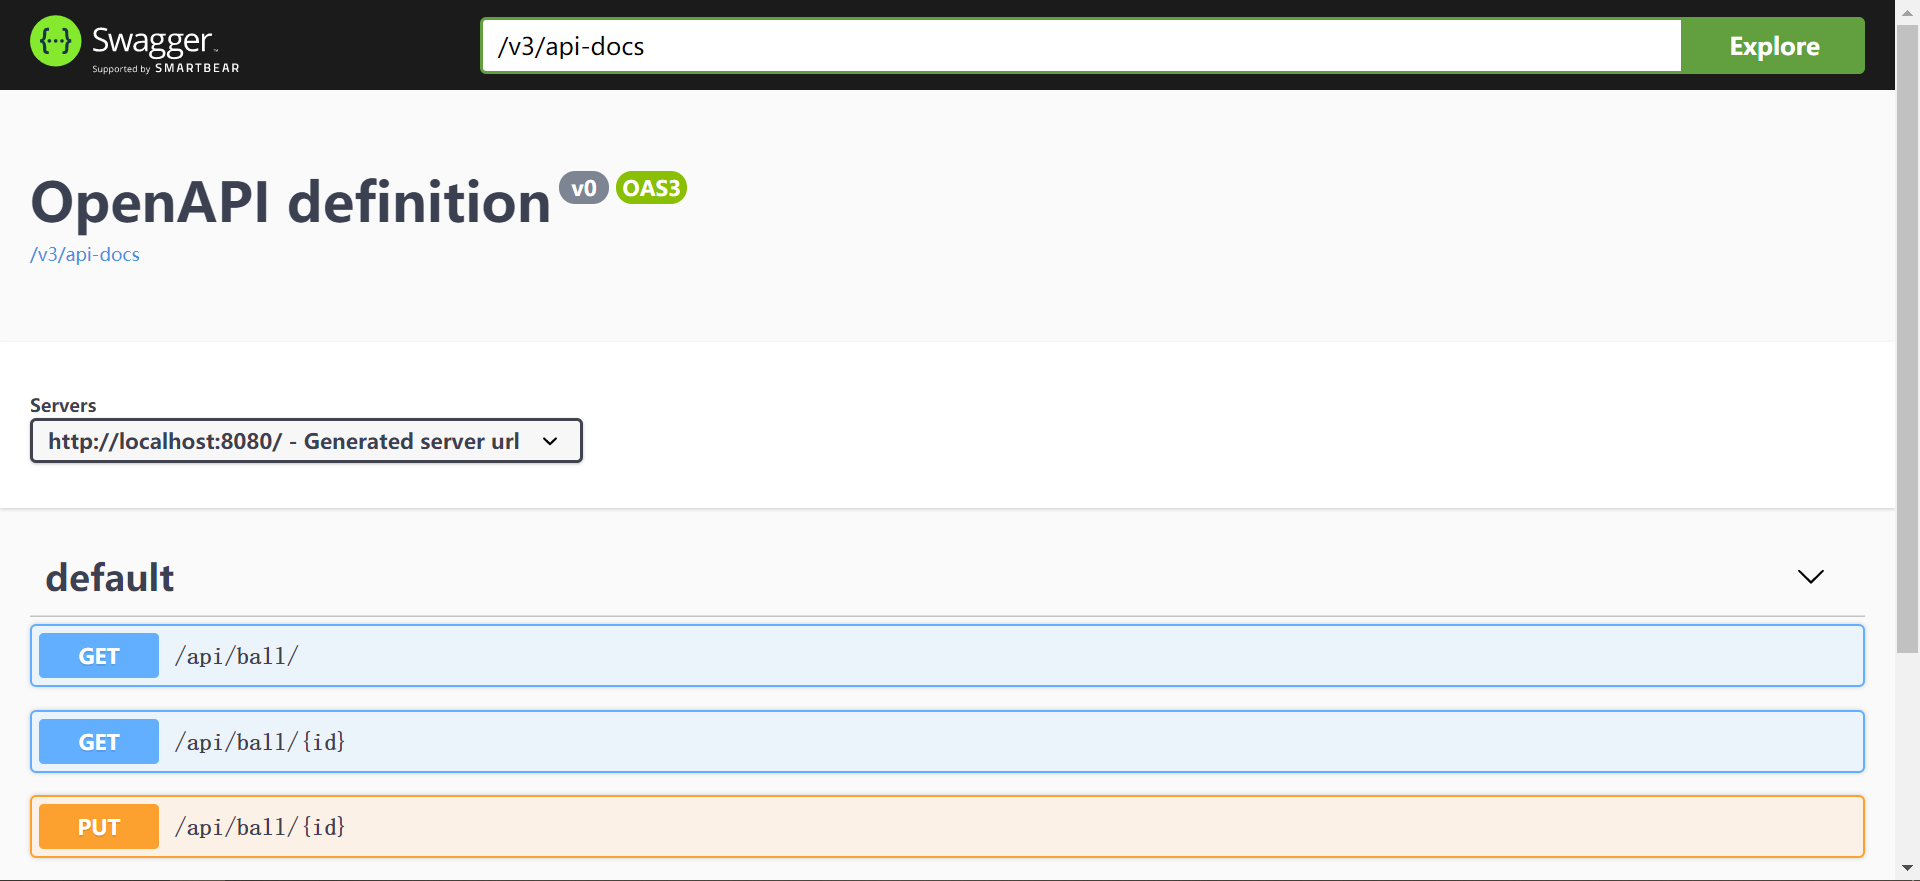
The swagger-ui interface:
4. springdoc-openapi integration with Spring WebFlux
We can integrate springdoc-openapi-webflux-ui with springdoc-openapi and Swagger UI by adding dependencies in the Spring WebFlux project:
<dependency>
    <groupid>org.springdoc</groupid>
    <artifactid>springdoc-openapi-webflux-ui</artifactid>
    <version>1.1.45</version>
</dependency>
Then the browser accesses the address
http://localhost:8080/swagger-ui.html
Similarly, you can customize the document access path by adding the springdoc.swagger-ui.path configuration item to the application.properties file.
5. Use the springdoc-openapi Maven plug-in
The springdoc-openapi library provides the springdoc-openapi-maven-plugin plug-in to generate an Open API description in JSON or yaml format.
springdoc-openapi-maven-plugin relies on the spring-boot-maven plug-in. Maven runs the OpenAPI plug-in during the integration testing phase.
So how do I configure plug-ins in pom.xml?See the following code:
<plugin>
    <groupid>org.springframework.boot</groupid>
    <artifactid>spring-boot-maven-plugin</artifactid>
    <version>2.1.8.RELEASE</version>
    <executions>
        <execution>
            <id>pre-integration-test</id>
            <goals>
                <goal>start</goal>
            </goals>
        </execution>
        <execution>
            <id>post-integration-test</id>
            <goals>
                <goal>stop</goal>
            </goals>
        </execution>
    </executions>
</plugin>
<plugin>
    <groupid>org.springdoc</groupid>
    <artifactid>springdoc-openapi-maven-plugin</artifactid>
    <version>0.2</version>
    <executions>
        <execution>
            <phase>integration-test</phase>
            <goals>
                <goal>generate</goal>
            </goals>
        </execution>
    </executions>
</plugin>
Of course, you can also configure plug-ins with custom values:
<plugin>
    <executions>
        .........
    </executions>
    <configuration>
        <apidocsurl>http://localhost:8080/v3/api-docs</apidocsurl>
        <outputfilename>openapi.json</outputfilename>
        <outputdir>${project.build.directory}</outputdir>
    </configuration>
</plugin>
Take a closer look at the parameters we configured in the plug-in:
- apiDocsUrl - URL to access a document in json format, default path: http://localhost:8080/v3/api-docs
- outputFileName - Stores the defined path by default: openapi.json
- outputDir - absolute path to document storage - defaults to: ${project.build.directory}
6. Automatically generate documents using JSR-303 Bean Validation
When we use JSR-303 bean validation annotations in our model, such as @NotNull, @NotBlank, @Size, @Min, @Max, etc., springdoc-openapi generates appropriate constraints for these beans.
Lift a chestnut:
public class Ball {

    private long id;

    @NotBlank
    @Size(min = 0, max = 20)
    private String title;

    @NotBlank
    @Size(min = 0, max = 30)
    private String author;

}
Documents generated for Ball bean s are richer:

7. Use @ControllerAdvice and @ResponseStatus to generate documents
In the *@RestControllerAdvice annotated class, using @ResponseStatus on a method automatically generates a document with a return status code.As in the following classes annotated by @ControllerAdvice, @ResponseStatus* modifies two methods:
@RestControllerAdvice public class GlobalControllerExceptionHandler { @ExceptionHandler(ConversionFailedException.class) @ResponseStatus(HttpStatus.BAD_REQUEST) public ResponseEntity<string> handleConnversion(RuntimeException ex) { return new ResponseEntity<>(ex.getMessage(), HttpStatus.BAD_REQUEST); } @ExceptionHandler(BallNotFoundException.class) @ResponseStatus(HttpStatus.NOT_FOUND) public ResponseEntity<string> handleBallNotFound(RuntimeException ex) { return new ResponseEntity<>(ex.getMessage(), HttpStatus.NOT_FOUND); } }
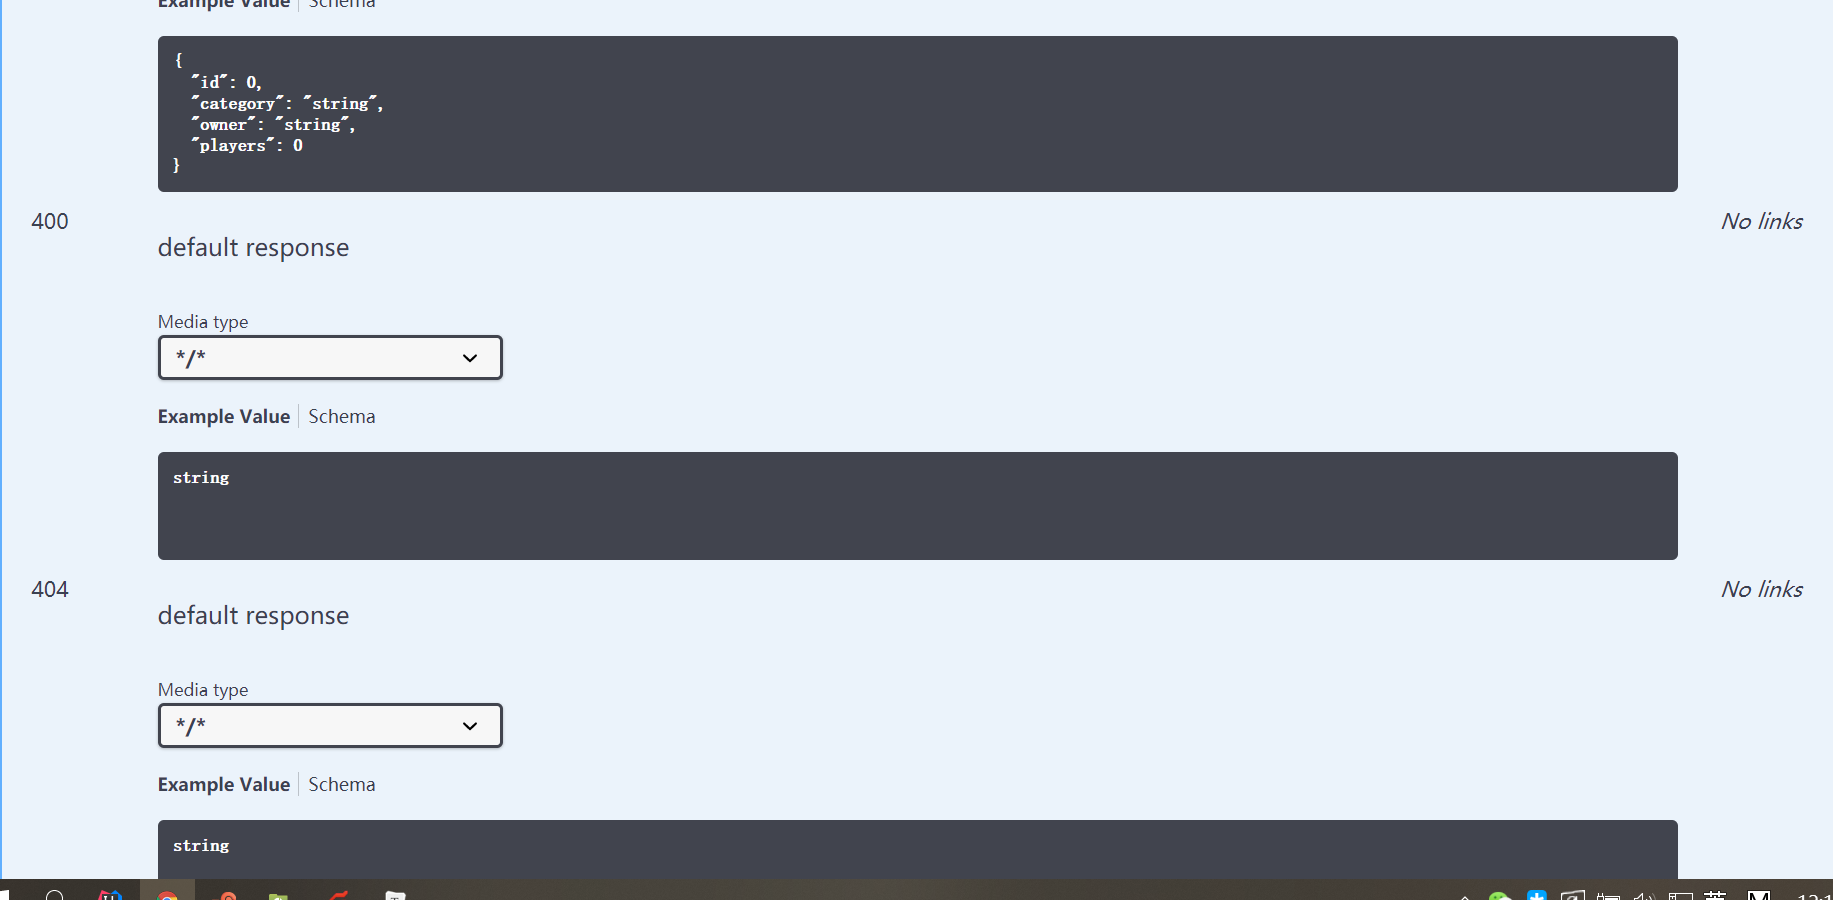
Now we can see in the document that the return status codes are 400 and 404.

8. Summary
Spring Boot version 2.2.x may not be supported at this time, so it is best to use 2.1.x. This article uses Spring Boot version 2.1.8.RELEASE.
The above code can be found in my github. over on GitHub.
Focus on Public Number: Reply 666 to receive translation article benefits:
 </string></string></book>
