Spring boot series (9) minutes to upload files
Previous recommendation
Spring boot series (I) idea new spring boot project
Introduction to SpringBoot series (2)
Spring boot series (3) configuration file details
Spring boot series (IV) detailed explanation of web static resource configuration
Spring boot series (V) Mybatis integrated full detailed version
Spring boot series (6) integrated tymeleaf detailed Edition
Spring boot series (7) integration interface document swagger, use, test
Spring boot series (8) minutes learn spring boot's multiple cross domain solutions
1. Project construction and configuration
let's just create a project with web dependencies.
Then you need to upload some settings in the profile configuration file. Here we use the yml file as the configuration file. If you don't understand the syntax, please move to the previous series 3, which has a detailed explanation.
server:
  port: 8095

spring:
  servlet:
    multipart:
      max-file-size: 10MB
      max-request-size: 30MB
- Max file size sets the maximum size of the file that can be accepted, remember MB, or KB
- Max request size sets the size of all files uploaded at once.
default size is 1MB
in addition to configuration files, java can also be used for configuration, as follows
@Bean
public MultipartConfigElement multipartConfigElement() {
    MultipartConfigFactory factory = new MultipartConfigFactory();
    //The maximum value of a single file uploaded is KB, which is set to 10MB here
    DataSize maxSize = DataSize.ofMegabytes(10);
    DataSize requestMaxSize = DataSize.ofMegabytes(30);
    factory.setMaxFileSize(maxSize);
    ///Set the total size of one upload file
    factory.setMaxRequestSize(requestMaxSize);
    return factory.createMultipartConfig();
}
this method can be placed in the startup class or in a configuration class, so that the project can be loaded normally when it is started.
2. File upload
For single file upload, we need to use the backend to accept and store the file in the project or define the path ourselves. Here is the picture as the uploaded file. And upload the file to the project.
@RestController
@RequestMapping("/file")
public class FileController {
    @PostMapping("/uploadFile")
    public String uploadFile(MultipartFile file, HttpServletRequest request)  {
        if (file.isEmpty()){
            return "The uploaded file cannot be empty! Please upload again";
        }
        if (file.getSize()<=0){
            return "The uploaded file size needs to be greater than 0 kb";
        }
        System.out.println(file.getContentType());//image/png
        Date date = new Date();
        Long time = date.getTime();
        String originFileName = file.getOriginalFilename();//Get the original name of the file
        String newFileName = time+originFileName;
        //Get absolute path of project running
        String filePath = System.getProperty("user.dir");

        //Because I am a multi module project, the obtained project running path is the outer project path,
        // At this time, we need to add the project name demo upload to the relative path of the project
        String newFilePath = filePath+"\\demo-upload\\src\\main\\resources\\static\\images\\";

        //Of course, you can also set an absolute path for image upload and file upload.
        //For example: D:\images\
        File file1 = new File(newFilePath);

        if (!file1.exists()){
            file1.mkdirs();
        }
        FileOutputStream fileOutputStream = null;
        try {
            fileOutputStream = new FileOutputStream(newFilePath+newFileName);
            fileOutputStream.write(file.getBytes());
            fileOutputStream.flush();
            fileOutputStream.close();
            return "localhost:8095/images/"+newFileName;
        } catch (java.io.IOException e) {
            e.printStackTrace();
        }
        return "Upload failed";
    }
}
Code Description:
in the code, we can use the parameter file to determine whether the file is empty, or take out the suffix name of the file to determine whether the type of the file meets our requirements. Using the getContentType() method, if you are uploading a png picture, then the printed image/png pictures of other types are other types. In order to distinguish pictures, we can use the number obtained by getTime method of current time as the prefix of pictures, or use other numbers or strings. I don't want to say anything. I'm tired of coding. Next, get the running path of the current project. Since I am a multi-module project, this path needs to be added with the project name, followed by the storage location of the file we need to upload, which is usually under the resources file. Then determine whether the folder where the file is stored exists. If not, create a file. Then, the byte stream is used to write the data to the file and return the Accessible path.
front end code, I directly create an upload.html file under the static directory, and then we write the content in the file
<p>Single file upload</p>
<form action="/file/uploadFile" method="POST" enctype="multipart/form-data">
    //File: < input type = "file" name = "file" / >
    <input type="submit" />
</form>
its action corresponds to the path of the corresponding method in our controller to access the uploaded file. The method attribute is post, which is consistent with the backend. The name attribute of the input box whose type is file needs to be consistent with the MultipartFile in the controller. If not, the backend cannot accept the data. If you have written the back-end, and the front-end and back-end parameters are inconsistent, you can add a comment to the back-end parameters. @The annotation RequestParam("file") is placed in front of MultipartFile, so that you can receive data correctly even if your parameter name is not file.
after uploading the file, the returned path should not be able to directly access the image, and 404 will be displayed. We need to add the following configuration.
@Configuration
public class ResourceConfigAdapter implements WebMvcConfigurer {


    @Override
    public void addResourceHandlers(ResourceHandlerRegistry registry) {
        //Get the real path of the file
        String path = System.getProperty("user.dir")+"\\demo-upload\\src\\main\\resources\\static\\images\\";
        String os = System.getProperty("os.name");
        if (os.toLowerCase().startsWith("win")) {
            registry.addResourceHandler("/images/**").
                    addResourceLocations("file:" + path);
        }

    }
}
the dynamic configuration of java here is more flexible than the configuration of yml. When you know where the file is to be stored, you can add your own configuration to the yml file. Then we run the project as follows: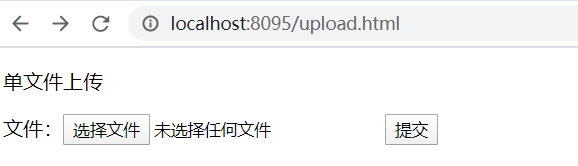
upload a picture and return to the Accessible path
then we copy the URL to the browser, run it, and you can access the picture.
this is a single file upload, and then you may need to do multiple file uploads. It's very simple. Just make a loop at the back end, and then use the array of MultipartFile to accept the files and make some changes to the front end.
 @PostMapping("/uploadFiles")
public String uploadFiles(MultipartFile[] files,HttpServletRequest request) {
    StringBuilder paths = new StringBuilder();
    for (MultipartFile file:files) {
        //The middle code is the same as above
        try {
            //Here, it can be modified according to the actual situation, and the array can be used
            paths.append("localhost:8095/images/"+newFileName+"\n");
        } catch (java.io.IOException e) {
            e.printStackTrace();
        }
    }
    return paths.toString();
}
slightly modify the front end
<p>Multi file upload</p>

<form action="/file/uploadFiles" method="POST" enctype="multipart/form-data">
    //File: < input type = "file" name = "files" multiple = "multiple" / >
    <input type="submit"/>
</form>
this completes the upload of multiple files. When uploading, you need to hold down the Ctrl key, and then select multiple files to upload.
3. Summary
this article explains single file, multi file upload, and then adds some configuration to the upload restrictions and access of files. If you think this article is useful to you, like it.