1. Spring Boot Fast Building
1. New projects using IntelliJ IDEA
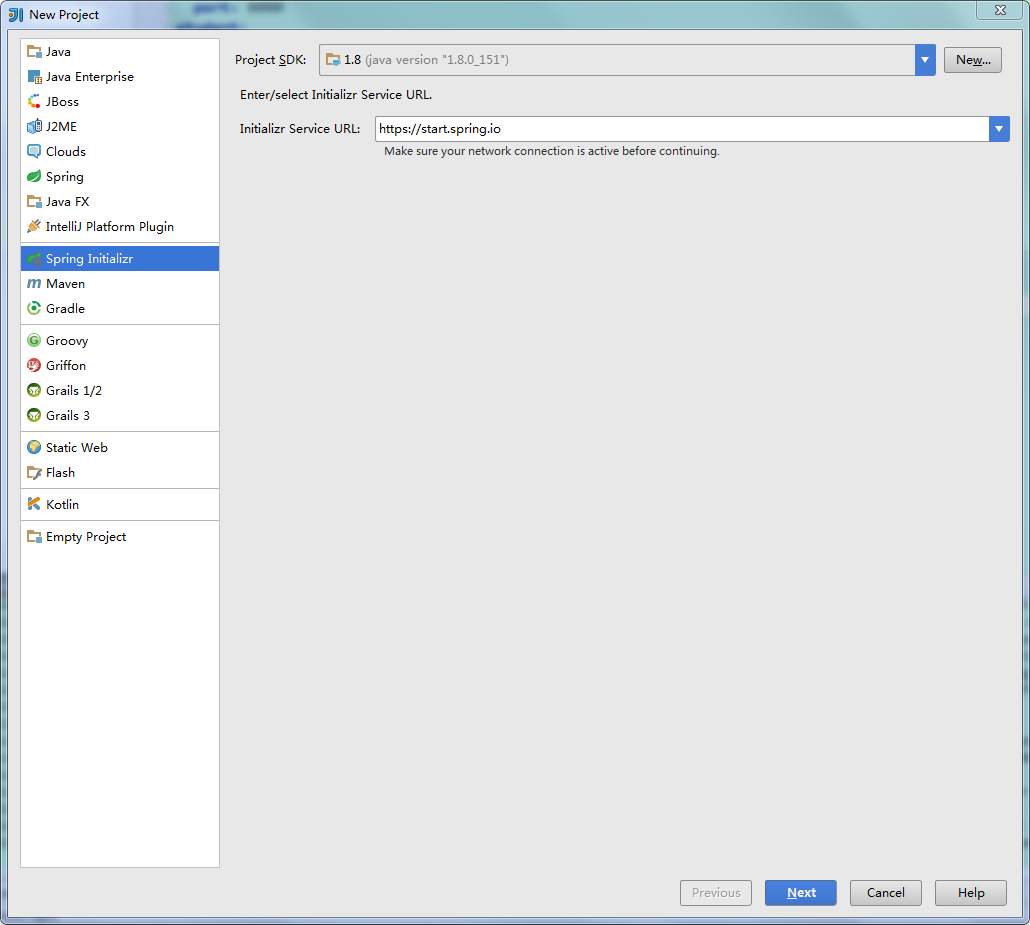
File-New-project Select Spring Initializr, then select the default url and click on [Next]:
Then modify the project information:

Check the Web template:

Select the location of the project and click Finish.
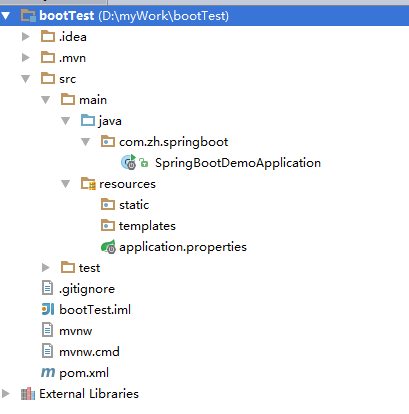
If you configure Spring Boot for the first time, you may need to wait for IDEA to download the corresponding dependency packages. The default project structure is as follows:
The structure of the project still looks refreshing and there are a lot of configuration files missing. Let's see what the default generation is.
- SpringbootApplication: A class with the main() method to start the application
- Springboot Application Tests: An empty Junit test loads a Spring application context using the Spring Boot dictionary configuration function
- application.properties: An empty properties file that adds configuration properties as needed
- pom.xml: Maven build description file
2,HelloController
Create a new Hello Controller under the package cn.zh.springboot:
package cn.zh.springboot;

import org.springframework.web.bind.annotation.RequestMapping;
import org.springframework.web.bind.annotation.RestController;

/**
 * Test Controller
 *
 * @author: @Substitute for design
 * @create: 2018 June 28, 2001 17:27:58
 */
@RestController
public class HelloController {

    @RequestMapping("/hello")
    public String hello() {
        return "Hello Spring Boot!";
    }
}- **@RestController Note: ** This annotation is a combination of @Controller and @ResponseBody annotations
3. Start up
Open the Springboot Application class and right-click to run:

- Note: We didn't configure Tomcat server manually in the above project because Spring Boot has Tomcat built in.
Wait for a moment and you'll see the following hints for successful operation:
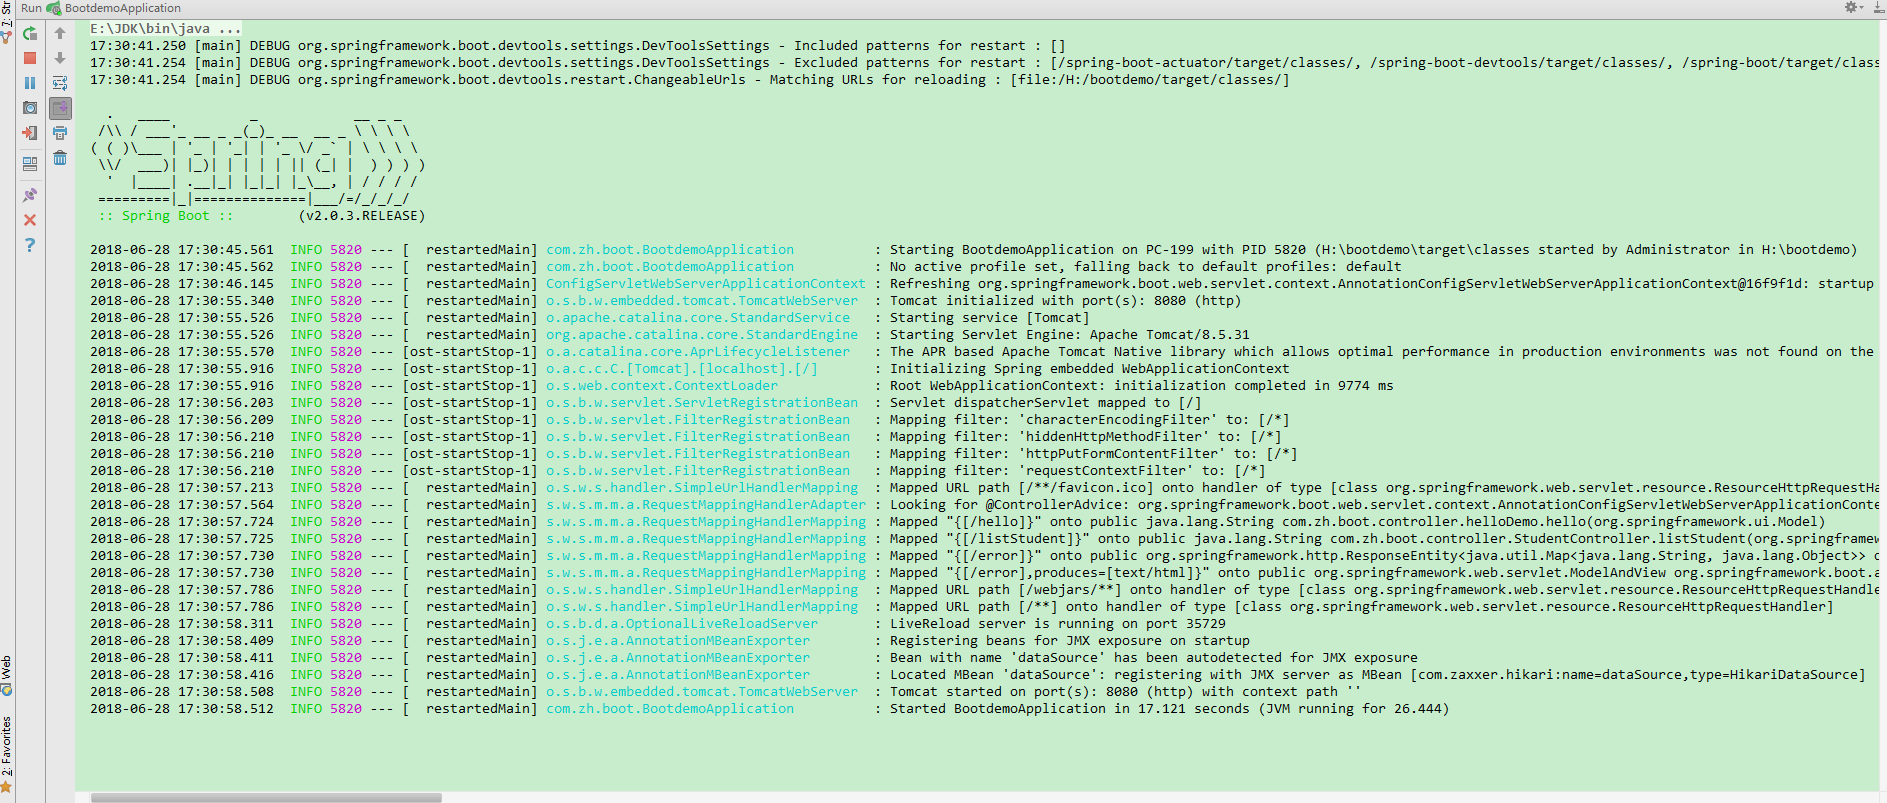
You can see that our Tomcat runs on port 8080. Let's visit the'/ hello'address and try:
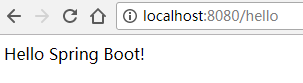
You can see that the page successfully displays the information we returned.
Integration of MyBatis
- Step 1: Modify pom.xml to increase support for MySql and MyBatis
<!-- mybatis -->
<dependency>
    <groupId>org.mybatis.spring.boot</groupId>
    <artifactId>mybatis-spring-boot-starter</artifactId>
    <version>1.1.1</version>
</dependency>
<!-- mysql -->
<dependency>
    <groupId>mysql</groupId>
    <artifactId>mysql-connector-java</artifactId>
    <version>5.1.21</version>
</dependency>- Step 2: Adding database link parameters
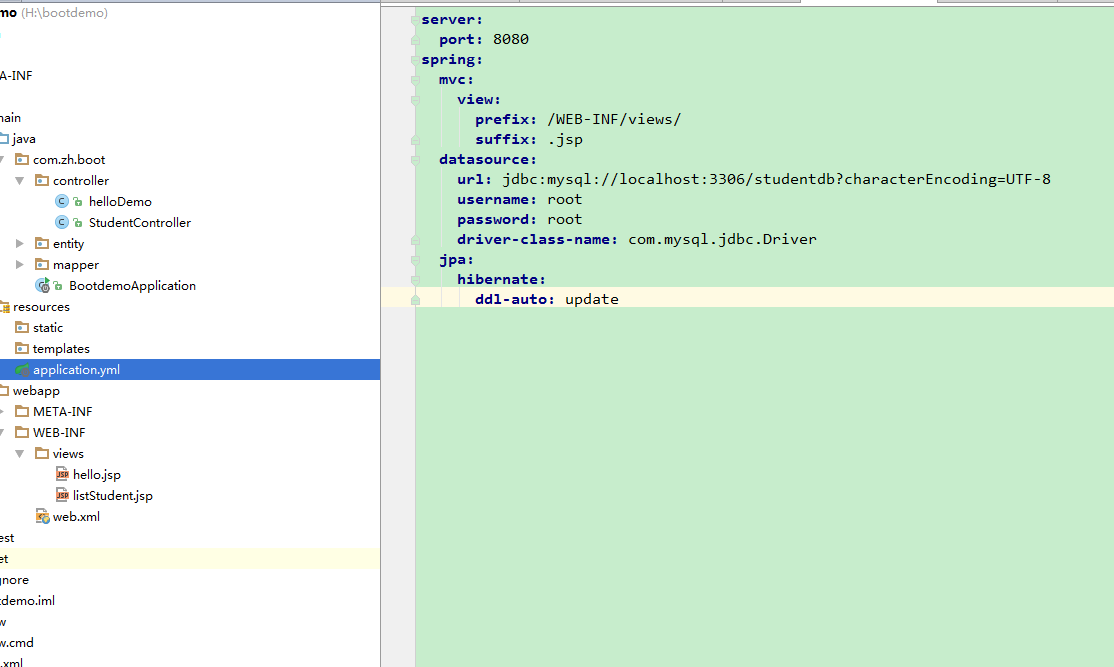
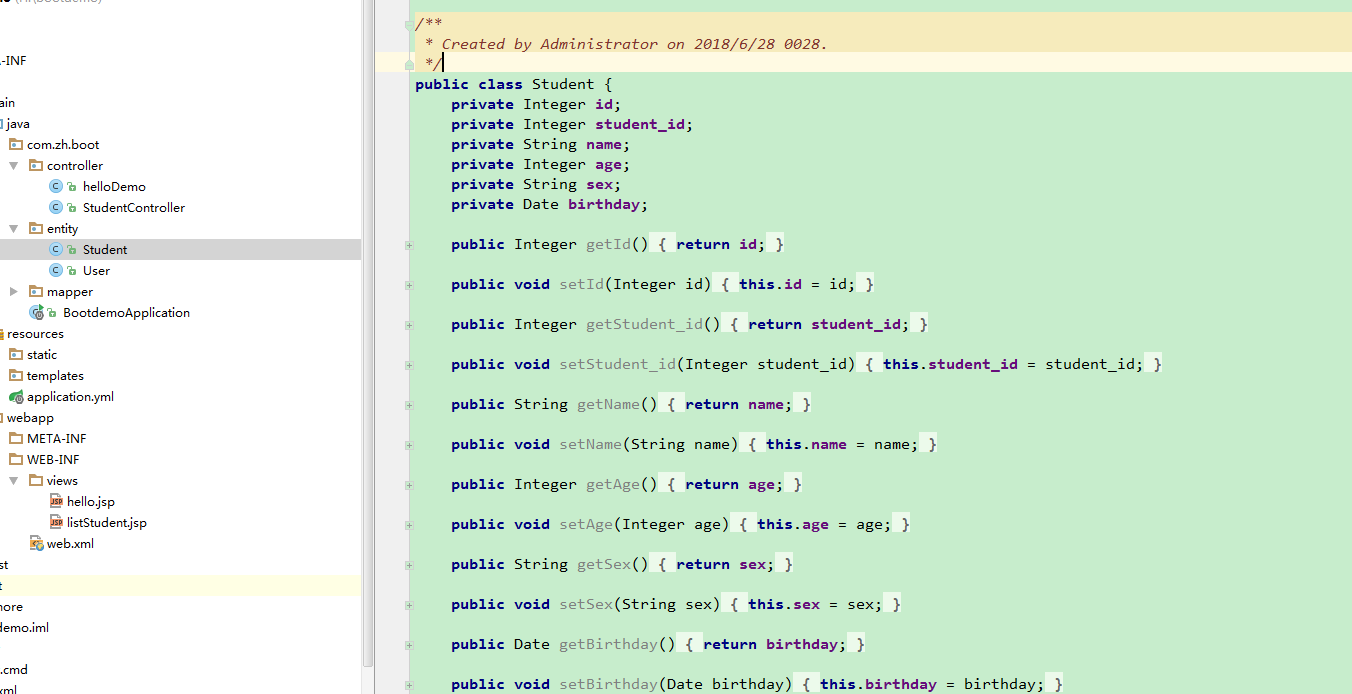
- Step 3: Create Student entity classes and Student Mapper mapping classes
Create a new entity package under [cn.zh.springboot], and then create a Student class under it:
Create a new [mapper] package under [cn.zh.springboot], and then create a Student Mapper mapping class under it:
package cn.zh.springboot.mapper;

import cn.wmyskxz.springboot.pojo.Student;
import org.apache.ibatis.annotations.Mapper;
import org.apache.ibatis.annotations.Select;

import java.util.List;

@Mapper
public interface StudentMapper {

    @Select("SELECT * FROM student")
    List<Student> findAll();
}- Step 4: Write Student Controller
Create a new controller package under [cn.zh.springboot], and then create a Student Controller under it:
package cn.zh.springboot.controller;

import cn.wmyskxz.springboot.mapper.StudentMapper;
import cn.wmyskxz.springboot.pojo.Student;
import org.springframework.beans.factory.annotation.Autowired;
import org.springframework.stereotype.Controller;
import org.springframework.ui.Model;
import org.springframework.web.bind.annotation.RequestMapping;

import java.util.List;

/**
 * Student Controller
 *
 * @author: @Substitute for design
 * @create: 2018 June 28, 2001 17:38:07
 */
@Controller
public class StudentController {

    @Autowired
    StudentMapper studentMapper;

    @RequestMapping("/listStudent")
    public String listStudent(Model model) {
        List<Student> students = studentMapper.findAll();
        model.addAttribute("students", students);
        return "listStudent";
    }
}
Step 5: Write listStudent.jsp file
Let's simplify the JSP file and display only two fields of data:
<%@ page language="java" contentType="text/html; charset=UTF-8"
         pageEncoding="UTF-8"%>

<%@ taglib uri="http://java.sun.com/jsp/jstl/core" prefix="c"%>

<table align='center' border='1' cellspacing='0'>
    <tr>
        <td>id</td>
        <td>name</td>
    </tr>
    <c:forEach items="${students}" var="s" varStatus="st">
        <tr>
            <td>${s.id}</td>
            <td>${s.name}</td>
        </tr>
    </c:forEach>
</table>- Step 6: Restart the server
Because new dependency packages have been added to pom.xml, automatic restart of the server does not work. We need to restart the server manually once, and then enter the address: localhost:8080/list Student to see the effect:
