Spring Boot 2.x Actual Warfare--First Spring Boot Program
The Spring Boot 2.X Actual Warfare series will be divided into the following modules. This section will build a RESTful API and customize the return data and HTTP return codes, as well as the data passed to the API interface. The next section will integrate Log4j2 with Slf4j for log printing and output to files:

I am Xiaoxian, a non-slash youth who is dedicated to big data and distributed technology. I love Coding, reading, photography and life!
Source code repository: https://github.com/zhshuixian/learn-spring-boot-2
The previous chapter focuses on Spring Boot and how to create a Spring Boot project in IDEA. On the basis of the previous chapter, this chapter describes how to run the Spring Boot project and writes some RESTful API s. This chapter mainly contains the following:
- Run Spring Boot Project
- Write RESTful API interface
- Write and run unit tests
- Set port number and HTTPS
- Package into Jar
1. Run Spring Boot program
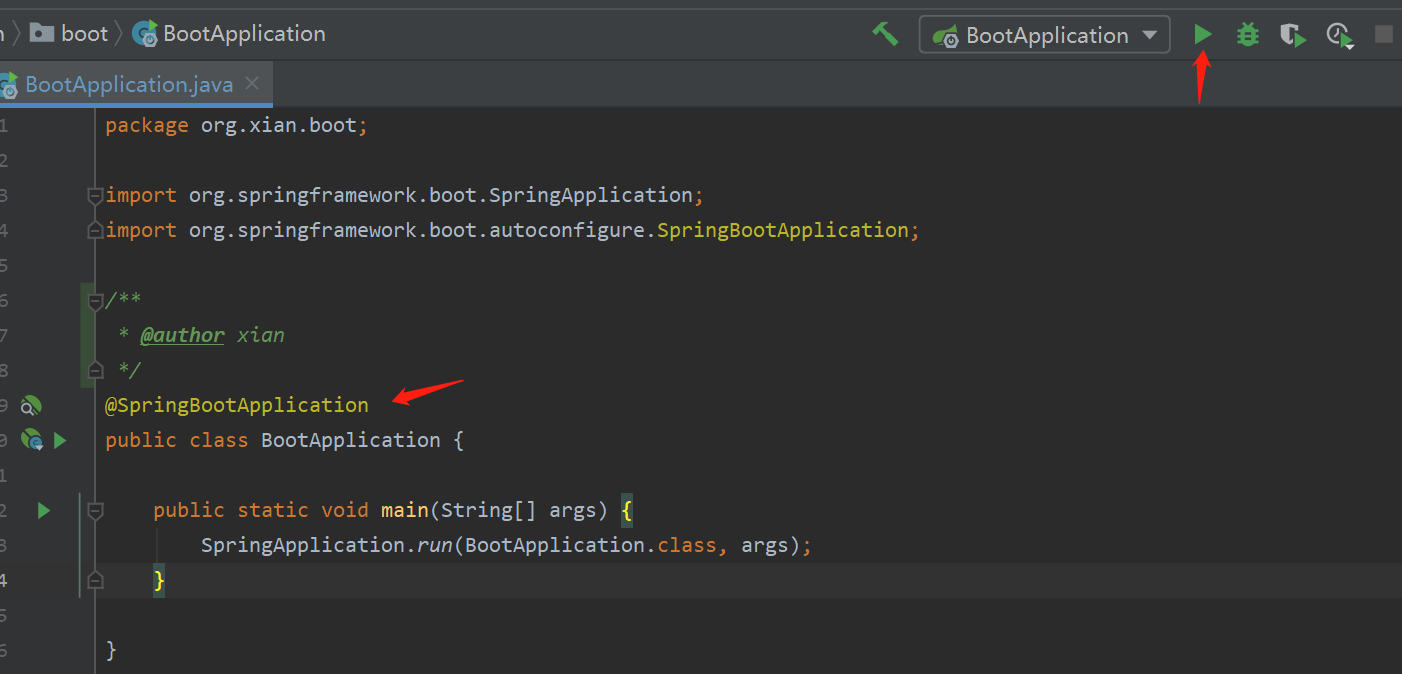
IDEA automatically configures how Spring Boot will start after completing the dependent resource download for the Spring Boot project.You can use the shortcut "Shift + F10" or click the run button in the upper right corner directly.If it's a community version of Idea, you can run the @SpringBootApplication annotated class directly, which is automatically generated when the project is created.
When the boot is complete, the following prompts appear in the lower window:
Started BootApplication in 0.884 seconds (JVM running for 1.393)
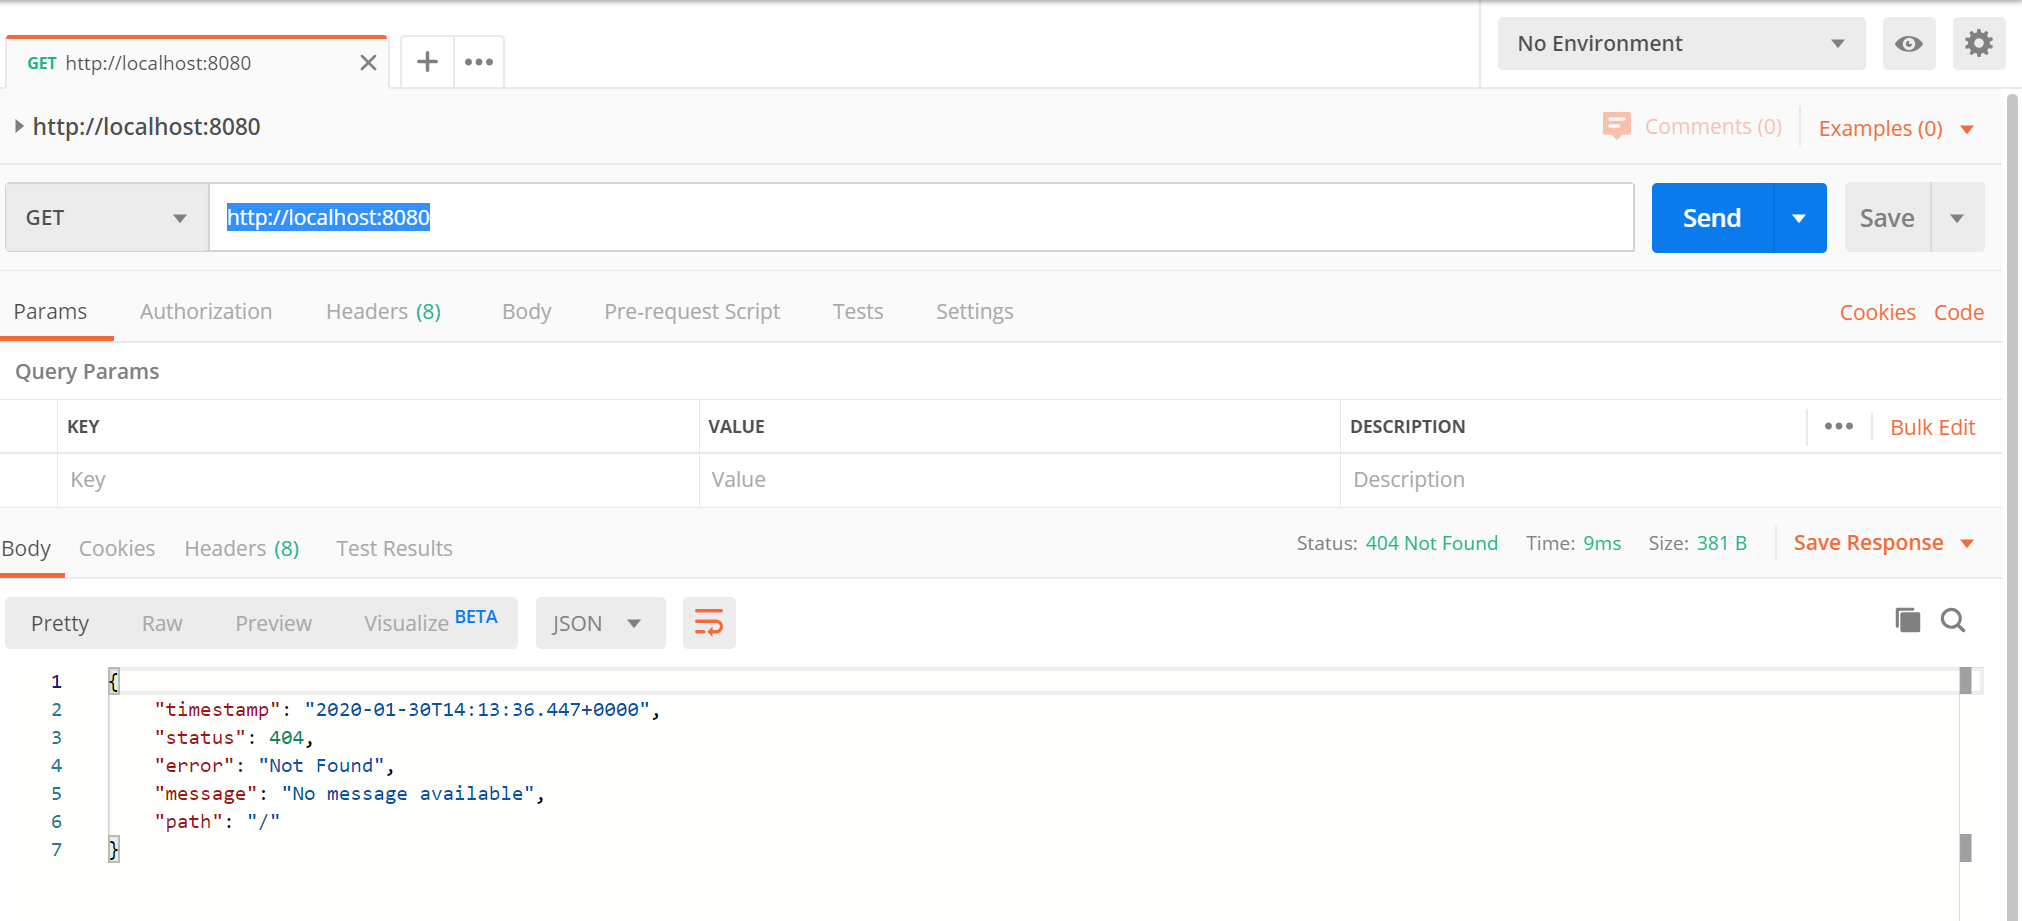
Open Postman, access http://localhost:8080 The following prompt appears, not because of a program error, but because we haven't written any API interfaces yet.
1.1, Spring Boot entry class and @SpringBootApplication
When a Spring Boot project is created, it automatically generates an entry class with the default name *Application. In general, the entry class is placed under the package path of groupId + arctifactID.The mian method of the entry class is actually the main method to start the Java program standard, and SpringApplication.run(BootApplication.class, args) means to start the Spring Boot project.
@SpringBootApplication
public class BootApplication {
    public static void main(String[] args) {
        SpringApplication.run(BootApplication.class, args);
    }
}
The @SpringBootApplication is the core comment for Spring Boot, which can be written in the following three comments with the same effect:
@Configuration
@ComponentScan
@EnableAutoConfiguration
public class BootApplication {
    public static void main(String[] args) {
        SpringApplication.run(BootApplication.class, args);
    }
}
The @Configuration is actually a re-encapsulation of @Component that defines a configuration class that replaces the corresponding xml configuration file and identifies that the class can be defined using the Spring IOC container as the source of the Bean.The annotated class contains one or more @Bean annotated methods, and the @Bean annotated methods will result in a Bean object that will be called only once and then put by Spring into the IOC container.
@ComponentScan defaults to the current package path as the scan path, scans and places classes that identify the @Controller, @Service, @Repository, @Component annotations in the Spring container.The scan path can be specified using @ComponentScan(value ='').
@EnableAutoConfiguration lets Spring Boot automatically configure the current project based on dependencies.For example, if you add the dependency mybatis-plus-boot-starter, Spring Boot automatically configures it.
2. Actual RESTful API
This section describes how to build a RESTful API interface and return and transfer data in different formats.
2.1, Hello Spring Boot
Implement an API interface and return the string "Hello Spring Boot".
Create a new class for HelloSpringBoot, type the following, and then run Spring Boot again:
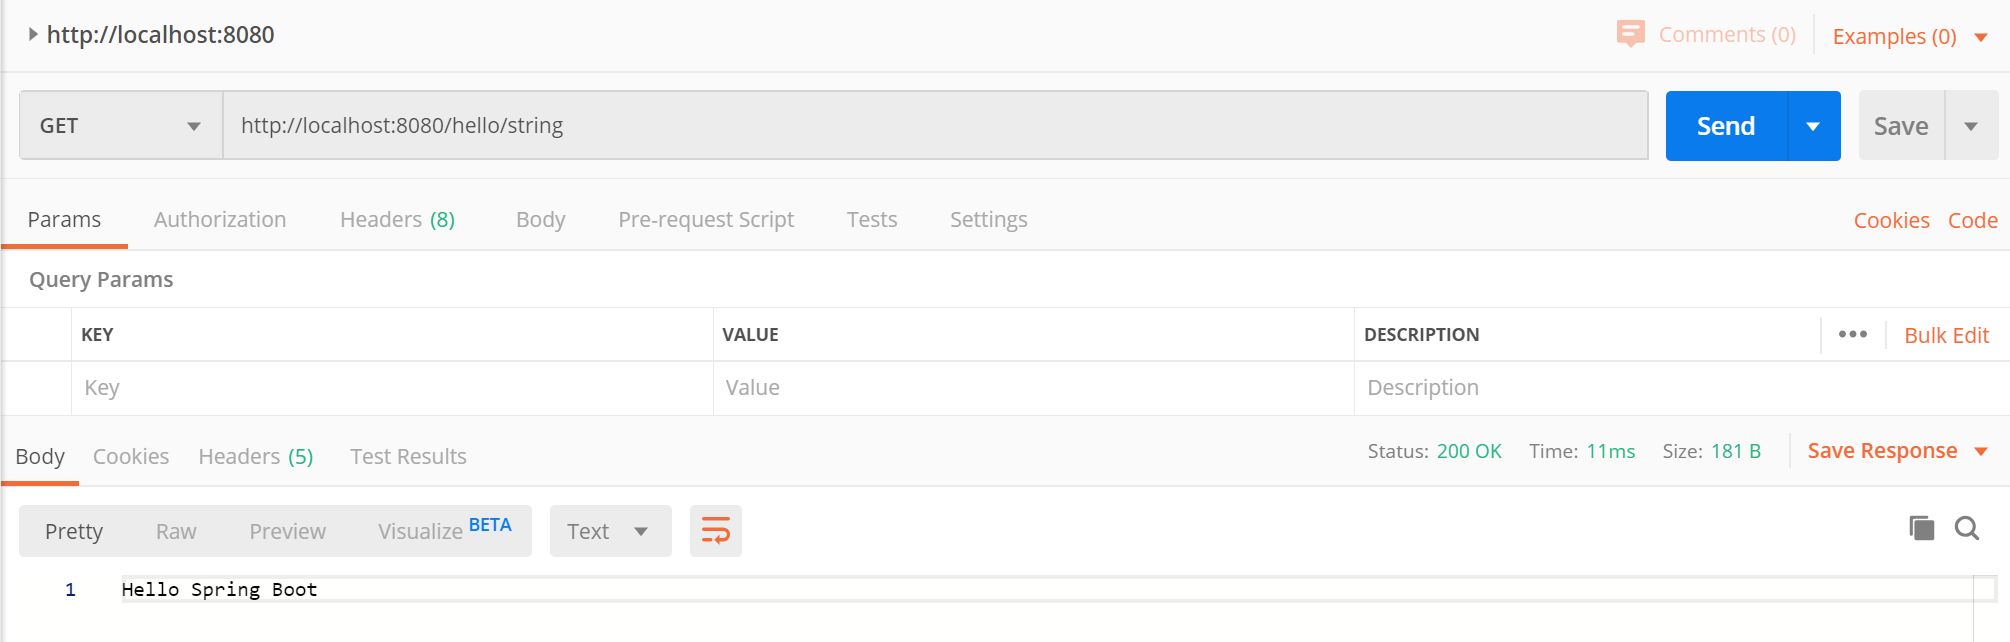
@RestController
@RequestMapping("hello")
public class HelloSpringBoot {
    @RequestMapping("string")
    @ResponseStatus(HttpStatus.OK)
    public String helloString(){
        return "Hello Spring Boot";
    }
}
Open Postman, access http://localhost:8080/hello/string You can see that the string "Hello Spring Boot" is returned.
Code interprets this end of the code.It mainly uses two annotations and writes a method to return a string.
The @RestController is a combined annotation equivalent to @Controller plus @ResponseBody.@Controller declares that this is a controller and that annotated classes can accept HTTP requests. If only this annotation is used, the view parser will parse the HTML, JSP pages, etc., corresponding to the return return return characters.
@ResponseBody writes the return ed content directly into the HTTP Response Body, and the view resolver InternalResourceViewResolver will not work.
@ResponseStatus(HttpStatus.XXX) sets the status code of the HTTP Response by default of 200.
@RequestMapping can be annotated on classes or methods.Mapping used to specify request URLs and corresponding processing methods.The @RequestMapping("hello") annotated on the class indicates that all URLs under this class are /hello/ Annotate the RequestMapping value in the method.You can specify the HTTP request method as follows; if you specify the request method method, you must use a change-of-method request or report "Request method'XXX'not supported".
// Equivalent to @GetMapping("string") only supports GET method access
@RequestMapping(value = "string",method = RequestMethod.GET)

// Equivalent to @PostMapping("string") only supports POST method access
@RequestMapping(value = "string",method = RequestMethod.POST)
2.2, Return JSON data
In the previous example, the RESTful API interface returned a string String.Returning JSON data is also fairly simple for Spring Boot.This section implements an interface that returns the following JSON data:
{
    "status": "success",
    "messages": "Hello Spring Boot By JSON"
}
Create a new Messages class: use Lombok here, remember to introduce the dependency'org.projectlombok:lombok', IDEA check'Enable annotation processing'and install the Lombok plug-in.
@AllArgsConstructor
@NoArgsConstructor
@Getter
@Setter
public class Messages {
    private String  status;
    private String messages;
}
Add helloJson to the HelloSpringBoot class and rerun the project:
    @RequestMapping("json")
    public Messages helloJson(){
        return new Messages("success","Hello Spring Boot By JSON");
    }
Access through Postman http://localhost:8080/hello/json Then the JSON data as shown above is returned.
2.3, Incoming Data@RequestParam
@RequestParam is an incoming ?name0=value0&name1=value1 Notes for the type parameters in this section are as follows:
@RequestParam(value = "username",required = true,defaultValue = "Boot")
- value: parameter name, which may not be set, defaults to the same parameter name as the method function
- required: must pass in, default false, set to true, must pass in this parameter, otherwise error occurs
- defaultValue: Default value, if default value is set, no error will be reported if required = true is set without passing in the parameter
Add a method param to this class, HelloSpringBoot, and rerun the project:
    @GetMapping(value = "param")
    public Messages param(@RequestParam(value = "username",defaultValue = "Boot") String username){
        return new Messages("success","Hello "+ username);
    }
Access through Postman using the GET method http://localhost:8080/hello/param?username=xiaoxian To change the value of the username parameter to see the results returned by different values.
{
    "status": "success",
    "messages": "Hello xiaoxian"
}
2.4 Incoming Data@PathVariable
The @PathVariable annotation passes variables of the URL path as parameters into the method function.For example, GitHub's personal home page URL https://github.com/zhshuixian That is to visit Xiaoxian's home page. https://github.com/{username} The username in is PathVariable.
@PathVariable(value = "username" ,name = "username",required = true)
- value:PathVariable name, needs to be the same {} as parentheses in RequestMapping
- Name:PathVariable name, like value, which requires only one
- Required: whether incoming is required, default true
Add pathVariable to the HelloSpringBoot class and rerun the project:
    @PostMapping(value = "path/{username}")
    public Messages pathVariable(@PathVariable("username") String username){
        return new Messages("success","Hello "+ username);
    }
Access through Postman using the POST method http://localhost:8080/hello/path/username Change the value of {username} to see the results returned by different values.
{
    "status": "success",
    "messages": "Hello username"
}
2.5, Incoming Data@RequestBody
The @RequestBody comment is intended to receive JSON data from the front end if we need to submit the following data:
{
    "username": "user",
    "password": "springboot"
}
@RequestBody(required = false)
- required: Whether the object must be passed in, default to true, how no json data is passed when setting false, the object will not be new er, so be aware of Null PointerException when using the object
Create a new class for SysUser:
@AllArgsConstructor
@Getter
@Setter
public class SysUser {
    private String username;
    private String password;
}
Add a new method body to this class, HelloSpringBoot, and rerun the project:
    @PostMapping("body")
    public Messages body(@RequestBody SysUser sysUser){
        Messages messages = new Messages();
        // Note Null PointerException
        if(sysUser.getUsername() !=null && sysUser.getPassword() !=null &&
                sysUser.getUsername().equals("user") && sysUser.getPassword().equals("springboot")){
            messages.setStatus("success");
            messages.setMessages("Login  Success");
        }else {
            messages.setStatus("error");
            messages.setMessages("Login  Error");
        }
        return messages;
    }
Open Postman and access it using the POST method http://localhost:8080/hello/body And pass in JSON data:
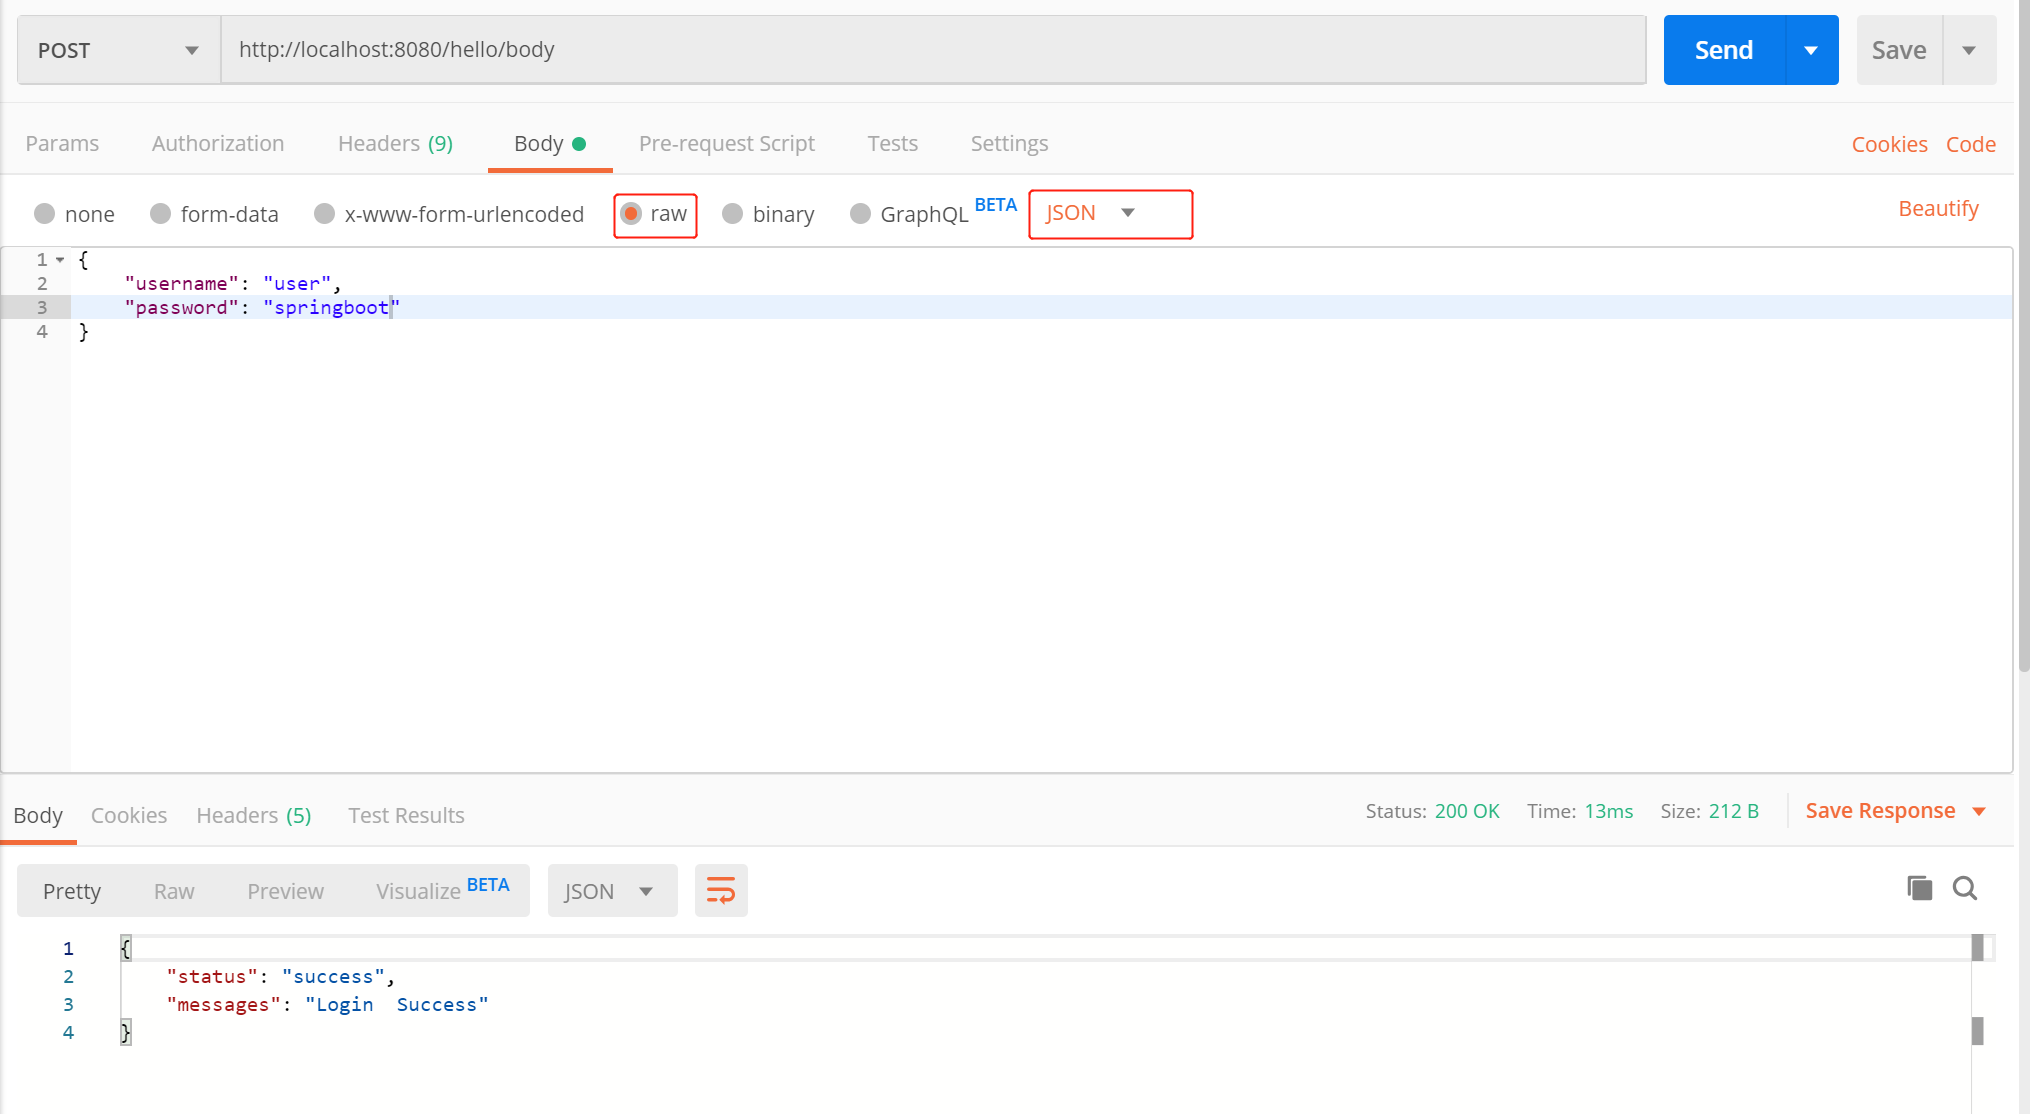
From the example, you can see that the @RequestBody annotation mainly receives incoming JSON data, corresponds to the key name of the JSON data and the member variable name, and assigns the value to the member variable of the corresponding name through the Setter or AllArgsConstructor constructor.Be sure to pay attention to Null PointerException when getting the member variables of the terrain.If the @RequestBody comment is String, this causes the Body's content to be assigned as a string:
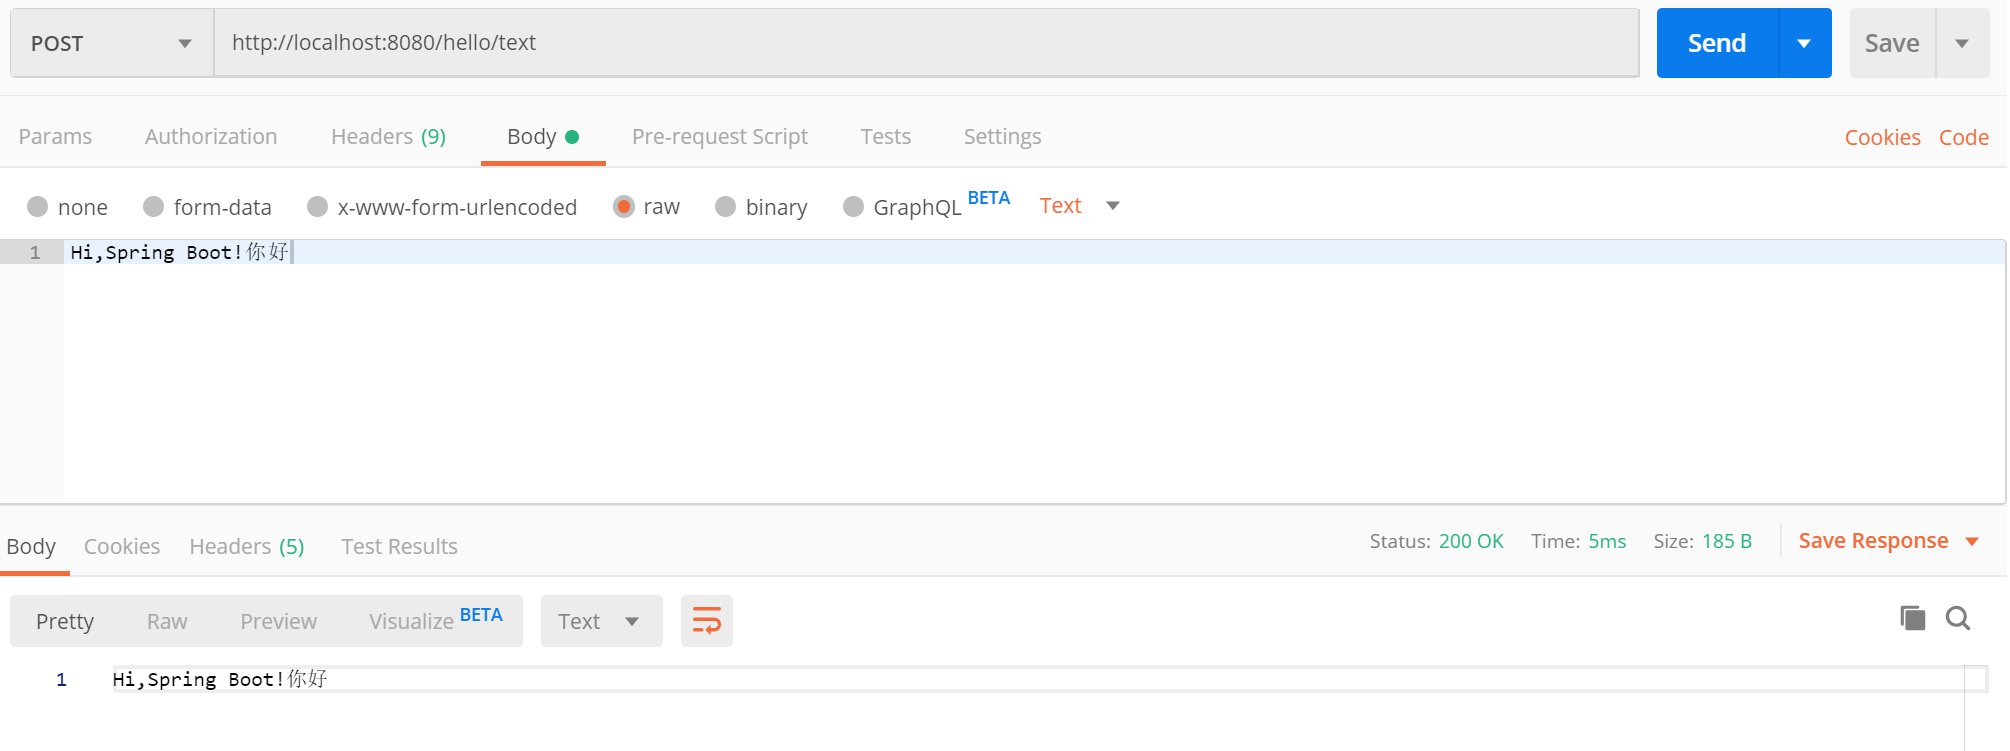
    @PostMapping("text")
    public String text(@RequestBody String  text){
        return text;
    }
The code works as follows:
2.6 Incoming Data Form Form Form
Form forms can be used in three ways: application/x-www-form-urlencoded, multipart/form-data, and text/plain. The first two are easier to use in Spring Boot. Simply delete @RequestBody from the body function in the previous section, and also pay attention to Null PointerException in Getter:
    @PostMapping("form")
    public Messages form(SysUser sysUser){
        Messages messages = new Messages();
        if(sysUser.getUsername() !=null && sysUser.getPassword() !=null &&
                sysUser.getUsername().equals("user") && sysUser.getPassword().equals("springboot")){
            messages.setStatus("success");
            messages.setMessages("Login  Success");
        }else {
            messages.setStatus("error");
            messages.setMessages("Login  Error");
        }
        return messages;
    }
After restarting the project, open Postman and access it using the POST method http://localhost:8080/hello/form And pass in Form form data, which can be used in the following ways:
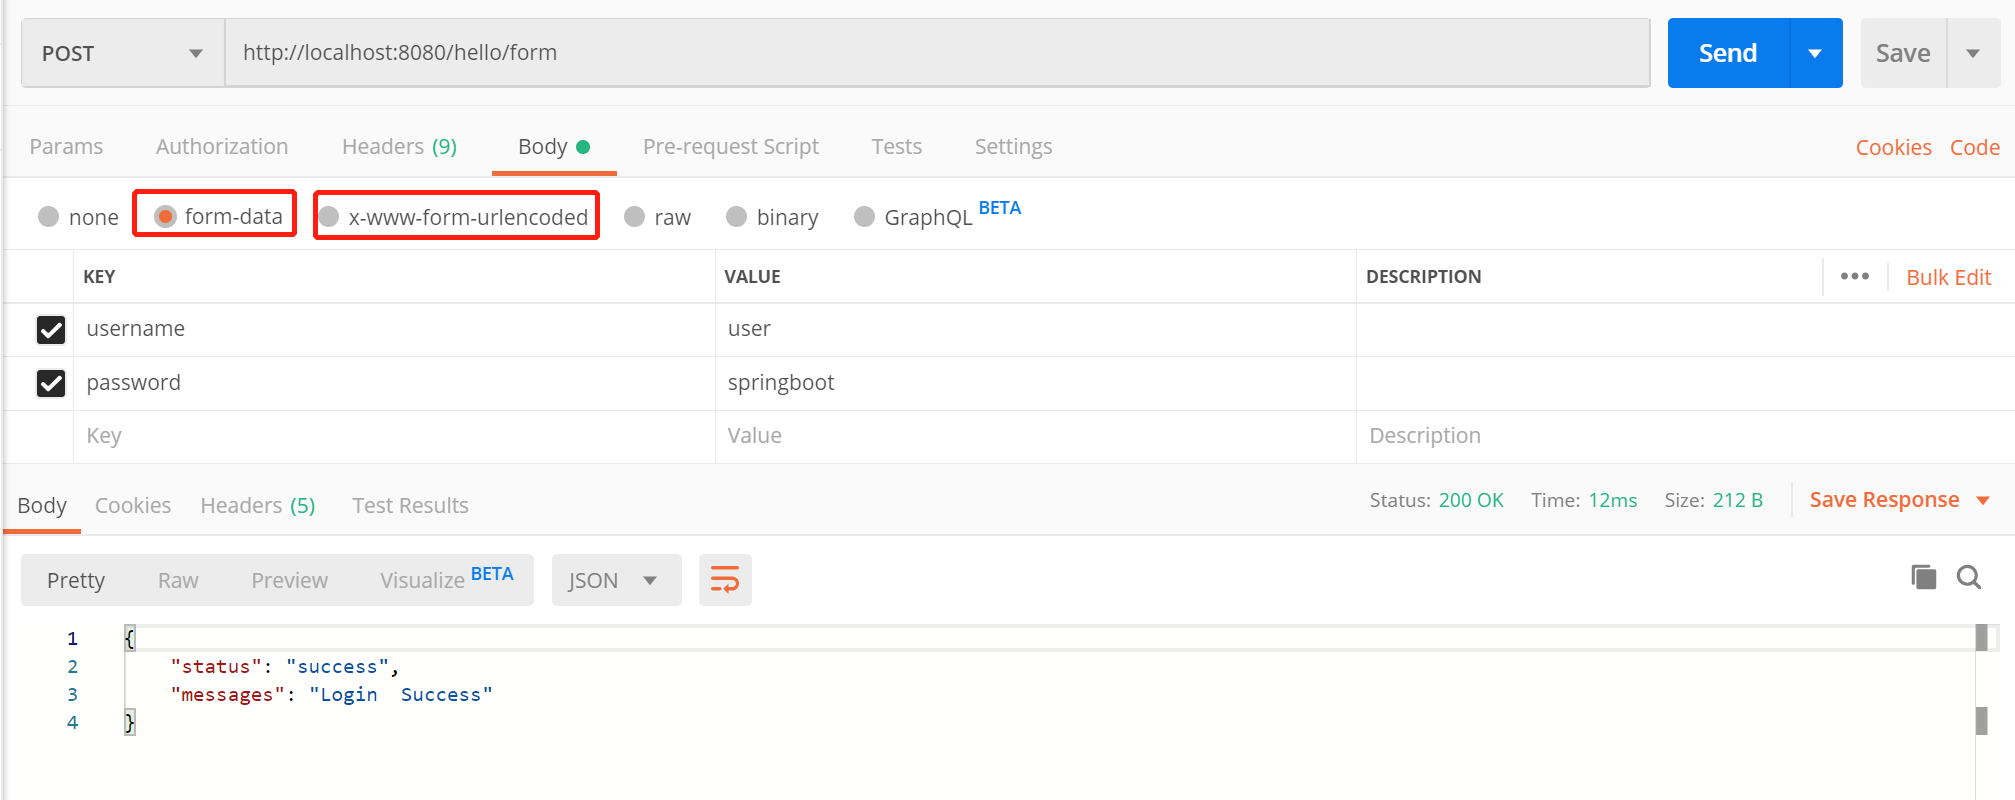
How to upload and download files and how to transfer data in XML format is not described here.
3. Spring Boot Unit Test
As an important part of the development process, unit testing is to discover possible errors within each small module and improve code quality. Here you will use JUnit 5 to unit test the newly built RESTful API using MockMvc and TestRestTemplate.
Spring Boot's spring-boot-starter-test supports JUnit 4 and JUnit 5 unit tests. If you only want to use JUnit 5, you should exclude JUnit 4 dependencies.
>Note: JUnit 4 dependencies are excluded by default when new versions of Spring Boot 2.2.3.RELEASE are created.
Gradle excludes JUnit 4
    testImplementation('org.springframework.boot:spring-boot-starter-test') {
        exclude group: 'org.junit.vintage', module: 'junit-vintage-engine'
    }
Maven excludes JUnit 4
<dependency>
    <groupid>org.springframework.boot</groupid>
    <artifactid>spring-boot-starter-test</artifactid>
    <scope>test</scope>
    <exclusions>
        <exclusion>
            <groupid>org.junit.vintage</groupid>
            <artifactid>junit-vintage-engine</artifactid>
        </exclusion>
    </exclusions>
</dependency>
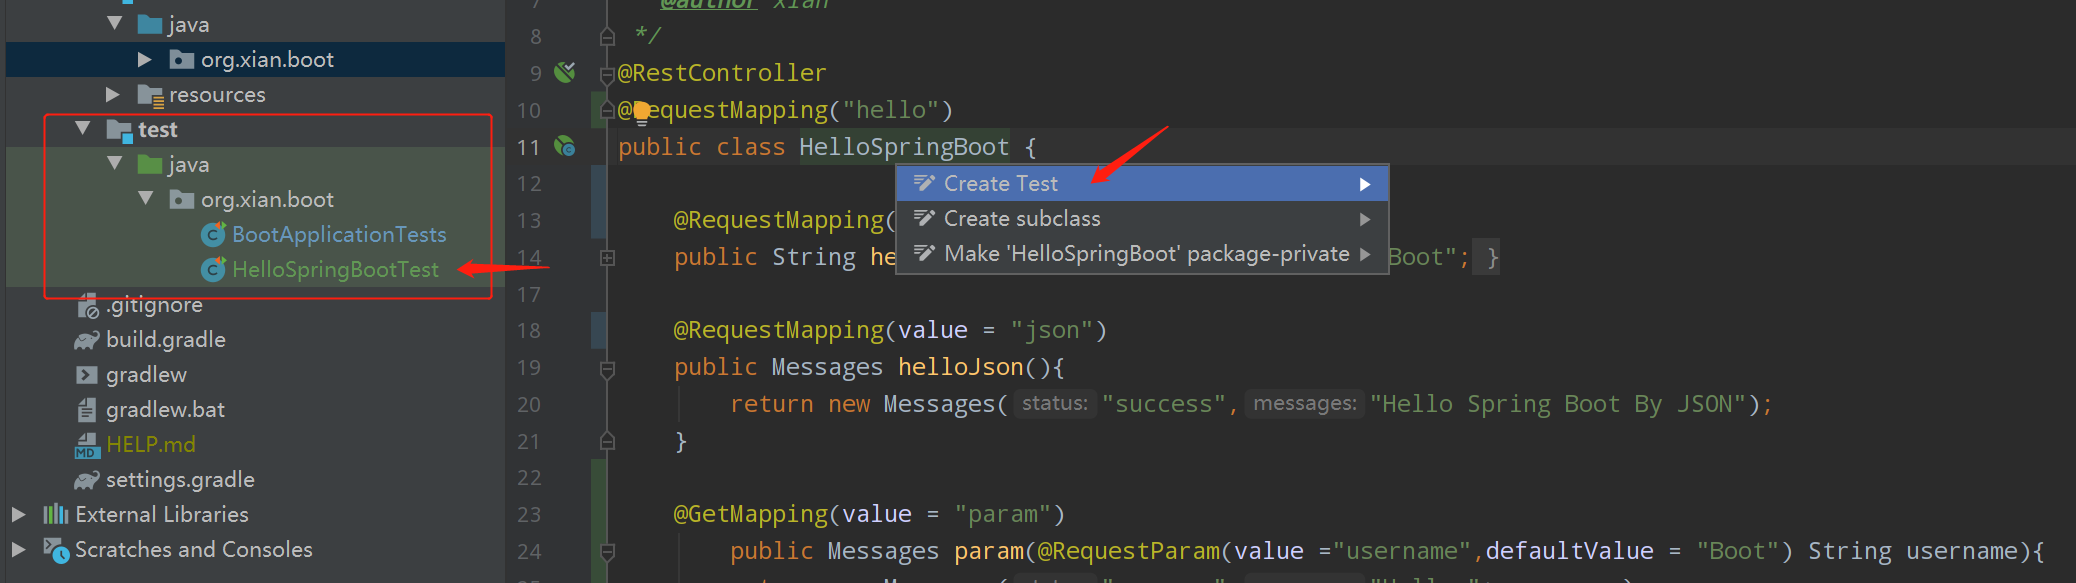
3.1, New HelloSpringBootTest Test Class
Place the mouse cursor in the middle of the HelloSpringBoot class you want to create, press the shortcut key Alt + Enter, a menu of options pops up, click Create Test, and IDEA automatically creates the corresponding test class HelloSpringBootTest in the same package package package package in the test directory.
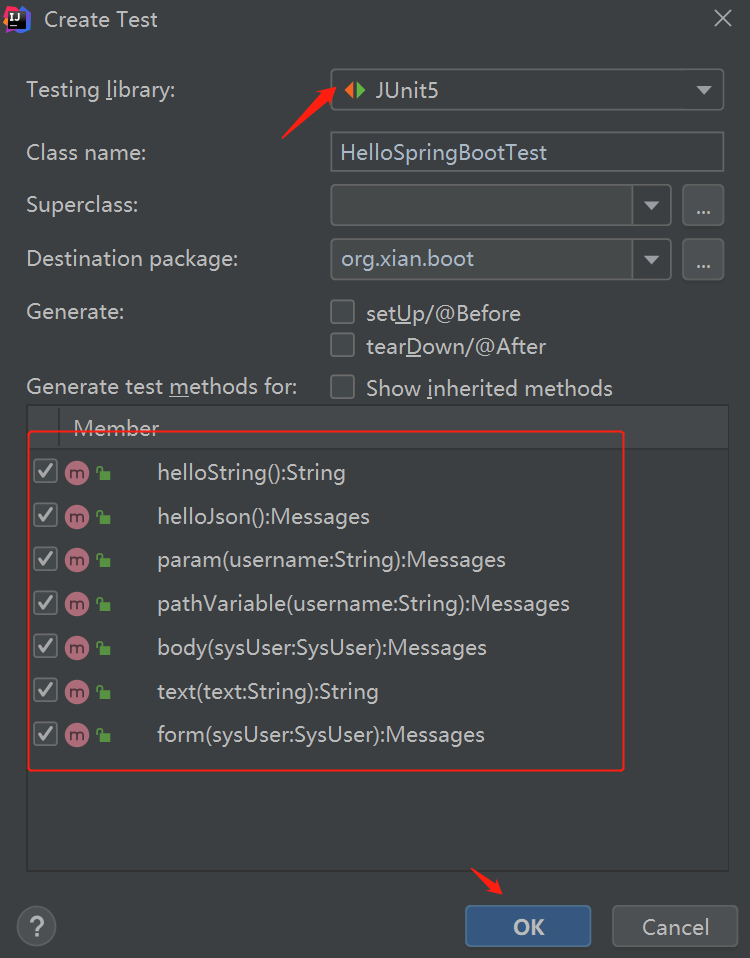
Select JUnit 5 and check the functions that require unit testing:
Open HelloSpringBootTest and add the following comments:
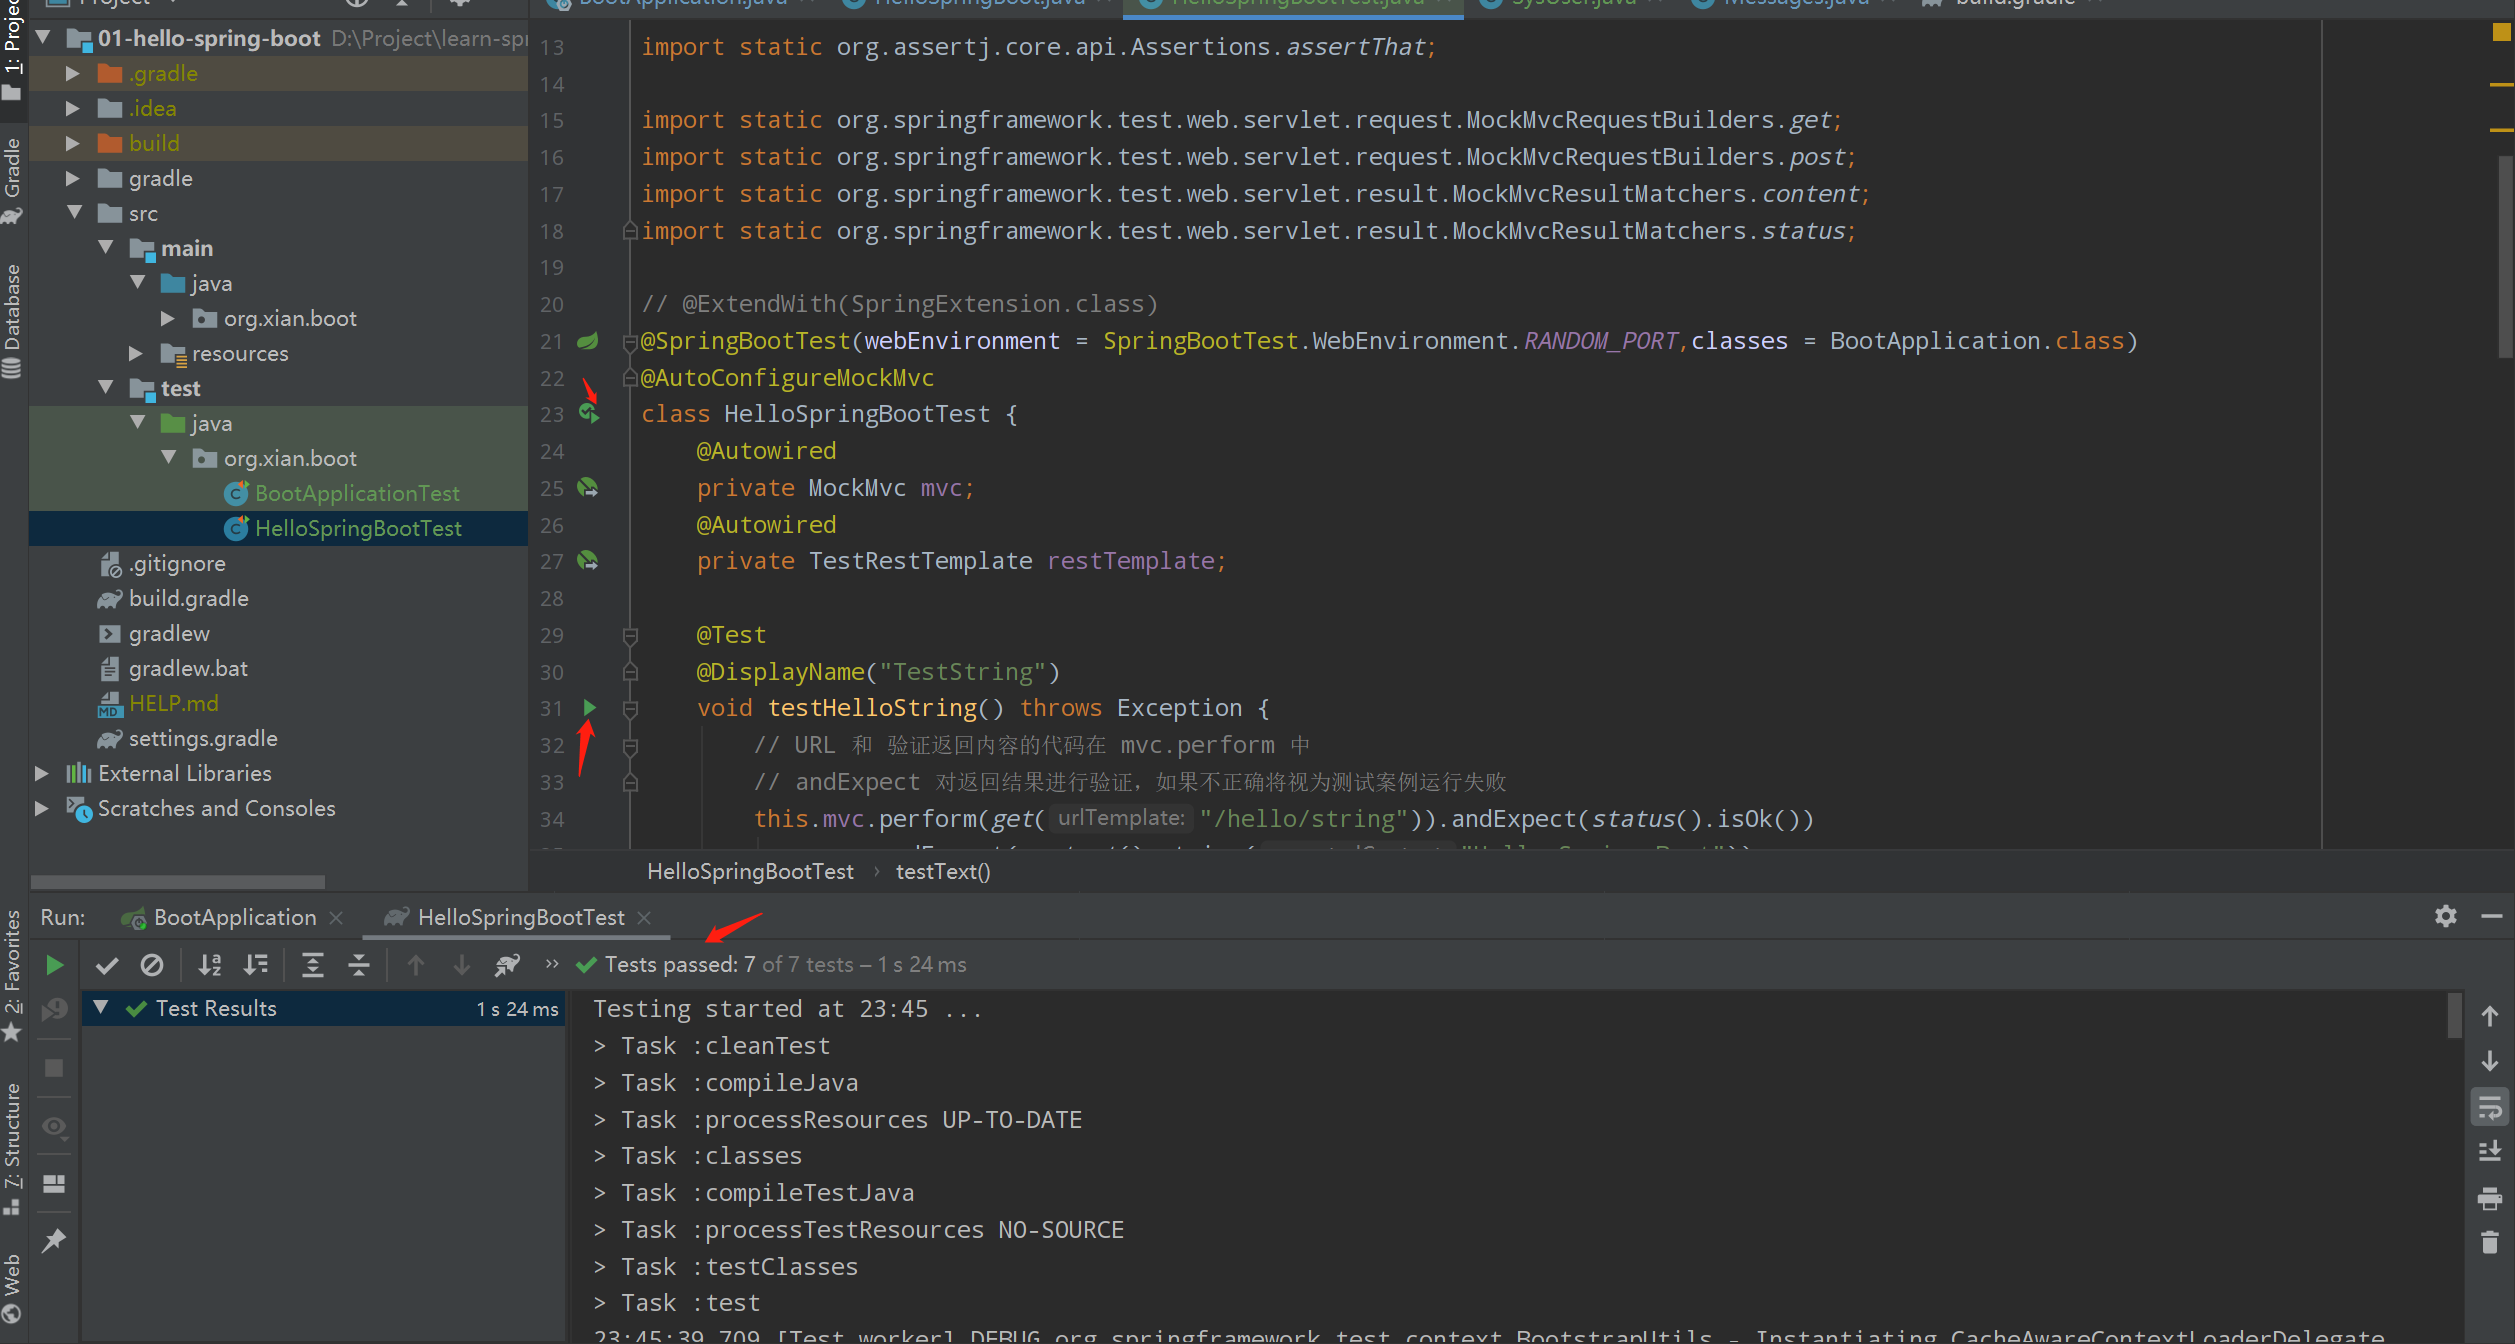
@ExtendWith(SpringExtension.class)
@SpringBootTest(webEnvironment = SpringBootTest.WebEnvironment.RANDOM_PORT,classes = BootApplication.class)
@AutoConfigureMockMvc
class HelloSpringBootTest {
    // Middle part omitted
}
@ExtendWith(SpringExtension.class) is a comment required by Spring Boot to run JUnit 5 and is used to determine how this class works before the test class name.This annotation is required for versions prior to SpringBoot 2.1.x, and later versions, which use version 2.2.3 for the Truth Project, are already in @SpringBootTest and can be deleted.
@SpringBootTest is a comment for a test introduced at 1.4.0. SpringBootTest.WebEnvironment.RANDOM_PORT indicates that the project runs using a random port number. classes = the boot class for the BootApplication.class Spring Boot project. Both parameters are not required.
@AutoConfigureMockMvc automatically configures MockMVC.
3.2. Use of MockMVC
How to use MockMVC for POST, GET requests and verify the correctness of the status code and content() returned by HTTP.
    @Autowired private MockMvc mvc;

    @Test
    void testHelloString() throws Exception {
        // The URL and the code to verify the returned content are in mvc.perform
        // andExpect validates the returned results and, if incorrect, considers the test case to have failed
        this.mvc.perform(get("/hello/string")).andExpect(status().isOk())
                .andExpect(content().string("Hello Spring Boot"));
    }

    @Test
    void testHelloJson() throws Exception {
        // content().json() validates the returned JSON data
        this.mvc.perform(get("/hello/json")).andExpect(status().isOk())
                .andExpect(content().json("{'status':'success';'messages':'Hello Spring Boot By JSON'}"));
    }

    @Test
    void testPathVariable() throws Exception {
        this.mvc.perform(post("/hello/path/xiaoxian")).andExpect(status().isOk())
                .andExpect(content().json("{'status':'success';'messages':'Hello xiaoxian'}"));
    }

    @Test
    void testForm() throws Exception {
        // contentType specifies the type of data uploaded
        // The key and value values of the param(key,value) parameter
        this.mvc.perform(post("/hello/form")
                .contentType("application/x-www-form-urlencoded")
                .param("username", "user")
                .param("password", "springboot"))
                .andExpect(status().isOk())
                .andExpect(content().json("{'status':'success';'messages':'Login  Success'}"));
    }
Code parsing
@Autowired labels member variables, methods, and constructors in the class to complete automatic assembly.In this code, after using this annotation, you do not need new when using the mvc member variable and hand it over to Spring for automatic assembly.There is a required = true/false parameter, which defaults to true.
The @Test annotation is a JUnit annotation. JUnit 5 has no parameters to set. The void type method of its annotation will act as a test case and run only when the test is executed.
3.3,TestRestTemplate
How to use TestRestTemplate for POST, GET requests, upload JSON, String type data, and accept the returned JSON data and use assertThat assertion to verify that the data is returned correctly.
    @Test
    void testParam() {
    	// Receive JSON data
        Messages messages = this.restTemplate.getForObject("/hello/param?username=xiaoxian", Messages.class);
        assertThat(messages.getMessages()).isEqualTo("Hello xiaoxian");
    }

    @Test
    void testBody() {
        SysUser sysUser = new SysUser("user", "springboot");
        // Upload JSON data
        Messages messages = this.restTemplate.postForObject("/hello/body", sysUser, Messages.class);
        assertThat(messages.getStatus()).isEqualTo("success");
        assertThat(messages.getMessages()).isEqualTo("Login  Success");
    }

    @Test
    void testText() {
        String string = "Hi,Spring Boot";
        // Upload String String
        String result = this.restTemplate.postForObject("/hello/text", string, String.class);
        assertThat(result).isEqualTo(string);
    }
3.4. Running unit tests
In IDEA, a green triangle arrow automatically appears in the unit test code and runs the unit test automatically when clicked.Click the small arrow to the left of the class name, right-click "Run...." or the shortcut "Ctrl + Shift + F10" to display the passed and failed cases below when the run is complete.
4. Set the port number and HTTPS
The Spring Boot project starts with a default port number of 8080, and we can customize the port number and enable HTTPS by modifying the file src/main/resources/application.properties.
Set Port Number
Add the following configuration to the application.properties file:
# Custom port number
server.port=8000
For HTTPS, you can generate a self-signed certificate file in your development project. Of course, browser access will prompt you that the connection is not secure, and in Postman you want to turn off the ability to verify HTTPS by replacing it with the CA's SSL digital certificate when deploying.
Generate self-signed certificate file
# keytool is a self-signed certificate generation tool provided by JDK. Both of the following commands can be used to generate certificates
# keytool -genkeypair -keystore ssl.p12 -storetype pkcs12 -validity 365
> keytool -genkey -alias worktool -keyalg RSA -keystore ssl.keystore
Enter keystore password:xiaoxian
Re-enter new password:xiaoxian
What is your first and last name?
  [Unknown]:  org
What is the name of your organizational unit?
  [Unknown]:  boot
What is the name of your organization?
  [Unknown]:  boot
What is the name of your City or Locality?
  [Unknown]:  MZ
What is the name of your State or Province?
  [Unknown]:  GD
What is the two-letter country code for this unit?
  [Unknown]:  CN
Is CN=org, OU=boot, O=boot, L=MZ, ST=GD, C=CN correct?
  [no]:  y

Generating 2,048 bit RSA key pair and self-signed certificate (SHA256withRSA) with a validity of 90 days
        for: CN=org, OU=boot, O=boot, L=MZ, ST=GD, C=CN
HTTPS Configuration
# Enable HTTPS
server.ssl.enabled=true
server.ssl.protocol=TLS
server.ssl.key-store=classpath:ssl.keystore
# Password is the password entered when the certificate is generated
server.ssl.key-store-password=xiaoxian
Rerun the project, open browser access https://localhost:8000/hello/string.
5. Packaging into Jar files
Open IDEA's Gradle tool window and double-click Run bootJar:
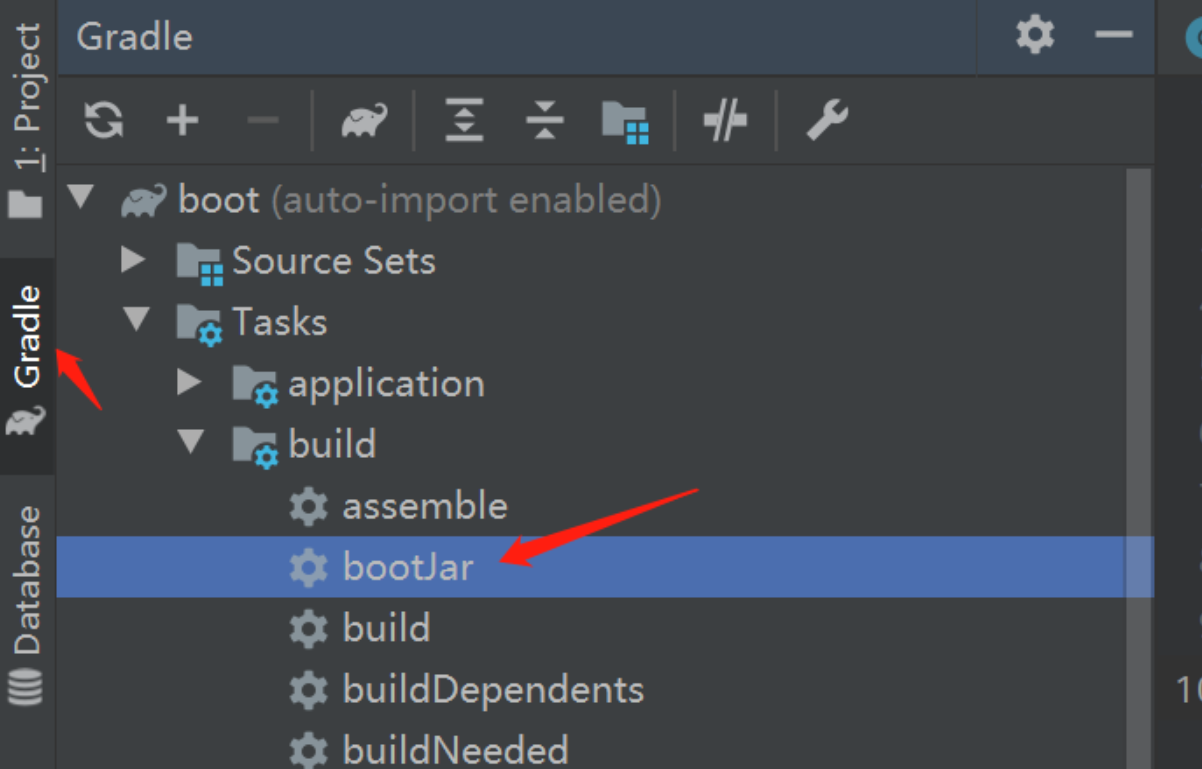
After running, a Jar file is generated in the build/lib folder, copied to the deployment environment, and then deployed by running the following command:
java -jar ./boot-0.0.1-SNAPSHOT.jar

If you find the article good, you are welcome to call the GitHub repository Stars. Welcome to "Advanced Programming Technology" or Xiao Xian's blog, the series of articles in Spring Boot 2.X Actual Warfare will be put on the public number first.