View sliding method is the basis of realistic and gorgeous custom controls
Generally speaking, there are three ways to achieve sliding:
- Implementation through scrollTo/scrollBy method provided by View itself
- Through animation method
- By changing View's Layout Params, it realizes re-layout.
1. Implementation by scrollTo/scrollBy method provided by View itself
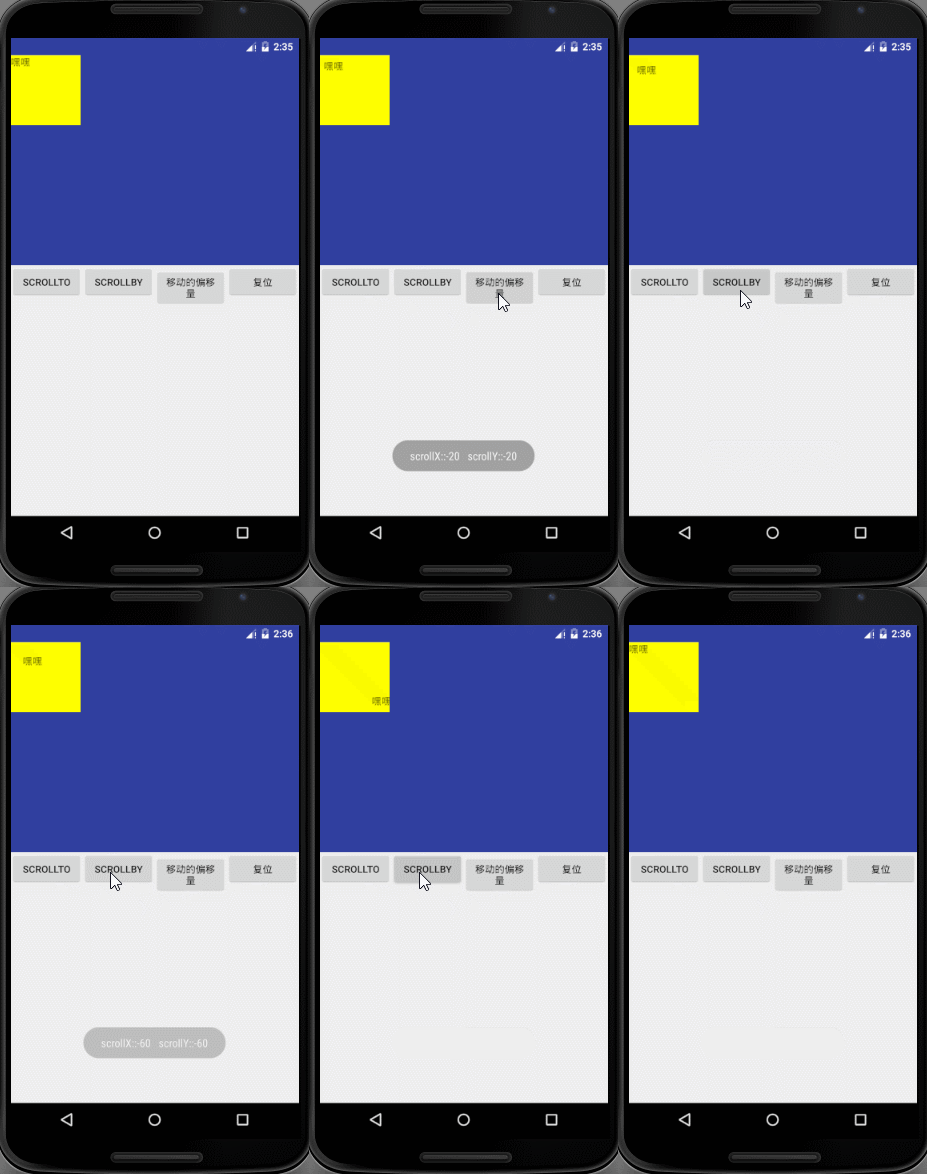
scrollTo/scrollBy changes the content of the control rather than the location of the control in the layout. For example, to set a TextView with a length, width and height of 100dp, the effect is as follows: 
scrollTo is used in the following ways:
/**
 * x:It's the offset on the x axis.
 * y:It's the offset on the y axis.
 * For example, from (0,0) to (20,20), then x = 0-20=-20, y = 0-20=-20
 * So, if you go from top to bottom and from left to right, then the offset X and y are negative and vice versa.
 */
tv.scrollTo(int x,int y);
ScollBy can migrate many times, and the location of the last migration is the starting point when it migrates again. The effect is as shown above.
tv.scrollBy(int x,int y);
II. Animation
The animation section will be described in detail next time, skipped this time.
Thirdly, by changing View's Layout Params, realizing the re-layout.
Make a page-turning interface. When turning the page, the dots change. The effect is as follows: 
View the main code:
xml layout:
<RelativeLayout
    xmlns:android="http://schemas.android.com/apk/res/android"
    xmlns:tools="http://schemas.android.com/tools"
    android:id="@+id/activity_test3"
    android:layout_width="match_parent"
    android:layout_height="match_parent"
    tools:context="cn.centran.zx_view_custom.Test3Activity">

    <android.support.v4.view.ViewPager
        android:id="@+id/vp_guide"
        android:layout_width="match_parent"
        android:layout_height="match_parent" />

    <RelativeLayout
        android:layout_width="wrap_content"
        android:layout_height="wrap_content"
        android:layout_alignParentBottom="true"
        android:layout_centerHorizontal="true"
        android:layout_marginBottom="30dp" >

        <LinearLayout
            android:id="@+id/ll_point_group"
            android:layout_width="wrap_content"
            android:layout_height="wrap_content"
            android:orientation="horizontal" >
        </LinearLayout>

        <View
            android:id="@+id/view_red_point"
            android:layout_width="10dp"
            android:layout_height="10dp"
            android:background="@drawable/shape_point_selected" />
    </RelativeLayout>


</RelativeLayout>
Important code snippets:
/**
 * Loading small dots
 */
for(int i=0;i<imageId.length;i++){
    View point = new View(this);
    //Setting the dot background
    point.setBackgroundResource(R.drawable.shape_point_normal);

    //Setting the width and height of the dot
    LinearLayout.LayoutParams params = new LinearLayout.LayoutParams(30,30);
    point.setLayoutParams(params);

    if(i!=0){
        params.leftMargin = 30;
    }
    llPointGroup.addView(point);

}


/**
     * Get the distance between two points
     */
    //Getting View Tree
    final ViewTreeObserver viewTreeObserver = llPointGroup.getViewTreeObserver();
    //Adding monitoring of layout processes in the attempt tree
    viewTreeObserver.addOnGlobalLayoutListener(new ViewTreeObserver.OnGlobalLayoutListener() {
        @TargetApi(Build.VERSION_CODES.JELLY_BEAN)
        @Override
        public void onGlobalLayout() {
            System.out.println("layout");
            llPointGroup.getViewTreeObserver().removeOnGlobalLayoutListener(this);
            pointWidth = llPointGroup.getChildAt(1).getLeft() - llPointGroup.getChildAt(0).getLeft();
        }
    });


/**
     * Monitor ViewPager sliding
     */
    mViewPager.addOnPageChangeListener(new ViewPager.OnPageChangeListener() {
        @Override
        public void onPageScrolled(int position, float positionOffset, int positionOffsetPixels) {
            System.out.println("position::"+position+"   positionOffset::"+positionOffset+"  positionOffsetPixels::"+positionOffsetPixels);
            int offset = (int) (pointWidth * positionOffset+pointWidth*position);
            RelativeLayout.LayoutParams params = new RelativeLayout.LayoutParams(mRedPoint.getLayoutParams());
            params.leftMargin = offset;
            mRedPoint.setLayoutParams(params);
        }

        @Override
        public void onPageSelected(int position) {

        }

        @Override
        public void onPageScrollStateChanged(int state) {

        }
    });
Velocity Tracker introduces:
Velocity Tracker is a speed tracker that tracks the speed of a finger during sliding, including vertical and horizontal speeds.
//Obtaining the object of the speed tracker
velocityTracker = VelocityTracker.obtain();


@Override
public boolean onTouchEvent(MotionEvent event) {
    //Incidents added for speed tracker monitoring
    velocityTracker.addMovement(event);
    switch (event.getAction()){

        case MotionEvent.ACTION_MOVE:
            /**
             * Time period for setting up speed tracker
             * 1000: Represents the pixels skipped in Tracking 1s
             */
            velocityTracker.computeCurrentVelocity(1000);
            xVelocity = velocityTracker.getXVelocity();
            yVelocity = velocityTracker.getYVelocity();

            break;
        case MotionEvent.ACTION_UP:
            Toast.makeText(Test4Activity.this, "Horizontal velocity:"+xVelocity+"   Vertical velocity:"+yVelocity, Toast.LENGTH_SHORT).show();
            break;

        default:break;
    }

    return super.onTouchEvent(event);
}


/**
     * Reset and release memory when not in use
     */
    velocityTracker.clear();
    velocityTracker.recycle();
Because: speed = (terminal position - starting position) / time interval, so the speed has a positive and negative value, down / right sliding, horizontal / vertical speed is positive value, and vice versa.
Gesture Dector details:
Gesture detector, although there is onTouch() method in android, but this method is too simple, if you need to deal with some complex gestures, you need to use gesture Dector.
The GestureDector class provides two interfaces and one class.
- OnGestureListener interface
- OnDoubleTapListener interface
-
SimpleOnGestureListener, which inherits all the methods of the above two interfaces, implements whatever method is needed.
GestureDetector mGestureDetector = new GestureDetector(mGestureListener);

 private GestureDetector.OnGestureListener mGestureListener = new GestureDetector.OnGestureListener(){
    ......
}

@Override
public boolean onTouch(View v, MotionEvent event) {
    return mGestureDetector.onTouchEvent(event);
}
Elastic sliding:
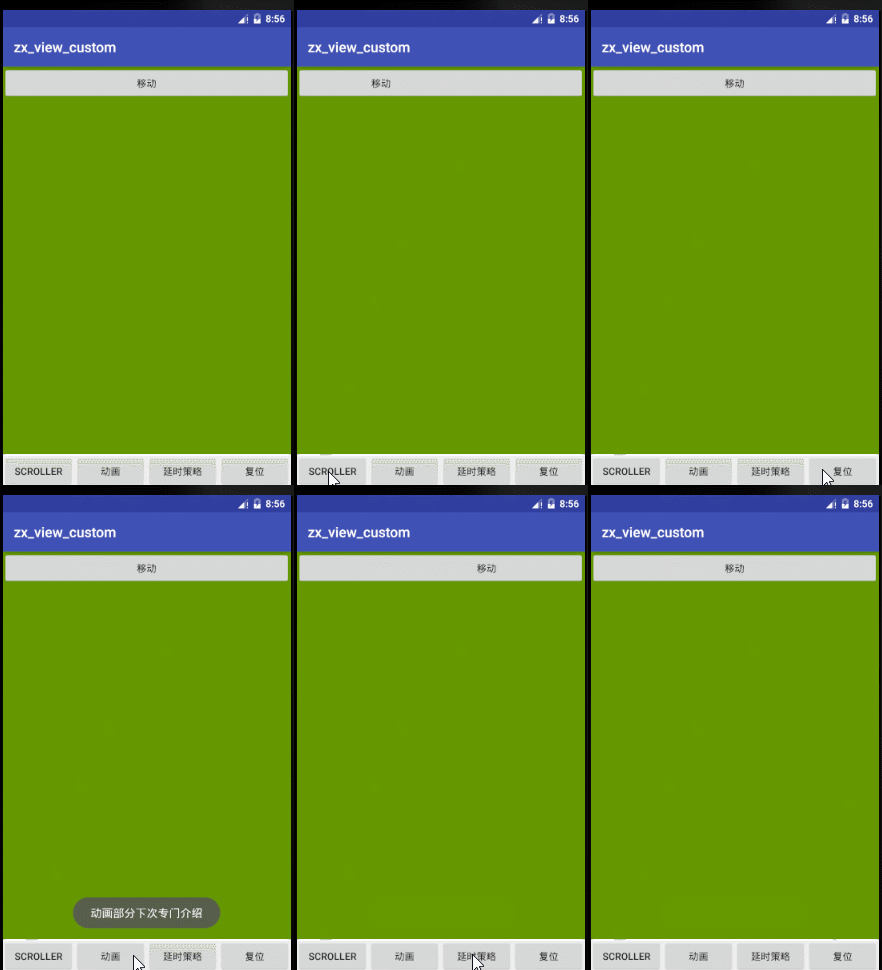
The sliding methods described above are all rigid sliding. This time, elastic sliding is introduced. There are almost three methods for elastic sliding:
- Using Scroller
- Through animation
- Through Delay Strategy

I. Use Scroller
scroller needs to be used in conjunction with computeScroll:
Scroller mScroller = new Scroller(context);

public void smoothScrollTo(int destX,int destY,int durationTime){
    int scrollX = getScrollX();
    int scrollY = getScrollY();
    mScroller.startScroll(scrollX,scrollX,destX,destY,durationTime);
    invalidate();
}

@Override
public void computeScroll() {
    super.computeScroll();
    if(mScroller.computeScrollOffset()){
        scrollTo(mScroller.getCurrX(),mScroller.getCurrY());
        postInvalidate();
    }
}
When the smoothScrollTo method is called, invalidate() method causes View redrawing. When the View is redrawn, computeScroll is called in the draw method, and computeScroll retrieves the current scrollX and scrollY from the Scroller, and then slides through scrollTo. Then the postInvalidate method is called to draw, which in turn leads to the call of the computeScroll method (note that the current scrollX and scrollY obtained at this time are the positions after the last slide), and so on, until the entire slide process is over.
II. Animation
The animation section will be described in detail next time, skipped this time.
3. Adoption of Delay Strategy
private static final int MESSAGE_TAG = 1;
private int mCount = 0;
private int TOTAL_COUNT = 30;
private int DELAY_TIME = 33;
public Handler mHandler = new Handler(){
    @Override
    public void handleMessage(Message msg) {
        super.handleMessage(msg);

        if(msg.what == MESSAGE_TAG){
            mCount++;
            if(mCount<TOTAL_COUNT){
                int scrollX = -300/TOTAL_COUNT;
                btn_moving.scrollBy(scrollX,0);
                mHandler.sendEmptyMessageDelayed(MESSAGE_TAG,DELAY_TIME);
            }
        }
    }
};