1. Two methods of creating Maven project
1.1 the first is to use spring initializr. This configuration is the simplest, but the operation process is a little cumbersome when building a project.
If there is no image, default is selected by default; Click next, Group package organization, artifact project name,
1.2 factors of packaging: jar and war
The front and back ends of jar are separated, and there is only java code
war has not only java code, but also web pages
Version version selection 8
1.3 dependency option, select the following four options
developer tools : spring boot devtools
web : spring web
sql: mabatis framwork mysql driver
1.4 after loading, select automatic update
After completing the above operations, maven configuration is completed,
2. You can also select maven to create a project and quickstart. The creation is simple, but after the creation,
You also need to configure. xml, which can be added according to the correspondence created above
3. Configure the driver, url, user name and password of the database in the resource folder to facilitate connection to the database
spring:
driver: com.mysql.jdbc.Driver
url: jdbc:mysql://192.168.154.100/kb15
username: root
passwor: ok

thymeleaf:
  prefix:
    classpath: /tempaltes/
  suffix: .html
4. The following operations are to display the user's query and login
To build the controller layer, dao layer, entity layer and service layer. A login.html should be added to the resource folder. This html is used to protect user information. The specific classes and methods of each layer are described below
. controller layer: realize page Jump
package cn.kgc.controller;

import cn.kgc.service.UserService;
import org.springframework.beans.factory.annotation.Autowired;
import org.springframework.stereotype.Controller;
import org.springframework.web.bind.annotation.RequestMapping;
import org.springframework.web.bind.annotation.ResponseBody;

@Controller
public class UserController {
    @Autowired
        private UserService userService;
    @RequestMapping("/doLogin")
    @ResponseBody
    public String login(String username,String password){
        return "<h1>"+userService.login( username,password )+"</h1>";
    }
    @RequestMapping("/userLogin")
    public String userLogin(){
        return "login";
    }
}
dao layer: interface, which is mainly used to write codes such as addition, deletion, modification and query of users
import cn.kgc.entity.User;
import org.apache.ibatis.annotations.Select;
import org.springframework.stereotype.Repository;
import org.springframework.web.bind.annotation.ResponseBody;

@Repository
public interface UserDao {
    @Select( "select *from tb_user_info where username=#{username}" )
    User queryUserByName(String username);

}
service layer: business logic judgment,
import cn.kgc.dao.UserDao;
import cn.kgc.entity.User;
import cn.kgc.service.UserService;
import com.mysql.jdbc.StringUtils;
import org.springframework.beans.factory.annotation.Autowired;
import org.springframework.stereotype.Service;

@Service
public class UserServiceImpl implements UserService {
    @Autowired
    private UserDao userDao;
    @Override
    public String login(String username, String password) {
       if(StringUtils.isNullOrEmpty( username )||StringUtils.isNullOrEmpty( password )){
           return "User name or password is empty";
       }
        User user=userDao.queryUserByName(username);
       if(user==null){
           return "user does not exist";
       }
       if(!password.equals( user.getPassword() )){
           return "Incorrect password input";
       }
       return "Congratulations, user"+username+"Login succeeded";
    }
}
Entity layer: entity class. The attributes in it should correspond to the column names of the database one by one
public class User {
    private int id;
    private String username;
    private String password;

    @Override
    public String toString() {
        return "User{" +
                "id=" + id +
                ", username='" + username + '\'' +
                ", password='" + password + '\'' +
                '}';
    }

    public int getId() {
        return id;
    }

    public void setId(int id) {
        this.id = id;
    }

    public String getUsername() {
        return username;
    }

    public void setUsername(String username) {
        this.username = username;
    }

    public String getPassword() {
        return password;
    }

    public void setPassword(String password) {
        this.password = password;
    }
}
Add an. html to the resource folder
<!DOCTYPE html>
<html>
<head>
<meta charset="UTF-8"/>
<title>Local login page</title>
</head>
<body>
<form action="/doLogin">
<p><input type="text" name="username" placeholder="enter one user name"></p>
<p><input type="password" name="password" placeholder="Please input a password"></p>
<p><input type="submit" value="Click me to log in"></p>
</form>
</body>
</html>
5. Implement operation
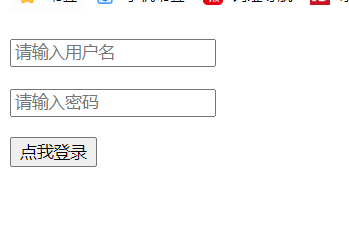

6. In this way, the user login is simple
Summary: some of the main problems I encountered when I was a User login page. First, the creation method is the wrong type. It may not be clear. Sometimes it needs to use User. I use String; Secondly, if you don't need page Jump, you need to add @ ResponseBody, which is equivalent to the output stream; Because the User's information needs to be kept confidential, an. html is added to the resource folder, which needs to add the corresponding dependencies in. xml
<dependency>
  <groupId>org.springframework.boot</groupId>
  <artifactId>spring-boot-starter-thymeleaf</artifactId>
</dependency>
The notes of each layer are very important and cannot be written wrong